Advertisement
Quick Links
5-036-028-02(1)
Vlog Monitor
/ Startup Guide /
/
/
/
XQZ-IV01
本機のマニュアルについて
このスタートガイドは、 本機をはじめてお使い
になるときに必要な準備、 基本的な使いかたな
どを説明しています。
詳しい使いかたは、 ヘルプガイド (Web取扱説明
書) をご覧ください。
ヘルプガイド (Web取扱説明書)
https://rd1.sony.net/help/mobile/xqz-iv01/ja/
本機の概要
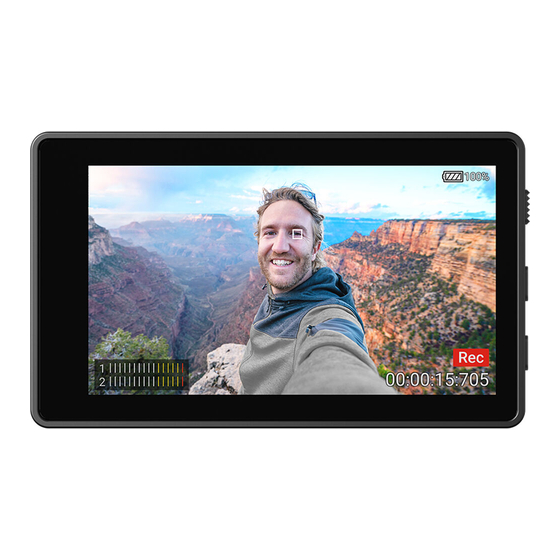
本機はVlog Monitorです。Xperia背面に取り付け、 三脚などと組み合
わせて使うと、Xperiaのメインカメラで自撮りができます。
本機対応の機器については、 ソニーの商品サイトでご確認ください。
各部の名称
モニター (イラスト-(1)参照)
1 液晶画面
2 ON/OFF (画面入/切) スイッチ
3 FLIP (画面反転) ボタン
4
(輝度調節) ボタン
5
マイク端子
マイクの接続については、 ヘルプガイドをご覧ください。
6 POWER (充電) 端子
7 INPUT (入力) 端子
8 三脚用ネジ穴
9 ホルダー取り付け部
ホルダー (イラスト-(2)参照)
10 モニター取り付け用マグネット
11 三脚用ネジ穴
12 アクセサリーシュー
接続ケーブル (イラスト-(3)参照)
グリップを取り付ける
カメラネジが付いたグリップを取り付けます。
① グリップのカメラネジをホルダーの三脚用ネジ穴に差し込む。
② グリップのカメラノブを回してしっかり固定する。
ご注意
ネジの長さが5.5 mm未満の三脚を使ってください。 5.5 mm以上の三
脚ではしっかり固定できず、 本機を傷つけることがあります。
スマートフォンを取り付ける
① カメラキー (a) と電源キー (b) の間にホルダーを配置する。
② ホルダーの上部にスマートフォンをひっかける。
③ ホルダーの下部にスマートフォンをはめ込む。
ご注意
ホルダーとスマートフォンの間に指を挟まないように注意してくだ
さい (④) 。けがの原因となることがあります。
モニターを取り付ける
① ホルダーの取り付け用マグネット (a) にモニターの取り付け部 (b)
がしっかり重なるように取り付けます。
ご注意
正しく取り付けないと、 モニターが落下し、 けがや故障の原因とな
ることがあります。
② モニターの位置を調整します。
• スマートフォンのカメラと重なっていないことを確認してくだ
さい。
• モニターの左がスマートフォンからはみ出さないようにしてく
ださい。通信障害が起こることがあります。
スマートフォンと接続する
① 付属の接続ケーブルをスマートフォンに接続する。
② INPUT (入力) 端子に、 接続ケーブルを接続する。
自撮りモニターとして使う
① スマートフォンの電源を入れ、 本機に対応のアプリを起動する。
例:Photography Pro、Videography Pro
② ON/OFF (画面入/切) スイッチを 「ON」 にして、 画面を点灯する。
本機の液晶画面にカメラから出力された画像が表示されます。
ヒント
画面の輝度は、 (輝度調節) ボタンを押して切り替えられます。
XQZ-IV01
5-036-028-02(1)
About the manual for this product
This guide describes the necessary
preparations to start using the product,
basic operations, etc. For details, refer
to the "Help Guide" (web manual).
"Help Guide" (Web manual)
https://rd1.sony.net/help/mobile/xqz-iv01/h_zz/
Overview of this unit
This unit is a Vlog Monitor. Attach this unit to the rear
side of Xperia and combine it with a tripod, etc. to shoot
selfies with the main camera of Xperia.
For details on compatible devices, visit the Sony product
web site in your area.
Identifying the parts
Monitor (see illustration -(1))
1
LCD screen
2
ON/OFF (Screen ON/OFF) switch
3
FLIP (Screen flip) button
4
(Brightness control) button
5
Microphone jack
For details about connecting a microphone, refer to
the "Help Guide".
6 POWER (Charging) port
7
INPUT (Input) port
8 Tripod socket hole
9 Holder attaching area
Holder (see illustration -(2))
10 Magnet for attaching monitor
11 Tripod socket hole
12 Accessory shoe
Connection cable (see illustration -(3))
Attaching a grip
Attach a grip with a camera mounting screw.
1 Insert the camera mounting screw of the grip into the
tripod socket hole of the holder.
2 Turn the camera mounting wheel of the grip to secure
the holder.
Note
Use a tripod with a screw shorter than 5.5 mm. The
holder cannot be fixed firmly to a tripod with a screw that
is 5.5 mm or longer, causing damage to this unit.
Attaching a smartphone
1 Position the holder between the camera key (a) and
the power key (b) of the smartphone.
2 Put the smartphone on the top of the holder.
3 Fit the smartphone to the bottom of the holder.
Note
Be careful not to pinch your finger between the holder
and the smartphone (4). It may cause bodily injury.
Attaching the monitor
1 Combine the magnet of the holder (a) and the holder
attaching area of the monitor (b) to attach the monitor
in a well-fitting manner.
Note
Attaching improperly may cause the monitor to drop,
resulting in bodily injury or malfunction of this unit.
2 Adjust the monitor position.
• Check that the monitor does not cover the
smartphone camera.
• Do not let the left side of the monitor stick out
of the smartphone. It may cause communication
disturbance.
Connecting a smartphone
1 Connect the included connection cable to the
smartphone.
2 Connect the connection cable to the INPUT (Input)
port.
Using as a selfie monitor
1 Turn on the power of the smartphone and launch a
compatible app.
Example: Photography Pro, Videography Pro
2 Turn the ON/OFF (Screen ON/OFF) switch to "ON".
A camera image is output to the LCD screen of this
unit.
Hint
Brightness of the screen can be switched by pressing the
(Brightness control) button.
关于本产品手册
本指南介绍了开始使用产品的
必要准备工作、基本操作等。
详情请参考"帮助指南"(网络
手册)。
"帮助指南"(网络手册)
https://rd1.sony.net/help/mobile/xqz-
iv01/h_zz/
本机概述
本机为Vlog监视器。将本机安装在Xperia后
侧,并与三脚架等组合,通过Xperia的主相机
进行自拍。
有关兼容设备的详情,请访问您所在地区的
Sony产品网站。
部件识别
监视器(见图-(1))
1 LCD屏幕
2 ON/OFF(屏幕打开/关闭)开关
3 FLIP(屏幕翻转)按钮
4
(亮度控制)按钮
5
麦克风插孔
关于麦克风连接的详情,请参阅"帮助指
南"。
6 POWER(充电)端口
7 INPUT(输入)端口
8 三脚架插座孔
9 底座连接区域
底座(见图-(2))
10 用于安装监视器的磁铁
11 三脚架插座孔
12 附件靴
连接线(见图-(3))
安装手柄
使用相机安装螺丝安装手柄。
1 将手柄的相机安装螺丝插入底座的三脚架插
座孔。
2 转动手柄的相机安装轮以固定底座。
注意
请使用螺丝长度短于5.5 mm的三脚架。使用
5.5 mm或以上的螺丝无法将底座牢牢固定在
三脚架上,会造成本机损坏。
安装智能手机
1 组装用于安装底座的磁铁(a)和用于安装监视
器的磁铁(b),以正确安装监视器。
2 将智能手机放在底座顶部。
3 将智能手机固定在底座底部。
注意
小心不要让手指夹在底座和智能手机之间
(4)。否则可能会造成身体伤害。
安装监视器
1 连接底座磁铁(a)和监视器的底座连接区
(b),以正确监视器。
注意
安装不当可能会导致监视器掉落,从而导致
身体伤害或本机故障。
2 调整监视器的位置。
•检查监视器是否遮盖了智能手机的摄像
头。
•请勿使监视器左侧超出智能手机。否则可
能会造成通信干扰。
连接智能手机
1 将随附连接线连接到智能手机上。
2 将连接线连接到INPUT(输入)端口。
作为自拍监视器使用
1 打开智能手机的电源,启动一个兼容的应用
程序。
示例:摄影大师、视频大师
2 将ON/OFF(屏幕打开/关闭)开关转
到"ON"。
相机图像输出到本机的LCD屏幕上。
提示
屏幕的亮度可以通过按 (亮度控制)按钮进
行切换。
Advertisement

Related Manuals for Sony XQZ-IV01


Summary of Contents for Sony XQZ-IV01
- Page 1 Xperia and combine it with a tripod, etc. to shoot / Startup Guide / 本機対応の機器については、 ソニーの商品サイトでご確認ください。 selfies with the main camera of Xperia. 本机为Vlog监视器。将本机安装在Xperia后 For details on compatible devices, visit the Sony product 各部の名称 侧,并与三脚架等组合,通过Xperia的主相机 web site in your area. モニター (イラスト-(1)参照)...
- Page 2 Để biết chi tiết về các thiết bị tương thích, hãy truy cập trang web về sản phẩm của Sony tại khu vực của bạn. โปรดเข า ไปที ่ เ ว็ บ ไซต ผ ลิ ต ภั ณ ฑ ข อง Sony ในพื ้ น ที ่ ข องท า น LCD螢幕...