NETGEAR SC101 Reference Manual
Netgear sc101 storage central: reference manual
Hide thumbs
Also See for SC101:
- User manual (58 pages) ,
- Revised troubleshooting manual (29 pages) ,
- Reference manual (4 pages)

Related Manuals for NETGEAR SC101


Summary of Contents for NETGEAR SC101
- Page 1 Reference Manual for the NETGEAR Storage Central SC101 NETGEAR, Inc. 4500 Great America Parkway Santa Clara, CA 95054 USA 202-10104-01 September 2005...
-
Page 2: Technical Support
NETGEAR is not warranting your hard drive or its contents; and (ii) NETGEAR is not responsible under any circumstances for any damage to or loss of contents that results from the misuse of any hard drive with the NETGEAR product, regardless of the cause of such damage or loss. - Page 3 15 of the FCC Rules. These limits are designed to provide reasonable protection against harmful interference in a residential installation. Product and Publication Details Model Number: Publication Date: Product Family: Product Name: Home or Business Product: Language: Publication Part Number: SC101 September 2005 storage area network Storage Central SC101 Home English 202-10104-01 v1.0, September 2005...
- Page 4 v1.0, September 2005...
-
Page 5: Table Of Contents
Connect the SC101 to Your Network ...3-5 Next, Install the SC101 Software ...3-5 Before You Begin ...3-5 Now, Create Disk Space for PCs That Will Use the SC101 ...3-7 Using the Status Bar and Context Sensitive Help ...3-8 Troubleshooting Tips ...3-9 Always restart your network in this sequence: ...3-9... - Page 6 No lights are lit on the storage area network ...7-1 Common Problems and Solutions ...7-2 Frequently Asked Questions ...7-2 Restoring the Default Configuration ...7-6 Appendix A Specifications Specifications for the SC101 ... A-1 Appendix B Related Documents v1.0, September 2005...
-
Page 7: About This Manual
This reference manual assumes that the reader has basic to intermediate computer and Internet skills. However, basic computer network, Internet, firewall, and VPN technologies tutorial information is provided in the Appendices and on the Netgear website. This guide uses the following typographical conventions: Table 1-1. - Page 8 This manual is written for the Storage Central according to these specifications: Table 1-2. Manual Scope Product Version Manual Publication Date Note: Product updates are available on the NETGEAR, Inc. Web site at http://kbserver.netgear.com/products/SC101.asp. Storage Central SC101 September 2005 v1.0, September 2005...
-
Page 9: How To Use This Manual
• button to access the full NETGEAR, Inc. online knowledge base for the product model. • Links to PDF versions of the full manual and individual chapters. -
Page 10: How To Print This Manual
Reference Manual for the NETGEAR Storage Central SC101 How to Print this Manual To print this manual you can choose one of the following several options, according to your needs. • Printing a Page in the HTML View. Each page in the HTML version of the manual is dedicated to a major topic. Use the Print button on the browser toolbar to print the page contents. -
Page 11: Introduction
For quick installation and setup, please see the SC101 Storage Central Installation Guide. This manual describes in detail how to set up the SC101 and provides you with further reference information. This chapter introduces the NETGEAR Storage Central SC101. Minimal prerequisites for installation are presented in “System Requirements”... -
Page 12: System Requirements
You should keep the Support Information card, along with the original packing materials, and use the packing materials to repack the SC101 if you need to return it for repair. To qualify for product updates and product warranty registrations, register on the NETGEAR Web site at: http://www.netgear.com. -
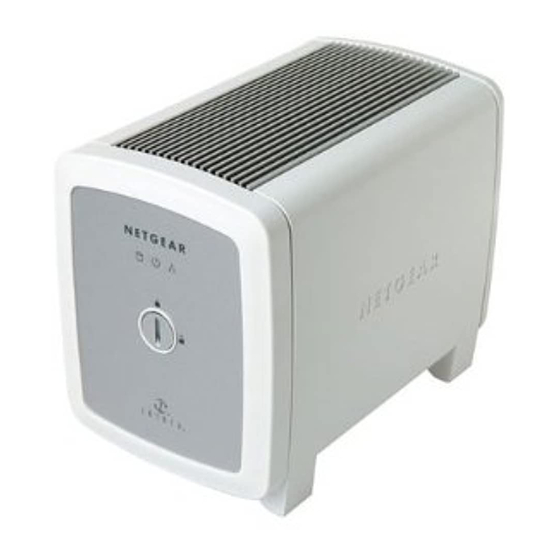
Page 13: Front Description
Front Description The Storage Central SC101 front functions are described below. Use a coin or screwdriver to open the spring loaded front cover lock by turning it clockwise. Front Cover Lock Figure 2-1 The following table describes the front cover information:... -
Page 14: Back Description
Reference Manual for the NETGEAR Storage Central SC101 ITEM Ethernet Status Light (Yellow) Blink Back Description The Storage Central SC101 front and rear hardware functions are described on the back label illustrated below. Ethernet Status LEDs Figure 2-2 The following table describes the rear label information:... - Page 15 Pushed and held for eight or more seconds, it restores the password for administrator to “password”, which is the default setting; and detaches all drives. • Use the SC101 Ethernet RJ-45 port to connect to an Ethernet LAN. Reference Manual for the NETGEAR Storage Central SC101 v1.0, September 2005...
- Page 16 Reference Manual for the NETGEAR Storage Central SC101 v1.0, September 2005...
-
Page 17: Installation And Basic Configuration
Installation and Basic Configuration This chapter describes how to install your Storage Central SC101 and set up basic connectivity on your Local Area Network (LAN). Installation Overview Estimated Completion Time: 30 minutes. These instructions will guide you through these three steps: 1. -
Page 18: First, Install A Hard Disk And Connect The Sc101
Familiarize yourself with the SC101 unit. Notice the rear of the SC101 has information about the ports and the front status lights. Note: When you set up the unit, stand it on its feet, and be sure it has ample ventilation. -
Page 19: Install The Hard Disk
Install the Hard Disk Warning: Be sure to unplug the power cord from the SC101 before adding or removing the disks. Failure to observe this precaution could render your disks useless. Follow the steps below to install an IDE hard disk drive into you SC101. - Page 20 Reference Manual for the NETGEAR Storage Central SC101 3. Connect the hard disk cables. Figure 3-6 a. Align and insert the hard disk power cable into the D-shaped power socket. b. Align the key of the hard disk data cable with the slot on the data cable socket and insert the cable.
-
Page 21: Connect The Sc101 To Your Network
2. Plug in the power adapter to a power source and connect the other end to the SC101. View the front panel to verify that the green power light is on and that the yellow network light is on. - Page 22 Figure 3-9 3. Click Check for Updates and proceed according to the prompts. The software checks to see if the SC101 is on your network. For more information about software upgrades, see “Understanding the Product Update Features” on page If Windows logo certification warnings appear, click Continue Anyhow to proceed.
-
Page 23: Now, Create Disk Space For Pcs That Will Use The Sc101
Now, Create Disk Space for PCs That Will Use the SC101 1. Click the Storage Central Manager software icon 2. Choose the Wizard configuration mode. The Wizard configuration mode is explained in detail in Chapter 4, “Management” , and in the help described in “Using the Status Bar... -
Page 24: Using The Status Bar And Context Sensitive Help
4. Verify that you can copy files to and from your new SC101 drive. Note: The SC101 formats hard disks differently than a PC does. Do not swap hard disks between a SC101 and a PC: the data will be unreadable. -
Page 25: Troubleshooting Tips
7, “Troubleshooting” Always restart your network in this sequence: 1. Turn off and unplug the modem, turn off the router, shut off the SC101, and shut down the computers. 2. Plug in and turn on the cable or DSL modem. Wait about two minutes. - Page 26 Reference Manual for the NETGEAR Storage Central SC101 3-10 v1.0, September 2005...
-
Page 27: Storage Application Scenarios
SC101, security considerations, and file backup requirements. Storage Application Scenarios You can share resources on the Storage Central SC101 for a wide variety of purposes. SC101 provides extra storage Figure 4-1 Storage applications may include: •... -
Page 28: Expanding Pc Disk Storage
If your network does include wireless access, then use a password to restrict access and implement appropriate wireless security. Now, each PC with access to a SC101 drive can save files to the drive or copy files from it. v1.0, September 2005... -
Page 29: Easy Access To Photos, Music, Or Videos
Figure 4-2 Typically, sharing photos, music, or videos, includes these elements: • One or more SC101 units each with one or two hard disks installed and the SC101 software installed on each PC that will access the SC101 units. •... -
Page 30: Protecting Against Data Loss
Now, PCs with access to the drive can save or play media photos, music, or movies from it. Protecting Against Data Loss You can use theStorage Central SC101 disks to protect against data loss that can happen when a hard disk fails or from other problems like virus attacks or accidental deletion. -
Page 31: Understanding The Product Update Features
NETGEAR provides. Both the product CD and the Storage Central Manager let you easily update your SC101. How do the NETGEAR CD and the Storage Central Manager software update features differ? Table 4-1 Updates Storage Central Manager... - Page 32 Reference Manual for the NETGEAR Storage Central SC101 v1.0, September 2005...
-
Page 33: Configuration
There are a variety of ways you can configure your Storage Central SC101.This chapter describes how to use the wizards to configure your SC101. Understanding the Wizard Setup Mode and the Advanced Configuration Mode You can choose to configure the Storage Central SC101 with Wizard Setup mode or Advanced Configuration mode. -
Page 34: Using The Wizard Setup Mode
Reference Manual for the NETGEAR Storage Central SC101 Using the Wizard Setup Mode The Storage Central Manager software provides Wizard Setup and Advanced Configuration modes. To use the Wizard Setup mode, follow the instructions below. 1. Click the icon, and both configuration mode options are displayed as shown to the right. -
Page 35: Creating A New Drive
1. From the Wizard Option screen, select Create a New Drive, and click Next. 2. Select which physical hard disk in the Storage Central SC101 to store data for this PC. 3. Enter the name and size for the new drive that you are creating. -
Page 36: Managing An Existing Drive
8. Repeat these steps for each computer that will use the SC101 drives. Managing an Existing Drive After you have created drives for each computer that will use the Storage Central SC101 you may need to manage the drives. You can use the wizard to complete the following tasks: •... - Page 37 2. Choose the drive that you want to manage and click Next. 3. Choose the task that you want to complete, and follow the wizard prompts. Reference Manual for the NETGEAR Storage Central SC101 Figure 5-5 Figure 5-6 v1.0, September 2005...
-
Page 38: Attaching Drives
Reference Manual for the NETGEAR Storage Central SC101 Attaching Drives When you first create a shared drive it is only available to the PC that you were using when you created it. If you want to use the shared drive from other PCs, then you must run the Storage Central Manager software on that PC and attach the drive. -
Page 39: Advanced Configuration
There are a variety of ways you can configure your Storage Central SC101. For information about using the Wizard Setup Configuration Options, see This chapter describes how to use Advanced Configuration to set up your SC101. You can use Advanced Configuration to complete the following tasks: •... -
Page 40: Using Advanced Configuration Options
Reference Manual for the NETGEAR Storage Central SC101 Using Advanced Configuration Options To use Advanced Configuration, follow the steps below. 1. Click the icon, select Advanced Configuration, and click Next. 2. Select a drive and click Next. The Advanced Configuration Options screen opens. -
Page 41: Checking Storage Central Status
1. Click the icon, select Advanced Configuration, and click Next. 2. Click the Check Storage Central Status button. The Status screen opens as shown to the right. Reference Manual for the NETGEAR Storage Central SC101 Figure 6-3 Figure 6-4 v1.0, September 2005... -
Page 42: Creating Or Managing Drives
Reference Manual for the NETGEAR Storage Central SC101 Creating or Managing Drives To create or modify drives, follow the instructions below. 1. From the Advanced Configuration Options screen, select Create/Manage drives. The screen shown to the right appears. 2. Select the drive that you want to work with and follow the onscreen instructions and prompts. -
Page 43: View/Attach Available Drive
3. Browse to locate the firmware, and follow the onscreen prompts to install it. 4. After the upgrade the SC101 reboots. Please wait for the reboot to complete. If you created a lot of drives on the SC101 then it will increase the time needed for rebooting. - Page 44 Reference Manual for the NETGEAR Storage Central SC101 v1.0, September 2005...
-
Page 45: Troubleshooting
If it is plugged directly into the wall, verify that it is not a switched outlet. • Make sure you are using the correct NETGEAR power adapter supplied with your storage area network. No lights are lit on the storage area network It takes a few seconds for the status light to be lit. -
Page 46: Common Problems And Solutions
SC101, and then the PC. Either reboot the SC101 or restart the network so that the DHCP server clears this problem. The SC101 requires DHCP; you cannot use the SC101 on a network that has static only IP addresses. “Restoring the Default Configuration” on v1.0, September 2005... - Page 47 If you upgrade the firmware, or click the reset button, or disconnect and reconnect the CAT5 cable to the SC101, the SC101 will reboot, please wait for about two minute for the reboot to complete. If you create many drives, it may take some extra seconds to the reboot the complete.
- Page 48 How do I know whether my hard disk is broken (e.g., gets bad sector)? The green power LED of the SC101 will blink: If one 200ms blink at 1.5s intervals and continues that way, disk 1 is bad If two 200 ms blinks at 1.5s intervals and continues that way, disk 2 is bad The default hard disk is named by the IP address.
- Page 49 • Delete an existing drive For the same Storage Central Manager GUI session, it is authenticated the first time you try to run one of the operations, after that, the same GUI session won’t need authentication again until you exit and restart SCM.
-
Page 50: Restoring The Default Configuration
In very rare cases, the drive was allocated in the SC101 hard disk, but it is not formatted and its property was not communicated back to the Storage Central Manager, which caused the SCM to not able to find it. -
Page 51: Appendix A Specifications
This appendix provides the Storage Central SC101 technical specifications. Specifications for the SC101 Parameter Storage Central SC101 Network Management PC based SmartWizard Configuration Management software. Status LEDs Power/Ethernet LAN/Hard Disk Drive Dimensions: 6.75” x 4.25” x 5.66” Power Adapter 12V, 5 A... - Page 52 Reference Manual for the NETGEAR Storage Central SC101 v1.0, September 2005...
-
Page 53: Appendix B Related Documents
This appendix provides links to reference documents you can use to gain a more complete understanding of the technologies used in your NETGEAR product. Document Link Internet Networking and http://documentation.netgear.com/reference/enu/tcpip/index.htm TCP/IP Addressing: Glossary: http://documentation.netgear.com/reference/enu/glossary/index.htm Related Documents v1.0, September 2005 Appendix B... - Page 54 Reference Manual for the NETGEAR Storage Central SC101 v1.0, September 2005...