Table of Contents
Advertisement
Quick Links
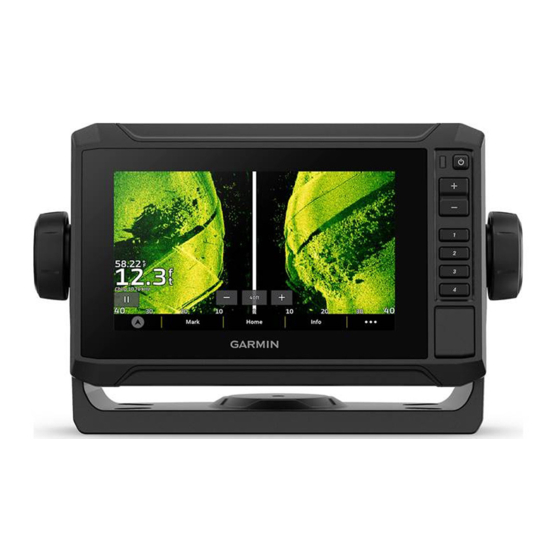
ECHOMAP
UHD2 6/7/9 SV
™
INSTALLATION INSTRUCTIONS
Important Safety Information
WARNING
Failure to follow these warnings, cautions, and notices could result in personal injury, damage to the vessel or
device, or poor product performance.
See the Important Safety and Product Information guide in the product box for product warnings and other
important information.
When connecting the power cable, do not remove the in-line fuse holder. To prevent the possibility of injury or
product damage caused by fire or overheating, the appropriate fuse must be in place as indicated in the product
specifications. In addition, connecting the power cable without the appropriate fuse in place voids the product
warranty.
CAUTION
To avoid possible personal injury, always wear safety goggles, ear protection, and a dust mask when drilling,
cutting, or sanding.
To avoid possible personal injury or damage to the device and vessel, disconnect the vessel's power supply
before beginning to install the device.
To avoid possible personal injury or damage to the device or vessel, before applying power to the device, make
sure that it has been properly grounded, following the instructions in the guide.
To avoid possible personal injury or damage to this device and vessel, only install this device when the vessel is
on land, or when properly secured and docked in calm water conditions.
NOTICE
For the best possible performance, the device must be installed according to these instructions.
When drilling or cutting, always check what is on the opposite side of the surface to avoid damaging the vessel.
Read all installation instructions before proceeding with the installation. If you experience difficulty during the
installation, contact Garmin
Product Support.
®
Software Update
You may need to update the chartplotter software after installation. For the instructions on how to update the
software, see the owner's manual at garmin.com/manuals/ECHOMAP_UHD2_679sv.
December 2022
GUID-B4327979-40C0-487D-8117-A36D7AD0FA51 v1
Advertisement
Table of Contents

Related Manuals for Garmin ECHOMAP UHD2 6 SV


Summary of Contents for Garmin ECHOMAP UHD2 6 SV
- Page 1 Read all installation instructions before proceeding with the installation. If you experience difficulty during the installation, contact Garmin Product Support. ® Software Update You may need to update the chartplotter software after installation. For the instructions on how to update the software, see the owner's manual at garmin.com/manuals/ECHOMAP_UHD2_679sv. December 2022 GUID-B4327979-40C0-487D-8117-A36D7AD0FA51 v1...
-
Page 2: Tools Needed
Tools Needed • Drill • Drill bits ◦ Bail mount, fixed or swivel: 3 mm ( in.) drill bit or drill bits appropriate for the surface and hardware ◦ Flush mount: 3 mm ( in.) and 12.7 mm ( in.) drill bits • #2 Phillips screwdriver •... -
Page 3: Fixed-Bail Mounting The Device
Fixed-Bail Mounting the Device NOTICE If you are mounting the bracket on fiberglass with screws, it is recommended to use a countersink bit to drill a clearance counterbore through only the top gel-coat layer. This will help to avoid cracking in the gel-coat layer when the screws are tightened. - Page 4 Bail Mounting a Device with a Swivel Base NOTICE If you are mounting the bracket on fiberglass with screws, it is recommended to use a countersink bit to drill a clearance counterbore through only the top gel-coat layer. This will help to avoid cracking in the gel-coat layer when the screws are tightened.
-
Page 5: Flush Mounting The Device
Flush Mounting the Device NOTICE Be careful when cutting the hole to flush mount the device. There is only a small amount of clearance between the case and the mounting holes, and cutting the hole too large could compromise the stability of the device after it is mounted. - Page 6 14 Install the rubber gasket pieces on the back of the device. The pieces of the rubber gasket have adhesive on the back. Make sure you remove the protective liner before installing them on the device. NOTICE On ECHOMAP UHD2 9 sv models, the top and bottom gasket pieces are not interchangeable and are labeled to help install correctly.
-
Page 7: Connection Considerations
Garmin Marine Network cable port for connection to compatible Panoptix , GCV , and ECHOMAP ™ ™ devices NETWORK NOTE: This device is not compatible with some Garmin Marine Network devices such as GPSMAP , GSD , and radar devices. ® ™ NOTICE To prevent corrosion of the metal contacts, cover unused connectors with weather caps. -
Page 8: Connecting The Device To A Transducer
Connecting the Device to a Transducer Go to garmin.com/transducers or contact your local Garmin dealer to determine the appropriate type of transducer for your needs. NOTE: If you use an existing transducer and the transducer cable pin connector does not match the device port, you may be able to use a transducer cable adapter to connect your existing transducer to this device. -
Page 9: Installing Locking Rings On The Cables
Item Description ECHOMAP UHD2 6/7/9 sv device GPS antenna or other NMEA 2000 device Ignition or in-line switch NMEA 2000 power cable NMEA 2000 drop cable 12 Vdc power source NMEA 2000 female terminator or backbone extension cable NMEA 2000 T-connector NMEA 2000 male terminator or backbone extension cable Connecting Devices Wirelessly to Share User Data and Sonar You can connect two ECHOMAP UHD2 devices wirelessly to share user data and sonar. -
Page 10: Installing The Device In The Cradle
Installing the Device in the Cradle After the cables are connected to the cradle, you can quickly place the device in the cradle. 1 On a 7xsv or 9xsv device, press the button on the release lever, and lift the lever to unlock it. 2 Place the base of the device in the bottom of the cradle. -
Page 11: Specifications
3.2 A Compass-safe distance 28 cm (11 in.) The device withstands incidental exposure to water of up to 1 m for up to 30 min. For more information, go to www.garmin.com/waterrating. Dependent upon the transducer. Dependent upon the transducer rating and depth. Dependent upon the transducer, water salinity, bottom type, and other water conditions. - Page 12 7Xsv Models Dimensions, device and cradle only (W x H x D) 218 x 142 x 81 mm (8 x 5 x 3 in.) Dimensions, in bail mount with sun cover (W x H x D) 261 x 166 x 99 mm (10 x 6 x 3 in.) 155 x 87 mm (6 x 3 in.) Display size (W x H) 178 mm (7 in.) diagonal Display resolution (W x H) 800 x 480 pixels...
- Page 13 物質宣言 有毒有害物质或元素 邻苯二甲酸 邻苯二甲 部件名称 多溴二苯 邻苯二甲 邻苯二甲 铅 汞 镉 六价铬 多溴联苯 二(2-乙基 酸二异丁 醚 酸丁苄酯 酸二丁酯 己)酯 酯 印刷电路板组件 屏幕/背光 金属零件 电缆 电缆组件 连接器 塑料和橡胶零件 本表格依据 SJ/T11364 的规定编制。 : 代表此种部件的所有均质材料中所含的该种有害物质均低于 (GB/T26572) 规定的限量 产品 : 代表此种部件所用的均质材料中, 至少有一类材料其所含的有害物质高于 (GB/T26572) 规定的限量 * 该产品说明书应提供在环保使用期限和特殊标记的部分详细讲解产品的担保使用条件。...
- Page 14 © 2022 Garmin Ltd. or its subsidiaries Garmin ® and the Garmin logo, are trademarks of Garmin Ltd. or its subsidiaries, registered in the USA and other countries. ECHOMAP is a trademark of Garmin Ltd. or its ™ subsidiaries. These trademarks may not be used without the express permission of Garmin.