Table of Contents
Advertisement
Advertisement
Table of Contents
Troubleshooting

Related Manuals for Garmin ECHOMAP UHD2 5 Series


Summary of Contents for Garmin ECHOMAP UHD2 5 Series
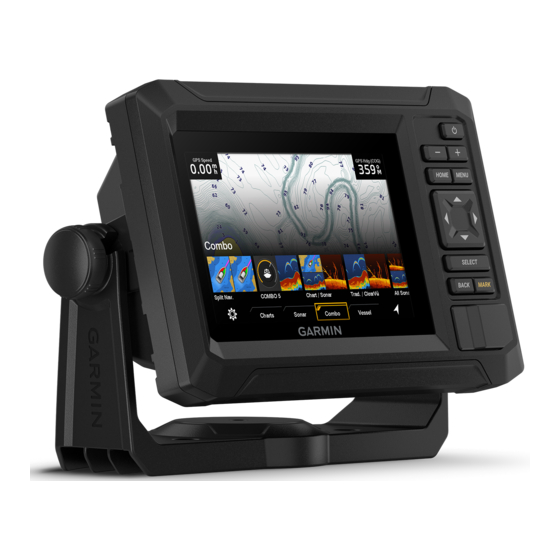
- Page 1 ECHOMAP UHD2 5X/7X ™ Owner’s Manual...
- Page 2 © 2022 Garmin Ltd. or its subsidiaries All rights reserved. Under the copyright laws, this manual may not be copied, in whole or in part, without the written consent of Garmin. Garmin reserves the right to change or improve its products and to make changes in the content of this manual without obligation to notify any person or organization of such changes or improvements. Go to www.garmin.com...
-
Page 3: Table Of Contents
Chart Subscriptions......11 Mapping a Body of Water Using the Purchasing a Chart Subscription with Garmin Quickdraw Contours Feature.. 24 ActiveCaptain........11 Adding a Label to a Garmin Quickdraw Activating the Chart Subscription Contours Map........24 Card............ 11 Garmin Quickdraw Community.... 25 Downloading Updated Charts... - Page 4 Connecting to the Garmin Quickdraw Deleting All Saved Routes....34 Community with ActiveCaptain..25 Auto Guidance........34 Connecting to the Garmin Quickdraw Setting and Following an Auto Community with Garmin Connect..25 Guidance Path........34 Garmin Quickdraw Contours Creating and Saving an Auto Guidance Settings..........
- Page 5 Setting the Graph Range and Time ActiveCaptain and Garmin Express..62 Scales..........52 Garmin Express App......62 Warning Manager......53 Installing the Garmin Express App on a Computer........... 63 Viewing Messages........ 53 Registering Your Device Using the Sorting and Filtering Messages... 53 Garmin Express App......63...
- Page 6 My device will not acquire GPS signals..........66 My device will not turn on or keeps turning off.......... 67 My device is not creating waypoints in the correct location......67 Contacting Garmin Support....67 Specifications........68 Specifications........68 Table of Contents...
-
Page 7: Introduction
The support ® pages will provide answers to frequently asked support questions, and you can download software and chart updates. There is also contact information to Garmin support should you have any questions. Front View Power key... -
Page 8: Device Keys
Device Keys Turns on and off the device when held. Opens a shortcut menu when quickly pressed and released. Scrolls through the brightness levels when pressed repeatedly. Zooms out. Zooms in. Opens the Home screen. HOME Takes a screenshot when held MENU Opens a menu of options for the page, when applicable. -
Page 9: Tips And Shortcuts
2 Select a manual. 3 Select Open. Accessing the Manuals from the Web You can get the latest owner's manual and translations of manuals from the Garmin website. 1 Go to garmin.com/manuals/echomapUHD2. 2 Select the Owner's Manual. A web manual opens. You can download the entire manual by selecting Download PDF. -
Page 10: Inserting Memory Cards
> System > GPS. If the device loses satellite signals, a flashing question mark appears over on the chart. For more information about GPS, go to garmin.com/aboutGPS. For help acquiring satellite signals, see device will not acquire GPS signals, page Selecting the GPS Source You can select your preferred source for GPS data, if you have more than one GPS source. -
Page 11: Customizing The Chartplotter
Customizing the Chartplotter Home Screen The home screen is an overlay that provides access to all of the features in the chartplotter. The features are dependent on the accessories you have connected to the chartplotter. You may not have all of the options and features discussed in this manual. -
Page 12: Customizing Pages
Customizing Pages Customizing the Startup Screen You can personalize the image that is displayed when the chartplotter is turning on. For the best fit, the image should be 50 MB or less and conform to the recommended dimensions (800 x 480 pixels). 1 Insert a memory card that contains the image you want to use. -
Page 13: Creating A New Combination Page
Creating a New Combination Page You can create a custom combination page to suit your needs. 1 Select Combo > MENU > Add Combo. 2 Select a window. 3 Select a function for the window. 4 Repeat these steps for each window of the page. 5 Select Resize Layout and use the arrows to resize the windows. -
Page 14: Customizing The Data Overlays
Customizing the Data Overlays You can customize the data in the data overlays shown on a screen. 1 Select an option based on the type of screen you are viewing: • From a full screen view, select MENU > Edit Overlays. •... -
Page 15: Turning On The Chartplotter Automatically
ActiveCaptain App WARNING This feature allows users to submit information. Garmin makes no representations about the accuracy, completeness, or timeliness of information submitted by users. Any use or reliance on the information submitted by users is at your own risk. -
Page 16: Getting Started With The Activecaptain App
Garmin device, using ® the name and password you entered in the Garmin device. Updating Software with the ActiveCaptain App If your device has Wi‑Fi technology, you can use the ActiveCaptain app to download and install the latest software updates for your device. -
Page 17: Updating Charts With Activecaptain
Chart Subscriptions A chart subscription allows you to access the latest chart updates and additional content using the ActiveCaptain mobile app or the Garmin Express desktop app. You can download updated charts and content each day. You can purchase chart subscriptions in a variety of ways. -
Page 18: Downloading Updated Charts
Downloading Updated Charts If you have a chart subscription, you can download updated content regularly. You can use the ActiveCaptain app to download and transfer the latest chart updates for your device. To save space on your mobile device, space on the ActiveCaptain card, and download time, consider using the ActiveCaptain app to download only the areas of the chart you need. -
Page 19: Connecting Two Echomap Uhd2 Devices To Share User Data And Sonar
Managing the Wi‑Fi Network Changing the Wi‑Fi Host If there are multiple chartplotters with Wi‑Fi technology on the Garmin marine network, you can change which chartplotter is the Wi‑Fi host. This can be helpful if you are having trouble with Wi‑Fi communications. Changing the Wi‑Fi host allows you to select a chartplotter that is physically closer to your mobile device. -
Page 20: Charts And 3D Chart Views
Charts and 3D Chart Views The charts and 3D chart views that are available depend on the map data and accessories used. NOTE: 3D chart views are available with premium charts, in some areas. You can access the charts and 3D chart views by selecting Charts. Nav. -
Page 21: Chart Symbols
Chart Symbols This table contains some of the common symbols you might see on the detailed charts. Icon Description Buoy Information Marine services Tide station Current station Overhead photo available Perspective photo available Other features common to most charts include depth contour lines, intertidal zones, spot soundings (as depicted on the original paper chart), navigational aids and symbols, obstructions, and cable areas. -
Page 22: Viewing Location And Object Information On A Chart
Viewing Location and Object Information on a Chart You can view information, such as tide, current, celestial, chart notes, or local services, about a location or an object on the Navigation chart or the Fishing chart. 1 From the Navigation chart or Fishing chart, select a location or object. A list of options appears. -
Page 23: Premium Charts
Relief Shading: Shows the gradient of the bottom with shading. Fish Eye 3D Chart View Using the depth contour lines of the premium charts, such as Garmin Navionics Vision+, the Fish Eye 3D chart view provides an underwater view of the sea floor or lake bottom. -
Page 24: Viewing Tide Station Information
Viewing Tide Station Information WARNING Tide and current information is for information purposes only. It is your responsibility to heed all posted water- related guidance, to remain aware of your surroundings, and to use safe judgment in, on, and around the water at all times. -
Page 25: Showing Satellite Imagery On The Navigation Chart
Layers: Adjusts the appearance of the different items on the charts (Chart Layers, page 20). Quickdraw Contours: Turns on bottom contour drawing, and allows you to create fishing map labels (Garmin Quickdraw Contours Mapping, page 24). Settings: Adjusts the chart settings (Chart Settings, page 23). -
Page 26: Chart Layers
(User Data Layer Settings, page 21). Water: Shows and hides depth items (Water Layer Settings, page 21). Quickdraw Contours: Shows and hides Garmin Quickdraw Contours data (Garmin Quickdraw Contours Settings, page 27). Chart Layer Settings From a chart, select MENU > Layers > Chart. - Page 27 User Data Layer Settings You can show user data, such as waypoints, boundaries, and tracks, on the charts. From a chart, select MENU > Layers > User Data. Waypoints: Shows waypoints on the chart and opens the list of waypoints. Boundaries: Shows boundaries on the chart and opens the list of boundaries.
- Page 28 For inland fishing, a maximum of five depth ranges can help reduce map clutter. The depth ranges apply to all charts and all bodies of water. Some Garmin LakeVü and premium supplemental charts have multiple depth range shading by default.
-
Page 29: Chart Settings
Fish Symbols: Shows suspended targets. Supported Maps To help you have a safe and enjoyable time on the water, Garmin devices only support official maps produced by Garmin or an approved third party producer. You can purchase maps from Garmin. If you purchase maps from a seller other than Garmin, investigate the seller before purchasing. -
Page 30: Garmin Quickdraw Contours Mapping
1,500 hours of data onto a 2 GB memory card. When you record data on a memory card in your chartplotter, the new data is added to your existing Garmin Quickdraw Contours map, and is saved on the memory card. When you insert a new memory card, the existing data does not transfer onto the new card. -
Page 31: Garmin Quickdraw Community
Garmin Quickdraw Community The Garmin Quickdraw Community is a free, public, online community that enables you to download maps other users have created. You can share your Garmin Quickdraw Contours maps with others. If your device has Wi‑Fi technology, you can use the ActiveCaptain app to access the Garmin Quickdraw... - Page 32 Sharing Your Garmin Quickdraw Contours Maps with the Garmin Quickdraw Community Using Garmin Connect You can share Garmin Quickdraw Contours maps that you have created with others in the Garmin Quickdraw Community. When you share a contour map, only the contour map is shared. Your waypoints are not shared.
-
Page 33: Garmin Quickdraw Contours Settings
Survey Coloring: Sets the color of the Garmin Quickdraw Contours display. When this setting is turned on, the colors indicate the quality of the recording. When this setting is turned off, the contour areas use standard map colors. -
Page 34: Basic Navigation Questions
For example, the roue segment is red striped when the route crosses under a very low bridge or is in shallow waters. This line is red striped in Garmin Navionics+ and Garmin Navionics Vision+ charts only; it is magenta and gray striped in previous versions of the charts. -
Page 35: Searching For A Destination By Name
Searching for a Destination by Name You can search for saved waypoints, saved routes, saved tracks, and marine services destinations by name. 1 Select > Services > Search by Name. 2 Enter at least a portion of the name of your destination. 3 If necessary, select Done. -
Page 36: Waypoints
Waypoints Waypoints are locations you record and store in the device. Waypoints can mark where you are, where you are going, or where you have been. You can add details about the location, such as name, elevation, and depth. Marking Your Present Location as a Waypoint From any screen, select MARK. -
Page 37: Moving A Saved Waypoint
Moving a Saved Waypoint 1 Select > User Data > Waypoints. 2 Select a waypoint. 3 Select Review > Edit > Position. 4 Indicate a new location for the waypoint: • To move the waypoint using coordinates, select Enter Coordinates, enter the new coordinates, and select Done or Cancel. -
Page 38: Routes
Routes A route is a path from one location to one or more destinations. Creating and Navigating a Route From Your Present Location You can create and immediately navigate a route on the Navigation chart or the Fishing chart. This method does not save the route. -
Page 39: Finding And Navigating A Saved Route
Finding and Navigating a Saved Route Before you can browse a list of routes and navigate to one of them, you must create and save at least one route (Creating and Saving a Route, page 32). 1 Select > User Data > Routes. 2 Select a route. -
Page 40: Initiating A Search Pattern
Initiating a Search Pattern You can initiate a search pattern to search an area. Different patterns are better suited for different search situations. 1 Select > User Data > Routes > New > Route Using SAR Pattern. 2 Select a pattern: •... -
Page 41: Creating And Saving An Auto Guidance Path
Creating and Saving an Auto Guidance Path 1 Select > Routes > New > Auto Guidance. 2 Select a starting point, and select Next. 3 Select a destination, and select Next. 4 Select an option: • To view a hazard and adjust the path near a hazard, select Hazard Review. •... -
Page 42: Auto Guidance Path Configurations
If a section of an Auto Guidance path is shallower than the Preferred Depth or lower than the Vertical Clearance settings, the section of the Auto Guidance path appears as a solid orange line or a red striped line in Garmin LakeVü g4 and BlueChart ®... -
Page 43: Tracks
Adjusting the Distance from Shore The Shoreline Distance setting indicates how close to the shore you want the Auto Guidance line to be placed. The Auto Guidance line may move if you change this setting while navigating. The available values for the Shoreline Distance setting are relative, not absolute. -
Page 44: Setting The Color Of The Active Track
Setting the Color of the Active Track 1 Select > User Data > Tracks > Active Track Options > Track Color. 2 Select a track color. Saving the Active Track The track currently being recorded is called the active track. 1 Select >... -
Page 45: Deleting All Saved Tracks
Deleting All Saved Tracks Select > User Data > Delete User Data > Saved Tracks. Retracing the Active Track The track currently being recorded is called the active track. 1 Select > User Data > Tracks > Follow Active Track. 2 Select an option: •... -
Page 46: Creating A Boundary
Creating a Boundary 1 Select > User Data > Boundaries > New. 2 Select a boundary shape. 3 Follow the on-screen instructions. Converting a Route to a Boundary 1 Select > User Data > Routes. 2 Select a route. 3 Select Review > Edit Route > Save as Boundary. Converting a Track to a Boundary 1 Select >... -
Page 47: Sonar Fishfinder
For more information about which transducer is best for your needs, go to garmin.com/transducers. Different sonar views can help you view the fish in the area. The sonar views available vary depending on the type of transducer and sounder module connected to the chartplotter. For example, you can view certain Garmin ClearVü... -
Page 48: Garmin Clearvü Sonar View
NOTE: To receive Garmin ClearVü scanning sonar, you need a compatible transducer. For information about compatible transducers, go to garmin.com/transducers. Garmin ClearVü high-frequency sonar provides a detailed picture of the fishing environment around the boat in a detailed representation of structures the boat is passing over. -
Page 49: Flasher View
Flasher View The flasher shows sonar information on a circular depth scale, indicating what is beneath your boat. It is organized as a ring that starts at the top and progresses clockwise. Depth is indicated by the scale inside the ring. -
Page 50: Selecting The Transducer Type
When you are using more than one sonar data source for a particular sonar view, you can select the source to use for that sonar view. For example, if you have two sources for Garmin ClearVü, you can select the source to use from the Garmin ClearVü... -
Page 51: Viewing Sonar History
You can adjust the intensity of colors and highlight areas of interest on the sonar screen by adjusting the color gain for traditional transducers or the contrast for Garmin ClearVü transducers. This setting works best after you have adjusted the level of detail shown on the screen using the gain or brightness settings. -
Page 52: Sonar Setup
NOTE: Not all options and settings apply to all models and transducers. These settings apply to the following types of transducers. • Traditional • Garmin ClearVü From a sonar view, select MENU > Sonar Setup. Scroll Speed: Sets the rate at which the sonar scrolls from right to left (Setting the Scroll Speed, page 47). -
Page 53: Setting The Scroll Speed
The Auto setting selects a scroll rate to match the boat speed, so targets in the water are drawn with the correct aspect ratio and appear less distorted. When viewing Garmin ClearVü sonar views or searching for structure, it is recommend to use the Auto setting. -
Page 54: Sonar Noise Rejection Settings
Sonar Noise Rejection Settings From a sonar view, select MENU > Sonar Setup > Noise Reject. Interference: Adjusts the sensitivity to reduce the effects of interference from nearby sources of noise. The lowest interference setting that achieves the desired improvement should be used to remove interference from the screen. -
Page 55: Sonar Alarms
From an applicable sonar view, select an option. • From a Traditional sonar view, select MENU > Sonar Setup > Installation. • From a Garmin ClearVü sonar view, select MENU > ClearVü Setup > Installation. Restore Sonar Defaults: Restores the sonar settings to the factory default values. -
Page 56: Sonar Frequencies
Sonar Frequencies NOTE: The frequencies available depend on the transducers being used. Adjusting the frequency helps adapt the sonar for your particular goals and the present depth of the water. Higher frequencies use narrow beam widths, and are better for high-speed operation and rough sea conditions. Bottom definition and thermocline definition can be better when using a higher frequency. -
Page 57: Turning On The A-Scope
Turning On the A-Scope NOTE: This feature is available in the Traditional sonar views. The a-scope is a vertical flasher along the right side of the view, showing you what is underneath the transducer right now. You can use the a-scope to identify target returns that may be missed when the sonar data is quickly scrolling across the screen, such as when your boat is moving at high speeds. -
Page 58: Changing The Data Shown In A Gauge
Changing the Data Shown in a Gauge 1 Open a gauge page. 2 Select MENU > Edit Gauge Pages. 3 Select a gauge to edit. 4 Select Replace Data. 5 Select a data type. 6 Select the data to display. Customizing the Gauges You can add a gauge page, change the layout of the gauge page, change how the gauges are displayed, and change the data in each gauge. -
Page 59: Warning Manager
Warning Manager The Warning Manager displays a color-coded alarm icon and prioritizes alarm messages by severity. To open the Warning Manager, select > Warning Manager. Color Severity Hazards that require immediate action to avoid severe personal injury or death Yellow Hazards or unsafe practices which could result in minor personal injury or product or property damage Viewing Messages 1 Select >... -
Page 60: Gps Settings
GPS Settings NOTE: Not all options are available on all models. Select > System > GPS. Skyview: Shows the relative position of GPS satellites in the sky. GLONASS: Turns on or off GLONASS data (Russia satellite system). When the system is used in situations with poor sky visibility, GLONASS data can be used in combination with GPS to provide more accurate position information. -
Page 61: Units Settings
Clearance settings, the section of the Auto Guidance path appears as a solid orange line or a red striped line in Garmin LakeVü g4 and BlueChartg4 Vision charts and appears as a magenta and gray striped line in previous versions. When your boat enters one of those areas, a warning message appears (Route Color Coding, page 28). -
Page 62: Communications Settings
Adjusting the Distance from Shore The Shoreline Distance setting indicates how close to the shore you want the Auto Guidance line to be placed. The Auto Guidance line may move if you change this setting while navigating. The available values for the Shoreline Distance setting are relative, not absolute. -
Page 63: Navigation Alarms
Navigation Alarms Select > Alarms > Navigation. Arrival: Sets an alarm to sound when you are within a specified distance or time from a turn or a destination. Anchor Drag: Sets an alarm to sound when you exceed a specified drift distance while anchored. Off Course: Sets an alarm to sound when you are off course by a specified distance. -
Page 64: My Vessel Settings
My Vessel Settings NOTE: Some settings and options require additional charts or hardware. Select MENU > My Vessel. Transducers: Shows all transducers on the network, allows you to change transducers, and allows you to view diagnostic information (Selecting the Transducer Type, page 44). -
Page 65: Setting The Keel Offset
Setting the Keel Offset You can enter a keel offset to compensate the water depth reading for the transducer installation location. This allows you to view the depth of the water below the keel or the true depth of the water, depending on your needs. -
Page 66: Setting The Water Temperature Offset
• To clear saved data and reset device settings to the factory default values, disconnect the chartplotter from the Garmin Marine Network, and select Delete Data and Reset Settings. This does not affect maps or software updates. Sharing and Managing User Data WARNING This feature allows you to import data from other devices that may have been generated by third parties. -
Page 67: Copying User Data From A Memory Card
1 Insert a memory card into the computer's card slot (Inserting Memory Cards, page 2 Open the Garmin Express application. If you do not have the Garmin Express application installed on your computer, you can download it from garmin.com/express. 3 If necessary, register your device (Registering Your Device Using the Garmin Express App, page 63). -
Page 68: Restoring Backup Data To A Chartplotter
Garmin Express App The Garmin Express desktop app allows you to use your computer and a memory card to download and update Garmin device software and charts and register your devices. We recommend it for larger downloads and updates for faster data transfer and to avoid possible data charges with some mobile devices. -
Page 69: Installing The Garmin Express App On A Computer
The Garmin Express application searches the memory card for the device information. 12 Select Add Device to register the device. When registration is complete, the Garmin Express application searches for additional charts and chart updates for your device. When you add devices to the chartplotter network, repeat these steps to register the new devices using the Garmin Express app. -
Page 70: Updating Your Charts Using The Garmin Express App
You can use the ActiveCaptain mobile app to update the device software (Updating Software with the ActiveCaptain App, page 10). You can also use the Garmin Express desktop app to update your chartplotter software (Loading the New Software on a Memory Card Using Garmin Express, page 65). -
Page 71: Cleaning The Screen
Loading the New Software on a Memory Card Using Garmin Express You can copy the software update to a memory card using a computer with the Garmin Express app. This device supports up to a 32 GB microSD memory card, formatted to FAT32 with speed class 4 or higher. -
Page 72: Viewing Images On A Memory Card
1 Remove the memory card from the chartplotter, and insert it into a card reader that is attached to a computer. 2 From Windows Explorer, open the Garmin\scrn folder on the memory card. 3 Copy the image file from the card and paste it to any location on the computer. -
Page 73: My Device Will Not Turn On Or Keeps Turning Off
To check the voltage, measure the female power and ground sockets of the power cable for DC voltage. If the voltage is less than 12 Vdc, the device will not turn on. • If the device is receiving enough power but does not turn on, contact Garmin product support. My device is not creating waypoints in the correct location You can manually enter a waypoint location to transfer and share data from one device to the next. -
Page 74: Specifications
Compass-safe distance 7.62 cm (3 in.) The device withstands incidental exposure to water of up to 1 m for up to 30 min. For more information, go to www.garmin.com/waterrating. Dependent upon the transducer. Dependent upon the transducer rating and depth. - Page 75 7x Models Dimensions, device only (W x H x D) 232 x 143.1 x 67 mm (9 in.) Dimensions, in bail mount with sun cover (W x H x D) 243.4 x 153.9 x 105.5 mm (9 in.) 86.9 x 155.1 mm (3 in.) Display size (W x H) 177.8 mm (7 in.) diagonal...
- Page 76 April 2022 GUID-CDD85099-F5B6-41B4-84D1-524AE6475690 v1...