Garmin ECHOMAP PLUS 40 Series Owner's Manual
Hide thumbs
Also See for ECHOMAP PLUS 40 Series:
- Installation instruction (6 pages) ,
- Installation instructions manual (6 pages) ,
- Owner's manual (69 pages)
Table of Contents
Advertisement
Advertisement
Table of Contents

Related Manuals for Garmin ECHOMAP PLUS 40 Series


Summary of Contents for Garmin ECHOMAP PLUS 40 Series
- Page 1 ECHOMAP PLUS 40/60/70/90 SERIES ™ Owner’s Manual...
- Page 2 © 2017–2019 Garmin Ltd. or its subsidiaries All rights reserved. Under the copyright laws, this manual may not be copied, in whole or in part, without the written consent of Garmin. Garmin reserves the right to change or improve its products and to make changes in the content of this manual without obligation to notify any person or organization of such changes or improvements.
-
Page 3: Table Of Contents
Mapping a Body of Water Using the Garmin Quickdraw Contours Feature ..............11 Introduction..............1 Adding a Label to a Garmin Quickdraw Contours Map .... 11 ECHOMAP Plus 40 Device View ..........1 Garmin Quickdraw Community ..........11 Device Keys ................1 Connecting to the Garmin Quickdraw Community with ECHOMAP Plus 60 Front View .......... - Page 4 Current Station Information ............30 Playing Sonar Recordings ........... 22 Celestial Information ..............30 Traditional, Garmin ClearVü, and SideVü Sonar Setup ... 22 Viewing Tide Station, Current Station, or Celestial Information Setting the Zoom Level on the Sonar Screen ...... 22 for a Different Date ..............
- Page 5 Restoring the Original Chartplotter Factory Settings ....37 Sharing and Managing User Data....... 38 Connecting to a Garmin Device to Share User Data ....38 User Data Sharing Cable Wiring Diagram ......38 Selecting a File Type for Third-Party Waypoints and Routes ... 38 Copying User Data from a Memory Card .........
-
Page 7: Introduction
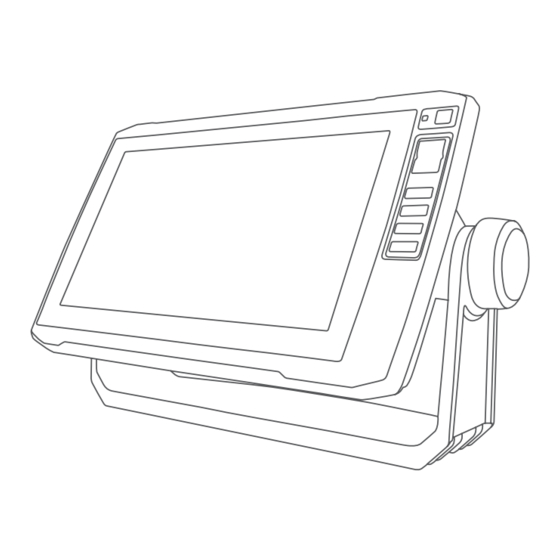
Introduction ECHOMAP Plus 60 Front View WARNING See the Important Safety and Product Information guide in the product box for product warnings and other important information. ECHOMAP Plus 40 Device View Power key Automatic backlight sensor Keys microSD memory card slot NOTICE Each time you place the device in the cradle, you should make sure the device is firmly secured in the cradle, the cables are... -
Page 8: Device Keys
• Hold a numbered key to create a shortcut to a screen. For more information about GPS, go to garmin.com/aboutGPS. • Select HOME from any screen to return to the Home screen. -
Page 9: Creating A New Combination Page With The Echomap Plus 70/90
Select Combos > Customize > Add. CAUTION Select a layout. This feature allows users to submit information. Garmin makes no representations about the accuracy, completeness or timeliness of information submitted by users. Any use or reliance on the information submitted by users is at your own risk. -
Page 10: Getting Started With The Activecaptain App
From the application store on your mobile device, install and areas of the chart you need. open the ActiveCaptain app. If you are downloading an entire chart, you can use the Garmin Bring the mobile device within 32 m (105 ft.) of the Express ™... -
Page 11: Navigation Chart And Fishing Chart
Navigation Chart: Shows navigation data available on your pre- NOTE: To pan from a combination screen, select SELECT. loaded maps and from supplemental maps, if available. The Selecting an Item on the Map Using the Device Keys data includes buoys, lights, cables, depth soundings, From a chart or 3D chart view, select , , , or to move... -
Page 12: Viewing Location And Object Information On A Chart
• To use Auto Guidance, select Auto Guidance. • Select Time > Time, and enter the time used to calculate the distance your boat will travel in the specified time at Review the course indicated by the magenta line. your present speed. NOTE: When using Auto Guidance, a gray segment within Turning on Angle Markers any part of the magenta line indicates that Auto Guidance... -
Page 13: Showing Satellite Imagery On The Navigation Chart
You can view indicators for animated tide station and current range, that are equipped with a transponder, and that are direction on the Navigation chart or the Fishing chart. You must actively transmitting AIS information. also enable animated icons in the chart settings (Chart Layer The information reported for each vessel includes the Maritime Settings, page... -
Page 14: Activating A Target For An Ais Vessel
indicated by the direction of the barb at the end of the heading You can view more information about an ATON if you select the line. The length of the barb does not change. ATON on the chart. Symbol Meaning Real or synthetic ATON Real or synthetic ATON: Topmark North When course over ground and heading information are provided... -
Page 15: Turning Off Ais Reception
Sailing Angle: Allows you to select how the device calculates page 10). laylines. The Actual option calculates the laylines using the Quickdraw Contours: Shows and hides Garmin Quickdraw measured wind angle from the wind sensor. The Manual Contours data (Garmin Quickdraw Contours Settings,... -
Page 16: Fish Eye 3D Settings
Details: Shows other vessel details on the chart. You can purchase maps from Garmin. If you purchase maps Projected Heading: Sets the projected heading time for AIS- from a seller other than Garmin, investigate the seller before activated and MARPA-tagged vessels. -
Page 17: Mapping A Body Of Water Using The Garmin Quickdraw Contours Feature
ECHOMAP Plus device, your contour maps are transferred to Contours Map the community automatically. You can add labels to a Garmin Quickdraw Contours map to Connecting to the Garmin Quickdraw Community with mark hazards or points of interest. Garmin Connect From the Navigation chart, select a location. -
Page 18: Garmin Quickdraw Contours Settings
I want to go (bearing)? To, page 13). Survey Coloring: Sets the color of the Garmin Quickdraw How do I make the device Build a single-leg route and navigate it Contours display. When this setting is turned on, the colors... -
Page 19: Selecting A Destination Using The Navigation Chart
The 50 nearest destinations that contain your search criteria • To create the waypoint by entering position coordinates, appear. select Enter Coordinates, and enter the coordinates. Select the destination. • To create the waypoint using a chart, select Use Chart, select the location, and select SELECT. -
Page 20: Deleting A Waypoint Or An Mob
The Auto Guidance feature is based on electronic chart Creating and Saving a Route information. That data does not ensure obstacle and bottom This procedure saves the route and all the waypoints in it. The clearance. Carefully compare the course to all visual sightings, starting point can be your present location or another location. -
Page 21: Deleting A Saved Route
Select Offset to navigate parallel to the route, offset from it NOTE: When using Auto Guidance, a gray segment within by a specific distance. any part of the magenta line indicates that Auto Guidance cannot calculate part of the Auto Guidance line. This is due to Indicate how to navigate the route: the settings for minimum safe water depth and minimum safe •... -
Page 22: Tracks
3 feet, the charts only use depths of 3 feet for Auto Guidance Near or Nearest. As a result, the chartplotter may not path calculations. reposition the Auto Guidance line, unless the destination selected requires navigation through a narrow waterway. Vertical Clearance: Sets the minimum height of a bridge or obstacle, based on chart data, that your boat can safely Repeat steps 3 through 9 at least once more, using a... -
Page 23: Deleting All Saved Tracks
Follow the on-screen instructions. and sounder module connected to the chartplotter. For example, you can view Garmin ClearVü ™ sonar screens only if you have a compatible Garmin ClearVü transducer connected. -
Page 24: Stopping The Transmission Of Sonar Signals
Old tires Garmin ClearVü Sonar View Logs NOTE: To receive Garmin ClearVü scanning sonar, you need a Distance from the side of the boat compatible chartplotter or fishfinder and a compatible Water between the vessel and the bottom transducer. For information about compatible transducers, go to garmin.com/transducers. -
Page 25: Panoptix™ Sonar Views
Boat Range Fish Panoptix ™ Sonar Views Trails NOTE: Not all models support Panoptix transducers. Bottom To receive Panoptix sonar, you need a compatible chartplotter and a compatible transducer. RealVü 3D Forward Sonar View The Panoptix sonar views allow you to see all around the boat in This sonar view shows a three-dimensional view of what is in real time. -
Page 26: Realvü 3D Historical Sonar View
Before you can select the transducer type, you must know what Bottom of the body of water kind of transducer you have. This chartplotter is compatible with a range of accessory transducers, including the Garmin ClearVü transducers, which are available at garmin.com/transducers. Sonar Fishfinder... -
Page 27: Calibrating The Compass
For example, if you have two sources for Garmin NOTE: Using multiple transducers simultaneously can create ClearVü, you can select the source to use from the Garmin cross talk, which can be removed by adjusting the Interference ClearVü... -
Page 28: Adjusting The Color Intensity
Select an option: Appearance: See Sonar Appearance Settings, page • While in the Garmin ClearVü or SideVü sonar view, select Contrast. Overlay Numbers: Sets the data shown on the sonar screen. • While in a Panoptix LiveVü sonar view, select Color Gain. -
Page 29: Sonar Appearance Settings
Advanced Sonar Settings appear on the screen as long as it appears within the range you have set. NOTE: Not all options and settings apply to all models and From a sonar view, select MENU > Range. transducers. Select an option: From a sonar view, select MENU >... -
Page 30: Turning On The A-Scope
Adjusting the RealVü Sweep Speed using a fixed frequency, you should consider your goals and water conditions when using CHIRP frequencies. You can update how quickly the transducer sweeps back and forth. A faster sweep rate creates a less detailed image, but the Some sonar black boxes and transducers also provide the ability screen refreshes faster. -
Page 31: Livevü And Frontvü Appearance Settings
obligation of the vessel operator to ensure safe operation of the This applies to Panoptix transducers in the FrontVü, LiveVü vessel. Forward, and RealVü 3D Forward sonar views. Beam Width: Sets the width of the down view Panoptix This alarm is available only with Panoptix FrontVü transducers. transducer beam. -
Page 32: Autopilot
Your intended heading shows in the center of the Autopilot When the compatible chartplotter is connected to a compatible screen. Garmin autopilot system, you can engage and control the autopilot from the chartplotter. Steering Patterns For information about compatible Garmin autopilot systems, go to garmin.com. -
Page 33: Following The Williamson Turn Pattern
For more information about using the remote, see the Reactor By default, the start line guidance window and the race timer autopilot remote control instructions at garmin.com window appear in the Sail Racing combination screen. Pairing a Reactor Autopilot Remote Control With a... -
Page 34: Setting The Keel Offset
When in sailing mode (Setting the Vessel Type, page 3), you can display laylines on the navigation chart. Laylines can be very helpful when racing. From the navigation chart, select MENU > Layers > My Vessel > Laylines > Setup. Display: Sets how the laylines and vessel appear on the chart, and sets the length of the laylines. -
Page 35: Tack And Gybe
Tack and Gybe Viewing Engine and Fuel Gauges You can set the autopilot to perform a tack or gybe while Before you can view engine and fuel gauges, you must be heading hold or wind hold is engaged. connected to a NMEA 2000 network capable of sensing engine and fuel data. -
Page 36: Viewing The Wind Gauges
Tide, Current, and Celestial Select an option: • After you have filled up all the fuel tanks on the vessel, Information select Fill Up All Tanks. The fuel level is reset to maximum capacity. Tide Station Information • After you have added less than a full tank of fuel, select You can view information about a tide station for a specific date Add Fuel to Boat, and enter the amount added. -
Page 37: Turning On Dsc
Navigation chart at the time of the DSC distress call. When you connect the chartplotter to a Garmin VHF radio, you can use the chartplotter interface to set up an individual routine Select Nav Info > Other Vessels > DSC List. -
Page 38: Browsing For Music
From the media screen, select MENU > Installation > Alpha Search. The chartplotter sends information about the call to the radio. On your Garmin VHF radio, complete the call. Setting a Song to Repeat While playing a song, select MENU > Repeat. -
Page 39: Presets
From the media screen, select MENU > Tuning Mode. DAB Presets You can save your favorite DAB stations as presets for easy Select an option. access. If necessary, select SELECT. You can save up to 15 DAB-station presets. Presets Saving a DAB Station as a Preset You can save your favorite AM stations and FM stations as From the DAB media screen, select the station to save as a presets for easy access. -
Page 40: Saving A Siriusxm Channel To The Presets List
Saving a SiriusXM Channel to the Presets List Software updates and instructions are available on your device product page. You can save your favorite channels to the presets list. Insert the USB flash drive into the USB port of the stereo. Select Media. -
Page 41: Viewing The Event Log
(if applicable), the software • If the transducer is installed at the water line version for an optional Garmin radar (if applicable), and the unit anywhere above the end of the keel, measure the ID number. You may need this information to update the system distance from the transducer location to the keel of the software or to purchase additional map data information. -
Page 42: Calibrating A Water Speed Device
‑ Fi Wireless Network, page If the wheel turns freely, check the cable connections. the Wi 37). If you continue to get the message, contact Garmin product NMEA 0183 support. The chartplotters support the NMEA 0183 standard, which is Setting the Fuel Capacity of the Vessel... -
Page 43: Wi-Fi Network
Wi‑Fi Network Variance: Sets the magnetic declination, the angle between magnetic north and true north, for your present location. ‑ Fi Wireless Network Setting Up the Wi North Reference: Sets the direction references used in The chartplotters can create a Wi‑Fi network to which you can calculating heading information. -
Page 44: Sharing And Managing User Data
Select Nav Info > Manage Data > Data Transfer > File Type. Select GPX. Sharing and Managing User Data To transfer data with Garmin devices again, select the ADM file You can share data between compatible devices. type. • You can share and manage user data using a memory card. -
Page 45: Backing Up Data To A Computer
Insert a memory card into the card slot. page 41). Select Settings > System > System Information > Garmin • Make sure the device has a clear view of the sky so the Devices > Save to Card. antenna can receive the GPS signal. If it is mounted inside of... -
Page 46: My Sonar Does Not Work
Changing the Fuse in the Power Cable Description Open the fuse housing 130306 Wind data 130312 Temperature Transmit Description Twist and pull the fuse to remove it 126464 Transmit and receive PGN list group function Insert a new 3 A fast-blow fuse. 127258 Magnetic Variance Close the fuse housing. -
Page 47: Registering Your Device
The chartplotter opens the card management page and Next > Finish. creates a file named GarminDevice.xml in the Garmin folder A Garmin folder containing the software update is created on the on the memory card. memory card. The software update can take several minutes to Remove the memory card. -
Page 48: Index
Garmin ClearVü 18 vessel trails 10, 31 Garmin Marine Network 36 celestial information 30 NMEA 0183 30, 36, 40 Garmin product support. See product support chart NMEA 2000 36, 40 gauges layers 9, 10 notifications 4 engine 29 settings 9 fuel 29, 36 charts 4, 9–11 limits 36 appearance 9, 10 off course alarm 37... - Page 49 24 Wi‑Fi 4 FrontVü 20 Wi‑Fi technology 36, 37 gain 21 wind, rose 9 Garmin ClearVü 18 wind gauges 30 interference 23 wind hold 28, 29 measuring distances 21 adjusting 28 noise 21–23 wireless devices 37 overlay numbers 22 connecting a wireless device 37 Panoptix 19, 20, 24, 25...
- Page 50 TA-2018/154 TA-2018/209 TA-2018/183 April 2019 190-02242-00_0E...