Table of Contents

Related Manuals for Ariston AURES EASY 3.5


Summary of Contents for Ariston AURES EASY 3.5
- Page 1 The home of sustainable comfort RELEASE 25/05/22 AURES EASY INSTANTANEOUS ELECTRIC WATER HEATER MÁY NƯ C NÓNG ĐI N T C TH I PEMANAS AIR LISTRIK INSTAN ASSEMBLY AND OPERATION INSTRUCTIONS...
-
Page 2: General Safety Instruction
16. Do not place anything under the water heater which may be damaged by a leak. 17. If any of the follow conditions occur, immediately switch off the mains and contact to Ariston service agent for repair. Never attempt to repair the unit yourself. -
Page 3: General Safety Standards
18. During lighting/thunder, switch off the electric supply to protect the shower unit against pos- sible damage. 19. The earth continuity conductor of the electrical installation must be effectively connected to all exposed metal parts of the appliance and services in the room, which the heater is to be installed to conform to local regulations and ensure proper earthing/grounding for ELCB to be effective. -
Page 4: Technical Characteristics
TECHNICAL CHARACTERISTICS For the technical specifications, refer to the nameplate (located on the right side of the water heater). PRODUCT INFORMATION AURES AURES AURES AURES MODEL EASY 3.5 EASY 4.5P EASY 4.5D EASY 2.4 Power (kW) Voltage (V) Phases Mono Installation Single point Construction... -
Page 5: Install The Appliance
Install the appliance 1. Select a suitable position in the bathroom. 2. Remove the screw A-(fig. 3) at the bottom of the unit and lift up the front. 3. Mark screw points of the heater base on the wall. The heater position should be 1.5 m from the bathroom floor. - Page 6 4. Insert the cable through channel ‘ A ’ (Fig 4) for side entry, after breaking plastic wall and clean burrs. 5. Connect the cable to terminal block and fully tighten them as follow. BROWN or RED for LIVE (L) BLUE or BLACK for NEUTRAL(N) GREEN or GREEN/YEOLLOW for EARTH(E) 6.
-
Page 7: Maintenance
PUMP FUNCTIONING (only for pump version models) The pump has to be activated by pump switch on the side of the product (fig: 6). The pump starts to work when the user turns on the product water supply valve and pump switch is ON. MAINTENANCE ELCB TEST To make sure ELCB function is working properly, it is recommended to repeat this procedure at least... -
Page 8: Troubleshooting
Troubleshooting HEATING PROBLEM LAMP CHECKING ACTIONS 1. Make sure power supplier is available, by checking house pow- er supply voltage; 2. Make sure the “ELCB” button is not accidentally pressed. Cold Water 3. Make sure the water heater is turned ON, by checking the knob no temperature increase position. - Page 9 HƯỚNG DẪN AN TOÀN CHUNG Sách hướng dẫn này là một phần rất quan trọng của sản phẩm. Xin hãy cất giữ cẩn thận sách hướng dẫn này cùng với thiết bị và trao lại cho người dùng/người sở hữu tiếp theo trong trường hợp thiết bị thay đổi chủ...
- Page 10 18. Khi có sấm sét, hãy tắt nguồn sản phẩm để bảo vệ sản phẩm tránh bị hư hại. 19. Đảm bảo nối đất phải có hiệu quả đối với tất cả các chi tiết kim loại của thiết bị và dịch vụ trong phòng, máy nước nóng phải được lắp đặt phù...
-
Page 11: Đặc Điểm Kỹ Thuật
ĐẶC ĐIỂM KỸ THUẬT Để biết các thông số kỹ thuật, hãy tham khảo nhãn tem (nhãn tem nằm ở mặt bên của máy nước nóng). THÔNG TIN SẢN PHẨM AURES AURES AURES AURES KIỂU MÁY EASY 3.5 EASY 4.5P EASY 4.5D EASY 2.4 Công suất (kW) - Page 12 Lắp đặt thiết bị 1. Lựa chọn vị trí phù hợp trong phòng tắm. 2. Tháo vít A (hình 3) ở đáy thiết bị và nhấc cụm mặt trước lên 3. Đánh dấu vị trí bắt máy lên tường. Vị trí khuyến nghị khi treo bình là 1.5m từ sàn phòng tắm. 4.
- Page 13 4. Luồn cáp qua màng cao su A (Hình .4) bên sườn máy hoạc lỗ B phía sau máy, sau khi cắt bỏ thành nhựa và làm sạch bavia. 5. Nối cáp vào cầu đấu dây trong máy và xiết chặt theo thứ tự như sau (Hình. 3b). NÂU hoặc ĐỎ...
- Page 14 BẢO DƯỠNG KIỂM TRA ELCB Để đảm bảo cơ chế ELCB hoạt động ổn định, không sau sót thì nên thực hiện chu trình kiểm tra sau ít nhất 1 lần 1 tháng. Sau khi đóng nguồn điện và cấp nước cho sản phẩm, nhấn nút “ELCB”, cần đỏ ở đáy sản phẩm sẽ tụt xuống.
- Page 15 Nhận biết và giải quyết lỗi ĐÈN VẤN ĐỀ ELCB HÀNH ĐỘNG KIỂM TRA 1. Đảm bảo có nguồn điện cấp cho sản phẩm, kiểm tra lại điện áp cung cấp tại nhà. 2. Đảm bảo nút “ELCB” không bị ấn nhầm. Nước lạnh, không tăng Tắt 3.
- Page 16 16. Do not place anything under the water heater which may be damaged by a leak. 17. If any of the follow conditions occur, immediately switch off the mains and contact to Ariston service agent for repair. Never attempt to repair the unit yourself.
- Page 17 18. During lighting/thunder, switch off the electric supply to protect the shower unit against pos- sible damage. 19. The earth continuity conductor of the electrical installation must be effectively connected to all exposed metal parts of the appliance and services in the room, which the heater is to be installed to conform to local regulations and ensure proper earthing/grounding for ELCB to be effective.
- Page 18 TECHNICAL CHARACTERISTICS For the technical specifications, refer to the nameplate (located on the right side of the water heater). PRODUCT INFORMATION AURES AURES AURES AURES MODEL EASY 3.5 EASY 4.5P EASY 4.5D EASY 2.4 Power (kW) Voltage (V) Phases Mono Installation Single point Construction...
- Page 19 Install the appliance 1. Select a suitable position in the bathroom. 2. Remove the screw A-(fig. 3) at the bottom of the unit and lift up the front. 3. Mark screw points of the heater base on the wall. The heater position should be 1.5 m from the bathroom floor.
- Page 20 4. Insert the cable through channel ‘ A ’ (Fig 4) for side entry, after breaking plastic wall and clean burrs. 5. Connect the cable to terminal block and fully tighten them as follow. BROWN or RED for LIVE (L) BLUE or BLACK for NEUTRAL(N) GREEN or GREEN/YEOLLOW for EARTH(E) 6.
- Page 21 PUMP FUNCTIONING (only for pump version models) The pump has to be activated by pump switch on the side of the product (fig: 6). The pump starts to work when the user turns on the product water supply valve and pump switch is ON. MAINTENANCE ELCB TEST To make sure ELCB function is working properly, it is recommended to repeat this procedure at least...
- Page 22 Troubleshooting HEATING PROBLEM LAMP CHECKING ACTIONS 1. Make sure power supplier is available, by checking house pow- er supply voltage; 2. Make sure the “ELCB” button is not accidentally pressed. Cold Water 3. Make sure the water heater is turned ON, by checking the knob no temperature increase position.
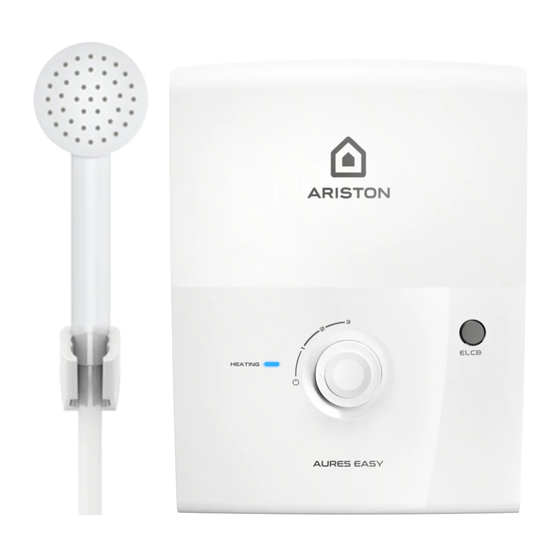
- Page 23 Shower Head đ u vòi hoa sen Hanger Giá treo Front Plate Trư c t m Wall plug N nh a Screw Vít Water Outlet Water Inlet Đ u ra nư c Nư c vào Water supply valve Van c p nư c Shower Hose Vòi hoa sen ELCB TEST button...
-
Page 24: Cold Water
FUSE distributor FUSE distributor board miniature board miniature Double PVC cable Double PVC cable circuit breaker (MCB) circuit breaker (MCB) Dây PVC đôi Dây PVC đôi Cầu dao (MCB) Cầu dao (MCB) ON/OFF DP (double pole) Switch Công tắc chuyển 2 cực ON/OFF DP (double pole) Switch Công tắc chuyển 2 cực... - Page 25 PUMP MODEL / MÔ HÌNH BƠM Terminal block 2. Relay PUMP MODEL PUMP MODEL 3. Leakage circuit breaker Pump PCB Pump PCB 4. Reset handle 2. Terminal block 2. Blok terminal 5. Flow switch 3. Pump 3. Pump 6. Outlet pipe 4. Leakage circuit breaker 4.
- Page 26 PUMP MODEL / MÔ HÌNH BƠM / PUMP MODEL PUMP SWITCH CÔNG TẮC BƠM PUMP SWITCH Table 1- ELECTRICAL LOADING TABLE Bảng 1- BẢNG THÔNG SỐ ĐIỆN Table 1- ELECTRICAL LOADING TABLE Voltage Power Current ON/OFF Switch Fuse MBC Điện thế Công suất Dông điện Sáng/ Tắt công tắc Cầu chÌ MBC Voltage Power Current...
- Page 27 Produced by: Ariston S.p.A. Viale Aristide Merloni, 45 60044 Fabriano (AN) - ITALY ariston.com 420011260300 - 0522...