
Related Manuals for Daikin FHA35AVEB98


Summary of Contents for Daikin FHA35AVEB98
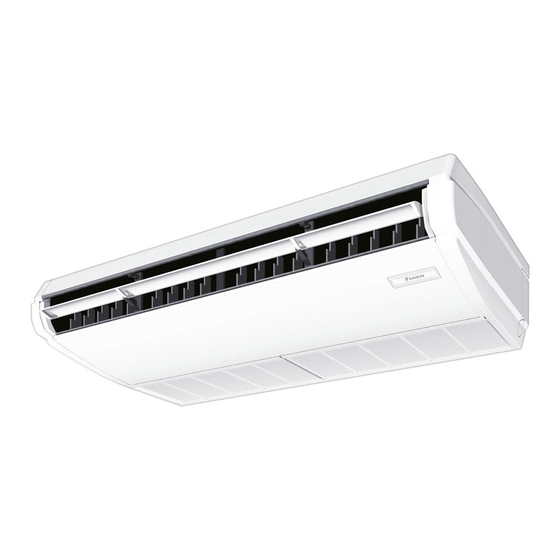
- Page 1 Installation and operation manual Split system air conditioner FHA35AVEB98 FHA50AVEB98 FHA60AVEB98 FHA71AVEB98 FHA100AVEB8 Installation and operation manual FHA125AVEB8 English Split system air conditioner FHA140AVEB8...
- Page 2 4P686644-9B...
- Page 3 4P686644-10B...
-
Page 4: Table Of Contents
15 Finishing the indoor unit installation Daikin website (publicly accessible). 15.1 To mount the suction grille and decoration side panel ....21 ▪ The full set of latest technical data is available on the Daikin Business Portal (authentication required). Installation and operation manual FHA-A(9) Split system air conditioner 3P668115-4E –... -
Page 5: Specific Installer Safety Instructions
4 19]) Electrical installation (see "14 Electrical Make sure installation, servicing, maintenance, repair and applied materials follow the instructions from Daikin WARNING (including all documents listed in “Documentation set”) ALWAYS use multicore cable for power supply cables. and, in addition, comply with applicable legislation and are performed by qualified persons only. -
Page 6: General
3 User safety instructions ▪ Batteries are marked with the following symbol: General WARNING If you are NOT sure how to operate the This means that the batteries may NOT be mixed with unsorted unit, contact your installer. household waste. If a chemical symbol is printed beneath the symbol, this chemical symbol means that the battery contains a WARNING heavy metal above a certain concentration. - Page 7 3 User safety instructions Maintenance and service (see "7 Maintenance and WARNING service" [ 4 10]) Before operating the unit, be sure the CAUTION: Pay attention to the fan! installation has been carried out It is dangerous to inspect the unit while correctly by an installer.
-
Page 8: About The System
4 About the system location of the terminals, see the WARNING warning label for persons performing ▪ R410A is a non-combustible service and maintenance. refrigerant, and R32 is a mildly flammable refrigerant; they normally CAUTION do NOT leak. If the refrigerant leaks Turn off the unit before cleaning the in the room and comes into contact unit exterior, air filter and suction grille. -
Page 9: System Layout
5 User interface NOTICE Operation For future modifications or expansions of your system: A full overview of allowable combinations (for future Operation range system extensions) is available in technical engineering data and should be consulted. Contact your installer to INFORMATION receive more information and professional advice. -
Page 10: Adjusting The Airflow Direction
7 Maintenance and service Operation Description NOTICE Hot start During hot start, the indoor unit fan will stop Avoid operating in the horizontal direction. It may cause operation, and the following icon will appear on the dew or dust to settle on the ceiling or flap. home screen: Left and right airflow direction setting The left and right airflow direction can be set only manually in fixed... -
Page 11: Cleaning The Unit Exterior, Air Filter And Suction Grille
7 Maintenance and service WARNING NOTICE NEVER replace a fuse with a fuse of a wrong ampere ▪ Do NOT use gasoline, benzene, thinner polishing ratings or other wires when a fuse blows out. Use of wire powder or liquid insecticide. Possible consequence: or copper wire may cause the unit to break down or cause Discoloration and deformation. -
Page 12: To Clean The Suction Grille
8 Troubleshooting 6 Reattach the suction grille and close it. (steps 2 and 1 in reverse order). INFORMATION When closing the suction grille, make sure the straps of the suction grille are not pinched anywhere. About the refrigerant 4 Dry the air filter in the shadow. This product contains fluorinated greenhouse gases. -
Page 13: Relocation
Refer reference guide located https:// unusual occurs (burning smells etc.). www.daikin.eu for more troubleshooting tips. Use the search function to find your model. Leaving the unit running under such circumstances may cause breakage, electrical shock or fire. Contact your If after checking all above items, it is impossible to fix the problem dealer. -
Page 14: Mounting The Indoor Unit
12 Unit installation ▪ Ceiling strength. Check whether the ceiling is strong enough to CAUTION support the weight of the unit. If there is a risk, reinforce the ceiling Appliance NOT accessible to the general public. Install it in before installing the unit. a secured area, protected from easy access. - Page 15 12 Unit installation ▪ Level. Use the level to make sure the unit is installed horizontally. To mount the indoor unit If possible, install the unit so the drain piping side is slightly tilted 1 Open the knockout hole at the wiring inlet at the rear or the top (maximum 1°) of the unit, and install the resin bushing (accessory).
-
Page 16: Guidelines When Installing The Drain Piping
12 Unit installation Rear right drain piping 5 Install the hanger bracket fixing screws (M5) on both sides back Right drain piping (2 screws in total). Rear left or left drain piping 6 Fully tighten all hanger bracket installation bolts (M8) (4 screws in total). -
Page 17: Piping Installation
13 Piping installation (mm) Round part Rectangular part of the decoration side panel Air outlet Decoration side panel Plastic water container with tube length ≥100 mm Screw Reinforcing plate Right drain piping Piping installation Drain piping connection 13.1 Preparing refrigerant piping 13.1.1 Refrigerant piping requirements CAUTION... -
Page 18: Refrigerant Piping Insulation
13 Piping installation Rear right piping 13.1.2 Refrigerant piping insulation 1 Remove the rear piping pipe port cover and cut out the holes for ▪ Use polyethylene foam as insulation material: piping. When cutting out the holes, make sure to avoid the knob part of the cover. -
Page 19: Electrical Installation
14 Electrical installation Electrical installation DANGER: RISK OF ELECTROCUTION WARNING ALWAYS use multicore cable for power supply cables. WARNING Use an all-pole disconnection type breaker with at least Round part 3 mm between the contact point gaps that provides full Rectangular part of the decoration side panel disconnection under overvoltage category III. - Page 20 14 Electrical installation Power supply wiring Resin bushing (accessory) Sealing material for gaps around pipes and cables (accessory) User interface cable and transmission cable 3 Install the 2 wiring fixtures with screws for wiring fixture (accessory). Power supply 4 User interface cable: Route the cable through the large cut out Residual current device Outdoor unit hole and connect it to the terminal block (symbols P1, P2).
-
Page 21: Finishing The Indoor Unit Installation
Next commissioning instructions in this chapter, a general commissioning checklist is also available on the Daikin Business Portal (authentication required). The general commissioning checklist is complementary to the instructions in this chapter and can be used as a guideline and reporting template during commissioning and hand-over to the user. -
Page 22: To Perform A Test Run
17 Configuration The system is properly earthed and the earth terminals INFORMATION are tightened. ▪ The connection of optional accessories to the indoor The fuses or locally installed protection devices are unit might cause changes to some field settings. For installed according to this document, and have NOT been more information, see the installation manual of the bypassed. -
Page 23: Technical Data
Unified setting 11 (21) Daikin website (publicly accessible). Individual setting ▪ The full set of latest technical data is available on the Daikin 2 Perform field setting for the master unit. Business Portal (authentication required). 3 Turn off main power supply. - Page 24 18 Technical data Symbol Meaning Symbol Meaning Symbol Meaning Residual current Thermo switch device Residual current device Resistor Symbol Colour Symbol Colour Thermistor Black Orange Receiver Blue Pink Limit switch Brown PRP, PPL Purple Float switch Green S*NG Refrigerant leak detector Grey White S*NPH...
- Page 28 3P668115-4E 2022.11 Verantwortung für Energie und Umwelt...