Table of Contents
Advertisement
Quick Links
Advertisement
Table of Contents

Related Manuals for Rinnai RH-C1059-PBR


Summary of Contents for Rinnai RH-C1059-PBR
-
Page 2: Table Of Contents
Page 12 Installation Instructions Page 13 To register your product warranty, please paste the serial numbers stickers enclosed with the packaging on your warranty card. Please contact your local Rinnai After Sales Service Center should you require further assistance. Version 2020.10... -
Page 3: Intended Use
Intended Use Please read this user manual thoroughly before attempting to use this appliance for the first time. This manual contains important information on safe installation, use and care of the appliance. Keep these instructions for reference and pass them on to future user. This appliance can only be used safely if it is correctly installed according to the safety instructions. -
Page 4: Safety Information
Incorrect repairs are dangerous. Repairs should be attempted by our qualified technical personnel’s only. If the appliance is defective, unplug the appliance from the mains or switch off the circuit breaker in the fuse box. Contact your local Rinnai After Sales Service Center for assistance. - Page 5 Unplug the appliance from the mains or switch off the circuit breaker in the fuse box. Contact your local Rinnai After Sales Service Center for assistance. Incorrect repairs are dangerous. Any repairs and replacements of damaged power cable or ...
-
Page 6: Environmental Protection
Environmental Protection Energy Saving During cooking ensure that there is a sufficient supply of air to enable the extractor hood to work efficiently and with a low level of operating noise. Adjust the fan speed to the amount of cooking vapor produced during cooking. Only use ... -
Page 7: Operating Instructions
Operating Instructions Operating the Extractor Hood Touch the sensor buttons gently to operate this appliance. To achieve better air extraction, it is advisable to switch on the extractor hood a few minutes before starting to cook and leave it on for approximately 15 minutes after cooking (or at least all cooking smell is completely removed). - Page 8 Note: Touching once on the timer symbol will indicate a number 1 on the display window. The timer is preset from a minimum of 5 minutes to a maximum of 20 minutes where 1 is equivalent to 5 minutes, 2 is 10 minutes, 3 is 15 minutes and 4 is 20 minutes.
-
Page 9: Care And Maintenance
Care and Maintenance Warning: Before carrying out any cleaning or maintenance activities, ensure that the appliance is disconnected from the main power supply. Components inside the appliance may have sharp edges. Wear protective gloves. Cleaning Agents To ensure that the different surfaces are not damaged by using the wrong cleaning product, follow the instructions in the table. - Page 10 Grease Filter Warning: It is important to regularly clean and/or replace the grease filters at appropriate intervals as grease deposits build-up increases the risk of fire. Do not operate the extractor hood without any grease filter installed. Components inside the appliance may have sharp edges. It is advisable that you wear protective gloves.
- Page 11 Installing the Grease Filter Insert back the grease filter and lock it in place, at the same time take hold of the grease filter from underneath using your other hand to insert into the grease filter holder, make sure the grease filter is positioned correctly.
- Page 12 Note: If the perimeter LED light panel has malfunction, do not attempt to fix it yourself, please contact your local Rinnai After Sales Service Center. Oil Collector Cup Cleaning the Oil Collector Cup (Fig.3 & Fig.3.1) Fig.3 Fig.3.1 Gently pull down the perimeter LED light panel and disconnect the power cable.
-
Page 13: Trouble Shooting
Incorrect repairs are dangerous. Repairs should be attempted by our qualified technical personnel’s only. If the appliance is defective, unplug the appliance from the mains or switch off the circuit breaker in the fuse box. Contact your local Rinnai After Sales Service Center for assistance. -
Page 14: Specification And Component List
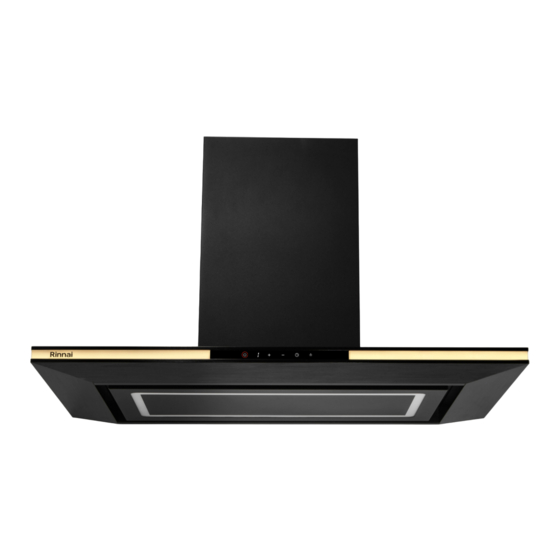
Specification Model: RH-C1059-PBR Power Rating: 300W Voltage: 220-240V Power Frequency: 50/60Hz Power of Lamps: (25W Lamp board + 2 x 2.5W Decorative light) Length of the cable: 1.5m Appliance 898 x 500 x 550 - 1030mm Dimensions: (W x D x H) -
Page 15: Installation Instructions
Installation Instructions Safety and General Information Read these instructions carefully. Check the appliance for damage after unpacking it. The appliance can only be used safely if it is correctly installed according to the safety instructions. The installer is responsible for ensuring that the appliance works correctly at its installation location. - Page 16 Minimum installation height: Gas range 700mm Electric range 550mm Fig 5 Warning Components inside the appliance may have sharp edges. Wear protective gloves. The extractor hood may fall down if it has not been properly fastened in place. All fastening components must be fixed firmly and securely.
- Page 17 The max weight of the extractor hood is 18kgs. Preparing the Installation Ensure that there are no electrical wires, gas pipes or water pipes in the area where holes are to be drilled. Step 1 (Fig.6) Determine where the extractor hood ...
- Page 18 Tighten the screws 3, 4, 5, 6 firmly after realignment. (Fig. 7.2) Fig.7.2 Mounting the Plasma Filter onto the Extractor Hood Warning: Failure to install the screws or fixing the device in accordance with these instructions may result in electrical hazards. The appliance must be installed by a qualified person in compliance with the instructions provided Step 3 (Fig.8, Fig.8.1, Fig.8.2, Fig.8.3)
- Page 19 Connect the main power cable (provided) from the plasma filter to the main power socket on the wall. (Fig.8.3) Switch ON the extractor hood to activate the plasma filter. Air flow will pass through a sensor to activate the plasma filter automatically.
- Page 20 Use the provided ST4*8 screws to attach the inner flue duct on the left and right sides of the bracket. (Fig. 9.2) Fig.9.2...
- Page 24 2805 電話 傳真 ...