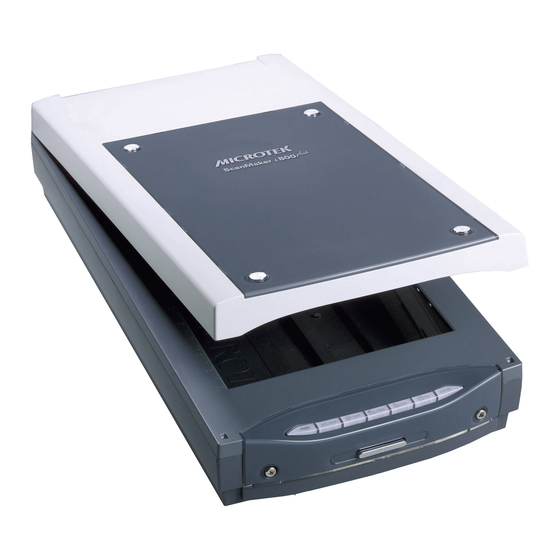
Microtek ScanMaker i800 Scanning Manual
Scanning scenarios with scanwizard pro
Hide thumbs
Also See for ScanMaker i800:
- Supplementary manual (31 pages) ,
- Quick start (2 pages) ,
- Reference manual (166 pages)
Table of Contents
Advertisement
Scanning Guide
This Scanning Guide shows you how to use ScanWizard Pro, the professional-grade
scanning software included with the ScanMaker i800. While the Guide lays out only
the most basic scanning scenarios on these pages, ScanWizard Pro can be used for a
wide range of applications involving sophisticated functionalities and advanced
levels of image manipulation and control.
For information on more advanced scanning scenarios, refer to the ScanWizard Pro
User's Guide. Additional information can also be found in the ScanWizard Pro
Reference Manual for detailed discussions of individual scanning commands and
options. Both documents are in Adobe Acrobat PDF format, available for viewing and
printing from your Microtek ScanMaker i800 Pro CD-ROM.
Contents
About This Scanning Guide ...................................................................... 1
Installing Software .................................................................................... 2
Positioning Transparent Film .................................................................... 3
A. Using the EZ-Lock 35mm Slide Holder ....................................... 4
B. Using the EZ-Lock 35mm Filmstrip Holder ................................. 5
C. Using the EZ-Lock 6 x 22 cm (120) Film Holder ........................... 6
D. Using the EZ-Lock 4 " x 5 " Film Holder ......................................... 7
E. Using the Film Alignment Ruler .................................................. 8
Copyright © 2005
Microtek International, Inc.
I49-003964 A, August 2005
ScanMaker i800 Scanning Scenarios with ScanWizard Pro
About This Scanning Guide
http://www.microtek.com
Scanning Scenarios ................................................................................... 9
Scanning Regular, Non-Damaged Photos ............................................ 10
Scanning Damaged Photos .................................................................... 13
Scanning Regular, Non-Damaged Positive Film ................................... 16
Scanning Regular, Non-Damaged Negative Film .................................. 18
Scanning Damaged Film ......................................................................... 20
Advertisement
Table of Contents

Related Manuals for Microtek ScanMaker i800


Summary of Contents for Microtek ScanMaker i800
-
Page 1: Table Of Contents
This Scanning Guide shows you how to use ScanWizard Pro, the professional-grade scanning software included with the ScanMaker i800. While the Guide lays out only the most basic scanning scenarios on these pages, ScanWizard Pro can be used for a wide range of applications involving sophisticated functionalities and advanced levels of image manipulation and control. -
Page 2: Installing Software
Follow the steps below for installation. 1. Place the Adobe CD-ROM into the CD-ROM drive, and install the software. 2. Place the Microtek ScanMaker i800 Pro CD-ROM into the CD-ROM drive, and follow the on-screen instructions to install the driver and software. -
Page 3: Positioning Transparent Film
Positioning Transparent Film To scan transparent film, use the EZ-Lock™ Film Holders or Film Alignment Ruler included with your ScanMaker i800 package. Use the EZ-Lock Film Holders to scan standard-size transparent film such as 35mm slides, 35mm filmstrips, 4" x 5" film, 6 x 4.5 cm, 6 x 6 cm, 6 x 7 cm, 6 x 9 cm, or 6 x 17 cm (120) film. -
Page 4: Using The Ez-Lock 35Mm Slide Holder
Orient the holder with the “Microtek” logo facing up 2. Raise the scanner lid, then place the EZ-Lock 35mm Slide Holder towards the back of the scanner, with the loaded film on the scanner glass surface. Keep calibration strip on the glass surface clear and free of any obstruction “Microtek”... -
Page 5: Using The Ez-Lock 35Mm Filmstrip Holder
Filmstrip Holder. The shiny base of the 35mm filmstrip should be facing down, and the emulsion side of the filmstrip should be facing up. 2. Raise the scanner lid, then place the EZ-Lock 35mm Filmstrip Holder towards the back of the scanner, with the loaded film on the scanner glass surface. -
Page 6: Using The Ez-Lock 6 X 22 Cm (120) Film Holder
Push on the side to open the lid. 2. Raise the scanner lid, then place the EZ-Lock 6 x 22 cm (120) Film Holder towards the back of the scanner, with the loaded film on the scanner glass surface. -
Page 7: Using The Ez-Lock 4" X 5" Film Holder
Push on the side to open the lid. 2. Raise the scanner lid, then place the EZ-Lock 4" x 5" Film Holder towards the back of the scanner, with the loaded film on the scanner glass surface. Keep calibration strip... -
Page 8: Using The Film Alignment Ruler
8" x 10" film, use the Film Alignment Ruler, which allows you to scan film up to 8" x 12" in size. 1. Place the Film Alignment Ruler towards the back of the scanner on the scanner glass surface. Calibration strip 2. -
Page 9: Scanning Scenarios
Take note that with the use of ScanWizard Pro, the Smart Touch buttons located on the front panel of the ScanMaker i800 are deactivated and become unavailable for use. The Smart Touch buttons are intended to be used in conjunction with ScanWizard 5, Microtek's other scanning software also included with the ScanMaker i800, geared for tasks assigned to the buttons. -
Page 10: Scanning Regular, Non-Damaged Photos
The first time you launch ScanWizard Pro, you will be prompted to set up color matching for your scanner. If you are not sure about what to do, simply click the OK button to accept the settings. You can always change the settings at a later time. - Page 11 When you have completed the settings, press the Done/Save button, and the scanner will automatically scan and save your image based on your settings.
- Page 12 ScanMaker i800 Pro Scanning Guide...
-
Page 13: Scanning Damaged Photos
Scanning Damaged Photos 1. Raise the scanner lid, then place the damaged photo to be scanned face down on the scanner glass surface. Center the top of the photo along the horizontal ruler towards the back of the scanner. Black Mat... - Page 14 Settings window. Select from Normal or Strong. 10. If the colors in your photo are faded and need restoring, check the “Automatic Color Restoration” box in the Settings window. ScanMaker i800 Pro Scanning Guide 600 dpi.
- Page 15 When you have completed the settings, press the Done/Save button, and the scanner will automatically scan and save your image based on your settings.
-
Page 16: Scanning Regular, Non-Damaged Positive Film
8. Adjust image quality if necessary, using the Advanced Image Correction (AIC) tools. 9. If the colors in your film are faded and need restoring, check the “Automatic Color Restoration” box in the Settings window. ScanMaker i800 Pro Scanning Guide... - Page 17 When you have completed the settings, press the Done/Save button, and the scanner will automatically scan and save your image based on your settings.
-
Page 18: Scanning Regular, Non-Damaged Negative Film
For more details on how to control settings for negative film scanning, see the section “Negative Scan Settings Window” in the ScanWizard Pro Reference Manual in the Microtek ScanMaker i800 Pro CD-ROM. ScanMaker i800 Pro Scanning Guide choose the Film Brand, Film Type, and ISO settings that match your film. - Page 19 When you have completed the settings, press the Done/Save button, and the scanner will automatically scan and save your image based on your settings.
-
Page 20: Scanning Damaged Film
9. Choose the DIGITAL ICE option that works best for you in the Settings window. Select from Normal or Strong. In Film mode, DIGITAL ICE automatically removes surface defects from your slides, negatives, and transparencies. ScanMaker i800 Pro Scanning Guide 1200 dpi. - Page 21 When you have completed the settings, press the Done/Save button, and the scanner will automatically scan and save your image based on your settings.
- Page 22 ScanMaker i800 Pro Scanning Guide...