Table of Contents
Advertisement
Quick Links
Supplement
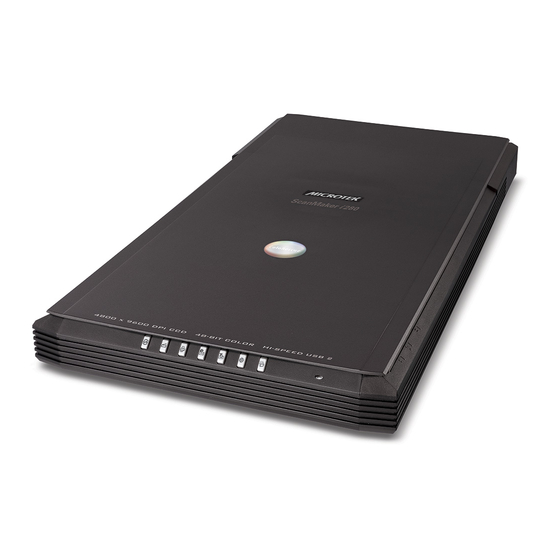
The ScanMaker i280 is a high resolution scanner for reflective scanning. It features
4800 x 9600 dpi, 48-bit color, an 8.5" x 11.7" scan bed, and seven Smart-Touch buttons
on the front panel for one-touch automation. The optional LightLid 35 III
transparency adapter adds to the versatility of the scanner by allowing you to scan
35mm slides and filmstrips. The ScanMaker i280 also offers ColoRescue™ -
Microtek's one-touch color restoration to revive faded color in both photos and film.
Contents
Getting to Know Your ScanMaker i280 ........................................................... 1
Features of the ScanMaker i280 ...................................................................... 2
Taking a Closer Look ........................................................................................ 3
How the Smart-Touch Scanner Buttons Work .............................................. 4
Positioning Your Originals .............................................................................. 6
Positioning Reflective Originals ................................................................ 6
Positioning Transparent Film .................................................................... 6
Using the LightLid 35 III ................................................................................... 7
Step 1. Connecting the LightLid 35 III ........................................................ 8
Step 2. Loading Film .................................................................................. 8
Step 3. Placing the LightLid 35 III ............................................................... 9
Copyright © 2013
Microtek International, Inc.
I49-004757 B, September 2013
ScanMaker i280 features, scenarios, and information
Getting to Know Your ScanMaker i280
http://www.microtek.com
Scanning Scenarios ....................................................................................... 10
For PC Users Using ScanWizard EZ ........................................................ 1 1
A. Scanning Photos (1) ...................................................................... 1 1
B. Scanning Photos (2) ...................................................................... 12
C. Scanning Photos (3) ...................................................................... 14
D. Scanning Film (1) ........................................................................... 16
E. Scanning Film (2) ........................................................................... 18
For Mac Users Using ScanPotter ............................................................ 20
A. Scanning Photos ........................................................................... 20
B. Scanning Film ................................................................................. 22
Specifications / System Requirements ........................................................ 24
FCC Compliance Statement .......................................................................... 25
Advertisement
Table of Contents

Related Manuals for Microtek ScanMaker i280


Summary of Contents for Microtek ScanMaker i280
-
Page 1: Table Of Contents
ScanMaker i280 features, scenarios, and information Getting to Know Your ScanMaker i280 The ScanMaker i280 is a high resolution scanner for reflective scanning. It features 4800 x 9600 dpi, 48-bit color, an 8.5" x 11.7" scan bed, and seven Smart-Touch buttons on the front panel for one-touch automation. -
Page 2: Features Of The Scanmaker I280
• Microtek ScanWizard EZ scanning software (PC): ScanWizard EZ is developed exclusively for Microtek scanners running on a PC system. It has three unique scan modes, the EZ mode, the Advanced mode and the Professional mode that no matter novices and experienced users can find it productive and easy to use. -
Page 3: Taking A Closer Look
Taking a Closer Look Scanner lid Horizontal ruler (top ruler) Glass surface (Scan bed) Scan Copy E-mail Custom Cancel/ Setup Hi-Speed USB port (1) 9-pin accessory port Power switch Power connector ScanMaker i280 Supplement... -
Page 4: How The Smart-Touch Scanner Buttons Work
Windows system; however, if you are using Mac OS X, you need to activate ScanPotter program before using scanner buttons. The ScanMaker i280 is equipped with seven Smart-Touch buttons for easy access to frequently used scanner functions. To carry out a specific task, simply press the corresponding button on the scanner. - Page 5 - Scan: Defines another button to be a second “Scan” button. Use this if you need a second “Scan” button with different parameters from the first Scan button. - Fax: Launches a fax driver installed on your computer. - Launch Application: Defines an application to be launched. ScanMaker i280 Supplement...
-
Page 6: Positioning Your Originals
4 mounted slides or one strip of 5 frames can be loaded at a time. Microtek recommends the use of this accessory to scan slides for on-screen display purposes or where high resolution is not critical. For high-quality print reproduction, we recommend purchasing a dedicated slide scanner or a Microtek scanner with built- in film-scanning features. -
Page 7: Using The Lightlid 35 Iii
Step 1. Connecting the LightLid 35 III 1. Unpack the LightLid 35 III. 2. Remove the scanner lid. 3. Make sure that the scanner is powered off; then plug the connector of the LightLid into the scanner’s 9-pin accessory port. ScanMaker i280 Supplement... -
Page 8: Step 2. Loading Film
The slides should be inserted inside the slots specifically allotted for slides, as shown in the illustration. The lower slot is for loading 35mm slides Ensure that the calibration window is kept clear and free from any obstruction for successful calibration and best image results. ScanMaker i280 Supplement... -
Page 9: Step 3. Placing The Lightlid 35 Iii
Align the top of the LightLid 35 III with the recessed area, as label “Place LightLid 35 III Here” . ScanMaker i280 Supplement... -
Page 10: Scanning Scenarios
• Scanning film (2): This scenario is similar to that described above but uses the Professional Mode in ScanWizard EZ. For Mac Users Using ScanPotter, • Scanning photos: This scenario details the steps for scanning photos. • Scanning film: This scenario details the steps for scanning film. ScanMaker i280 Supplement... -
Page 11: For Pc Users Using Scanwizard Ez
Press the Scan button Allows you to switch to to start scanning the Advanced Mode Allows you to activate the Minimizes Preferences window, which ScanWizard EZ contains selections for image settings (i.e., file Exits format, resolution, scan quality) ScanWizard EZ ScanMaker i280 Supplement... -
Page 12: Scanning Photos (2)
9. Specify the scanning requirements depending on your purpose about manipulating the image. - Select a desired viewing size for the on-screen display purpose. - Select a desired output dimension and a resolution for printing purpose. - Set up a custom resolution. ScanMaker i280 Supplement... - Page 13 Allows you access the ScanWizard EZ manual Allows you to switch to the EZ Mode Allows you to switch to the Professional Mode Selections and options for image settings The display of Returns to the previous page nine-image effects ScanMaker i280 Supplement...
-
Page 14: Scanning Photos (3)
10. Click the Scan to button to scan the image. When the “Scan To: Save As” dialog box appears, specify the folder location, a file name, and the format for the output image; then click Save. The image is scanned and saved to the specified location. ScanMaker i280 Supplement... - Page 15 Settings window Preview window Scan Job Queue window Information window ScanMaker i280 Supplement...
-
Page 16: Scanning Film (1)
- Select a desired output dimension and a resolution for printing purpose. - Set up a custom resolution. 9. Choose a desired image effect from the display of nine-image effects, and click the Scan button to start scanning. ScanMaker i280 Supplement... - Page 17 Allows you access the ScanWizard EZ manual Allows you to switch to the EZ Mode Allows you to switch to the Professional Mode Selections and options for image settings Returns to the previous page The display of nine-image effects ScanMaker i280 Supplement...
-
Page 18: Scanning Film (2)
9.. Click the Scan to button in the Preview window to scan all the checked jobs. When the “Scan To: Save As” dialog box appears, specify the folder location, a file name, and the format for the output image, then click Save. The image is scanned and saved to the specified location. ScanMaker i280 Supplement... - Page 19 “One-pass Scan for Multiple Jobs” option in the Scan Job Queue window. For more details about the “One-pass Scan for Multiple Jobs” , refer to the Information window ScanWizard EZ- Professional Mode Scan Job Queue window on-line help. ScanMaker i280 Supplement...
-
Page 20: For Mac Users Using Scanpotter
8. If necessary, click the Image Settings button to switch to a window in which you can select a preset image effect to the image directly or adjust image quality manually by using the additional image correction tools. 9. Click the Scan button to start scanning. ScanMaker i280 Supplement... - Page 21 Click the Image Settings button to switch to a window where contains a composite display of nine-image-effects (Filter column) and additional image correction tools (Additional Adjustment column) for your scanned image. Preview window Scan frame (enclosed by dotted lines) ScanMaker i280 Supplement...
-
Page 22: Scanning Film
8. If necessary, click the Image Settings button to switch to a window in which you can select a preset image effect to the image directly or adjust image quality manually by using the additional image correction tools. 9. Click the Scan button to start scanning. ScanMaker i280 Supplement... - Page 23 (Filter column) and additional image correction tools (Additional Adjustment column) for your scanned image. Preview window Multiple scan frames (bordered in dotted lines and tagged with the number (e.g., 1, 2) at the top-left corner of the scan frame) ScanMaker i280 Supplement...
-
Page 24: Specifications / System Requirements
• Pentium IV PC or higher with Hi-Speed USB (USB 2.0) port • Microsoft Windows XP/Vista, or Windows 7 Macintosh • Intel-Based Mac computer with built-in USB port • Mac OS X 10.6 through 10.7 Important Specifications, software bundles, and accessories are subject to change without notice. ScanMaker i280 Supplement... -
Page 25: Fcc Compliance Statement
This device complies with Part 15 of the FCC Rules. Operation is subject to the following two conditions: (1) This device may not cause harmful interference, and (2) this device must accept any interference received, including interference that may cause undesired operation. ScanMaker i280 Supplement...