Table of Contents
Advertisement
Quick Links
Advertisement
Table of Contents

Related Manuals for Garmin MONTANA 700 Series


Summary of Contents for Garmin MONTANA 700 Series
- Page 1 MONTANA 700 SERIES ® Owner’s Manual...
- Page 2 © 2020 Garmin Ltd. or its subsidiaries All rights reserved. Under the copyright laws, this manual may not be copied, in whole or in part, without the written consent of Garmin. Garmin reserves the right to change or improve its products and to make changes in the content of this manual without obligation to notify any person or organization of such changes or improvements. Go to www.garmin.com...
-
Page 3: Table Of Contents
Replying to a Message......8 Downloading Connect IQ Features Checking for Messages...... 8 Using Your Computer......19 Viewing Message Details....8 Garmin Explore........19 Navigating to a Message Location..8 Wireless Headsets........ 19 Including Location Coordinates in a Pairing a Wireless Headset with Your Message..........9... - Page 4 Repositioning a Waypoint to Your Customizing and Sharing the Main Current Location........ 23 Menu..........35 Routes............ 24 Garmin Adventures....... 35 Creating a Route........ 24 Sending Files to and from Creating a Route Using the Map..24 BaseCamp......... 35 Creating a Round-Trip Route.... 24 Creating an Adventure......
- Page 5 Device Information......54 Marking and Starting Navigation to a Man Overboard Location...... 42 Product Updates........54 Downloading Maps....... 43 Setting Up Garmin Express....55 Enabling Maps........43 Getting More Information....55 Deleting a Map........43 Viewing E-label Regulatory and Creating Map Sets.........43 Compliance Information.......
-
Page 7: Introduction
Introduction WARNING See the Important Safety and Product Information guide in the product box for product warnings and other important information. Device Overviews Montana 700i/750i Device Overview Iridium and GNSS antenna ® SOS button Camera lens (Montana 750i only) Flashlight Camera flash (Montana 750i only) Power button microSD... -
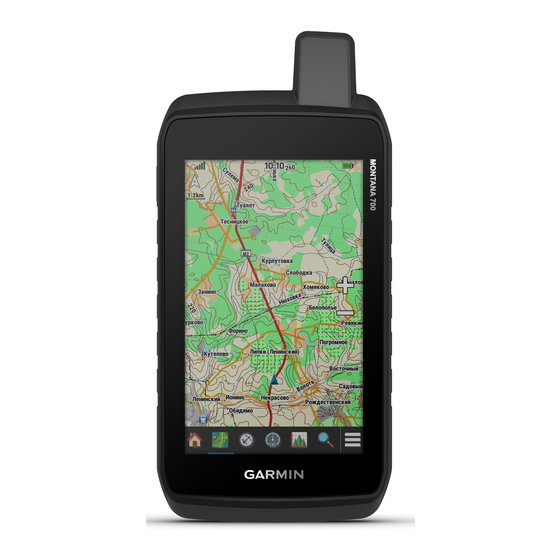
Page 8: Montana 700 Device Overview
Montana 700 Device Overview GNSS antenna Flashlight Power button microSD card slot (under battery pack) Battery pack D-ring Micro-USB port (under weather cap) Introduction... -
Page 9: Status Led
Status LED The status LED indicates the device status. LED Activity Status Double flashing green You have an unread inReach ® message. Flashing green The device is in expedition mode. An inReach message failed to send. Flashing red The device is below 10-percent battery power. Alternating red and green flashes The device is in SOS mode. -
Page 10: Charging The Battery Pack
To prevent corrosion, thoroughly dry the USB port, the weather cap, and the surrounding area before charging or connecting to a computer. Do not attempt to use the device to charge a battery that was not provided by Garmin ®... -
Page 11: Using The Power Button
Using the Power Button By default, you can use the power button to turn the device on and off, turn off the screen, and open the status page. You can customize the power button functions (Customizing the Power Button, page 48). •... -
Page 12: Activating The Device
Before you can use the inReach features of your Montana 700i/750i device, you must activate it (inReach Features, page 7). 1 Create an account, and select a satellite subscription at explore.garmin.com. 2 Turn on the device. 3 Select Next. 4 Follow the on-screen instructions. -
Page 13: Status Icons
Sending a Preset Message Preset messages have predefined text and predetermined recipients. Preset messages must be set up on the Garmin Explore website at explore.garmin.com. ™ 1 Select inReach > Messages > Send Preset. 2 Choose a preset message, and select Send Message. -
Page 14: Sending A Text Message
2 Select an option: • To start with a pre-written message, select Send Quick Text. NOTE: You can add and edit quick text messages on the Garmin Explore website. • To write a custom message, select Type Message. 3 Select To to choose recipients from your contacts list, or enter each recipient's contact information. -
Page 15: Including Location Coordinates In A Message
Tracking You can use the tracking feature on your Montana 700i/750i device to record track points and transmit them over the Iridium satellite network at the specified send interval. Track points appear on the Garmin Explore website and the MapShare tracking page. -
Page 16: Sos
During an emergency, you can use your Montana 700i/750i device to contact the Garmin Response center to request help. Pressing the SOS button sends a message to the Garmin Response team, and they notify the appropriate emergency responders of your situation. You can communicate with the Garmin Response team during your emergency while you wait for help to arrive. -
Page 17: Sending A Custom Sos Message
You can sync data from your explore.garmin.com account to your device using the Garmin Explore app. After you make edits to your data, such as plan changes, contacts, preset messages, or quick text messages, you must sync them to your device using the mobile app. -
Page 18: Deleting A Contact
Deleting a Contact 1 Select inReach > Contacts. 2 Select a contact. 3 Select > Delete Contact. Data Use and History You can view plan details and data use on the Montana 700i/750i device. Viewing Plan Details 1 Select inReach > inReach Utilities. 2 Select Viewing Data Use You can view the number of messages, preset messages, and track points sent during the current billing cycle. -
Page 19: Map Page Settings
Map Page Settings From the map, select Stop Navigation: Stops navigating the current route. Map Setup: Enables you to open additional map settings (Map Settings, page 13). Measure Distance: Allows you to measure the distance between multiple locations (Measuring Distance on the Map, page 13). -
Page 20: Navigating With The Compass
Navigating with the Compass When navigating to a destination, points to your destination, regardless of the direction you are moving. 1 Begin navigating to a destination (Navigating to a Destination, page 20). 2 Turn until points toward the top of the compass, and continue moving in that direction to the destination. Compass Settings From the compass, select Sight 'N Go: Allows you to point the device at an object in the distance, and navigate using the object as a... -
Page 21: Trip Computer
Heading Settings From the compass, select , and select Heading Setup. Display: Sets the type of directional heading shown on the compass. North Reference: Sets the north reference used on the compass. Go To Line (Pointer): Sets the behavior of the pointer that appears on the map. Bearing points in the direction of your destination. -
Page 22: Trip Computer Settings
Trip Computer Settings From the trip computer, select Reset: Resets all the trip computer values to zero. For accurate information, reset the trip information before beginning a trip. Change Dashboard: Changes the theme and information displayed on the dashboard. NOTE: Your customized settings are remembered by the dashboard. Your settings are not lost when you change profiles (Profiles, page 53). -
Page 23: Connected Features
EPO Downloads: Allows you to download an extended prediction orbit file to quickly locate GPS satellites and reduce the time it takes to get an initial GPS fix using the Garmin Explore app or when connected to a Wi‑Fi network. -
Page 24: Pairing A Smartphone With Your Device
® device, go to the iOS notifications settings to select the items to show on the device. • If you are using an Android smartphone, from the Garmin Connect app, select Settings > Smart Notifications. Connecting to a Wireless Network 1 Select Setup >... -
Page 25: Connect Iq Features
Connect IQ Features You can add Connect IQ features to your device from Garmin and other providers using the Connect IQ app. You can customize your device with data fields, widgets, and apps. Data Fields: Allow you to download new data fields that present sensor, activity, and history data in new ways. -
Page 26: Disconnecting Or Removing A Wireless Headset
Disconnecting or Removing a Wireless Headset 1 Select Setup > Bluetooth > Audio Device. 2 Select your headset. 3 Select an option: • To temporarily disconnect a headset without deleting it from the paired devices list, select Disconnect Device. • To delete a headset from the paired devices list, select Remove. Navigation You can use the GPS navigation features on your device to navigate a saved activity, route, or course. -
Page 27: Finding A Location Near Another Location
Turns appear in the text bar along the top of the map. Audible tones signal turns in the route. Optional Maps You can use additional maps with the device, such as Outdoor Maps+, City Navigator, and Garmin HuntView ™ Plus detailed maps. Detailed maps may contain additional points of interest, such as restaurants or marine services. -
Page 28: Finding A Waypoint
Finding a Waypoint 1 Select Waypoint Manager. 2 Select a waypoint from the list. 3 If necessary, select to narrow the search. 4 Select an option: • Select Spell Search to search using the name of the waypoint. • Select Select Symbol to search using the symbol of the waypoint. •... -
Page 29: Projecting A Waypoint From A Saved Waypoint
Projecting a Waypoint from a Saved Waypoint You can save a new waypoint by projecting the distance and bearing from a saved waypoint to a new location. 1 Select Waypoint Manager. 2 Select a waypoint. 3 Select > Project Waypoint. 4 Enter the bearing, and select 5 Select a unit of measure. -
Page 30: Routes
Routes A route is a sequence of waypoints or locations that leads you to your final destination. Routes are saved as GPX files on the device. Creating a Route 1 Select Route Planner > Create Route > Add Point. 2 Select a category. 3 Select the first point in the route. -
Page 31: Editing A Route
Adding Points to a Route 1 While navigating a route, select a location on the map. 2 Select the information bar at the top of the screen. 3 Select Go. 4 Select an option: • To add the point as an intermediate destination in the current route, select Add as Via Point. •... -
Page 32: Deleting A Route
(File Types, page 57). The FIT option records your activity with fitness information that is tailored for the Garmin Connect application and can be used for navigation. The FIT and GPX option records your activity as both a traditional track that can be viewed on the map and used for navigation, and as an activity with fitness information. -
Page 33: Viewing The Current Activity
Viewing the Current Activity By default, the device automatically starts recording your path as an activity when it is turned on and has acquired satellite signals. You can pause and start recording manually. 1 Select to open the status page. 2 Select Activity Recording. -
Page 34: History
NOTE: History is not recorded while the timer is stopped or paused. When the device memory is full, a message appears. The device does not automatically delete or overwrite your history. You can upload your history to Garmin Connect periodically to keep track of all your activity data (Using Garmin Connect, page 58). -
Page 35: Courses
Deleting a Saved Activity 1 Select Recorded Activities. 2 Select an activity. 3 Select > Delete. Courses A course can have multiple destinations, and can be navigated point to point or on routable roads. Courses are saved as FIT files on the device. Creating a Course 1 Select Course Planner >... -
Page 36: Editing A Course
> Reverse Course. Creating a Track or Route from a Saved Course You can create a track or route from a saved course. The tracks or routes can be navigated using Garmin devices that do not support course navigation. 1 Select Course Planner. -
Page 37: Deleting A Course
Deleting a Course 1 Select Course Planner. 2 Select a course. 3 Select > Delete. Weather Active Weather: While your Montana device is connected to your smartphone or to a Wi‑Fi network and has an active internet connection, it can receive detailed weather information from the internet. This feature provides hourly and daily forecasts and live graphical weather maps. -
Page 38: Viewing An Active Weather Forecast
Viewing an Active Weather Forecast While your Montana device is connected to your smartphone or to a Wi‑Fi network and has an active internet connection, it can receive detailed weather information from the internet. 1 Select Active Weather. The device automatically downloads a weather forecast for your current location. 2 Select a day to view an hourly forecast, if available. -
Page 39: Main Menu Applications
Camera: Allows you to take photos with the camera (Taking a Photo, page 36). NOTE: The camera is available only on the Montana 750i device. Collections Manager: Displays collections synced from your Garmin Explore account. Compass: Displays the compass (Compass, page 13). -
Page 40: Customizing The Main Menu
Setup: Allows you to customize the device using the setup menu tools (Setup Menu, page 47). Share Wirelessly: Allows you to wirelessly transfer files to another compatible Garmin device (Sending and Receiving Data Wirelessly, page 45). Sight 'N Go: Allows you to point the device at an object in the distance, and navigate using the object as a... -
Page 41: Customizing And Sharing The Main Menu
6 Copy the .gpf file with the recognizable profile name to your computer. 7 Connect the next Montana device to your computer, and copy the .gpf file to the Garmin > Profiles folder. 8 On the Montana device, select Profile Change from the main menu to select the new profile... -
Page 42: Starting An Adventure
Starting an Adventure Before you can start an adventure, you must send an adventure from BaseCamp to your device (Sending Files to and from BaseCamp, page 35). When you start a saved adventure, the device follows the saved track and displays shortcuts to related information along the track, such as photos and waypoints. -
Page 43: Dog Tracking
Sorting Photos 1 Select Photo Viewer > > Sort Photos. 2 Select an option: • Select Most Recently. • Select Near A Location, and select a location. • Select On A Specific Date, and enter a date. Viewing the Location of a Photo 1 Select Photo Viewer. -
Page 44: Tracking Your Dogs
Tracking Your Dogs 1 Select DogTrack. The dogs connected to your handheld device appear on the screen. 2 Select a dog. The dog's location and track log appear on the map. 3 Select Go to navigate to your dog. Dog Status Icons Icons on the dog list page indicate the status and location of your dogs. -
Page 45: Registering Your Device At Geocaching.com
1 Connect to a wireless network (Connecting to a Wireless Network, page 18) or to the Garmin Connect app (Pairing a Smartphone with Your Device, page 18). 2 Select Setup > Geocaching > Register Device. -
Page 46: Filtering The Geocache List
Searching for a Geocache You can search the geocaches loaded on your device. If you are connected to geocaching.com, you can search live geocache data and download geocaches. NOTE: You can download detailed information for a limited number of geocaches per day. You can purchase a premium subscription to download more. -
Page 47: Viewing Geocache Details
If you are signed in to www.geocaching.com, the log uploads to your www.geocaching.com account automatically. chirp A chirp is a small Garmin accessory that is programmed and left in a geocache. You can use your device to find a chirp in a geocache. Main Menu Applications... -
Page 48: Removing Live Geocache Data From The Device
Enabling chirp Searching 1 Select Setup > Geocaching > chirp Setup. 2 Select chirp Searching > On. Finding a Geocache with a chirp 1 With chirp searching enabled, navigate to a geocache. When you are within approximately 10 m (33 ft.) of the geocache that contains a chirp, details about the chirp appear. -
Page 49: Downloading Maps
• To download premium maps and activate your Outdoor Maps+ subscription for this device, select Check Subscription. NOTE: Go to garmin.com/outdoormaps for information about purchasing a subscription. 3 Select > Layer Information to view details about the map layers (optional). -
Page 50: Editing A Map Set
Editing a Map Set 1 Select Map Manager > Map Sets. 2 Select a map set. 3 Select an option: • To add or remove maps from the map set, select Edit. • To change the order of the map sets, select Move Up or Move Down. •... -
Page 51: Gps Satellite Settings
Sending and Receiving Data Wirelessly Before you can share data wirelessly, you must be within 3 m (10 ft.) of a compatible Garmin device. Your device can send and receive data wirelessly when connected with a compatible Garmin device using ANT+ technology. -
Page 52: Customizing The Data Fields
Customizing the Data Fields Before you can change the map data fields, you must enable them (Enabling the Map Data Fields, page 45). You can customize the data fields and dashboards of the map, compass, trip computer, and altimeter pages. 1 From a page that displays data fields, select a data field. 2 Select a data field category and a data field. -
Page 53: Setup Menu
Setup Menu Select Setup. System: Allows you to customize system settings (System Settings, page 48). Display: Adjusts the backlight and display settings (Display Settings, page 49). Bluetooth: Pairs your device to a smartphone or audio device, and allows you to customize the Bluetooth settings (Bluetooth Settings, page 49). -
Page 54: System Settings
Garmin Spanner: Allows you to use the device USB port with most NMEA 0183-compliant mapping programs by creating a virtual serial port. Garmin Serial: Sets the device to use a Garmin proprietary format to exchange waypoint, route, and track data with a computer. -
Page 55: Display Settings
Display Settings Select Setup > Display. Backlight Timeout: Sets the length of time before the backlight turns off. Orientation Lock: Locks the screen orientation in portrait or landscape mode, or allows the screen to change orientation automatically based on the device orientation. Auto Lock Screen: Sets the screen to lock automatically. -
Page 56: Routing Settings
Popularity Routing: Calculates routes based on the most popular runs and rides from Garmin Connect. Route Transitions: Sets how the device routes from one point on the route to the next. This setting is available only for some activities. -
Page 57: Geocaching Settings
Remote: Allows you to enable or disable the inReach remote function and device verification for your Montana 700i/750i device. NOTE: You can pair a compatible Garmin device and use it to remotely send messages from your Montana 700i/750i device. -
Page 58: Marine Settings
Marking Laps by Distance You can use Auto Lap to automatically mark the lap at a specific distance. This feature is helpful for comparing ® your performance over different parts of an activity. 1 Select Setup > Fitness > Auto Lap. 2 Enter a value, and select Setting Your Fitness User Profile The device uses information that you enter about yourself to calculate accurate data. -
Page 59: Position Format Settings
Position Format Settings NOTE: You should not change the position format or the map datum coordinate system unless you are using a map or chart that specifies a different position format. Select Setup > Position Format. Position Format: Sets the position format in which a location reading appears. Map Datum: Sets the coordinate system on which the map is structured. -
Page 60: Resetting Data And Settings
Device Information Product Updates On your computer, install Garmin Express (www.garmin.com/express). On your smartphone, you can install the Garmin Explore app to upload your waypoints, routes, tracks, and activities. Garmin Express provides easy access to these services for Garmin devices: •... -
Page 61: Setting Up Garmin Express
• Go to support.garmin.com for additional manuals, articles, and software updates. • Go to buy.garmin.com, or contact your Garmin dealer for information about optional accessories and replacement parts. Viewing E-label Regulatory and Compliance Information The label for this device is provided electronically. The e-label may provide regulatory information, such as identification numbers provided by the FCC or regional compliance markings, as well as applicable product and licensing information. -
Page 62: Device Care
3 Insert three AA batteries, observing polarity, and close the battery pack. 4 Insert the AA battery pack into the back of the device, turn the D-ring clockwise, and press the D-ring flat against the back of the device. 5 Hold 6 Select Setup >... -
Page 63: File Types
• GPX geocache files (Downloading Geocaches Using a Computer, page 39). • JPEG photo files. • GPI custom POI files from the Garmin POI Loader. Go to www.garmin.com/products/poiloader. • FIT files for exporting to Garmin Connect. Installing a Memory Card WARNING Do not use a sharp object to remove user-replaceable batteries. -
Page 64: Transferring Files To Your Device
If you do not know the purpose of a file, do not delete it. Your device memory contains important system files that should not be deleted. 1 Open the Garmin drive or volume. 2 If necessary, open a folder or volume. -
Page 65: Specifications
Cadence: Cycling. The number of revolutions of the crank arm. Your device must be connected to a cadence accessory for this data to appear. The device withstands incidental exposure to water of up to 1 m for up to 30 min. For more information, go to www.garmin.com/waterrating. Appendix... - Page 66 Calories: The amount of total calories burned. Compass Heading: The direction you are moving based on the compass. Course: The direction from your starting location to a destination. Course can be viewed as a planned or set route. You must be navigating for this data to appear. Current Lap: The stopwatch time for the current lap.
- Page 67 Last Lap Cadence: Cycling. The average cadence for the last completed lap. Last Lap Descent: The vertical distance of descent for the last completed lap. Last Lap Distance: The distance traveled for the last completed lap. Last Lap HR: The average heart rate for the last completed lap. Last Lap Speed: The average speed for the last completed lap.
-
Page 68: Optional Accessories
Tips for Pairing ANT+ Accessories with Your Garmin Device • Verify that the ANT+ accessory is compatible with your Garmin device. • Before you pair the ANT+ accessory with your Garmin device, move 10 m (33 ft.) away from other ANT+ accessories. -
Page 69: My Device Is In The Wrong Language
My device is in the wrong language You can change the device language selection if you have accidently selected the wrong language on the device. 1 Select 2 Select 3 Select 4 Select the second item in the list. 5 Select the first item in the list. 6 Select your language. - Page 70 November 2022 GUID-20A50E5B-3DFB-42C7-A3B4-8D55519B532C v4...