Garmin Forerunner 35 Manual
- Owner's manual (16 pages) ,
- Owner's manual (418 pages) ,
- Quick start manual (9 pages)
Advertisement
- 1 Introduction
- 2 Training
- 3 Heart Rate Features
- 4 Smart Features
- 5 History
- 6 Customizing Your Device
- 7 ANT+ Sensors
- 8 Device Information
- 9 Troubleshooting
- 10 Data Fields
- 11 Device Care
- 12 Heart Rate Zone Calculations
- 13 Software License Agreement
- 14 BSD 3-Clause License
- 15 Symbol Definitions
- 16 Videos
- 17 Documents / Resources
Introduction

See the Important Safety and Product Information guide in the product box for product warnings and other important information.
Always consult your physician before you begin or modify any exercise program.
Keys

| 1 |  | Hold to turn the device on and off. |
 | Select to turn the backlight on and off. | |
| 2 |  | Select to choose an activity profile. Select to start and stop the timer. Select to choose the highlighted menu item. Select to view more information. |
| 3 |  | Select to scroll through the screens, pages, options, and settings. |
 | Hold to open the music controls for your smartphone. | |
| 4 |  | Select to return to the previous screen. Select to mark a new lap, when the lap key function is enabled. |
 | From the time of day screen, select to view the menu. |
Using the Backlight
- At any time, select
![]() to turn on the backlight.
to turn on the backlight.
NOTE: Alerts and messages activate the backlight automatically. - Customize the backlight behavior during activities (Customizing the Backlight for Activities).
Charging the Device
This device contains a lithium-ion battery. See the Important Safety and Product Information guide in the product box for product warnings and other important information.
NOTICE
To prevent corrosion, thoroughly clean and dry the contacts and the surrounding area before charging or connecting to a computer. Refer to the cleaning instructions in the appendix.
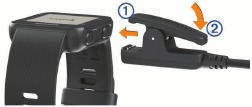
- Align the charger posts with the contacts on the back of the device, and connect the charging clip 1 securely to the device.
![]()
- Plug the USB cable into a USB port on your computer.
- Charge the device completely.
- Press 2 to remove the charger.
Training
Going for a Run
The first fitness activity you record on your device can be a run, ride, or any outdoor activity. The device comes partially charged. You may need to charge the device (Charging the Device) before starting the activity.
- Select
![]() , and select an outdoor activity profile.
, and select an outdoor activity profile. - Go outside, and wait while the device locates satellites.
- Select
![]() to start the timer.
to start the timer. - Go for a run.
The timer appears. You can select![]() to view more data pages.
to view more data pages.
![]()
- After you complete your run, select
![]() to stop the timer.
to stop the timer. - Select an option:
- Select Resume to restart the timer.
- Select Save to save the run and reset the timer. You can view a summary of the run.
- Select Discard > Yes to delete the run.
 to view more data pages.
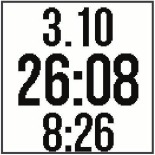
Setting the Run Mode
- Select
![]() , and select a running profile.
, and select a running profile. - Select Options > Run Mode.
- Select an option:
- Select Free to run outdoors or indoors, at your own pace, (Training Indoors) without running mode alerts.
NOTE: This is the default run mode. - Select Run/Walk to set run and walk intervals for a run (Using Run and Walk Intervals).
- Select Virtual Pacer to help improve your pacing ability (Running With the Virtual Pacer Feature).
- Select Intervals to create an interval workout based on distance or time (Interval Workouts).
- Select Free to run outdoors or indoors, at your own pace, (Training Indoors) without running mode alerts.
- Go for a run.
Training Indoors
You can turn off GPS when you are training indoors or to save battery life. When GPS is off, speed and distance are calculated using the accelerometer in the device. The accelerometer is self-calibrating. The accuracy of the speed and distance data improves after a few outdoor runs using GPS.
- Select
![]() .
. - Select an option:
- Select Run Indoor or Cardio.
- Select Walk > Options > Use Indoors.
Using Run and Walk Intervals
NOTE: You must set up the run/walk intervals before starting a run. After you start the run timer, you cannot change the settings.
- Select
![]() , and select a running profile.
, and select a running profile.
NOTE: Walk break alerts are available only for running profiles. - Select Options > Run Mode > Run/Walk.
- Set the run time for each interval.
- Set the walk time for each interval.
- Go for a run.
Each time you complete an interval, a message appears. The device also beeps or vibrates if audible tones are turned on (Setting the Device Sounds). After you turn on the run/walk intervals, it is used each time you go for a run until you turn it off or enable a different run mode.
Virtual Pacer™
Virtual Pacer is a training tool designed to help you improve your performance by encouraging you to run at the pace you set.
Running With the Virtual Pacer Feature
NOTE: You must set up the Virtual Pacer feature before starting a run. After you start the run timer, you cannot change the settings.
- Select
![]() , and select a running profile.
, and select a running profile. - Select Options > Run Mode > Virtual Pacer.
- Enter your pace.
- Go for a run.
Each time you exceed or drop below the target pace, a message appears. The device also beeps or vibrates if audible tones are turned on (Setting the Device Sounds). After you turn on the Virtual Pacer feature, it is used each time you go for a run until you turn it off or enable a different run mode.
Interval Workouts
You can create interval workouts based on distance or time. The device saves your custom interval workout until you create another interval workout. You can use open intervals for track workouts and when you are running a known distance.
Creating an Interval Workout
Interval workouts are available for running, biking, or cardio activity profiles.
- Select
![]() , and select an activity profile.
, and select an activity profile. - Select Options.
NOTE: If you are using a running profile, the interval workout is a run mode. - Select Intervals > Edit > Interval.
- Select Distance, Time, or Open.
TIP: You can create an open-ended interval by setting the type to Open. When you select![]() , the device records the interval and moves to the next interval.
, the device records the interval and moves to the next interval. - If necessary, enter a distance or time interval value.
- Select Rest.
- Select Distance, Time, or Open.
- If necessary, enter a distance or time value for the rest interval.
- Select one or more options:
- To set the number of repetitions, select Repeat.
- To add an open-ended warm up to your workout, select Warm Up > Turn On.
- To add an open-ended cool down to your workout, select Cool Down > Turn On.
Each time you complete an interval, a message appears. The device also beeps or vibrates if audible tones are turned on (Setting the Device Sounds).
Starting an Interval Workout
- Select
![]() , and select an activity profile.
, and select an activity profile. - Select Options.
NOTE: If you are using a running profile, the interval workout is a run mode. - Select Intervals > Do Workout.
- Select
![]() .
. - When your interval workout has a warm up, select
![]() to begin the first interval.
to begin the first interval. - Follow the on-screen instructions.
Stopping an Interval Workout
- At any time, select
![]() to end an interval.
to end an interval. - At any time, select
![]() to stop the timer.
to stop the timer. - If you added a cool down to your interval workout, select
![]() to end the interval workout.
to end the interval workout.
Alerts
You can use alerts to train toward specific time, distance, calories, and heart rate goals.
Setting a Recurring Alert
A recurring alert notifies you each time the device records a specified value or interval. For example, you can set the device to alert you every 30 minutes.
- Select
![]() , and select an activity profile.
, and select an activity profile. - Select Options > Alerts.
- Select Time, Distance, or Calories.
- Turn on the alert.
- Select or enter a value.
Each time you reach the alert value, a message appears. The device also beeps or vibrates if audible tones are turned on (Setting the Device Sounds).
Setting Your Heart Rate Alerts
You can set the device to alert you when your heart rate is above or below a target zone or a custom range. For example, you can set the device to alert you when your heart rate is below 150 beats per minute (bpm).
- Select
![]() , and select an activity profile.
, and select an activity profile. - Select Options > Alerts > HR Alert.
- Select an option:
- To use the range of an existing heart rate zone, select a heart rate zone.
- To customize the maximum value, select Custom > High > Turn On, and enter a value.
- To customize the minimum value, select Custom > Low > Turn On, and enter a value.
Each time you exceed or drop below the specified range or custom value, a message appears. The device also beeps or vibrates if audible tones are turned on (Setting the Device Sounds).
Using the Auto Pause® Feature
You can use the Auto Pause feature to pause the timer automatically when you stop moving. This feature is helpful if your activity includes stop lights or other places where you need to stop.
NOTE: History is not recorded while the timer is stopped or paused.
- Select
![]() , and select an activity profile.
, and select an activity profile. - Select Options > Auto Pause > Turn On.
The Auto Pause feature stays on for the selected activity profile until you turn it off.
Marking Laps by Distance
You can use the Auto Lap® feature to mark a lap at a specific distance automatically. This feature is helpful for comparing your performance over different parts of a run (for example, every 1 mi. or 1 km).
- Select
![]() , and select an activity profile.
, and select an activity profile. - Select Options > Laps > Auto Lap > Turn On.
- If necessary, select a distance.
Each time you complete a lap, a message appears that displays the time for that lap. The device also beeps or vibrates if audible tones are turned on (Setting the Device Sounds). The Auto Lap feature stays on for the selected activity profile until you turn it off.
If necessary, you can customize the data screens to display additional lap data.
Turning on the Lap Key
You can customize ![]() to function as a lap key during timed activities.
to function as a lap key during timed activities.
- Select
![]() , and select an activity profile.
, and select an activity profile. - Select Options > Laps > Lap Key.
The lap key stays on for the selected activity profile until you turn off the lap key.
Activity Tracking and Features
You can select ![]() to view your heart rate, steps for the day, and additional screens. Some features require a Bluetooth® connection to a compatible smartphone.
to view your heart rate, steps for the day, and additional screens. Some features require a Bluetooth® connection to a compatible smartphone.
Time of day: Displays the current time and date. The time and date are set automatically when the device acquires satellite signals and when you sync your device with a smartphone. The move bar displays the amount of time you are inactive.
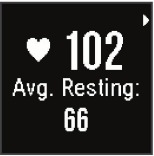
Heart rate: Displays your current heart rate in beats per minute (bpm) and your resting heart rate for today.
Notifications: Alerts you to view notifications from your smartphone, including calls, texts, social network updates, and more, based on your smartphone notification settings.
Activity tracking: Tracks your daily step count, progress toward your goal, and distance traveled. The device learns and proposes a new step goal for you each day. You can customize goals using your Garmin Connect™ account.
Calories: Displays the total calories burned for the current day, including both active and resting calories.
Intensity minutes: Tracks your time spent participating in moderate to vigorous intensity activities, your weekly intensity minutes goal, and your progress toward your goal.
Last activity: Displays a brief summary of your last recorded activity.
Weather: Displays the current temperature and weather forecast.
Icons
Icons represent different device features. Some features require a paired smartphone.
 | Your current heart rate in beats per minute (bpm) and resting heart rate for today. A flashing icon means the device is acquiring your heart rate data. A solid icon means the device is locked on to your heart rate. |
 | Notifications received from a paired smartphone. |
 | The total number of steps taken for the day, your step goal for the day, and your progress toward your goal. |
 | The distance traveled in kilometers or miles. |
 | The total calories burned for the current day, including both active and resting calories. |
 | Your time spent participating in moderate to vigorous intensity activities, your weekly intensity minutes goal, and your progress toward your goal. |
 | The current temperature and weather forecast from a paired smartphone. |
Auto Goal
Your device creates a daily step goal automatically, based on your previous activity levels. As you move during the day, the device shows your progress toward your daily goal 1.
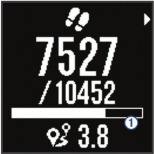
If you choose not to use the auto goal feature, you can set a personalized step goal on your Garmin Connect account.
Move Bar
Sitting for prolonged periods of time can trigger undesirable metabolic state changes. The move bar reminds you to keep moving. After one hour of inactivity, the move bar 1 appears. Additional segments 2 appear after every 15 minutes of inactivity.
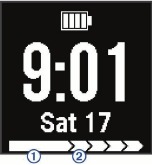
You can reset the move bar by walking a short distance.
Intensity Minutes
To improve your health, organizations such as the U.S. Centers for Disease Control and Prevention, the American Heart Association®, and the World Health Organization, recommend at least 150 minutes per week of moderate intensity activity, such as brisk walking, or 75 minutes per week of vigorous intensity activity, such as running.
The device monitors your activity intensity and tracks your time spent participating in moderate to vigorous intensity activities (heart rate data is required to quantify vigorous intensity). You can work toward achieving your weekly intensity minutes goal by participating in at least 10 consecutive minutes of moderate to vigorous intensity activities. The device adds the amount of moderate activity minutes with the amount of vigorous activity minutes. Your total vigorous intensity minutes are doubled when added.
Earning Intensity Minutes
Your Forerunner device calculates intensity minutes by comparing your heart rate data during an activity to your average resting heart rate. If heart rate is turned off, the device calculates moderate intensity minutes by analyzing your steps per minute.
- Start a timed activity for the most accurate calculation of intensity minutes.
- Exercise for at least 10 consecutive minutes at a moderate or vigorous intensity level.
Sleep Tracking
While you are sleeping, the device monitors your movement. Sleep statistics include total hours of sleep, sleep levels, and sleep movement. You can set your normal sleep hours in the user settings on your Garmin Connect account. You can view your sleep statistics on your Garmin Connect account.
Heart Rate Features
The Forerunner 35 has a wrist-based heart rate monitor and is compatible with ANT+® heart rate monitors. You must have a heart rate monitor to use the features described in this section.
Wearing the Device and Heart Rate
- Wear the Forerunner device above your wrist bone.
NOTE: The device should be snug but comfortable, and it should not move while running or exercising.

NOTE: The heart rate sensor is located on the back of the device. - See (Troubleshooting) for more information about wrist-based heart rate.

Viewing Your Heart Rate Data
The heart rate screen displays your current heart rate in beats per minute (bpm) and your average resting heart rate for the last 7 days.
- From the time of day screen, select
![]() .
.
![]()
- Select
![]() to view your heart rate data for the last 4 hours.
to view your heart rate data for the last 4 hours.
 to view your heart rate data for the last 4 hours.
 Broadcasting Heart Rate Data to Garmin® Devices
You can broadcast your heart rate data from your Forerunner device and view it on paired Garmin devices. For example, you can broadcast your heart rate data to an Edge® device while cycling, or to a VIRB® action camera.
NOTE: Broadcasting heart rate data decreases battery life.
- Select
![]() to view the heart rate screen.
to view the heart rate screen. - Select
![]() twice.
twice. - Select Broadcast HR.
The Forerunner device starts broadcasting your heart rate data, and![]() appears.
appears.
NOTE: You can view only the heart rate screen while broadcasting heart rate data. - Pair your Forerunner device with your Garmin ANT+ compatible device.
NOTE: The pairing instructions differ for each Garmin compatible device. See your owner's manual.
TIP: To stop broadcasting your heart rate data, select any key, and select Yes.
About Heart Rate Zones
Many athletes use heart rate zones to measure and increase their cardiovascular strength and improve their level of fitness. A heart rate zone is a set range of heartbeats per minute. The five commonly accepted heart rate zones are numbered from 1 to 5 according to increasing intensity. Generally, heart rate zones are calculated based on percentages of your maximum heart rate.
Fitness Goals
Knowing your heart rate zones can help you measure and improve your fitness by understanding and applying these principles.
- Your heart rate is a good measure of exercise intensity.
- Training in certain heart rate zones can help you improve cardiovascular capacity and strength.
- Knowing your heart rate zones can prevent you from overtraining and can decrease your risk of injury.
If you know your maximum heart rate, you can use the table (Heart Rate Zone Calculations) to determine the best heart rate zone for your fitness objectives.
If you do not know your maximum heart rate, use one of the calculators available on the Internet. Some gyms and health centers can provide a test that measures maximum heart rate. The default maximum heart rate is 220 minus your age.
Setting Your Maximum Heart Rate
The device uses your user profile information from the initial setup to estimate your maximum heart rate and determine your default heart rate zones. The default maximum heart rate is 220 minus your age. For the most accurate calorie data during your activity, you should set your maximum heart rate (if known).
- Select
![]() > Settings > User Profile > Max. HR.
> Settings > User Profile > Max. HR. - Enter your maximum heart rate.
Letting the Device Set Your Heart Rate Zones
The default settings allow the device to detect your maximum heart rate and set your heart rate zones as a percentage of your maximum heart rate.
- Verify that your user profile settings are accurate (Setting Your User Profile).
- Run often with the wrist or chest heart rate monitor.
- Try a few heart rate training plans, available from your Garmin Connect account.
- View your heart rate trends and time in zones using your Garmin Connect account.
Smart Features
Bluetooth Connected Features
The Forerunner device has several Bluetooth connected features for your compatible smartphone or mobile device using the Garmin Connect Mobile app. For more information, go to www.garmin.com/intosports/apps.
LiveTrack: Allows friends and family to follow your races and training activities in real time. You can invite followers using email or social media, allowing them to view your live data on a Garmin Connect tracking page.
Activity uploads: Automatically sends your activity to Garmin Connect Mobile as soon as you finish recording the activity.
Social media interactions: Allows you to post an update to your favorite social media website when you upload an activity to Garmin Connect Mobile.
Notifications: Displays phone notifications and messages on your Forerunner device.
Turning On the Smartphone Connection Alert
You can set the Forerunner device to alert you when your paired smartphone connects and disconnects using Bluetooth wireless technology.
Select ![]() > Settings > Bluetooth > Connection Alert > Turn On.
> Settings > Bluetooth > Connection Alert > Turn On.
Locating a Lost Smartphone
You can use this feature to help locate a lost mobile device that is paired using Bluetooth wireless technology and currently within range.
- Select
![]() > Find My Phone.
> Find My Phone.
The Forerunner device begins searching for your paired mobile device. Bars appear on the Forerunner device screen corresponding to Bluetooth signal strength, and an audible alert sounds on your mobile device. - Select
![]() to stop searching.
to stop searching.
Turning Off Bluetooth Technology
- From the Forerunner device, select
![]() > Settings > Bluetooth > Turn Off.
> Settings > Bluetooth > Turn Off. - See the owner's manual for your smartphone to turn off Bluetooth wireless technology.
Pairing Your Smartphone
Your Forerunner device must be paired directly through the Garmin Connect Mobile app, instead of from the Bluetooth settings on your smartphone. You can pair your Forerunner device with your smartphone during the initial setup or through the Bluetooth menu.
- From the app store on your smartphone, install and open the Garmin Connect Mobile app.
You can go to www.garminconnect.com/forerunner for additional information on pairing and setup. - Follow the on-screen instructions to create an account using your email address, and connect the Forerunner device to your account.
- From the Forerunner device, select
![]() > Settings > Bluetooth > Pair Smartphone.
> Settings > Bluetooth > Pair Smartphone.
After you pair successfully, a message appears, and your device syncs automatically with your smartphone.
Synchronizing Your Data with the Garmin Connect Mobile App
Your device periodically synchronizes data with the Garmin Connect Mobile app automatically. You can also manually synchronize your data at any time.
- Bring the device within 3 m (10 ft.) of your smartphone.
- Select
![]() > Sync.
> Sync. - View your current data in the Garmin Connect Mobile app.
Updating the Software Using Garmin Connect Mobile
Before you can update your device software using the Garmin Connect Mobile app, you must have a Garmin Connect account, and you must pair the device with a compatible smartphone (Pairing Your Smartphone).
- Synchronize your device with the Garmin Connect Mobile app (Synchronizing Your Data with the Garmin Connect Mobile App).
When new software is available, the Garmin Connect Mobile app automatically sends the update to your device. - Follow the on-screen instructions.
Phone Notifications
Phone notifications require a compatible smartphone to be paired with the Forerunner device. When your phone receives messages, it sends notifications to your device.
Enabling Notifications
- Select
![]() > Settings > Bluetooth > Smart Notifications.
> Settings > Bluetooth > Smart Notifications. - Select During Activity > Alerts.
NOTE: During Activity means you are recording a timed activity. - Select Off, Show Calls Only, or Show All.
- Select Not During Activity > Alerts.
NOTE: Not During Activity means normal watch use. - Select Off, Show Calls Only, or Show All.
NOTE: You can change the audible sounds for notifications.
Managing Notifications
You can use your compatible smartphone to manage notifications that appear on your Forerunner device.
Select an option:
- If you are using an Apple® device, use the notification center settings on your smartphone to select the items to show on the device.
- If you are using an Android™ device, use the app settings in the Garmin Connect Mobile app to select the items to show on the device.
Turning Off Notifications
Select ![]() > Settings > Bluetooth > Smart Notifications > Turn Off.
> Settings > Bluetooth > Smart Notifications > Turn Off.
Garmin Connect
You can connect with your friends on your Garmin Connect account. Garmin Connect gives you the tools to track, analyze, share, and encourage each other. Record the events of your active lifestyle including runs, walks, rides, hikes, and more. To sign up for a free account, go to www.garminconnect.com/forerunner.
Store your activities: After you complete and save a timed activity with your device, you can upload that activity to your Garmin Connect account and keep it as long as you want.
Analyze your data: You can view more detailed information about your activity, including time, distance, heart rate, calories burned, cadence, an overhead map view, pace and speed charts, and customizable reports.

Track your progress: You can track your daily steps, join a friendly competition with your connections, and meet your goals.
Share your activities: You can connect with friends to follow each other's activities or post links to your activities on your favorite social networking sites.
Manage your settings: You can customize your device and user settings on your Garmin Connect account.
Using Garmin Connect
- Connect the device to your computer using the USB cable.
- Go to www.garminconnect.com/start.
- Follow the on-screen instructions.
Synchronizing Your Data with Your Computer
You should synchronize your data regularly to track your progress in the Garmin Connect application.
- Connect the device to your computer using the USB cable.
The Garmin Express™ application synchronizes your data. - View your current data in the Garmin Connect application.
Playing Audio Prompts During Your Activity
Before you can set up audio prompts, you must have a smartphone with the Garmin Connect Mobile app paired to your Forerunner device.
You can set the Garmin Connect Mobile app to play motivational status announcements on your smartphone during a run or other activity. Audio prompts include the lap number and lap time, pace or speed, and ANT+ sensor data. During an audio prompt, the Garmin Connect mobile app mutes the primary audio of the smartphone to play the announcement. You can customize the volume levels on the Garmin Connect Mobile app.
- From the settings in the Garmin Connect Mobile app, select Garmin Devices.
- Select your device.
- Select Activity Options > Audio Prompts.
History
You can view your last seven timed activities and seven days of activity tracking data on your Forerunner device. You can upload and view unlimited running sessions and activity tracking data on Garmin Connect. When the device memory is full, your oldest data is overwritten.
NOTE: History is not recorded while the timer is stopped or paused.
Viewing History
- Select
![]() > History.
> History. - Select an option:
- Select Activities to view additional information about the activity.
- Select Records to view your personal record time and distance over various distances.
Deleting a Run from History
NOTE: Deleting a run or activity from your device history does not delete it from your Garmin Connect account.
- Select
![]() > History > Activities.
> History > Activities. - Select an activity.
- Select
![]() > Discard > Yes.
> Discard > Yes.
 > History > Activities.
Personal Records
When you complete a run, the device displays any new personal records you achieved during that run. Personal records include your fastest time over several typical race distances and longest run.
Viewing Your Personal Records
- Select
![]() > History > Records.
> History > Records. - Select a sport.
- Select
![]() to view your personal records.
to view your personal records.
Clearing a Personal Record
- Select
![]() > History > Records.
> History > Records. - Select a sport.
- Select a record.
- Select an option, for example Clear Longest Run > Yes.
NOTE: This does not delete any saved activities.
Restoring a Personal Record
You can set each personal record back to the one previously recorded.
- Select
![]() > History > Records.
> History > Records. - Select a sport.
- Select a record.
- Select Use Previous > Use Record.
NOTE: This does not delete any saved activities.
Garmin Move IQ™ Events
The Move IQ feature automatically detects activity patterns, such as walking, running, biking, swimming, and elliptical training, for at least 10 minutes. You can view the event type and duration on your Garmin Connect timeline, but they do not appear in your activities list, snapshots, or newsfeed. For more detail and accuracy, you can record a timed activity on your device.
Data Management
NOTE: The device is not compatible with Windows® 95, 98, Me, Windows NT®, and Mac® OS 10.3 and earlier.
Deleting Files
NOTICE
If you do not know the purpose of a file, do not delete it. Your device memory contains important system files that should not be deleted.
- Open the Garmin drive or volume.
- If necessary, open a folder or volume.
- Select a file.
- Press the Delete key on your keyboard.
Disconnecting the USB Cable
If your device is connected to your computer as a removable drive or volume, you must safely disconnect your device from your computer to avoid data loss. If your device is connected to your Windows computer as a portable device, it is not necessary to safely disconnect.
- Complete an action:
- For Windows computers, select the Safely Remove Hardware icon in the system tray, and select your device.
- For Mac computers, drag the volume icon to the trash.
- Disconnect the cable from your computer.
Customizing Your Device
Setting Your User Profile
You can update your gender, birth year, height, weight, and maximum heart rate settings (Setting Your Maximum Heart Rate). The device uses this information to calculate accurate training data.
- Select
![]() > Settings > User Profile.
> Settings > User Profile. - Select an option.
Changing the Watch Face
You can use the digital or analog watch face.
Select ![]() > Settings > Watch Face.
> Settings > Watch Face.
Activity Profiles
Activity profiles are a collection of settings that optimize your device based on how you are using it. For example, the settings and data screens are different when you are using the device for running than for riding your bike.
When you are using a profile and you change settings such as data fields or alerts, the changes are saved automatically as part of the profile.
Changing Your Activity Profile
Your device has default activity profiles. You can modify each of the saved profiles.
Select ![]() , and select an activity profile.
, and select an activity profile.
Displaying Pace or Speed
You can change the type of information that appears in the pace or speed data field.
- Select
![]() , and select an activity profile.
, and select an activity profile. - Select Options > Pace/Speed.
- Select an option.
Customizing the Data Fields
You can customize data fields based on your training goals or optional accessories. For example, you can customize data fields to display your lap pace and heart rate zone.
- Select
![]() , and select an activity profile.
, and select an activity profile. - Select Options > Data Fields.
- Select a page.
- Select a data field to change it.
Garmin Connect Settings
You can customize your device settings and user settings on your Garmin Connect account.
- From the settings menu in the Garmin Connect Mobile app, select Garmin Devices, and select your device.
- From the devices widget in the Garmin Connect application, select Device Settings.
After customizing settings, sync your data to apply the changes to your device (Synchronizing Your Data with the Garmin Connect Mobile App).
Activity Tracking Settings
Select ![]() > Settings > Activity Tracking.
> Settings > Activity Tracking.
Turn Off: Turns off the activity tracking feature.
Move Alert: Displays a message and move bar on the digital watch face and steps screen. The device also beeps or vibrates if audible tones are turned on (Setting the Device Sounds).
Goal Alerts: Allows you to turn on and off goal alerts or disable goal alerts during a timed activity.
System Settings
Select ![]() > Settings > System.
> Settings > System.
Language: Sets the language displayed on the device.
Time: Adjusts the time of day settings (Time Settings).
Sounds: Sets the device sounds, such as key tones and alerts (Setting the Device Sounds).
Backlight During Activity: Sets the backlight behavior during an activity (Customizing the Backlight for Activities).
Units: Sets the units of measure used on the device.
Software Update: Allows you to install software updates downloaded using the Garmin Express application or Garmin Connect Mobile app (Updating the Software).
Restore Defaults: Allows you to clear user data and activity history (Restoring All Default Settings).
About: Displays device, software, and regulatory information (Viewing Device Information).
Time Settings
Select ![]() > Settings > System > Time.
> Settings > System > Time.
Time Format: Sets the device to show time in a 12-hour or a 24-hour format.
Set Time: Allows you to set the time manually or automatically based on your paired mobile device or GPS location.
Time Zones
Each time you turn on the device and acquire satellites or sync with your smartphone, the device automatically detects your time zone and the current time of day.
Using Do Not Disturb Mode
You can use do not disturb mode to turn off tones, vibrations, and the backlight for alerts and notifications. For example, you can use this mode while sleeping or watching a movie.
NOTE: The device automatically enters do not disturb mode during your normal sleep hours. You can set your normal sleep hours in the user settings on your Garmin Connect account.
Select ![]() > Do Not Disturb > Turn On.
> Do Not Disturb > Turn On.
TIP: To exit do not disturb mode, you can select ![]() > Do Not Disturb > Turn Off.
> Do Not Disturb > Turn Off.
Setting an Alarm
- Select
![]() > Alarm > Add New.
> Alarm > Add New. - Select Time, and enter a time.
- Select Sounds, and select an option.
- Select Repeat, and select an option.
Deleting an Alarm
- Select
![]() > Alarm.
> Alarm. - Select an alarm.
- Select Remove > Yes.
Setting the Device Sounds
The device sounds include key tones, alert tones, and vibrations.
Select ![]() > Settings > System > Sounds.
> Settings > System > Sounds.
Customizing the Backlight for Activities
You can customize the backlight behavior during timed activities.
- Select
![]() > Settings > System > Backlight During Activity.
> Settings > System > Backlight During Activity. - Select an option:
- Select Auto to automatically turn on the backlight for alerts, messages, and key presses.
NOTE: The backlight turns off automatically. - Select Stays On to manually turn on and off the backlight.
- Select Auto to automatically turn on the backlight for alerts, messages, and key presses.
ANT+ Sensors
Your device can be used with wireless ANT+ sensors. For more information about compatibility and purchasing optional sensors, go to http://buy.garmin.com.
Pairing ANT+ Sensors
Pairing is the connecting of ANT+ wireless sensors, for example, connecting a heart rate monitor with your Garmin device. The first time you connect an ANT+ sensor to your device, you must pair the device and sensor. After the initial pairing, the device automatically connects to the sensor when you start your activity and the sensor is active and within range.
- Select
![]() , and select an activity profile.
, and select an activity profile. - Install the sensor or put on the heart rate monitor.
- Bring the device within 1 cm of the sensor, and wait while the device connects to the sensor.
When the device detects the sensor, a message appears. You can customize a data field to display sensor data. - If necessary, select
![]() > Settings > Sensors to manage ANT+ sensors.
> Settings > Sensors to manage ANT+ sensors.
Foot Pod
Your device is compatible with the foot pod. You can use the foot pod to record pace and distance instead of using GPS when you are training indoors or when your GPS signal is weak. The foot pod is on standby and ready to send data (like the heart rate monitor).
After 30 minutes of inactivity, the foot pod powers off to conserve the battery. When the battery is low, a message appears on your device. Approximately five hours of battery life remain.
Going for a Run Using a Foot Pod
Before you go for a run, you must pair the foot pod with your Forerunner device (Pairing ANT+ Sensors).
You can run indoors using a foot pod to record pace, distance, and cadence. You can also run outdoors using a foot pod to record cadence data with your GPS pace and distance.
- Install your foot pod according to the accessory instructions.
- Select the Run Indoor activity profile.
- Go for a run.
Foot Pod Calibration
The foot pod is self-calibrating. The accuracy of the speed and distance data improves after a few outdoor runs using GPS.
Device Information
Specifications
| Battery type | Rechargeable, built-in lithium-ion battery |
| Battery life | Up to 9 days for watch mode, includes smart notifications, activity tracking, and wrist heart rate Up to 13 hr. for GPS training mode |
| Operating temperature range | From -20º to 50ºC (from -4º to 122ºF) |
| Charging temperature range | From 0º to 45ºC (from 32º to 113ºF) |
| Radio frequency/protocol | 2.4 GHz ANT+ wireless communications protocol Bluetooth Smart wireless technology |
| Water rating | Swim, 5 ATM* |
*The device withstands pressure equivalent to a depth of 50 m. For more information, go to www.garmin.com/waterrating.
Troubleshooting
Support and Updates
Garmin Express (www.garmin.com/express) provides easy access to these services for Garmin devices.
- Product registration
- Product manuals
- Software updates
- Data uploads to Garmin Connect
Getting More Information
- Go to www.garmin.com/intosports.
- Go to www.garmin.com/learningcenter.
- Go to http://buy.garmin.com, or contact your Garmin dealer for information about optional accessories and replacement parts.
Resetting the Device
If the device stops responding, you may need to reset it.
NOTE: Resetting the device may erase your data or settings.
- Hold
![]() for 15 seconds.
for 15 seconds.
The device turns off. - Hold
![]() for one second to turn on the device.
for one second to turn on the device.
 for 15 seconds.
Restoring All Default Settings
NOTE: This deletes all user-entered information and activity history.
You can reset all settings back to the factory default values.
Select ![]() > Settings > System > Restore Defaults > Yes.
> Settings > System > Restore Defaults > Yes.
Viewing Device Information
You can view the unit ID, software information, and regulatory information.
- Select
![]() > Settings > System > About.
> Settings > System > About. - Select
![]() .
.
Updating the Software
Before you can update your device software, you must have a Garmin Connect account, and you must download the Garmin Express application.
- Connect the device to your computer using the USB cable.
When new software is available, the Garmin Express application sends it to your device. - Follow the on-screen instructions.
- Do not disconnect your device from the computer while the Garmin Express application downloads the software.
TIP: If you are having trouble updating the software with the Garmin Express application, you may need to upload your activity history to the Garmin Connect application and delete your activity history from the device. This should provide sufficient memory space for the update.
Maximizing Battery Life
- Turn off smart notifications (Turning Off Notifications).
- Turn off the Bluetooth wireless feature (Turning Off Bluetooth Technology).
- Turn off activity tracking (Activity Tracking Settings).
- Stop broadcasting heart rate data to paired Garmin devices (Broadcasting Heart Rate Data to Garmin® Devices).
- Turn off wrist-based heart rate monitoring (Garmin Connect Settings).
NOTE: Wrist-based heart rate monitoring is used to calculate vigorous intensity minutes and calories burned.
Acquiring Satellite Signals
The device may need a clear view of the sky to acquire satellite signals. The time and date are set automatically based on the GPS position.
- Go outdoors to an open area.
The front of the device should be oriented toward the sky. - Wait while the device locates satellites.
It may take 30–60 seconds to locate satellite signals.
Improving GPS Satellite Reception
- Frequently sync the device to your Garmin Connect account:
- Connect your device to a computer using the USB cable and the Garmin Express application.
- Sync your device to the Garmin Connect Mobile app using your Bluetooth enabled smartphone.
While connected to your Garmin Connect account, the device downloads several days of satellite data, allowing it to quickly locate satellite signals.
- Take your device outside to an open area away from tall buildings and trees.
- Remain stationary for a few minutes.
When does my step count reset?
The daily step count resets every night at midnight.
My step count does not seem accurate
If your step count does not seem accurate, you can try these tips.
- Wear the device on your non-dominant wrist.
- Carry the device in your pocket when actively using your hands or arms only.
NOTE: The device may interpret some repetitive motions, such as clapping your hands or brushing your teeth, as steps.
My intensity minutes are flashing
When you exercise at an intensity level that qualifies toward your intensity minutes goal, the intensity minutes flash.
Exercise for at least 10 consecutive minutes at a moderate or vigorous intensity level.
Tips for Erratic Heart Rate Data
If the heart rate data is erratic or does not appear, you can try these tips.
- Clean and dry your arm before putting on the device.
- Avoid wearing sunscreen, lotion, and insect repellent under the device.
- Avoid scratching the heart rate sensor on the back of the device.
- Wear the device above your wrist bone. The device should be snug but comfortable.
- Wait until the
![]() icon is solid before starting your activity.
icon is solid before starting your activity. - Warm up for 5 to 10 minutes and get a heart rate reading before starting your activity.
NOTE: In cold environments, warm up indoors. - Rinse the device with fresh water after each workout.
Can I use the cardio profile outdoors?
You can turn on GPS and use the cardio profile for an outdoor activity.
- Select
![]() > Cardio > Options > Use Outdoors.
> Cardio > Options > Use Outdoors. - Go outside, and wait while the device locates satellites.
- Select
![]() to start the timer.
to start the timer.
GPS stays on for the selected activity profile until you turn it off.
Data Fields
Some data fields require ANT+ accessories to display data.
Avg. Pace: The average pace for the current activity.
Avg. Speed: The average speed for the current activity.
Cadence: Cycling. The number of revolutions of the crank arm. Your device must be connected to a cadence accessory for this data to appear.
Cadence: Running. The steps per minute (right and left).
Calories: The total calories burned.
Distance: The distance traveled for the current track or activity.
Heart Rate: Your heart rate in beats per minute (bpm).
HR Zone: The current range of your heart rate (1 to 5). The default zones are based on your user profile and maximum heart rate (220 minus your age).
Lap Distance: The distance traveled for the current lap.
Lap Pace: The average pace for the current lap.
Lap Speed: The average speed for the current lap.
Lap Time: The stopwatch time for the current lap.
Pace: The current pace.
Speed: The current rate of travel.
Time: The stopwatch time for the current activity.
Device Care
NOTICE
Avoid extreme shock and harsh treatment, because it can degrade the life of the product.
Avoid pressing the keys under water.
Do not use a sharp object to clean the device.
Avoid chemical cleaners, solvents, and insect repellents that can damage plastic components and finishes.
Thoroughly rinse the device with fresh water after exposure to chlorine, salt water, sunscreen, cosmetics, alcohol, or other harsh chemicals. Prolonged exposure to these substances can damage the case.
Do not store the device where prolonged exposure to extreme temperatures can occur, because it can cause permanent damage.
Do not remove the bands.
Cleaning the Device
NOTICE
Even small amounts of sweat or moisture can cause corrosion of the electrical contacts when connected to a charger. Corrosion can prevent charging and data transfer.
- Wipe the device using a cloth dampened with a mild detergent solution.
- Wipe it dry.
After cleaning, allow the device to dry completely.
TIP: For more information, go to www.garmin.com/fitandcare.
Heart Rate Zone Calculations
| Zone | % of Maximum Heart Rate | Perceived Exertion | Benefits |
| 1 | 50–60% | Relaxed, easy pace, rhythmic breathing | Beginning-level aerobic training, reduces stress |
| 2 | 60–70% | Comfortable pace, slightly deeper breathing, conversation possible | Basic cardiovascular training, good recovery pace |
| 3 | 70–80% | Moderate pace, more difficult to hold conversation | Improved aerobic capacity, optimal cardiovascular training |
| 4 | 80–90% | Fast pace and a bit uncomfortable, breathing forceful | Improved anaerobic capacity and threshold, improved speed |
| 5 | 90–100% | Sprinting pace, unsustainable for long period of time, labored breathing | Anaerobic and muscular endurance, increased power |
Software License Agreement
BY USING THE DEVICE, YOU AGREE TO BE BOUND BY THE TERMS AND CONDITIONS OF THE FOLLOWING SOFTWARE LICENSE AGREEMENT. PLEASE READ THIS AGREEMENT CAREFULLY.
Garmin Ltd. and its subsidiaries ("Garmin") grant you a limited license to use the software embedded in this device (the "Software") in binary executable form in the normal operation of the product. Title, ownership rights, and intellectual property rights in and to the Software remain in Garmin and/or its thirdparty providers.
You acknowledge that the Software is the property of Garmin and/or its third-party providers and is protected under the United States of America copyright laws and international copyright treaties. You further acknowledge that the structure, organization, and code of the Software, for which source code is not provided, are valuable trade secrets of Garmin and/or its third-party providers and that the Software in source code form remains a valuable trade secret of Garmin and/or its third-party providers. You agree not to decompile, disassemble, modify, reverse assemble, reverse engineer, or reduce to human readable form the Software or any part thereof or create any derivative works based on the Software. You agree not to export or re-export the Software to any country in violation of the export control laws of the United States of America or the export control laws of any other applicable country.
BSD 3-Clause License
Copyright © 2003-2010, Mark Borgerding
All rights reserved.
Redistribution and use in source and binary forms, with or without modification, are permitted provided that the following conditions are met:
- Redistributions of source code must retain the above copyright notice, this list of conditions and the following disclaimer.
- Redistributions in binary form must reproduce the above copyright notice, this list of conditions and the following disclaimer in the documentation and/or other materials provided with the distribution.
- Neither the author nor the names of any contributors may be used to endorse or promote products derived from this software without specific prior written permission.
THIS SOFTWARE IS PROVIDED BY THE COPYRIGHT HOLDERS AND CONTRIBUTORS "AS IS" AND ANY EXPRESS OR IMPLIED WARRANTIES, INCLUDING, BUT NOT LIMITED TO, THE IMPLIED WARRANTIES OF MERCHANTABILITY AND FITNESS FOR A PARTICULAR PURPOSE ARE DISCLAIMED. IN NO EVENT SHALL THE COPYRIGHT OWNER OR CONTRIBUTORS BE LIABLE FOR ANY DIRECT, INDIRECT, INCIDENTAL, SPECIAL, EXEMPLARY, OR CONSEQUENTIAL DAMAGES (INCLUDING, BUT NOT LIMITED TO, PROCUREMENT OF SUBSTITUTE GOODS OR SERVICES; LOSS OF USE, DATA, OR PROFITS; OR BUSINESS INTERRUPTION) HOWEVER CAUSED AND ON ANY THEORY OF LIABILITY, WHETHER IN CONTRACT, STRICT LIABILITY, OR TORT (INCLUDING NEGLIGENCE OR OTHERWISE) ARISING IN ANY WAY OUT OF THE USE OF THIS SOFTWARE, EVEN IF ADVISED OF THE POSSIBILITY OF SUCH DAMAGE.
Symbol Definitions
These symbols may appear on the device or accessory labels.
 | WEEE disposal and recycling symbol. The WEEE symbol is attached to the product in compliance with the EU directive 2012/19/EU on Waste Electrical and Electronic Equipment (WEEE). It is intended to deter the improper disposal of this product and to promote reuse and recycling. |

1800 235 822

+ 32 2 672 52 54

1-866-429-9296

+420 221 985466
+420 221 985465

+ 358 9 6937 9758

+ 39 02 36 699699

0800 427 652

+47 815 69 555

+35 1214 447 460

0861 GARMIN (427 646)
+27 (0)11 251 9800

+ 46 7744 52020

0808 238 0000
+44 870 850 1242

913-397-8200
1-800-800-1020

+43 (0) 820 220230

0800 770 4960

+385 1 5508 272
+385 1 5508 271

+ 45 4810 5050

+ 331 55 69 33 99

(+52) 001-855-792-7671

0800 0233937

00800 4412 454
+44 2380 662 915

+386 4 27 92 500

+34 93 275 44 97

+886 2 2642-9199 ext 2

+49 (0) 89 858364880
zum Ortstarif - Mobilfunk kann abweichen

All rights reserved. Under the copyright laws, this manual may not be copied, in whole or in part, without the written consent of Garmin. Garmin reserves the right to change or improve its products and to make changes in the content of this manual without obligation to notify any person or organization of such changes or improvements. Go to www.garmin.com for current updates and supplemental information concerning the use of this product.
Garmin®, the Garmin logo, ANT+®, Auto Lap®, Auto Pause®, Edge®, Forerunner®, and VIRB® are trademarks of Garmin Ltd. or its subsidiaries, registered in the USA and other countries. Garmin Connect™, Garmin Express™, Garmin Move IQ™, and Virtual Pacer™ are trademarks of Garmin Ltd. or its subsidiaries. These trademarks may not be used without the express permission of Garmin.
American Heart Association®is a registered trademark of American Heart Association, Inc. Android™ is a trademark of Google Inc. Apple® and Mac®are trademarks of Apple Inc., registered in the U.S. and other countries. The Bluetooth® word mark and logos are owned by the Bluetooth SIG, Inc. Advanced heartbeat analytics by Firstbeat. Windows® and Windows NT®are registered trademarks of Microsoft Corporation in the United States and other countries and any use of such marks by Garmin is under license.
This product may contain a library (Kiss FFT) licensed by Mark Borgerding under the 3-Clause BSD License (http://opensource.org/licenses/BSD-3-Clause).
This product is ANT+®certified. Visit www.thisisant.com/directory for a list of compatible products and apps. M/N: A02990
© 2016 Garmin Ltd. or its subsidiaries

VideosForerunner 35: Getting Started Video
Garmin Forerunner 35 | Factory Reset Video
Documents / Resources
References
![www.garmin.com]() Garmin | Select a Location
Garmin | Select a Locationhttp://www.garminconnect.com/forerunner
http://www.garminconnect.com/start
![buy.garmin.com]() Garmin International | Home
Garmin International | Home![www.garmin.com]() Water Rating Definitions | Garmin
Water Rating Definitions | Garmin![www.garmin.com]() Garmin Express - Windows | Garmin
Garmin Express - Windows | Garmin![www.garmin.com]() All Sport and Fitness Devices | Garmin
All Sport and Fitness Devices | Garmin![www.garmin.com]() Garmin Customer Support
Garmin Customer Support![www.garmin.com]() Watch Wear and Care Tips | Garmin
Watch Wear and Care Tips | Garmin![www.garmin.com]() Garmin Customer Support
Garmin Customer Support![www.garmin.com]() Garmin International | Home
Garmin International | Home![opensource.org]() The 3-Clause BSD License | Open Source Initiative
The 3-Clause BSD License | Open Source InitiativeDirectory - THIS IS ANT
Download manual
Here you can download full pdf version of manual, it may contain additional safety instructions, warranty information, FCC rules, etc.
Advertisement
Thank you! Your question has been received!


Need Assistance?
Do you have a question about the Forerunner 35 that isn't answered in the manual? Leave your question here.