Advertisement
Quick Links
DI-000-RZP03-00C
WARNINGS AND CAuTIONS:
• To be installed and/or used in accordance with appropriate electrical codes and regulations.
• If you are unsure about any part of these instructions, consult a qualified electrician.
• To reduce the risk of overheating and possible damage to other equipment do not install to control a
motor-operated appliance, fluorescent lighting fixture, or a transformer supplied appliance.
INTRODuCTION
Leviton's Vizia
TM
RF components are designed
to communicate with each other via Radio
Frequency (RF) to provide remote control
of your lighting. Using RF technology allows
Leviton to provide the greatest signal integrity
possible. Each module in Leviton's Vizia
RF component line is a Z-Wave
TM
enabled
device. In a Z-Wave
network, each device is
TM
designed to act as a router. These routers will
re-transmit the RF signal from one device to
another until the intended device is reached.
This ensures that the signal is received by its
intended device by routing the signal around
obstacles and radio dead spots. The Scene
Capable Plug-in Lamp Dimming Module
is compatible with any Z-Wave™ enabled
network, regardless of the manufacturer and
can also be used with other devices displaying
the Z-Wave™ logo.
CAuTION:
Remember to exercise good common sense
when using the Timer features of your remote,
especially when scheduling unattended
devices. There can be some unexpected
consequences if not used with care. For
example, an empty coffee pot can be remotely
turned on. If that should happen, your coffee
pot could be damaged from overheating. If an
electric heater is turned on by remote control
while clothing is draped over it, a fire could
result. DO NOT uSE the remote for the control
of high power heating appliances such as
portable heaters. This device will not control
lighting that is used with electronic low-voltage
and high frequency power supply transformers,
nor high pressure discharge lamps (HID
lighting). This includes mercury-vapor, sodium
vapor and metal halide lamps. DO NOT change
location after unit is enrolled in Z-wave
network.
FEATuRES
• Soft fade ON/OFF
• Scene capable
• ON/OFF LED
• Two way communication
• Manual ON capability at load
• RF reliability
• Ease of installation – No new wiring
• Compatible with other Z-Wave™ enabled devices
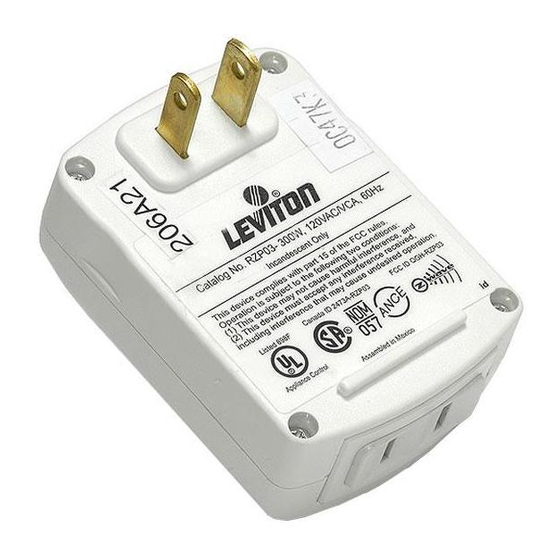
Scene Capable Plug-In Lamp Dimming Module
Incandescent: 300W max., 60W min.
INSTALLATION INSTRuCTIONS
INSTALLING YOuR DIMMING MODuLE
NOTE: Use check boxes when Steps are
completed.
Attaching Load to Scene
Step 1
Capable Plug-In Lamp
TM
Dimming Module:
NOTE: In order to use your Vizia
Capable Lamp Dimming Module in a Z-Wave
network, it must be Included into the network
using a Primary Programmer/Remote, such as
Leviton's Cat. No., RZCPG. Before Including your
module, please refer to the Primary Programmer/
Remote instruction sheet for complete
information. Refer to Step 3 for further details.
• Locate lamp to be controlled by Scene
Capable Plug-In Lamp Dimming Module and
ensure it is fully operational. Attach lamp plug
into module receptacle noting proper polarity of
blades.
TM
Attaching Scene Capable
Step 2
Plug-In Lamp Dimming
Module to Wall Receptacle:
• Plug the Plug-in Dimmer Module into wall
receptacle. Verify that receptacle is live. If
controlled by a wall switch, the switch
must be kept ON at all times.
Cat. No. RZPØ3-1LW
Rated: 120VAC, 60Hz
WARNINGS AND CAuTIONS:
• Unplug unit when servicing connected lighting fixtures.
• Save this instruction sheet. It contains important technical data along with testing
and troubleshooting information which will be useful after installation is complete.
Step 2 cont'd
TM
Scene
TM
Including Scene Capable
Step 3
Plug-In Lamp Dimming Module
into Z-Wave
NOTES:
• If using a non-Leviton Programmer/Remote,
refer to the Programmer/Remote instruction
sheet for Including a device.
A) If using a Leviton Z-Wave
Remote, Cat. No. RZCPG, press the Menu
button and scroll down to System Setup.
Press the center button to select System
Setup Menu. Press the center button to select
Network.
Programmer/Remote
Cat. No. RZCPG
Center Button
Step 3 cont'd
B) While standing close to the module
(approximately 2-5 ft.), press the center
button to <Include> device in the network.
NOTE: Only one device may be included
at a time. DO NOT put multiple devices into
the Inclusion mode at any time.
C) While the Programmer/Remote is in the
Inclusion mode and the LED is ON on the
Scene Capable Plug-In Lamp Dimming
Module, press the ON/OFF button on the
module. The Programmer/Remote will verify
inclusion and the LED will turn OFF on the
Scene Capable Plug-In Lamp Dimming
Module.
If the Scene Capable Plug-In Lamp
Dimming Module is flashing Amber while
in the Inclusion mode, the Programmer/
Remote is still trying to communicate with
the Scene Capable Plug-In Lamp Dimming
Network:
TM
Module. Wait until the device stops flashing,
then press ON/OFF button.
NOTE: If the LED on the Scene Capable
Plug-In Lamp Dimming Module turns
solid Red while including, there has
been a communication error. Refer to
TM
Programmer/
Troubleshooting section.
D) The Primary Programmer/Remote will
assign a node ID number (Name) for this
module.
NOTE: This ID number (Name) will be
stored in the controller to be used for future
reference.
NOTE: You may name or edit the node of
this device at this time.
E) The module is now installed in the
network.
NOTE: If the module has been successfully
Included in the network and the user tries to
Include it again without
Menu Button
first excluding it from the
network, the module will
retain the first node ID it
had received and ignore
1
ON
OFF
the second.
2
OFF
ON
3
Programming and
ON
OFF
4
ON
OFF
TM
Compatible with
enabled products!
ON/OFF Button
Advertisement

Related Manuals for Leviton Vizia RF RZP03-1LW


Summary of Contents for Leviton Vizia RF RZP03-1LW
-
Page 1: Installation Instructions
Step 2 cont’d Attaching Load to Scene Capable Plug-In Lamp Dimming Module: Scene Capable Plug-In Lamp Dimming Module and Step 3 ensure it is fully operational. Attach lamp plug into module receptacle noting proper polarity of blades. NOTES: • If using a non-Leviton Programmer/Remote, refer to the Programmer/Remote instruction sheet for Including a device. A) If using a Leviton Z-Wave Remote, Cat. No. RZCPG, press the Menu button and scroll down to System Setup. Press the center button to select System Setup Menu. Press the center button to select Network. Attaching Scene Capable Plug-In Lamp Dimming Module to Wall Receptacle: receptacle. Verify that receptacle is live. If... - Page 2 Leviton is not liable for incidental, indirect, special, or consequential damages, including without limitation, damage to, or loss of use of, any equipment, lost sales or profits or delay or failure to perform this warranty obligation. The remedies provided herein are the exclusive remedies under this warranty, whether based on contract, tort or otherwise.