Table of Contents
Advertisement
Quick Links
Advertisement
Table of Contents

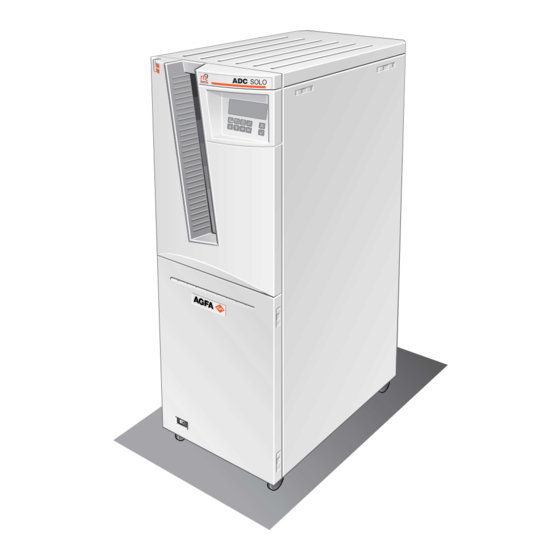
Summary of Contents for AGFA ADC Solo
- Page 1 HealthCare Maintenance Order-No.: DD+DIS013.02E ADC Solo *1UT44X1* Type 5155 / 100/200 1 Piece UT44X MA1 Edition ADC Solo Digitizer Type 5155 / 100/200 Base: VME This documentation is separately available. Order No: DD+DIS013.02E printed in Germany 01 / 2002...
- Page 2 The CE Declaration (CE Conformity) becomes invalid if the product is changed without explicit consent of the manufacturer! This applies to all parts, not only to safety elements. We reserve the right to technical changes Section 12 ADC Solo Edition 1, Revision 10 (Type 5155 / 100/200)
-
Page 3: Table Of Contents
Checking the Image Quality........12 Test Cycles................12 Exposure of a Flatfield ............12 Evaluation of a Flatfield ............15 Completion of Maintenance ........16 Maintenance Checklist Edition 1, Revision 10 ADC Solo Section 12 / I (Type 5155 / 100/200) - Page 4 Maintenance DD+DIS013.02E Section 12 / II ADC Solo Edition 1, Revision 10 (Type 5155 / 100/200)
-
Page 5: Safety
As is the case for all technical devices, the ADC Solo must be operated, cared for and serviced correctly. • If you don't operate the ADC Solo correctly or if you don't have it serviced correctly, Agfa-Gevaert is not liable for resulting disturbances, damages or injuries. -
Page 6: General Information
"must" maintenance points. Maintenance Frequency The maintenance has to be carried out: • every 15.000 cycles or • every 6 months Required Time approximately 3 h Section 12 / 2 ADC Solo Edition 1, Revision 10 (Type 5155 / 100/200) -
Page 7: Required Tools
Description CM+9.0362.6031.0 1x Filter with micro insert CM+9.0450.6553.0 10 x Erasure lamp, 100 W CM+9.5145.6550.0 2 x Suction cups CM+9.5145.9100.0 2 x Roller (for cassette unit) Edition 1, Revision 10 ADC Solo Section 12 / 3 (Type 5155 / 100/200) -
Page 8: Maintenance Step By Step
2.2 Throughput For throughput most important are the cycles per day. They usually count between 50 and 200. Section 12 / 4 ADC Solo Edition 1, Revision 10 (Type 5155 / 100/200) -
Page 9: Clear Infocounter
(1) Clear the infocounter to refresh relative counters. 3.1.5 Visual Check • Flashlight (1) Check overall condition of the machine – outside and inside – for obvious changes or damage. Edition 1, Revision 10 ADC Solo Section 12 / 5 (Type 5155 / 100/200) -
Page 10: Safety Switches
• Toothed belt (CM+9.5145.5195.0) Opener (1) Remove panel on right hand mechanism side of the digitizer. (2) Clean the opener mechanism with a soft dust brush. Figure 3 Section 12 / 6 ADC Solo Edition 1, Revision 10 (Type 5155 / 100/200) -
Page 11: Vme Rack
VME rack fan by hand. There is no air filter to be replaced. General (2) Remove visible dust and dirt deposits by means of a vacuum cleaner. Edition 1, Revision 10 ADC Solo Section 12 / 7 (Type 5155 / 100/200) -
Page 12: Scan Unit
(CM+9.5145.6550.0) Filter (1) Pull the hoses off the filter (2) Unscrew the filter spot A (3) Shake the micro-filter B and blow it clean. Figure 6 Section 12 / 8 ADC Solo Edition 1, Revision 10 (Type 5155 / 100/200) -
Page 13: Erasure Unit
(3) Remove pane A Lamps (4) Pull all lamps carefully out of their sockets B (5) Check all parts of the erasure unit for damage 515512BM.CDR Figure 8 Edition 1, Revision 10 ADC Solo Section 12 / 9 (Type 5155 / 100/200) - Page 14 Use a soft cloth to insert the lamps. (9) Check fan of erasure unit for dust and clean if necessary. (10) Re-insert Erasure Unit Section 12 / 10 ADC Solo Edition 1, Revision 10 (Type 5155 / 100/200)
-
Page 15: Cassettes
(1) Check if there are scratches Visual Check on the surface (2) Check if edges are loose as an indication for mechanical problems at IP transport Edition 1, Revision 10 ADC Solo Section 12 / 11 (Type 5155 / 100/200) -
Page 16: Checking The Image Quality
<Send flatfield> <Calibration pattern> <Banding pattern> Print the flat fields "Calibration" and "Banding" via the Processing Station (window setting of 0.6, without changing the level setting). Section 12 / 12 ADC Solo Edition 1, Revision 10 (Type 5155 / 100/200) - Page 17 In the <Sub-examination> list, click <Flat field>. • Confirm the Exposure class <200>. Make sure that the outlined areas are filled in as shown in the example. Edition 1, Revision 10 ADC Solo Section 12 / 13 (Type 5155 / 100/200)
- Page 18 (4) Insert the cassette into the digitizer and print the image on a printer with a window setting of 0.6 without changing the level setting. Figure 11 Section 12 / 14 ADC Solo Edition 1, Revision 10 (Type 5155 / 100/200)
-
Page 19: Evaluation Of A Flatfield
Fine sharp white or gray lines in fast scan direction on the flat field (see beside). • Check diagnostic images. If there are still unacceptable effects please contact the Support Center. Figure 13 Edition 1, Revision 10 ADC Solo Section 12 / 15 (Type 5155 / 100/200) -
Page 20: Completion Of Maintenance
(2) Make a backup of the system on floppy. (3) Inform the customer about what was done during the maintenance and which repairs need to be done in next future. Section 12 / 16 ADC Solo Edition 1, Revision 10 (Type 5155 / 100/200) - Page 22 AGFA and the Agfa-Rhombus are trademarks of Agfa-Gevaert AG, Germany Herausgegeben von / Published by / Edité par / Pubblicato da / ../ Editado por Agfa-Gevaert AG Fototechnik Tegernseer Landstraße 161 D - 81539 München Printed in Germany / Imprimé en Allemagne /...


