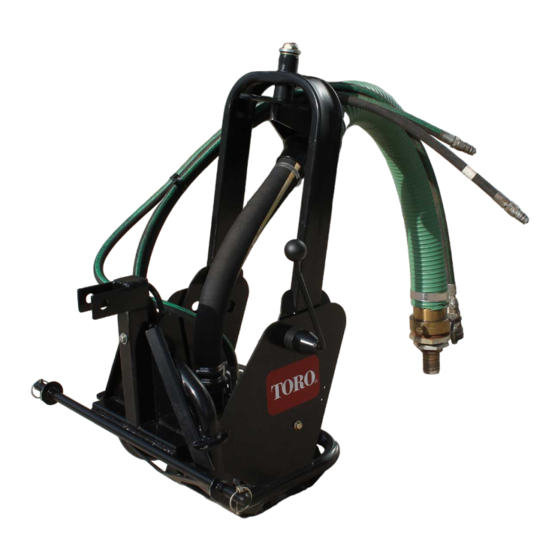
Toro Sand Pro 3040 Operator's Manual
Hide thumbs
Also See for Sand Pro 3040:
- Service manual (262 pages) ,
- Operator's manual (44 pages) ,
- Manual (12 pages)
Table of Contents
Advertisement
Quick Links
Register at www.Toro.com.
Original Instructions (EN)
QAS Bunker Pump
Sand Pro
®
/Infield Pro
Traction Unit
Model No. 08765—Serial No. 315000001 and Up
Model No. 08765—Serial No. 316000001 and Up
Model No. 08765—Serial No. 400000000 and Up
Model No. 08765—Serial No. 405560000 and Up
Form No. 3457-815 Rev A
®
3040 and 5040
*3457-815*
Advertisement
Table of Contents

Summary of Contents for Toro Sand Pro 3040
- Page 1 3040 and 5040 Traction Unit Model No. 08765—Serial No. 315000001 and Up Model No. 08765—Serial No. 316000001 and Up Model No. 08765—Serial No. 400000000 and Up Model No. 08765—Serial No. 405560000 and Up *3457-815* Register at www.Toro.com. Original Instructions (EN)
-
Page 2: Table Of Contents
Whenever you need service, genuine Toro parts, or additional information, contact an Authorized Service g000502 Dealer or Toro Customer Service and have the model Figure 2 and serial numbers of your product ready. Figure 1 identifies the location of the model and serial numbers 1. -
Page 3: Safety
Safety Operation ..............8 Adjusting the Discharge Nozzle ......8 Before Operating ..........8 Hazard control and accident prevention are Operating the Bunker Pump ....... 9 dependent upon the awareness, concern, and Operating Tips ............ 9 proper training of the personnel involved in the Maintenance ............11 operation, transport, maintenance, and storage of Pump Cleaning ..........11... -
Page 4: Maintenance
Toro replacement parts object injuries. Do not resume operation until the and accessories to keep the machine all Toro. area is cleared. Never use “will-fit” replacement parts and accessories made by other manufacturers. -
Page 5: Safety And Instructional Decals
Safety and Instructional Decals Safety decals and instructions are easily visible to the operator and are located near any area of potential danger. Replace any decal that is damaged or lost. decal106-5517 106-5517 1. Warning–Do Not touch the hot surface. -
Page 6: Setup
Setup Loose Parts Use the chart below to verify that all parts have been shipped. Procedure Description Qty. Mount the bunker pump to the traction Bunker pump assembly unit. – No parts required Adjust the link assembly. Media and Additional Parts Description Qty. -
Page 7: Adjusting The Link Assembly
Adjusting the Link Assembly No Parts Required Procedure With the bunker pump mounted and secured on the machine, raise the attachment. Measure the gap between the top washer and the spacer in the link assembly on the attachment adapter as shown in Figure g008127 Note:... -
Page 8: Operation
Operation adjusting the torque on the large nut on top of the pivot tower. Adjusting the Discharge Nozzle The discharge nozzle (Figure 6) can be adjusted up and down or from side to side to direct the flow to the desired location. -
Page 9: Operating The Bunker Pump
g008236 Figure 11 g008122 Figure 9 1. Pump clamp Note: If the Sand Pro machine cannot be moved into the desired position, the pump can be removed from the housing and placed into the water. To remove the pump, pivot the pump clamp forward, slide the pump to the rear of the frame and lift the pump out with the handle. - Page 10 Note: If the attachment adapter becomes stuck to the traction unit adapter, insert a pry bar/screwdriver into the pry slot to disengage the parts (Figure 12). g003783 Figure 12 1. Pry slot...
-
Page 11: Maintenance
Maintenance Pump Cleaning If foreign matter gets into the bunker pump, the flow may decrease or stop. If this occurs, the pump will have to be removed from the frame, disassembled, cleaned, reassembled and installed back into the frame. Stop the Sand Pro machine, apply the parking brake and remove the key from the ignition switch. - Page 12 smearing will require replacing all of the motor severely worn, or the impeller blades are bent, parts. replace each item • Clean the parts that are to be reused using a • Check the impeller blade surface between the solvent or mild cleaner. Remove abrasive material. impeller and the suction flange.
- Page 13 Secure the shaft with a wrench on the flats of Connect the hydraulic hoses to the machine. the shaft and thread the impeller onto the shaft (note left hand thread). Tighten the impeller until Checking the Nozzle Sleeve it shoulders onto the shaft. Place new quad rings onto the thrust plate.
- Page 14 Notes:...
- Page 15 The method of transmission shall be electronic transmittal. This machinery shall not be put into service until incorporated into approved Toro models as indicated on the associated Declaration of Conformity and in accordance with all instructions, whereby it can be declared in conformity with all relevant Directives.
- Page 16 The method of transmission shall be electronic transmittal. This machinery shall not be put into service until incorporated into approved Toro models as indicated on the associated Declaration of Conformity and in accordance with all instructions, whereby it can be declared in conformity with all relevant Directives.
- Page 17 The Way Toro Uses Information Toro may use your personal information to process warranty claims, to contact you in the event of a product recall and for any other purpose which we tell you about. Toro may share your information with Toro's affiliates, dealers or other business partners in connection with any of these activities. We will not sell your personal information to any other company.
- Page 18 Countries Other than the United States or Canada Customers who have purchased Toro products exported from the United States or Canada should contact their Toro Distributor (Dealer) to obtain guarantee policies for your country, province, or state. If for any reason you are dissatisfied with your Distributor's service or have difficulty obtaining guarantee information, contact the Toro importer.


