
Related Manuals for La Crosse Technology WS-7047U


Summary of Contents for La Crosse Technology WS-7047U
- Page 1 WS-7047U Wireless 433 MHz Weather Station With Rainfall and Temperature Instruction Manual TABLE OF CONTENTS...
-
Page 2: Table Of Contents
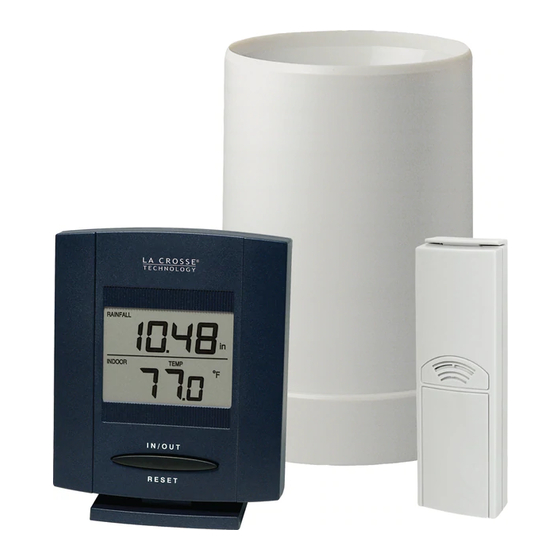
Topic Inventory of Contents Additional Equipment Quick Setup Detailed Setup Guide Battery Installation Mounting Operation of the Wireless Weather Station Troubleshooting Maintenance and Care Specifications Warranty Information INVENTORY OF CONTENTS 1. The digital indoor weather station. 2. The remote temperature sensor and mounting bracket. 3. -
Page 3: Detailed Setup Guide
Hint: Use good quality Alkaline Batteries and avoid rechargeable batteries. 1. Have the indoor weather station, remote temperature sensor and remote rain sensor 3 to 5 feet apart. 2. Batteries should be out of all units for 10 minutes. Place the batteries into the remote rain sensor first then into the remote temperature sensor and finally into the indoor weather station. -
Page 4: Battery Installation
I) Battery Installation Note: Batteries will fit tightly. To avoid start-up problems make sure that the batteries do not spring free. A) Remote Rainfall Sensor 1. Remove the flat-head screw and battery cover located on the underside of the base. 2. - Page 5 Note: To achieve a true temperature reading, avoid mounting in direct sunlight. We recommend that you mount the remote temperature sensor on a North-facing wall. The sending range is 80ft; obstacles such as walls, concrete, and large metal objects will reduce the range. Place both units in their desired location before permanently mounting.
-
Page 6: Mounting
• with the use of screws • using the adhesive tape A. Mounting with Screws 1. Remove the mounting bracket from the remote temperature sensor. 2. Place the mounting bracket over the desired location. Through the three screw holes of the bracket, mark the mounting surface with a pencil. 3. -
Page 7: Troubleshooting
A) Viewing the Temperature (Remote and Indoor) The indoor temperature will display in the Temperature portion of the LCD. To View the remote temperature press and release the “RESET” button. Press and release the “RESET” button to return to the indoor temperature. B) Viewing the Rainfall The rainfall total will be displayed in the Rainfall portion of the LCD. -
Page 8: Maintenance And Care
Problem: No outdoor temperature is displayed. Solution: 1. Remove all batteries, reinsert into remote rain sensor first, then into the remote temperature sensor and then into the indoor temperature station. 2. Place remote temperature sensor closer to the indoor weather station. 3. -
Page 9: Specifications
• Do not subject the units to unnecessary heat or cold by placing them in the oven or freezer. • Opening the casings invalidates the warranty. SPECIFICATIONS Transmitting Frequency Measuring Temperatures station 32°F to 156.2°F with 0.2 °F resolution Indoor weather Remote temperature sensor Temperature accuracy... - Page 10 This warranty does not cover any defects resulting from improper use, unauthorized repairs, faulty batteries, or the indoor weather stations inability to receive a signal due to any source of interference. LA CROSSE TECHNOLOGY WILL NOT ASSUME LIABILITY FOR INCIDENTAL, CONSEQUENTIAL, PUNITIVE OR OTHER SIMILAR DAMAGES ASSOCIATED WITH THE OPERATION OR MALFUNCTION OF THIS INDOOR WEATHER STATION.