Table of Contents
Advertisement
Quick Links
QUICK REFERENCE GUIDE >
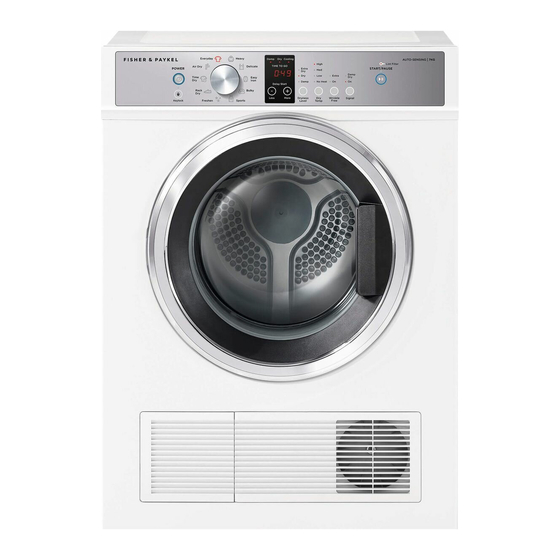
DE7060P2
Vented Dryer, 7kg
Series Seven | Vented
White
Dry your clothes efficiently without over drying, with multiple
ways to install and vent.
Auto-sensing detects moisture level to prevent under or over
drying
Ten different fabric care cycles including Delicate, Bulky, and
Freshen
Full reverse tumbling to help dry garments quicker and more
evenly
Drying rack for items that are too precious to tumble
DIMENSIONS
Height
Width
Depth
FEATURES & BENEFITS
Auto-sensing technology
Auto-sensing prevents over-drying by sensing moisture levels
inside the drum and shutting off automatically. This helps clothes
last for longer and reduces energy consumption.
Cares for clothes
This dryer has a cycle to suit every type of load including
Delicate, Bulky and Sports. Select a cycle with the easy to use
SmartTouch™ control dial.
Simple installation
Vent out either the front or the back of this dryer. A wall
mounting kit is included and the control panel can be inverted
easily.
830mm
Drying rack
600mm
This model comes with a drying rack, perfect for those items that
are too precious to tumble.
600mm
Reverse tumbling
Reverse tumbling alternates direction to help garments move
freely so they dry quicker and more evenly.
Easy loading
The robust dryer door features die cast metal hinges that open
to a full 180° for easy access and loading.
SPECIFICATIONS
Capacity
Capacity
Consumption
Energy rating
Dry Cycles
Air Dry
Air dry/Air fluff cycle
Bulky
Easy Iron
Everyday
Heavy
Rack dry
Sports
Time dry
Wrinkle Free
Date: 13.01.2022 > 1
7kg
2 star
•
•
•
•
•
•
•
•
•
•
Advertisement
Chapters
Table of Contents
Troubleshooting

Related Manuals for Fisher & Paykel DE7060P2


Summary of Contents for Fisher & Paykel DE7060P2
- Page 1 QUICK REFERENCE GUIDE > DE7060P2 Date: 13.01.2022 > 1 easily. Vented Dryer, 7kg 830mm Height Drying rack 600mm Width This model comes with a drying rack, perfect for those items that are too precious to tumble. 600mm Depth Series Seven | Vented...
- Page 2 QUICK REFERENCE GUIDE > DE7060P2 Date: 13.01.2022 > 2 Features The product dimensions and specifications in this page apply to the specific product and model. Under our policy of continuous improvement, these dimensions and Drying rack • specifications may change at any time. You should therefore check with Fisher &...
- Page 3 VENTED CLOTHES DRYER DE7060P & DE7060G models INSTALLATION GUIDE / USER GUIDE NZ AU SG ROW...
-
Page 5: Table Of Contents
CONTENTS Introduction Safety and warnings Installation instructions Dryer controls Sorting and loading Drying cycles Drying cycle options Cleaning your dryer Before you call for service Troubleshooting Manufacturer’s warranty Customer care IMPORTANT! Registration SAVE THESE INSTRUCTIONS Register your product with us so we can The models shown in this user guide provide you with the best service possible. -
Page 6: Introduction
INTRODUCTION Welcome to your Fisher & Paykel vented dryer. Thank you for purchasing a Fisher & Paykel clothes dryer. We are proud of this dryer and trust it will serve you well for many years. At Fisher & Paykel we aim to provide innovative products that are simple to use, ergonomic, energy efficient and kind to the environment. -
Page 7: Safety And Warnings
SAFETY AND WARNINGS Meaning of symbols on the dryer Warning: Risk of fire/Flammable materials Read the instructions WARNING! Fire Hazard Only dry fabrics that have been washed with water. Do not use heat to dry articles containing foam rubber or similarly textured rubber–like materials, dry on ‘Air Dry’. - Page 8 SAFETY AND WARNINGS When using this appliance always exercise basic safety precautions including the following: Dryer use This dryer has been designed for domestic use only, not for commercial applications, such as massage/beauty clinics where there may be increased lint accumulation or flammable materials in the atmosphere or load.
- Page 9 SAFETY AND WARNINGS Do not dry curtains in your dryer. Sunlight makes them brittle and they may disintegrate during drying. Do not use the water collected in the water tank for drinking or food processing. Never run the dryer without the water tank in place. If the water tank becomes full, the tumble dryer will pause drying and will sound an alarm.
- Page 10 SAFETY AND WARNINGS Spontaneous combustion IMPORTANT! To reduce the risk of fire in a tumble dryer the following should be observed: Items that have been spotted or soaked with vegetable oil or cooking oil are a fire hazard and should not be placed in a tumble dryer. Oil-affected items can ignite spontaneously, especially when exposed to heat sources such as a tumble dryer.
-
Page 11: Installation Instructions
INSTALLATION INSTRUCTIONS Read and follow the ‘Safety and warnings’ and ‘Installation instructions’ sections carefully before using your dryer! Accessories Please check you received the following accessories with your Fisher & Paykel dryer. You will find them inside the drum: 1 x Drying rack 1 x Installation guide/User guide 1 x Wall mounting kit 1 x Duct adapter... - Page 12 INSTALLATION INSTRUCTIONS Venting Correct installation is very important for all dryers to ensure maximum efficiency and safety. Never run the dryer unless the airflow system is free from obstruction. There must be adequate ventilation to avoid the back flow of gases into the room from appliances burning fuels, including open fires, when operating the dryer.
- Page 13 INSTALLATION INSTRUCTIONS Installation options There are two different ways your dryer can be positioned. Freestanding or inverted and mounted on a wall. Free standing The dryer stands on the floor and can easily be moved into position. Move the dryer into the desired position. Do not lift the dryer by the top panel. Have a minimum clearance on all sides of at least 20mm.
- Page 14 INSTALLATION INSTRUCTIONS Inverted wall mounting installation Your dryer has been designed to be inverted and mounted on the wall above a washer or tub. A wall mounting kit must be used. Inverting allows access to the dryer control panel. Tools and parts required: Drill and 3mm bit Phillips head screwdriver.
- Page 15 INSTALLATION INSTRUCTIONS Inverting the panel Unplug your dryer from the wall. Invert the panel of the dryer by unscrewing the screws on the side of the console (A). Remove the console from the dryer. Unscrew six screws on the inside of the console (B). Rotate the grey panel 180˚...
- Page 16 INSTALLATION INSTRUCTIONS Mounting dryer on wall Determine the position of the dryer on the wall and mark the bracket position. A minimum of 50mm is needed between the top of the dryer and the ceiling for ease of installation. If mounting above a washing machine, allow sufficient room to open the lid of the washer.
- Page 17 INSTALLATION INSTRUCTIONS Before a rear venting option is installed the dryer must be changed from the front venting factory setup. Remove the outlet grille from the front left-hand side and replace with the outlet cover from the rear left-hand side. These covers should be gently pried at the sides to prevent damage.
- Page 18 INSTALLATION INSTRUCTIONS Completing the installation Installation test cycle Ensure the installation test cycle is completed before you dry any items in your dryer. This is to check that your dryer is installed correctly and that it is functioning properly prior to use. Turn your dryer on by pressing the ‘Power’...
- Page 19 INSTALLATION INSTRUCTIONS Product specifications DE7060G DE7060P Capacity (kg)* DIMENSIONS (mm) Width Depth Height ELECTRICAL Volts 220 – 240 220 – 240 Amps (maximum) Rated Power (W) 1770 1770 * Capacity refers to the maximum dry weight of items the dryer can dry at any one time. Note: some cycles have a lower maximum capacity (see the ‘Drying cycles’...
- Page 20 INSTALLATION INSTRUCTIONS Check the lint filter is clean before every load. Ensure it is replaced correctly before using your dryer. The lint filter indicator light will flash at the beginning of every cycle when the machine is switched on, as a reminder to check the lint filter. Sort and load items into the dryer drum, ensuring no items are in the way of the door.
- Page 21 INSTALLATION INSTRUCTIONS If you make an invalid selection the dryer will beep to alert you. When the cycle finishes, your dryer will beep and then turn off automatically. If the ‘Wrinkle Free’ option has been selected the dryer will rotate the drum periodically blowing cool air into the drum to help minimise wrinkling and creasing of your load.
-
Page 22: Dryer Controls
DRYER CONTROLS SmartTouch™ Control Dial The SmartTouch™ Control Dial (DE7060P only) provides easy and efficient drying cycle selection. As you rotate the dial, the icon of the drying cycle selected will be illuminated, along with the default settings for that cycle on the right side of the control panel. SmartTouch™... -
Page 23: Sorting And Loading
SORTING AND LOADING When preparing your load there are some important things to consider: Sorting It is best that you sort your garments before placing them into the dryer. Sort into loads of similar items, and loads that will take similar times to dry. Heavier items (eg towels and flannelette sheets) are best dried separately from lightweight items (eg synthetics, polyester-cotton sheets and shirts). - Page 24 SORTING AND LOADING Before you load Check pockets for items that could damage your clothes or get caught in the dryer. Close zippers, hooks and eyes, and other fastenings (ie fasten the openings of duvet/doona covers), and remove loose bra wires. These may damage both your dryer and your clothes.
- Page 25 SORTING AND LOADING Drying times Drying very small loads is inefficient. Try to dry medium to large loads. Heavier items (towels and flannelette sheets) will take longer to dry than light items (synthetics and polyester cotton sheets and shirts). Drying times can be reduced by spinning the wash load at the highest spin speed suitable for the load type in your washing machine.
-
Page 26: Drying Cycles
DRYING CYCLES DE7060P model Your dryer has a number of drying cycles to suit your laundry needs. Selecting the most appropriate cycle for each particular load will help ensure you get the best result. DEFAULT DEFAULT MAX. LOAD DRYNESS DRYING CYCLE DESIGNED FOR DESCRIPTION... - Page 27 DRYING CYCLES DE7060G model Your dryer has a number of drying cycles to suit your laundry needs. Selecting the most appropriate cycle for each particular load will help ensure you get the best result. DEFAULT DEFAULT MAX. LOAD DRYNESS DRYING CYCLE DESIGNED FOR DESCRIPTION...
-
Page 28: Drying Cycle Options
DRYING CYCLE OPTIONS Timed programmes (Time Dry, Rack Dry, Air Dry) The dryer dries for the selected time regardless of the level of moisture in your clothes. It is important to check the clothes throughout the timed programmes to avoid over drying. Drying cycles All drying cycles default to the recommended options for that cycle based on the average expected load to be dried using that cycle. - Page 29 DRYING CYCLE OPTIONS Wrinkle Free If you wish to minimise wrinkling, select one of the ‘Wrinkle Free’ options. At the end of the cycle, the drum will rotate periodically and cool air will be circulated through the load to minimise wrinkling and creasing.
- Page 30 DRYING CYCLE OPTIONS Delay Start The ‘Delay Start’ option enables you to delay the start of the drying cycle from between 5 minutes and 12 hours. Times you can select are 5 min, 15 min, 30 min, 1 hour, then hourly up to 12 hours. This can be useful to time your drying to finish when you arrive home from work, or to start when power rates are lower.
-
Page 31: Cleaning Your Dryer
CLEANING YOUR DRYER When you have finished using your dryer Unplug the dryer from the power socket. Wipe around the door to remove any remaining condensation and/or foreign matter. Clear the lint filter. Cleaning your dryer Before you start cleaning your dryer, ensure that it is disconnected from the power (ie unplug the dryer from the power socket). -
Page 32: Before You Call For Service
BEFORE YOU CALL FOR SERVICE Your dryer is capable of diagnosing a number of its own problems. It will sound a continuous series of beeps and display a code when it has a problem that you can correct yourself. All control panel lights will turn off and a code will be displayed to inform you what the problem is. -
Page 33: Troubleshooting
TROUBLESHOOTING The following is a list of problems you may encounter when using this appliance and some suggestions that may help to correct the problem. If you still have problems, please contact your Fisher & Paykel trained and supported service technician. PROBLEM POSSIBLE CAUSES WHAT TO DO... - Page 34 TROUBLESHOOTING PROBLEM POSSIBLE CAUSES WHAT TO DO Dryer is beeping, Dryer has a fault. Refer to page 28. displaying unfamiliar light patterns and/or a message on the digital display Noises Dryer is overloaded. Remove some items from the dryer. Dryer has a fault. Continuous beeping or a musical series of beeps with a message displayed on digital display.
- Page 35 TROUBLESHOOTING PROBLEM POSSIBLE CAUSES WHAT TO DO Linting Lint filter not cleaned or Ensure the lint filter is cleaned after replaced. every cycle and replaced correctly. Refer to page 27. Loads not sorted correctly. Dry lint givers separately from lint receivers. Dry similar colours together eg light coloured items with light coloured items, dark items with dark items.
- Page 36 TROUBLESHOOTING PROBLEM POSSIBLE CAUSES WHAT TO DO Tangling Loads not separated Try separating out larger items from during loading. smaller items. Items loaded into the dryer Load items individually into the incorrectly. dryer. Do not place folded items in the dryer. Incorrect cycle selection.
-
Page 37: Manufacturer's Warranty
MANUFACTURER’S WARRANTY For New Zealand and Australia only. You automatically receive a 2-year Manufacturer’s Warranty with the purchase of this vented clothes dryer covering arts and labour for servicing within the country of purchase. Fisher & Paykel undertakes to: Repair or, at its option, replace without cost to the owner either for material or labour any part of the product, the serial number of which appears on the product, which is found to be defective within TWO YEARS of the date of purchase. - Page 38 MANUFACTURER’S WARRANTY This product has been designed for use in a normal domestic (residential) environment. This product is not designed for commercial use (whatsoever). Any commercial use by a customer will affect this product’s Manufacturer’s Warranty. Service under this Manufacturer’s Warranty must be provided by a Fisher & Paykel trained and supported service technician (refer to the ‘Customer care’...
-
Page 39: Customer Care
CUSTOMER CARE Before you call for service or assistance... Check the things you can do yourself. Go online to our website, fisherpaykel.com, for Support and Product Help, and refer to your User guide to check: Your product is correctly installed. You are familiar with its normal operation. You have read the ‘Before you call for service’, ‘Fault codes’... -
Page 40: Registration
CUSTOMER CARE Registration Register your product with us so we can provide you with the best service possible. To register your product visit our website: fisherpaykel.com Complete and keep for safe reference: Model Serial No. Purchase Date Purchaser Dealer Suburb Town Country... -
Page 42: Fisherpaykel.com
FISHERPAYKEL.COM © Fisher & Paykel Appliances 2019. All rights reserved. The product specifications in this document apply to the specific products and models described at the date of issue. Under our policy of continuous product improvement, these specifications may change at any time. - Page 43 VENTED CLOTHES DRYER DE7060P & DE7060G models INSTALLATION GUIDE / USER GUIDE NZ AU SG ROW...
- Page 45 CONTENTS Introduction Safety and warnings Installation instructions Dryer controls Sorting and loading Drying cycles Drying cycle options Cleaning your dryer Before you call for service Troubleshooting Manufacturer’s warranty Customer care IMPORTANT! Registration SAVE THESE INSTRUCTIONS Register your product with us so we can The models shown in this user guide provide you with the best service possible.
-
Page 46: Introduction
INTRODUCTION Welcome to your Fisher & Paykel vented dryer. Thank you for purchasing a Fisher & Paykel clothes dryer. We are proud of this dryer and trust it will serve you well for many years. At Fisher & Paykel we aim to provide innovative products that are simple to use, ergonomic, energy efficient and kind to the environment. -
Page 47: Safety And Warnings
SAFETY AND WARNINGS Meaning of symbols on the dryer Warning: Risk of fire/Flammable materials Read the instructions WARNING! Fire Hazard Only dry fabrics that have been washed with water. Do not use heat to dry articles containing foam rubber or similarly textured rubber–like materials, dry on ‘Air Dry’. - Page 48 SAFETY AND WARNINGS When using this appliance always exercise basic safety precautions including the following: Dryer use This dryer has been designed for domestic use only, not for commercial applications, such as massage/beauty clinics where there may be increased lint accumulation or flammable materials in the atmosphere or load.
- Page 49 SAFETY AND WARNINGS Do not dry curtains in your dryer. Sunlight makes them brittle and they may disintegrate during drying. Do not use the water collected in the water tank for drinking or food processing. Never run the dryer without the water tank in place. If the water tank becomes full, the tumble dryer will pause drying and will sound an alarm.
- Page 50 SAFETY AND WARNINGS Spontaneous combustion IMPORTANT! To reduce the risk of fire in a tumble dryer the following should be observed: Items that have been spotted or soaked with vegetable oil or cooking oil are a fire hazard and should not be placed in a tumble dryer. Oil-affected items can ignite spontaneously, especially when exposed to heat sources such as a tumble dryer.
-
Page 51: Installation Instructions
INSTALLATION INSTRUCTIONS Read and follow the ‘Safety and warnings’ and ‘Installation instructions’ sections carefully before using your dryer! Accessories Please check you received the following accessories with your Fisher & Paykel dryer. You will find them inside the drum: 1 x Drying rack 1 x Installation guide/User guide 1 x Wall mounting kit 1 x Duct adapter... - Page 52 INSTALLATION INSTRUCTIONS Venting Correct installation is very important for all dryers to ensure maximum efficiency and safety. Never run the dryer unless the airflow system is free from obstruction. There must be adequate ventilation to avoid the back flow of gases into the room from appliances burning fuels, including open fires, when operating the dryer.
- Page 53 INSTALLATION INSTRUCTIONS Installation options There are two different ways your dryer can be positioned. Freestanding or inverted and mounted on a wall. Free standing The dryer stands on the floor and can easily be moved into position. Move the dryer into the desired position. Do not lift the dryer by the top panel. Have a minimum clearance on all sides of at least 20mm.
- Page 54 INSTALLATION INSTRUCTIONS Inverted wall mounting installation Your dryer has been designed to be inverted and mounted on the wall above a washer or tub. A wall mounting kit must be used. Inverting allows access to the dryer control panel. Tools and parts required: Drill and 3mm bit Phillips head screwdriver.
- Page 55 INSTALLATION INSTRUCTIONS Inverting the panel Unplug your dryer from the wall. Invert the panel of the dryer by unscrewing the screws on the side of the console (A). Remove the console from the dryer. Unscrew six screws on the inside of the console (B). Rotate the grey panel 180˚...
- Page 56 INSTALLATION INSTRUCTIONS Mounting dryer on wall Determine the position of the dryer on the wall and mark the bracket position. A minimum of 50mm is needed between the top of the dryer and the ceiling for ease of installation. If mounting above a washing machine, allow sufficient room to open the lid of the washer.
- Page 57 INSTALLATION INSTRUCTIONS Before a rear venting option is installed the dryer must be changed from the front venting factory setup. Remove the outlet grille from the front left-hand side and replace with the outlet cover from the rear left-hand side. These covers should be gently pried at the sides to prevent damage.
- Page 58 INSTALLATION INSTRUCTIONS Completing the installation Installation test cycle Ensure the installation test cycle is completed before you dry any items in your dryer. This is to check that your dryer is installed correctly and that it is functioning properly prior to use. Turn your dryer on by pressing the ‘Power’...
- Page 59 INSTALLATION INSTRUCTIONS Product specifications DE7060G DE7060P Capacity (kg)* DIMENSIONS (mm) Width Depth Height ELECTRICAL Volts 220 – 240 220 – 240 Amps (maximum) Rated Power (W) 1770 1770 * Capacity refers to the maximum dry weight of items the dryer can dry at any one time. Note: some cycles have a lower maximum capacity (see the ‘Drying cycles’...
- Page 60 INSTALLATION INSTRUCTIONS Check the lint filter is clean before every load. Ensure it is replaced correctly before using your dryer. The lint filter indicator light will flash at the beginning of every cycle when the machine is switched on, as a reminder to check the lint filter. Sort and load items into the dryer drum, ensuring no items are in the way of the door.
- Page 61 INSTALLATION INSTRUCTIONS If you make an invalid selection the dryer will beep to alert you. When the cycle finishes, your dryer will beep and then turn off automatically. If the ‘Wrinkle Free’ option has been selected the dryer will rotate the drum periodically blowing cool air into the drum to help minimise wrinkling and creasing of your load.
-
Page 62: Dryer Controls
DRYER CONTROLS SmartTouch™ Control Dial The SmartTouch™ Control Dial (DE7060P only) provides easy and efficient drying cycle selection. As you rotate the dial, the icon of the drying cycle selected will be illuminated, along with the default settings for that cycle on the right side of the control panel. SmartTouch™... -
Page 63: Sorting And Loading
SORTING AND LOADING When preparing your load there are some important things to consider: Sorting It is best that you sort your garments before placing them into the dryer. Sort into loads of similar items, and loads that will take similar times to dry. Heavier items (eg towels and flannelette sheets) are best dried separately from lightweight items (eg synthetics, polyester-cotton sheets and shirts). - Page 64 SORTING AND LOADING Before you load Check pockets for items that could damage your clothes or get caught in the dryer. Close zippers, hooks and eyes, and other fastenings (ie fasten the openings of duvet/doona covers), and remove loose bra wires. These may damage both your dryer and your clothes.
- Page 65 SORTING AND LOADING Drying times Drying very small loads is inefficient. Try to dry medium to large loads. Heavier items (towels and flannelette sheets) will take longer to dry than light items (synthetics and polyester cotton sheets and shirts). Drying times can be reduced by spinning the wash load at the highest spin speed suitable for the load type in your washing machine.
-
Page 66: Drying Cycles
DRYING CYCLES DE7060P model Your dryer has a number of drying cycles to suit your laundry needs. Selecting the most appropriate cycle for each particular load will help ensure you get the best result. DEFAULT DEFAULT MAX. LOAD DRYNESS DRYING CYCLE DESIGNED FOR DESCRIPTION... - Page 67 DRYING CYCLES DE7060G model Your dryer has a number of drying cycles to suit your laundry needs. Selecting the most appropriate cycle for each particular load will help ensure you get the best result. DEFAULT DEFAULT MAX. LOAD DRYNESS DRYING CYCLE DESIGNED FOR DESCRIPTION...
-
Page 68: Drying Cycle Options
DRYING CYCLE OPTIONS Timed programmes (Time Dry, Rack Dry, Air Dry) The dryer dries for the selected time regardless of the level of moisture in your clothes. It is important to check the clothes throughout the timed programmes to avoid over drying. Drying cycles All drying cycles default to the recommended options for that cycle based on the average expected load to be dried using that cycle. - Page 69 DRYING CYCLE OPTIONS Wrinkle Free If you wish to minimise wrinkling, select one of the ‘Wrinkle Free’ options. At the end of the cycle, the drum will rotate periodically and cool air will be circulated through the load to minimise wrinkling and creasing.
- Page 70 DRYING CYCLE OPTIONS Delay Start The ‘Delay Start’ option enables you to delay the start of the drying cycle from between 5 minutes and 12 hours. Times you can select are 5 min, 15 min, 30 min, 1 hour, then hourly up to 12 hours. This can be useful to time your drying to finish when you arrive home from work, or to start when power rates are lower.
-
Page 71: Cleaning Your Dryer
CLEANING YOUR DRYER When you have finished using your dryer Unplug the dryer from the power socket. Wipe around the door to remove any remaining condensation and/or foreign matter. Clear the lint filter. Cleaning your dryer Before you start cleaning your dryer, ensure that it is disconnected from the power (ie unplug the dryer from the power socket). -
Page 72: Before You Call For Service
BEFORE YOU CALL FOR SERVICE Your dryer is capable of diagnosing a number of its own problems. It will sound a continuous series of beeps and display a code when it has a problem that you can correct yourself. All control panel lights will turn off and a code will be displayed to inform you what the problem is. -
Page 73: Troubleshooting
TROUBLESHOOTING The following is a list of problems you may encounter when using this appliance and some suggestions that may help to correct the problem. If you still have problems, please contact your Fisher & Paykel trained and supported service technician. PROBLEM POSSIBLE CAUSES WHAT TO DO... - Page 74 TROUBLESHOOTING PROBLEM POSSIBLE CAUSES WHAT TO DO Dryer is beeping, Dryer has a fault. Refer to page 28. displaying unfamiliar light patterns and/or a message on the digital display Noises Dryer is overloaded. Remove some items from the dryer. Dryer has a fault. Continuous beeping or a musical series of beeps with a message displayed on digital display.
- Page 75 TROUBLESHOOTING PROBLEM POSSIBLE CAUSES WHAT TO DO Linting Lint filter not cleaned or Ensure the lint filter is cleaned after replaced. every cycle and replaced correctly. Refer to page 27. Loads not sorted correctly. Dry lint givers separately from lint receivers. Dry similar colours together eg light coloured items with light coloured items, dark items with dark items.
- Page 76 TROUBLESHOOTING PROBLEM POSSIBLE CAUSES WHAT TO DO Tangling Loads not separated Try separating out larger items from during loading. smaller items. Items loaded into the dryer Load items individually into the incorrectly. dryer. Do not place folded items in the dryer. Incorrect cycle selection.
-
Page 77: Manufacturer's Warranty
MANUFACTURER’S WARRANTY For New Zealand and Australia only. You automatically receive a 2-year Manufacturer’s Warranty with the purchase of this vented clothes dryer covering arts and labour for servicing within the country of purchase. Fisher & Paykel undertakes to: Repair or, at its option, replace without cost to the owner either for material or labour any part of the product, the serial number of which appears on the product, which is found to be defective within TWO YEARS of the date of purchase. - Page 78 MANUFACTURER’S WARRANTY This product has been designed for use in a normal domestic (residential) environment. This product is not designed for commercial use (whatsoever). Any commercial use by a customer will affect this product’s Manufacturer’s Warranty. Service under this Manufacturer’s Warranty must be provided by a Fisher & Paykel trained and supported service technician (refer to the ‘Customer care’...
-
Page 79: Customer Care
CUSTOMER CARE Before you call for service or assistance... Check the things you can do yourself. Go online to our website, fisherpaykel.com, for Support and Product Help, and refer to your User guide to check: Your product is correctly installed. You are familiar with its normal operation. You have read the ‘Before you call for service’, ‘Fault codes’... -
Page 80: Registration
CUSTOMER CARE Registration Register your product with us so we can provide you with the best service possible. To register your product visit our website: fisherpaykel.com Complete and keep for safe reference: Model Serial No. Purchase Date Purchaser Dealer Suburb Town Country... -
Page 82: Fisherpaykel.com
FISHERPAYKEL.COM © Fisher & Paykel Appliances 2019. All rights reserved. The product specifications in this document apply to the specific products and models described at the date of issue. Under our policy of continuous product improvement, these specifications may change at any time.