Advertisement
Quick Links
Polaris Ranger 1000 Door Restraint Kit
POLARIS RANGER 900, XP 900, 1000 &
Available Options:
1. Door Kit (P/N: 1POLXP1000DR)
2. Roof Kit (P/N: 1POLXP1000RF)
3. Rear Panel Kit (P/N: 1POLXP1000RP)
Approximate Installation Time *
Experienced Dealer Technician – 15 minutes
Average Dealer Technician – 20 minutes
Do-It-Yourself – 30 minutes
(*=Not including accessories)
Register your new product quickly online at
Curtiscab.com/product-registration/
Curtis encourages all customers to register their
Curtis products. However, failure to do so will not
diminish right to warranty. Curtis Industries does not
sell or share your information with anyone else.
The contents of this envelope are the property of the owner. Leave with the owner when installation is complete.
p/n:1POLXP1000GS
Fits UTV Models:
XP 1000
4. Windshield Kit (P/N 1POLXP1000WS)
5. Front Wiper Kit (P/N 1POLXP1000WK)
6. Side View Mirrors (P/N: 9PM5)
Approximate Product Specifications
Weight: 2.0 lbs.
Download a digital copy of your installation
instructions online at Curtiscab.com/literature/
Curtis strives to continuously improve our products,
technical documentation, etc. Therefore, the
installation manual for this product may have been
updated after your product was packaged. The
latest revision of the installation manual can always
be found at the website above.
Rev. A, 08/16/2021
p/n: IM-1POLXP1000GS
1 of 5
Advertisement

Related Manuals for Curtis 1POLXP1000GS


Summary of Contents for Curtis 1POLXP1000GS
- Page 1 Therefore, the Curtis encourages all customers to register their installation manual for this product may have been Curtis products. However, failure to do so will not updated after your product was packaged. The diminish right to warranty. Curtis Industries does not latest revision of the installation manual can always sell or share your information with anyone else.
-
Page 2: Table Of Contents
BOLT TORQUE SPECIFICATIONS ..............5 WARNINGS, TIPS, & REQUIRED TOOLS Curtis cabs, kits, and accessories feature an assembly of parts designed for your vehicle which require adjustment and alignment of components to accommodate vehicle variations and provide proper weather protection. For accurate installation, proper operation, and years of satisfaction, please read and understand the installation and owner’s manual fully prior to installing this kit. -
Page 3: Kit Installation
Install WASHER SLEEVE .459 X 5/8 X 1/4 Plate w/ Spacer Ball Stud If Curtis door kit frames have pre-drilled holes as shown Note: in figure 1.3, skip step 1.3 and continue to step 1.4. Orientation is critical 1.3 Per figure 1.3, drill (2) 1/4” holes thru the Velcro, door frame, and vinyl. -
Page 4: Care And Maintenance
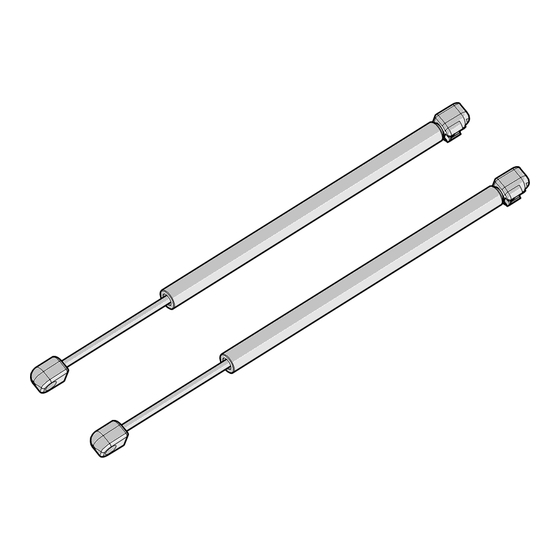
4 of 5 KIT INSTALLATION STEP 1: (KIT INSTALLATION CONT’D) 1.6 Install the provided gas shocks on the left and right doors per figure 1.6 (left door shown). Make sure that the rod of the gas shock is pointing down hill. Installation of kit is now fully complete. -
Page 5: Bolt Torque Specifications
Tightening of Non-Structural Bolts For light or medium duty fastening, Curtis recommends using a general industry standard of tightening until snug and then giving an additional one quarter turn of the tool as deemed reasonable for the application (i.e.: at the installer’s discretion).