
Related Manuals for NCR 5877


Summary of Contents for NCR 5877
- Page 1 All manuals and user guides at all-guides.com 5877 Personas ATM Operator Manual Publication ID: B006-6210-A000 Date: 0701...
- Page 2 NCR, therefore, reserves the right to change specifications without prior notice. All features, functions, and operations described herein may not be marketed by NCR in all parts of the world. In some instances, photographs are of equipment prototypes. Therefore, before using this document, consult with your NCR representative or NCR office for information that is applicable and current.
- Page 3 All manuals and user guides at all-guides.com Federal Communications Commission (FCC) Radio Frequency Interference Statement Note: This equipment has been tested and found to comply with the limits for a Class A digital device, pursuant to Part 15 of the FCC Rules.
- Page 4 If this equipment does cause interference, which can be determined by turning the equipment off and on, the user is encouraged to consult an NCR service representative immediately. Caution NCR Corporation is not responsible for any radio or television...
- Page 5 All manuals and user guides at all-guides.com Revision Record Date Page Description of Change Jul 01 New Publication P77 ATM - Operator Manual...
- Page 6 All manuals and user guides at all-guides.com P77 ATM - Operator Manual...
-
Page 7: About This Document
All manuals and user guides at all-guides.com About This Document Purpose And Audience This publication is intended for NCR customer personnel who are responsible for the day-to-day operation and maintenance of an NCR 5877 Personas ATM (P77). This manual shows operators how to maintain the P77 in an operational state by explaining the replenishment procedures. -
Page 8: What This Manual Contains
If your application has not been migrated to ADI-2, your ATM's error reporting and diagnostic system will be similar to previous generations of NCR ATMs, for example the 5070 or 5085. A list of the OES codes used in the previous generation of ATMs is included. -
Page 9: Guide To Illustrations Used In This Manual
All manuals and user guides at all-guides.com About This Document Guide To Illustrations Used In This Manual Guide To Illustrations Used In This Manual The illustrations are used as follows: Solid or black outlined objects (highlighted) are the objects on which an action is to be performed Outlined arrows indicate the direction of movement for the closest highlighted object. - Page 10 All manuals and user guides at all-guides.com About This Document Guide To Illustrations Used In This Manual P77 ATM - Operator Manual...
-
Page 11: Table Of Contents
All manuals and user guides at all-guides.com Table of Contents Contents About This Document Purpose And Audience .................vii What This Manual Contains ............... viii Guide To Illustrations Used In This Manual........ix Chapter 1 An Introduction To The Personas 77 What is the P77 ..................1-1 Module Location..................1-3 Chapter 2... - Page 12 All manuals and user guides at all-guides.com Table of Contents Security Enclosures with Controlled Access Electronic Lock ..2-15 Opening the Mas-Hamilton Lock ..........2-15 Closing the Mas-Hamilton Lock ..........2-18 Activating The Mas-Hamilton Lock..........2-19 Mas-Hamilton Documentation ............ 2-22 Front Operator Interface ..............
- Page 13 All manuals and user guides at all-guides.com Table of Contents Chapter 6 Journal Printer Replenishing Paper - Graphics Printer..........6-1 Clearing Jams - Graphics Printer ............6-13 Chapter 7 Maintenance What Is Required To Maintain The P77? ...........7-1 Daily Tasks ..................7-1 Weekly Tasks..................7-1 Emptying the Dip Reader Debris Bin ..........7-1 Replenishment ..................7-1 Cleaning Kit....................7-2...
- Page 14 All manuals and user guides at all-guides.com Table of Contents P77 ATM - Operator Manual...
-
Page 15: An Introduction To The Personas 77
All manuals and user guides at all-guides.com Table of Contents An Introduction To The Personas 77 Chapter 1 An Introduction To The Personas 77 What is the P77 1- 1 Module Location P77 ATM - Operator Manual... - Page 16 All manuals and user guides at all-guides.com Table of Contents An Introduction To The Personas 77 P77 ATM - Operator Manual...
-
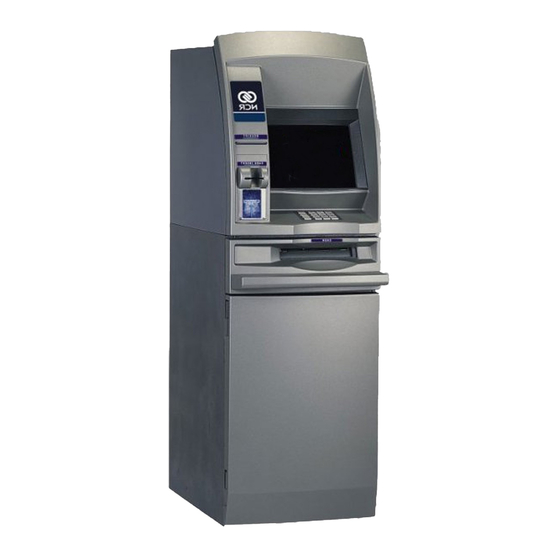
Page 17: What Is The P77
An Introduction To The Personas 77 What is the P77 What is the P77 The NCR 5877 Personas ATM (P77) is a PC-based self service ATM. The heart of the P77 is a PC, running self-service application software. This self-service application software manages transactions and controls the various devices, such as printers, card readers, monitor screens and keyboards. - Page 18 All manuals and user guides at all-guides.com An Introduction To The Personas 77 What is the P77 P77 With Bunch Presenter P77 ATM - Operator Manual...
-
Page 19: Module Location
All manuals and user guides at all-guides.com An Introduction To The Personas 77 Module Location Module Location The external and internal locations of the modules which comprise the P77 are shown in the following illustrations. External Location Facia Display/Touchscreen Receipt Printer Functional Display Keys Dip Card Reader... - Page 20 All manuals and user guides at all-guides.com An Introduction To The Personas 77 Module Location Internal Location PC Core Floppy Disk Drive On/Off Switch CD Rom Supervisor/Operator Panel Receipt Printer Journal Printer Currency Dispenser Purge Bin Security Enclosure Door Cabinet Front Door I/O Panel Power Supply...
-
Page 21: Getting Started
All manuals and user guides at all-guides.com Table of Contents Getting Started Chapter 2 Getting Started Opening/Closing The Exterior Of The P77 Top Cabinet - Opening Top Cabinet - Closing Security Enclosure - Opening Security Enclosure - Closing Switching Power On/Off Mains Power Switch Security Enclosure Interlock Switch Entering Supervisor Mode... - Page 22 All manuals and user guides at all-guides.com Table of Contents Getting Started Security Enclosures with Controlled Access Electronic Lock 2-15 Opening the Mas-Hamilton Lock 2-15 Closing the Mas-Hamilton Lock 2-18 Activating The Mas-Hamilton Lock 2-19 Mas-Hamilton Documentation 2-22 Front Operator Interface 2-23 Operator Panel 2-23...
-
Page 23: Opening/Closing The Exterior Of The P77
All manuals and user guides at all-guides.com Getting Started Opening/Closing The Exterior Of The P77 Opening/Closing The Exterior Of The P77 The top cabinet and security enclosure of the P77 can be opened independently of each other. This enables the consumables in the top cabinet to be replenished without compromising the security of the cash dispenser. - Page 24 All manuals and user guides at all-guides.com Getting Started Opening/Closing The Exterior Of The P77 Using both hands, carefully pull the facia out of the top cabinet until the slides are fully extended. P77 ATM - Operator Manual...
-
Page 25: Top Cabinet - Closing
All manuals and user guides at all-guides.com Getting Started Opening/Closing The Exterior Of The P77 Close the top cabinet as follows: Top Cabinet - Closing Caution Do not grip the facia when closing the top cabinet. With your hands flat, either side of the keypad, push the facia into the top cabinet until the lock locks. -
Page 26: Security Enclosure - Opening
All manuals and user guides at all-guides.com Getting Started Opening/Closing The Exterior Of The P77 Open the security enclosure as follows: Security Enclosure - Insert the key, in the cabinet lock, and turn it clockwise. Opening Open the cabinet door. Unlock the safe door, in accordance with the relevant instructions detailed under “Open/Closing The Standard Security Enclosure”... -
Page 27: Security Enclosure - Closing
All manuals and user guides at all-guides.com Getting Started Opening/Closing The Exterior Of The P77 Closing the security enclosure as follows: Security Enclosure - Close and lock the security enclosure door in accordance with Closing the relevant instructions detailed under “Open/Closing The Standard Security Enclosure”... -
Page 28: Switching Power On/Off
All manuals and user guides at all-guides.com Getting Started Switching Power On/Off Switching Power On/Off There are two power switches fitted to the P77: Mains Power Switch - switches mains power On/Off. Security Enclosure Interlock Switch - switches power, to the cash dispenser located inside the security enclosure, On/Off. -
Page 29: Security Enclosure Interlock Switch
All manuals and user guides at all-guides.com Getting Started Switching Power On/Off When the safe door is opened, power to the cash dispenser is Security Enclosure switched off by an isolator switch. The dispenser isolator switch is Interlock Switch located, behind a cover, on the bottom of the safe. Note: power is automatically restored to the cash dispenser when the safe door is closed. -
Page 30: Entering Supervisor Mode
All manuals and user guides at all-guides.com Getting Started Entering Supervisor Mode Entering Supervisor Mode Entering Supervisor Mode depends on whether you are accessing the top cabinet or the security enclosure of the P77: top cabinet - manually security enclosure - automatically. When you access the top cabinet of the P77, you will have to enter Manually Supervisor Mode manually:... -
Page 31: Auto-Supervisor
All manuals and user guides at all-guides.com Getting Started Entering Supervisor Mode The P77 is fitted with an Auto-Supervisor facility. However, this Auto-Supervisor only applies when accessing the security enclosure. The P77 will automatically enter Supervisor Mode when the safe door is opened. When the safe door is closed, the P77 automatically returns to the Normal Mode. -
Page 32: Opening/Closing The Standard Security Enclosure
All manuals and user guides at all-guides.com Getting Started Opening/Closing The Standard Security Enclosure Opening/Closing The Standard Security Enclosure The standard security enclosure door will have a locking handle plus either: one lock (primary) or, two locks (primary and secondary). The make of lock (Standard, or Sargent and Greenleaf) fitted depends on the configuration of the P77. - Page 33 All manuals and user guides at all-guides.com Getting Started Opening/Closing The Standard Security Enclosure Position of Primary and Secondary Locks The following illustrations show the relative positions of primary and secondary locks. Primary Lock Locking Handle Secondary Lock Opening Sequence of the Primary and Secondary Locks If the P77 has a primary and a secondary lock fitted, the opening sequence is as follows: Unlock the secondary lock.
-
Page 34: Keylocks
Keylocks a random factory-set combination. If one key should get lost, a new pair of keys should be obtained and the keylock setting changed..Refer to NCR publication, ATM Field Service Information (SAMM) FM0547, Chapter 20, for details. Unlock A Keylock To unlock a keylock, insert the key into the lock and turn it clockwise as far as it will turn. - Page 35 All manuals and user guides at all-guides.com Getting Started Opening/Closing The Standard Security Enclosure Opening Index Changing Index Dial Factory Set Combination - Unlocking If the combination lock is set at the original factory setting of 50, unlock it as follows, dialling on the opening index: If a keylock is fitted to the combination lock, insert the key into the lock and turn it clockwise.
- Page 36 All manuals and user guides at all-guides.com Getting Started Opening/Closing The Standard Security Enclosure Customer Set Combination - Unlocking If the combination has been set at a three-number combination, for example 36-82-44, unlock it as follows: If a keylock is fitted to the combination lock, insert the key into the lock and turn it clockwise.
-
Page 37: Security Enclosures With Controlled Access Electronic Lock
All manuals and user guides at all-guides.com Getting Started Security Enclosures with Controlled Access Electronic Lock Security Enclosures with Controlled Access Electronic Lock This section describes how to operate the Mas-Hamilton lock to gain access to the security enclosure of the P77. Note: Before the Mas-Hamilton lock can be operated, it must be activated. - Page 38 Take note of the 6-digit access code (three pairs of two), allocated by the KMC. Unlock and open the exterior of the 5877. Spin the opening/closing knob of the lock counter clockwise, this charges the lock, until EC is displayed on the LCD.
- Page 39 All manuals and user guides at all-guides.com Getting Started Security Enclosures with Controlled Access Electronic Lock Hold the PI key against the key reader to charge the PI key: Keypad Key Reader Knob (Opening/Closing) 10 If the correct 6-digit code has been entered and a valid PI key has been pressed against the key reader, OPr will be displayed on the LCD.
-
Page 40: Closing The Mas-Hamilton Lock
Note: Take a note of the close code as it is required by the KMC (Step 6). Close the exterior of the 5877 and remove the key. Phone the KMC. Note: Ensure that the lock/doors on the 5877 are locked/closed before contacting the KMC. -
Page 41: Activating The Mas-Hamilton Lock
All manuals and user guides at all-guides.com Getting Started Activating The Mas-Hamilton Lock Activating The Mas-Hamilton Lock Activating the Mas-Hamilton Lock requires a coordinated effort between a Dispatcher at the Key Management Centre (KMC) and First Line Maintenance (FLM) or Route person (the term FLM will be used throughout the following instructions). - Page 42 All manuals and user guides at all-guides.com Getting Started Activating The Mas-Hamilton Lock The roles of the Dispatcher and FLM personnel are as follows: Dispatcher - activates: the Mas-Hamilton lock in the program and the Supervisor Audit (SA) key. FLM person physically goes to the Mas-Hamilton lock on the P77 to complete the activation where he/she will need the following: the initialized SA key...
- Page 43 All manuals and user guides at all-guides.com Getting Started Activating The Mas-Hamilton Lock Enter the factory combination 50 25 50. After the factory combination has been correctly entered, the ISA symbol will be displayed. Hold the SA key against the Mas- Hamilton lock’s key reader until POC is displayed.
-
Page 44: Mas-Hamilton Documentation
All manuals and user guides at all-guides.com Getting Started Activating The Mas-Hamilton Lock Further details of how to set up and manage the Mas-Hamilton lock Mas-Hamilton operations are detailed in the following Mas-Hamilton Group Documentation publications: CENCON System 2000 Access Control System Getting Started Guide Supervisor Guide Special Supervisor Guide... -
Page 45: Front Operator Interface
Function Display Keys (FDKs) and the cardholder keyboard to display any error messages or State Of Health (SOH) messages, and to access the various Supervisor Mode programs described in the NCR publication, Self Service Terminal Supervisor Functions Manual (B006-0000-4718). P77 ATM - Operator Manual... -
Page 46: State Of Health Messages
All manuals and user guides at all-guides.com Getting Started Front Operator Interface The switches and indicator on the front operator panel are: Switch /Indicator Description Normal /Supervisor Used to enter the Supervisor Mode and return to Switch Normal Mode Comms Indicator Flashes to indicate that the P77 is communicating with a host system. -
Page 47: Hardware Reset
All manuals and user guides at all-guides.com Getting Started Hardware Reset Hardware Reset A Reset switch is provided on the operator panel. When the Reset switch is pressed, the P77 executes its diagnostic procedures, reloads the system software and initialises the user application program. -
Page 48: Inserting/Removing Diskettes
All manuals and user guides at all-guides.com Getting Started Inserting/Removing Diskettes Inserting/Removing Diskettes To insert or remove a diskettes from the disk drive proceed as follows. Open the top cabinet. If necessary, press in the button shown below to eject the current diskette from the disk drive. - Page 49 All manuals and user guides at all-guides.com Getting Started Inserting/Removing Diskettes Insert the new diskette into the disk drive as shown. Standard Enclosure Close and lock the top cabinet. P77 ATM - Operator Manual 2-27...
-
Page 50: Inserting/Removing Compact Disks
All manuals and user guides at all-guides.com Getting Started Inserting/Removing Compact Disks Inserting/Removing Compact Disks To insert or remove a Compact Disk (CD) from the disk drive proceed as follows. Open the top cabinet. Press the button shown below to open the disk tray and, if necessary, remove the current CD. - Page 51 All manuals and user guides at all-guides.com Getting Started Inserting/Removing Compact Disks Either, re-press the button, or lightly push the end of the tray inwards until it retracts automatically. Close and lock the top cabinet. P77 ATM - Operator Manual 2-29...
- Page 52 All manuals and user guides at all-guides.com Getting Started Inserting/Removing Compact Disks 2-30 P77 ATM - Operator Manual...
- Page 53 All manuals and user guides at all-guides.com Table of Contents Error Reporting Chapter 3 Error Reporting Error Reporting - Using State Of Health How Errors In The PC Module Are Reported Error Reporting - Using OES Codes The OES Codes OES Codes - Structure OES Codes OES Codes - Qualifier Codes...
-
Page 54: Error Reporting
All manuals and user guides at all-guides.com Table of Contents Error Reporting P77 ATM - Operator Manual... -
Page 55: Error Reporting - Using State Of Health
The asterisks (*) indicate the skill level required to fix whatever problem is generating the current SOH message, and also indicate which VERIFY SOH option (see NCR publication, Self Service Terminal Supervisor Functions Manual, B006-0000-4718) should be selected to clear the SOH message. - Page 56 All manuals and user guides at all-guides.com Error Reporting Error Reporting - Using State Of Health Some SOH messages require to be acted upon immediately, others indicate you should be prepared to carry out a replenishment/ replacement procedure in the near future. If required, use the relevant VERIFY SOH option as described in the Supervisor Manual to clear the SOH message.
-
Page 57: How Errors In The Pc Module Are Reported
All manuals and user guides at all-guides.com Error Reporting How Errors In The PC Module Are Reported How Errors In The PC Module Are Reported The SOH reporting system does not report on the operator panel if a fault has occurred on one of the boards in the PC module. The boards in the PC module are tested during power-up and at reset. - Page 58 All manuals and user guides at all-guides.com Error Reporting How Errors In The PC Module Are Reported The location of the LED, for the Pele board, is shown in the following illustrations. The LED for the Phantom board is located on the SSPA board. P77 ATM - Operator Manual...
-
Page 59: Error Reporting - Using Oes Codes
All manuals and user guides at all-guides.com Error Reporting Error Reporting - Using OES Codes Error Reporting - Using OES Codes P77s which do not use the State of Health (SOH) reporting system run applications which have been written to the migrated Application Device Interface (ADI). - Page 60 All manuals and user guides at all-guides.com Error Reporting Error Reporting - Using OES Codes OES Codes The OES codes are shown in the following tables: Code Module Receipt Printer Journal Printer Currency Dispenser Currency Cassette Type 1 Currency Cassette Type 2 Currency Cassette Type 3 Currency Cassette Type 4 Magnetic card reader/writer...
-
Page 61: Currency Dispenser
All manuals and user guides at all-guides.com Table of Contents Currency Dispenser Chapter 4 Currency Dispenser Replenishing Currency Cassettes Emptying The Currency Purge/Reject Bin Clearing Jams - Bunch Dispenser P77 ATM - Operator Manual... - Page 62 All manuals and user guides at all-guides.com Table of Contents Currency Dispenser P77 ATM - Operator Manual...
-
Page 63: Replenishing Currency Cassettes
All manuals and user guides at all-guides.com Currency Dispenser Replenishing Currency Cassettes Replenishing Currency Cassettes To replenish the currency cassettes in your P77 proceed as follows: Open the security enclosure. Lift the catch on the right-hand side of the currency cassette you wish to replenish and pull the cassette out of the P77. - Page 64 Replenishing Currency Cassettes If the cassette is to be sent to a secure area for refilling, do so in accordance with your institute's rules. Refer to NCR publication H-8015-STD1-01/02-08 Currency Cassette Owner's Manual, D1- 1297-A for details of how to open and replenish the currency cassette.
-
Page 65: Emptying The Currency Purge/Reject Bin
All manuals and user guides at all-guides.com Currency Dispenser Emptying The Currency Purge/Reject Bin Emptying The Currency Purge/Reject Bin To empty the standard currency purge/reject bin in your P77, proceed as follows: Open the security enclosure. P77 ATM - Operator Manual... - Page 66 All manuals and user guides at all-guides.com Currency Dispenser Emptying The Currency Purge/Reject Bin Lift the catch on the left-hand side of the bin and pull the bin out of your P77. Remove the currency from the bin. Slide the empty bin into your P77 until it locks in place. Close and lock the security enclosure.
-
Page 67: Clearing Jams - Bunch Dispenser
All manuals and user guides at all-guides.com Currency Dispenser Clearing Jams - Bunch Dispenser Clearing Jams - Bunch Dispenser The indication of a currency dispenser jam will be a State Of Health (SOH) message. To clear a currency jam proceed as follows: Open the security enclosure. - Page 68 All manuals and user guides at all-guides.com Currency Dispenser Clearing Jams - Bunch Dispenser The procedures for clearing a jam depend on the cause and location of the jam. The SOH message will indicate where the jam is. If SOH indicates a bill jam at the pick sensor/ module, or a gulp feed failure, go to Step 4.
- Page 69 All manuals and user guides at all-guides.com Currency Dispenser Clearing Jams - Bunch Dispenser Bill jam at the pick sensor/module or a gulp feed failure - Lift the green catch on the right-hand side of the currency cassette indicated in the SOH message (cassette position 1 is the top cassette) and pull the cassette out of the P77.
- Page 70 All manuals and user guides at all-guides.com Currency Dispenser Clearing Jams - Bunch Dispenser Bill jam in the main transport - Turn the pulley on the side of the dispenser counter-clockwise until the bills enter the stacking area. P77 ATM - Operator Manual...
- Page 71 All manuals and user guides at all-guides.com Currency Dispenser Clearing Jams - Bunch Dispenser Insert your hand through the hole in the side of the dispenser as shown, and remove the bills. Proceed to Step15. P77 ATM - Operator Manual...
- Page 72 All manuals and user guides at all-guides.com Currency Dispenser Clearing Jams - Bunch Dispenser Bill jam at sensor 2 - Turn the large gear wheel on the side of the dispenser until the clamp arm, indicated below, is in its up position.
- Page 73 All manuals and user guides at all-guides.com Currency Dispenser Clearing Jams - Bunch Dispenser 10 Insert your hand through the hole in the side of the dispenser as shown, and remove the bills. Proceed to Step15. P77 ATM - Operator Manual 4-11...
- Page 74 All manuals and user guides at all-guides.com Currency Dispenser Clearing Jams - Bunch Dispenser 11 Bill jam at sensor 1 - Lift the catch on the left-hand side of the purge bin and pull the purge bin out of the dispenser. 4-12 P77 ATM - Operator Manual...
- Page 75 All manuals and user guides at all-guides.com Currency Dispenser Clearing Jams - Bunch Dispenser 12 Reach inside the hole vacated by the purge bin and remove any jammed bills. If you cannot reach the bills, turn the drums indicated below until the bills are in an accessible position and then remove them.
- Page 76 All manuals and user guides at all-guides.com Currency Dispenser Clearing Jams - Bunch Dispenser 14 Bill jam at sensor 4, 5 or 6 - If required, turn the drums in the top of the transport until the bills are in an accessible position. Reach into the transport and remove the bills.
-
Page 77: Receipt Printer
All manuals and user guides at all-guides.com Table of Contents Receipt Printer Chapter 5 Receipt Printer Replenishing Paper Clearing Jams P77 ATM - Operator Manual... - Page 78 All manuals and user guides at all-guides.com Table of Contents Receipt Printer P77 ATM - Operator Manual...
-
Page 79: Replenishing Paper
Receipt Printer Replenishing Paper Replenishing Paper The paper used to replenish your printer must meet the specification given in NCR publication Consumable Items For Self Service, (B006-4992-0000). To replace the printer paper proceed as follows: Open the top cabinet. Press the Normal/Supervisor switch, on the operator panel, to the Supervisor position. - Page 80 All manuals and user guides at all-guides.com Receipt Printer Replenishing Paper Open the print mechanism cover using the green locking lever - the cover will spring open. Lift out the paper roll core, spindle and any remaining paper. Pull out any paper from the paper entry slot. Discard the paper roll core and any remaining paper, but retain the spindle.
- Page 81 All manuals and user guides at all-guides.com Receipt Printer Replenishing Paper Close the print mechanism cover - push it down until it clicks shut. Remove sufficient paper from the new supply roll so that no traces of glue or tape remain on the roll. Tear off the end of the supply roll to make a reasonably straight edge without creases.
- Page 82 All manuals and user guides at all-guides.com Receipt Printer Replenishing Paper Manually guide the paper into the printer entry slot until it stops - approximately 75 mm (3 in.). P77 ATM - Operator Manual...
- Page 83 All manuals and user guides at all-guides.com Receipt Printer Replenishing Paper Press the paper feed button and continue to feed in the paper manually until it is gripped by the print mechanism. The printer will automatically feed the paper through the printer, print a test graphic and feed the receipt out of the transport.
-
Page 84: Clearing Jams
All manuals and user guides at all-guides.com Receipt Printer Clearing Jams Clearing Jams The indication of a receipt printer jam will be a State Of Health message. To clear a jam within the receipt printer, proceed as follows: Open the top cabinet. Press the Normal/Supervisor switch, on the operator panel, to the Supervisor position. - Page 85 All manuals and user guides at all-guides.com Receipt Printer Clearing Jams Remove any jammed paper from the exit slot/end of the transport. Lift the transport, to align it with the exit slot, and slide the printer forwards until the plunger engages. Check that the transport is engaged correctly with the exit slot.
- Page 86 All manuals and user guides at all-guides.com Receipt Printer Clearing Jams Paper jammed in the printer transport - remove it carefully using your fingers. P77 ATM - Operator Manual...
- Page 87 All manuals and user guides at all-guides.com Receipt Printer Clearing Jams Paper jammed under the printer cover - open the print mechanism cover using the green locking lever - the cover will spring open. P77 ATM - Operator Manual...
- Page 88 All manuals and user guides at all-guides.com Receipt Printer Clearing Jams 10 Remove any torn or crumpled paper from under the cover. 11 Make sure that the receipt roll can turn freely by spinning the paper roll away from the front of the printer. If the roll does not turn freely, remove it from the printer and check that there are no foreign objects preventing the paper roll from rotating.
- Page 89 All manuals and user guides at all-guides.com Receipt Printer Clearing Jams 13 Close the print mechanism cover - push it down until it clicks. 14 If necessary, tear off the end of paper roll to make a reasonably straight edge. P77 ATM - Operator Manual 5-11...
- Page 90 All manuals and user guides at all-guides.com Receipt Printer Clearing Jams 15 Manually guide the paper roll into the printer entry slot until it stops - approximately 75 mm (3 in.). 5-12 P77 ATM - Operator Manual...
- Page 91 All manuals and user guides at all-guides.com Receipt Printer Clearing Jams 16 Press the paper feed button and continue to feed in the paper manually until it is gripped by the print mechanism. The printer will automatically feed the paper through the printer, print a test graphic and feed the receipt out of the transport.
- Page 92 All manuals and user guides at all-guides.com Receipt Printer Clearing Jams 5-14 P77 ATM - Operator Manual...
- Page 93 All manuals and user guides at all-guides.com Table of Contents Journal Printer Chapter 6 Journal Printer Replenishing Paper - Graphics Printer Clearing Jams - Graphics Printer 6-13 P77 ATM - Operator Manual...
- Page 94 All manuals and user guides at all-guides.com Table of Contents Journal Printer P77 ATM - Operator Manual...
-
Page 95: Journal Printer
The paper used to replenish your printer must meet the specification given in NCR publication Consumable Items for Self Service, B006-0000-4992. If your ATM is configured with Electronic Journal, refer to the NCR publication NDC+ Supervisor’s Reference Manual, B006-0000-2487. To replace the journal paper roll proceed as follows: Open the top cabinet. - Page 96 All manuals and user guides at all-guides.com Journal Printer Replenishing Paper - Graphics Printer If there is any paper left on the supply roll, press the paper feed button to wind on a few turns of blank paper to protect the printed journal roll.
- Page 97 All manuals and user guides at all-guides.com Journal Printer Replenishing Paper - Graphics Printer Remove the printed journal roll by pushing it up from underneath. If necessary, tear off the paper against the serrated cutter. P77 ATM - Operator Manual...
- Page 98 All manuals and user guides at all-guides.com Journal Printer Replenishing Paper - Graphics Printer Remove the take-up spindle from the paper roll. P77 ATM - Operator Manual...
- Page 99 All manuals and user guides at all-guides.com Journal Printer Replenishing Paper - Graphics Printer Lift one of the green locking levers to open the print mechanism. P77 ATM - Operator Manual...
- Page 100 All manuals and user guides at all-guides.com Journal Printer Replenishing Paper - Graphics Printer Remove the paper roll core and any remaining paper from the printer. P77 ATM - Operator Manual...
- Page 101 All manuals and user guides at all-guides.com Journal Printer Replenishing Paper - Graphics Printer Remove sufficient paper from the new journal roll so that there are no traces of glue or tape. Place the new roll in the journal printer as shown. Tear the end of the paper to leave a reasonably clean and straight edge without creases.
- Page 102 All manuals and user guides at all-guides.com Journal Printer Replenishing Paper - Graphics Printer 10 Lifting the paper entry cover with one hand, feed the paper through until the end is visible. Release the paper entry cover. 11 Pull about 300 mm (12in.) of paper through the print mechanism.
- Page 103 All manuals and user guides at all-guides.com Journal Printer Replenishing Paper - Graphics Printer 12 Hold the take-up spindle so that the black end is at the same side of the printer as the black roll guide. Insert the folded edge of the paper into the slot on the take-up spindle and wind the paper around the core two or three times in the direction shown.
- Page 104 All manuals and user guides at all-guides.com Journal Printer Replenishing Paper - Graphics Printer 13 Making sure that the black end of the spindle is against the black roll guide, push the take-up spindle down between the roll guides until it clicks into place. (Starting with the spindle at an angle will make it easier to fit between the roll guides.) The paper should wind over the top of the spindle.
- Page 105 All manuals and user guides at all-guides.com Journal Printer Replenishing Paper - Graphics Printer 14 Close the print mechanism, making sure that it clicks shut. A test graphic will be printed automatically: A “smiley” graphic indicates correct operation. A picture of the printer showing a paper roll being removed indicates that the empty paper core was left in the printer and is still under the new paper roll.
- Page 106 All manuals and user guides at all-guides.com Journal Printer Replenishing Paper - Graphics Printer 15 Press the paper feed button to wind on the paper until all slack is taken up and the test graphic has disappeared onto the take- up roll.
-
Page 107: Clearing Jams - Graphics Printer
All manuals and user guides at all-guides.com Journal Printer Clearing Jams - Graphics Printer Clearing Jams - Graphics Printer The indication of a journal printer jam will be a State Of Health message or overprinting. To clear a paper jam within the journal printer, proceed as follows: Open the top cabinet. - Page 108 All manuals and user guides at all-guides.com Journal Printer Clearing Jams - Graphics Printer Lift one of the green locking levers to open the print mechanism. Remove any torn or crumpled paper from within the print mechanism. If anything is printed on this paper, keep it with the printed take-up roll.
- Page 109 All manuals and user guides at all-guides.com Journal Printer Clearing Jams - Graphics Printer Check that the printed take-up roll is winding on evenly and that it is not being crumpled against one of the roll guides. If you cannot move the paper away from the guide, you should replace the journal roll as explained in the previous section.
- Page 110 All manuals and user guides at all-guides.com Journal Printer Clearing Jams - Graphics Printer 6-16 P77 ATM - Operator Manual...
-
Page 111: Maintenance
All manuals and user guides at all-guides.com Table of Contents Maintenance Chapter 7 Maintenance What Is Required To Maintain The P77? Daily Tasks Weekly Tasks Emptying the Dip Reader Debris Bin Replenishment Cleaning Kit Looking After The P77 Weekly Maintenance Procedures Cleaning the Facia and Exterior Panels Cleaning Magnetic Heads on Dip Card Readers Printer Media Storage... - Page 112 All manuals and user guides at all-guides.com Table of Contents Maintenance P77 ATM - Operator Manual...
-
Page 113: What Is Required To Maintain The P77
All manuals and user guides at all-guides.com Maintenance What Is Required To Maintain The P77? What Is Required To Maintain The P77? The P77 needs very little attention after installation. The following daily tasks are required: Daily Tasks Check that there are sufficient supplies in the P77. The following weekly tasks are required: Weekly Tasks Clean the facia and exterior panels... -
Page 114: Cleaning Kit
Cleaning Kit The cleaning kit (Ref No.009-0004633) contains all the recommended materials for maintenance and cleaning of your ATM. The kit is obtainable from your local NCR Field Engineering organisation and contains the materials shown in the following list: Item... -
Page 115: Looking After The P77
All manuals and user guides at all-guides.com Maintenance Looking After The P77 Looking After The P77 The weekly maintenance procedures are: Weekly Clean the facia and exterior panels Maintenance Clean the magnetic heads on the dip card reader. Procedures Clean the surfaces of the facia and exterior panels, using either the Cleaning the Facia general surface cleaner (refer "Cleaning Kit") or a dilute detergent and Exterior Panels... -
Page 116: Cleaning Magnetic Heads On Dip Card Readers
Paint stripper of any kind. Keyboards vandalised by paint should not be cleaned. The keyboard should be replaced. To clean the heads you will require a cleaning card, NCR part Cleaning Magnetic number 998-0052929 or equivalent. Proceed as follows: Heads on Dip Card Open the top cabinet. -
Page 117: Printer Media Storage
All manuals and user guides at all-guides.com Maintenance Printer Media Storage Printer Media Storage To get the best results from your printer, store spare paper supplies in a cool, dry, dust-free place. Leave the articles in their original packing material until required for use. P77 ATM - Operator Manual... - Page 118 All manuals and user guides at all-guides.com Maintenance Printer Media Storage P77 ATM - Operator Manual...
-
Page 119: Index
All manuals and user guides at all-guides.com Index Index Activating The Mas-Hamilton Lock 2-19 An Introduction To The P77 Module Location 1-3 What is the P77 1-1 Auto-Supervisor 2-9 Changing Combination 2-14 Cleaning kit 7-2 Clearing Jams Journal printer (graphics) 6-13 Receipt Printer 5-6 Closing Mas-Hamiltonr Lock 2-18... - Page 120 All manuals and user guides at all-guides.com Index Currency purge bin Emptying 4-3 Customer set combination Unlocking 2-14 Daily maintenance tasks 7-1 Digital audio Front access volume control 2-24 Dip card reader Head cleaning 7-4 Documentation Mas-Hamilton Lock 2-22 Emptying debris bin 7-1 Entering supervisor mode 2-8 Error message identification number 3-1 Error Reporting...
- Page 121 All manuals and user guides at all-guides.com Index Getting Started Activating The Mas-Hamilton Lock 2-19 Closing The Security Enclosure 2-5 Closing The Top Cabinet 2-3 Controlled Access Electronic Lock 2-15 Entering Supervisor Mode 2-8 Front operator interface 2-23 Hardware reset 2-25 Inserting/Removing Compact Disks 2-28 Diskettes 2-26...
- Page 122 All manuals and user guides at all-guides.com Index Lock Types 2-10 Locking Combination Lock 2-14 Keylock 2-12 Looking after the P77 Cleaning Facia and exterior panels 7-3 Cleaning magnetic heads Dip card readers 7-4 Daily maintenance tasks 7-1 Weekly maintenance tasks 7-3 Magnetic head cleaning Dip card readers 7-4 Mains Power Switch 2-6...
- Page 123 All manuals and user guides at all-guides.com Index Closing 2-1 Opening 2-1 With Bunch Presenter 1-2 PC module Error reporting 3-3 Power Switching On/Off 2-6 Primary and Secondary Locks Closing Sequence 2-11 Opening Sequence 2-11 Position 2-11 Primary lock types Combination lock 2-10 With keylock 2-10 Keylock 2-10...
- Page 124 All manuals and user guides at all-guides.com Index Sargent and Greenleaf 2-10 Secondary lock types 2-10 Combination lock 2-10 Keylock 2-10 Security Enclosure Closing 2-5 Opening 2-4 Security Enclosure Interlock Switch 2-7 Standard security enclosure Change The Combination 2-14 Combination locks 2-12 Customer set combination 2-14 Factory set combination 2-13 Keylocks 2-12...
- Page 125 All manuals and user guides at all-guides.com Index Unlocking A keylock 2-12 Customer set combination 2-14 Factory set combination lock 2-13 Weekly maintenance tasks 7-1, 7-3 What is required to maintain your terminal? 7-1 What is the P77 1-1 What This Manual Contains viii P77 ATM - Operator Manual Index-7...
-
Page 126: Index
All manuals and user guides at all-guides.com Index Index-8 P77 ATM - Operator Manual... - Page 127 NCR 5877 Personas ATM - Operator Manual Number: B006-6210- A000 Date: NCR welcomes your feedback on this publication. Your comments can be of great value in helping us improve our information products. You may send your comments, electronically, to the Information Solutions Department at Dundee.
- Page 128 Thank you for your evaluation of this publication. Fold the form where indicated, tape (please do not staple), affix stamp and drop in the mail. F 8763-0695 Fold Affix Postage Stamp Here NCR Financial Solutions Ltd. Information Solutions Kingsway West Dundee Scotland DD2 3XX...