Table of Contents
Advertisement
Quick Links
Advertisement
Table of Contents

Related Manuals for NEFF B17VR22N1


Summary of Contents for NEFF B17VR22N1
- Page 1 Oven [en] User manual and installation in- structions B17VR22N1...
-
Page 2: Table Of Contents
en Safety Futher information and explanations are available on- line: Table of contents 1 Safety Observe the following safety instructions. 1.1 General information INFORMATION FOR USE ¡ Read this instruction manual carefully. Safety .............. 2 ¡ Keep the instruction manual and the Preventing material damage ....... -
Page 3: Safety
Safety en 1.4 Safe use WARNING ‒ Risk of scalding! Always place accessories in the cooking com- The accessible parts of the appliance become partment the right way round. hot during operation. → "Accessories", Page 10 ▶ Never touch these hot parts. ▶ Keep children at a safe distance. WARNING ‒ Risk of fire! Hot steam may escape when you open the Combustible objects that are left in the cook-... - Page 4 en Safety 1.5 Steam WARNING ‒ Risk of electric shock! Incorrect repairs are dangerous. Follow these instructions when using a steam ▶ Repairs to the appliance should only be function. carried out by trained specialist staff. WARNING ‒ Risk of scalding! ▶ Only use genuine spare parts when repair- The water in the water tank may become very ing the appliance.
- Page 5 Preventing material damage en 1.7 Cleaning function WARNING ‒ Risk of burns! The outside of the appliance gets very hot when the cleaning function is in progress. ▶ Never touch the appliance door. ▶ Allow the appliance to cool down. ▶ Keep children at a safe distance. 2 ...
-
Page 6: Environmental Protection And Saving En- Ergy
en Environmental protection and saving energy Cleaning the water tank in the dishwasher will damage Do not clean the water tank in the dishwasher. ▶ Clean the water tank with a soft cloth and standard ▶ washing-up liquid. 3 Environmental protection and saving energy 3.1 Disposing of packaging The packaging materials are environmentally compat- ible and can be recycled. -
Page 7: Familiarising Yourself With Your Appliance
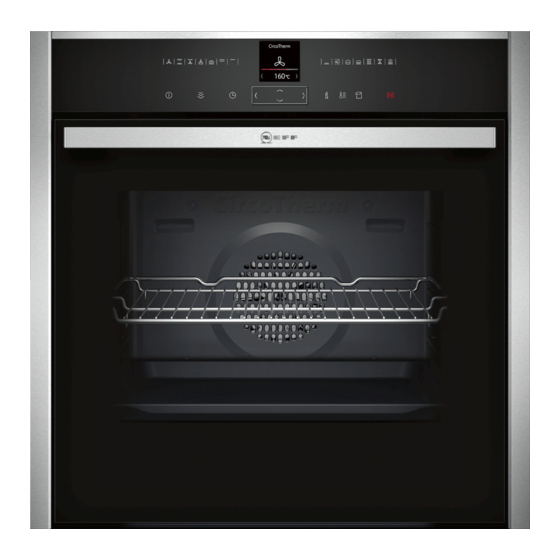
Familiarising yourself with your appliance en 4 Familiarising yourself with your appliance 4.1 Control panel You can use the control panel to configure all functions of your appliance and to obtain information about the operat- ing status. Display Buttons Control element 4.2 Buttons The buttons are touch-sensitive areas. - Page 8 en Familiarising yourself with your appliance Button Name Left Navigate to the left on the display Right Navigate to the right on the display Navigate upwards on the display Down Navigate downwards on the display 4.4 Display The display shows the current settings, options or rel- evant information.
- Page 9 Familiarising yourself with your appliance en Symbol Heating function Temperature Top/bottom heating 50 - 275 °C For gently cooking selected types of food. Heat is emitted from above and below. This type of heating is most effective between 150 and 250 °C. This type of heating is used to determine the energy consump- tion in the conventional mode.
- Page 10 en Accessories 5 Accessories Use original accessories. These have been made espe- The accessories supplied may differ depending on the cially for your appliance. appliance model. Note: Accessories may become deformed if they get hot. Deformation has no effect on function. As the ac- cessory cools down, it will regain its original shape.
- Page 11 You will find a comprehensive range of products for Wire rack your appliance in our brochures and online: on univer- www.neff-international.com sal pan Accessories vary from one appliance to another. When purchasing accessories, always quote the exact product number (E no.) of your appliance.
- Page 12 en Basic operation Use the button to select the next setting. Fill the water tank. Use the button to navigate to the next row. → "Filling the water tank", Page 14 Use the or button to select the correct year. Set the required heating function, temperature and Use the ...
- Page 13 Time-setting options en Press again to resume operation. 7.5 Changing the temperature You can also change the temperature once you have 7.8 Cancelling operation started the appliance. Use the or button to select the temperature Note: Some functions, e.g. cleaning functions, cannot row.
- Page 14 en Steam Use the or button to select the required cooking ¡ You cannot use the delayed start function with every time. heating function. Once the cooking time has been set, press to Place the food into the cooking compartment and start.
- Page 15 Steam en Lift the water tank and remove it from the water tank 9.3 Steam heating functions recess . Your appliance has several steam heating functions: ¡ Dough proving ¡ Reheat 9.4 Steam-assisted cooking When you cook with steam assistance, the appliance introduces steam into the cooking compartment at vari- ous intervals.
- Page 16 en Steam Drying the cooking compartment 9.5 After every steam operation To dry the cooking compartment, you can either use The remaining water is pumped back into the water the "Dry appliance" function or you can dry the cooking tank after every operation with steam. Then empty and compartment manually.
- Page 17 Steam programs en Remove limescale marks with a cloth soaked in vin- Leave the appliance door open for 1-2 minutes so egar, then wipe with clean water and dry with a soft that the cooking compartment dries completely. cloth. 10 Steam programs The steam programs help you to use your appliance to Some steam programs need to know the weight of cook various dishes by selecting the optimal settings...
- Page 18 en Childproof lock 11 Childproof lock You can secure your appliance to prevent children Press to switch the appliance on and then start it from accidentally switching it on or changing the set- tings. 11.4 Deactivating the automatic childproof 11.1 Locks lock Your appliance has two different locks: Press and hold the...
-
Page 19: Sabbath Mode
Sabbath mode en 12.2 Activating the "Rapid heat-up" function 12.4 Activating the "PowerBoost" function Set Top/bottom heating and a temperature of at Place the food on a single level in the cooking com- least 100 °C. partment. Press to start. Set CircoTherm hot air ... - Page 20 en Cleaning and servicing Use the or button to select a setting. Basic setting Selection Use the button to navigate to the next row. Button tone ¡ Off (except for ) Use the ...
- Page 21 Cleaning and servicing en Appliance front Surface Suitable cleaning agents Information Stainless steel ¡ Hot soapy water To prevent corrosion, remove any limescale, grease, starch or albu- min (e.g. egg white) stains on stainless steel fronts immediately. ¡ Special stainless steel cleaning products Apply a thin layer of the stainless steel cleaning product with a soft cloth.
-
Page 22: Cleaning Functions
en Cleaning functions 15.2 Cleaning the appliance WARNING ‒ Risk of fire! Loose food remnants, fat and meat juices may catch In order to avoid damaging the appliance, you must fire. clean your appliance only as specified, and with suit- Before using the appliance, remove the worst of the able cleaning products. - Page 23 Cleaning functions en Use the button to navigate to the next row. Remove any accessories from the cooking compart- ment. a The duration of the cleaning function will appear on the display. ATTENTION! Distilled water in the cooking compartment leads to Use the ...
-
Page 24: Appliance Door
en Rails 17 Rails To thoroughly clean the rails and the cooking compart- 17.2 Attaching the rails ment, or to replace the rails, you can remove the rails. Notes ¡ The rails only fit on the right or left. 17.1 Detaching the rails ¡... - Page 25 Appliance door en Note: Ensure that the appliance door slides onto the WARNING ‒ Risk of injury! hinges without any resistance. If you feel any resist- When the hinges are not secured, they can snap ance, check whether you are sliding it in at the cor- shut with great force.
-
Page 26: Troubleshooting
en Troubleshooting Components inside the appliance door may have sharp Dry the door panes and refit them. edges. Wear protective gloves. ▶ 18.4 Fitting the door panes Open the appliance door slightly. WARNING ‒ Risk of injury! Push on the left- and right-hand side of the door The hinges on the appliance door move when the door cover from the outside ... - Page 27 Troubleshooting en 19.1 Malfunctions Fault Cause and troubleshooting The appliance is not The circuit breaker is faulty. working. Check the circuit breaker in the fuse box. ▶ There has been a power cut. Check whether the lighting in your kitchen or other appliances are working. ▶...
- Page 28 Setting values, e.g. temperature or cooking time, depend on the recipe, quantity and food. Next time, set lower or higher values. ▶ Tip: A lot of information about the food preparation and corresponding setting values can be found on our website www.neff-international.com.
-
Page 29: Disposal
Disposal en 19.2 Replacing the oven light bulb Requirements ¡ The appliance is disconnected from the power sup- If the light in the cooking compartment fails, change ply. the oven light bulb. ¡ The cooking compartment has cooled down. Note: Heat-resistant, 40-watt, 230 V halogen bulbs are ¡... - Page 30 en How it works 21.1 Product number (E-Nr.) and production number (FD) You can find the product number (E-Nr.) and the pro- duction number (FD) on the appliance's rating plate. Make a note of your appliance's details and the Cus- You will see the rating plate with these numbers if you tomer Service telephone number to find them again open the appliance door.
-
Page 31: How It Works
How it works en ¡ Add up to ½ litre of water to the universal pan, de- Grilling pending on the size and type of food that you want Grill food if you want it to be crispy. to roast. ATTENTION! You can make a sauce from the juices that are col- Acidic food may damage the grid lected. - Page 32 en How it works Food Accessories/cook- Shelf pos- Heating Temperature in Steam in- Cooking time ware ition function °C tensity in mins → Page 8 Sponge cake, 6 eggs Springform cake 150–160 50–60 tin, diameter 28 cm Shortcrust tart with moist Universal pan ...
- Page 33 How it works en Food Accessories/cook- Shelf pos- Heating Temperature in Steam in- Cooking time ware ition function °C tensity in mins → Page 8 Small chicken portions, Wire rack 200 - 220 Medium 30 - 45 250 g each Goose, unstuffed, 3 kg Wire rack ...
- Page 34 en How it works Requirement: The cooking compartment is cold. 22.7 Special cooking methods and other applications Use fresh, clean, hygienic meat without bones. Place the cookware onto the wire rack at level 2 in Information and recommended settings for special the cooking compartment. cooking methods and other applications, e.g.
- Page 35 How it works en ¡ When defrosting food, use the following shelf posi- Tips for reheating food tions: ¡ Use uncovered, heat-resistant cookware that is suit- – 1 wire rack: Shelf position 2 able for cooking with steam. – 2 wire racks: Shelf positions 3 + 1 ¡...
-
Page 36: 23.1 General Installation Instructions
en Installation instructions Recommended settings for baking Food Accessories/cook- Shelf pos- Heating Temperature in Steam intens- Cooking ware ition function °C time in → Page 8 mins Viennese whirls Baking tray 140 - 150 25 - 40 Viennese whirls Baking tray ... - Page 37 Installation instructions en ¡ Do not use the door handle for the trans- WARNING ‒ Danger: Magnetism! port or installation. Permanent magnets are used in the control ¡ Check the appliance for damage after un- panel or in the controls. They may affect elec- packing it.
- Page 38 en Installation instructions ¡ To ventilate the appliance, the intermediate floor 23.3 Installation below a worktop must have a ventilation cut-out. Observe the installation dimensions and the installation ¡ The worktop must be secured to the fitted unit. instructions when installing below a worktop. ¡...
- Page 39 Installation instructions en ¡ Ensure that air exchange is guaranteed in accord- 23.5 Installation in a tall unit ance with the diagram. Observe the installation dimensions and the installation instructions when installing in a tall unit. ¡ Only fit appliances up to a height that allows ac- cessories to be easily removed.
- Page 40 en Installation instructions ¡ Contact protection must be guaranteed by the in- Open the appliance door and unscrew the left and stallation. right-hand panels. Electrically connect the appliance with the protective contact plug Note: The appliance must only be connected to a pro- tective contact socket that has been correctly installed.
- Page 41 Installation instructions en Refit the panels and screw them in place, first at the top and then at the bottom. If required, the gap between the appliance door and the side panels can be adjusted using the screws at the top left and right. Note: The gap between the worktop and the appliance must not be closed by additional battens.
- Page 44 Valid within Great Britain: Imported to Great Britain by BSH Home Appliances Ltd. Grand Union House Old Wolverton Road Wolverton, Milton Keynes MK12 5PT United Kingdom *9001749784* 9001749784 BSH Hausgeräte GmbH Carl-Wery-Straße 34 020913 81739 München, GERMANY...