
Related Manuals for Intermec ColorCoder 901


Summary of Contents for Intermec ColorCoder 901
- Page 1 Cutter Installation Instructions P/N 1-960405-02 Edition 3 September 1998 ColorCoder 901 Color Label Printer...
- Page 2 Edition 3, September 1998 Part No. 1-960405-02 The Intermec ColorCoder 901 Cutter can easily be fitted on any ColorCoder 901 printer and is used to automatically cut off the paper after printing. This optional device is an alternative to using the standard manual cutter when producing large volumes of tags.
-
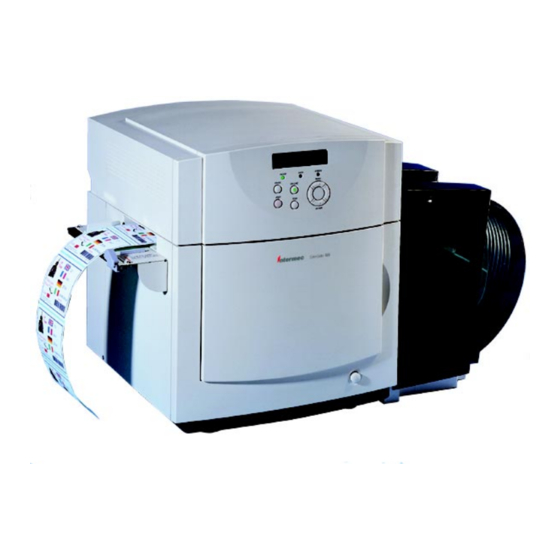
Page 3: Main Parts
Intermec ColorCoder 901 – Installation Instructions CUTTER, cont'd. Main Parts Interface Cable Handle (for processing paper jams) In this illustration, the top of the cutter unit has been opened to provide better view. AC Inlet LED Lamp Cover Delivery Slot... -
Page 4: Installation
In this case, do not mount the grounding plate. This will not impair the function of the cutter. Install the cutter on the Intermec ColorCoder 901 printer in accordance with the following procedure. Caution! Before starting the installation, check that the power to both the printer and the cutter is turned off. - Page 5 Intermec ColorCoder 901 – Installation Instructions CUTTER, cont'd. Installation, cont'd. /. Printers not fitted with any bracket (see step 3) do not have any holes for the three screws at the bottom of the mounting plate. In this case, omit these screws.
- Page 6 Intermec ColorCoder 901 – Installation Instructions CUTTER, cont'd. Installation, cont'd. Affix the cutter by means of the two M4 x 8 screws included in the delivery – one through each tab. (The adjusting screws are factory adjusted. Do not change the adjustment unless in case of oblique cutting).
-
Page 7: Maintenance
• Setting the cut interval, i.e. number of labels printed between each cutting operation. Note that these settings will be deleted, unless they are saved using a “NVRAM SAVE” operation, see the ColorCoder 901 User's Manual. After installing the cutter on the printer, turn on the power to the cutter. -
Page 8: Date & Time Set
Intermec ColorCoder 901 – Installation Instructions CUTTER, cont'd. Setting the Output Option, cont'd. Press the <Enter> key. DATE & TIME SET. Press the <Cursor right> key twice. OUTPUT OPT. Press the <Enter> key. *NOT USE Press the <Cursor right> key. -
Page 9: Paper Type
Intermec ColorCoder 901 – Installation Instructions CUTTER, cont'd. Setting the Cut Interval /. Intervals: 00000 will not be accepted. 00001 cuts after each copy. 00002 cuts after every second copy. etc. If the interval value exceeds the number of copies in the batch, the cutter will cut off the paper after the last printed copy. -
Page 10: Margin Set
Intermec ColorCoder 901 – Installation Instructions CUTTER, cont'd. Setting the Cut Interval, cont'd. Set all digits. When the cursor is positioned at the extreme right digit of the value, press the <Cursor right> key and the cursor disappears. CUT INT. - Page 11 Intermec ColorCoder 901 – Installation Instructions CUTTER, cont'd. Cut Angle Adjustment Check the printout samples. Compare with the sketches below and decide whether any adjustment is required. Print Direction Print Direction A. Cutting is in parallel with the label edges and centred between labels.
- Page 12 Note that this setting will be deleted, unless it is saved using a “NVRAM SAVE” operation, see the ColorCoder 901 User's Manual. When “READY” is shown on the display panel, press the <On line> key.
- Page 13 Intermec ColorCoder 901 – Installation Instructions CUTTER, cont'd. Cutting Position Adjustment, cont'd. Press the <Right cursor> key. A cursor appears in front of the first digit. CUTTER POS.= 0.0 The position in front of the value is used to select a positive or negative value, where positive value is indicated by a blank space and a negative value by a minus (-) sign.
-
Page 14: Cutting Angle Adjustment
Intermec ColorCoder 901 – Installation Instructions CUTTER, cont'd. Cutting Angle Adjustment If the paper is cut off in an oblique angle relative to the front and rear edges of the labels, the mounting angle between printer and cutter needs to be adjusted as described below. - Page 15 1. Remove the printer's roll cover. 2. Open the front cover of the printer and lift the PHS unit by pressing the green grip under its front edge. 3. Open the cover of the cutter unit by tilting it up and to the left.
- Page 16 5. Close the cutter cover, the PHS unit, and the front cover of the printer, in that order. 6. Cut off any wrinkled or creased parts of the paper and load the paper again (see ColorCoder 901 User's Manual). Continued!
- Page 17 Intermec ColorCoder 901 – Installation Instructions CUTTER, cont'd. Processing Paper Jams, cont'd. 7. Attach the roll cover. 8. The message "RECOVER PAGES=XX" appears on the display panel. Use the <Cursor left> and <Cursor right> keys to enter the number of sheets lost because of the paper jam, then press the <Enter>...
- Page 18 Specifications Information in this manual is subject to change without prior notice and does not represent a commitment on the part of Intermec Printer AB. © Copyright Intermec PTC AB, 1998. All rights reserved. Published in Sweden. ColorCoder is a trademark of Intermec Technologies Corp.
- Page 19 Intermec ColorCoder 901 – Installation Instructions NOTES...