
Related Manuals for Clarion CX201


Summary of Contents for Clarion CX201
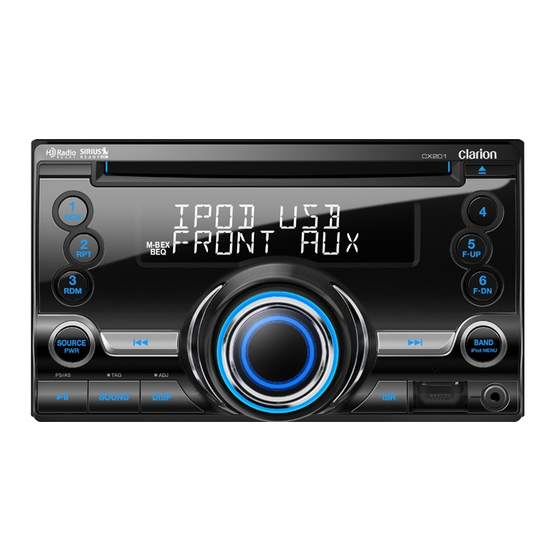
- Page 1 Owner’s manual Mode d’emploi Manual de instrucciones CX201 2-DIN CD/USB/MP3/WMA RECEIVER LECTEUR CD/USB/MP3/WMA 2-DIN RECEPTOR 2-DIN CD/USB/MP3/WMA...
- Page 2 Once you’re registered, we can keep you informed of important product information. Register at www.clarion.com - it’s easy to keep your Clarion product up to date. INFORMATIONS DE L’ENREGISTREMENT DE PRODUITS CLARION Cher client: Nous vous remercions d’avoir acheté...
-
Page 3: Table Of Contents
Thank you for purchasing this Clarion product. ∗ Please read this owner’s manual in its entirety before operating this equipment. ∗ Check the contents of the enclosed warranty card and keep it carefully with this manual. Contents 1. FEATURES ... 3 2. -
Page 4: Precautions
Bottom View of Source Unit CX201 CAUTION USE OF CONTROLS, ADJUSTMENTS, OR PERFORMANCE OF PROCEDURES OTHER THAN THOSE SPECIFIED HEREIN, MAY RESULT IN HAZARDOUS RADIATION EXPOSURE. -
Page 5: Handling Compact Discs
Digital Corporation. This HD Radio Ready receiver is ready to receive HD Radio broadcasts when connected to the THD300 or THD301, sold separately. • SIRIUS, the SIRIUS Dog logo and related marks are trademarks of SIRIUS XM Radio, Inc. CX201... -
Page 6: Controls
• Commence fast-forward or fast-reverse mode. • Press to seek up/down. ] button • Perform preset scan while in the radio mode. • Play or pause a track while in CD/MP3/WMA/ USB/iPod mode. CX201 [CD SLOT] CX201 [ROTARY ] [ISR ] [SOUND] button •... -
Page 7: Remote Control
• When in MP3/WMA and USB modes, press and hold the button (1 sec.) to perform folder repeat play. [RDM] button • Press to perform random play. • When in MP3/WMA and USB modes, press and hold the button (1 sec.) to perform folder random play. CX201... -
Page 8: Inserting The Battery
4 Replace the cover and slide in until it clicks into place. Insertion guide CX201 [RPT] button • Press to perform repeat play. [RDM] button • Press to perform random play. -
Page 9: Operations
● Setting the BEAT EQ This unit is provided with 4 types of sound tone effects stored in memory. Select the one you prefer. ∗ The factory default setting is “OFF”. 2-1. Select “BEAT EQ” “ENT” , you CX201... -
Page 10: Adjusting The Balance
∗ The factory default setting is “BASS 3-3. Turn the [ROTARY] knob to select the setting. BASS<G>:The factory default setting is “0”. (Adjustment range: +7 to CX201 BASS<F>: The factory default setting is “50”. (Adjustment range: 50/100/200) BASS<Q>:The factory default setting is “1”. (Adjustment range: 0.7/1/1.4/2) MID<G>... -
Page 11: Adjusting The High Pass Filter
∗ The factory default setting is “THROUGH” (through). Note: • During SOUND adjustment mode, if no operation is performed for more than 10 seconds, this mode can be cancelled and return to previous mode. “THROUGH ”. “0 ”. NORMAL ”. CX201... -
Page 12: Radio Operations
2. Press and hold one of the [DIRECT] buttons (2 sec.) to store the current station into preset memory. CX201 Auto store Auto store is a function for storing up to 6 stations that are automatically tuned in sequentially. -
Page 13: Sirius Satellite Radio Operations
2. Turn the [ROTARY] knob to select the desired preset station. Preset memory 1. Press the [BAND] button to select the desired band. 2. Select the desired channel. 3. Press and hold the [DIRECT] button (2 sec.) to store the current channel into preset memory. CX201... -
Page 14: Scan Function
• If no operation is performed for more than 1 second, category seek tuning can automatically tune in a receivable broadcast channel category. CX201 Scan function There are two scan modes: the category scan mode and the preset scan mode. - Page 15 Unskip all channel function This function allows you to unskip the skipped channel. 1. Press and hold the [DISP] button. 2. Press the [x] or [v] button to select “UNSKIP ALL CH”. 3. Press and hold the [ROTARY] knob. CX201...
-
Page 16: Hd Radio Operations
DIGITAL icon will light. If the digital signal becomes unavailable, the unit will revert to Analog reception. CX201 Recalling a preset station Up to six stations on each band can be stored. This allows you to store your favorite HD Radio stations in memory for later recall. -
Page 17: Itunes Tagging
• “iTunes Tagging” function works by connecting THD300/THD301(sold separately). iPod compatibility For detailed information on the playable iPod models, see our home page: www.clarion.com. Note: • This system will not operate or may operate improperly with unsupported versions. Tagging music Tune to an HD Radio to begin tagging music. -
Page 18: Cd/Mp3/Wma Operations
Instead, “- - : - -” will appear in the play time display. ∗ When MP3/WMA files are played, a little no sound part is caused between tunes. CX201 ● Logical format (File system) 1. When writing MP3/WMA file on a CD-R disc or CD-RW disc, please select “ISO9660 level 1, 2 or JOLIET or Romeo”... -
Page 19: Pausing Play
● Track-down 1. Press the [x] button to move back to the beginning of the current track. 2. Press the [x] button twice to move back to the beginning of the previous track. mark and ] button CX201... -
Page 20: Random Play
This function allows you to play the current track repeatedly. 1. Press the [RPT] button to perform repeat play. CX201 ● Folder repeat play This function allows you to play a track currently being played in the MP3/WMA folder repeatedly. -
Page 21: Operations Common To Each Mode
● Setting the anti-theft function (CATS) “CATS” is the acronym of “Clarion Anti-Theft System”. When you set a PIN code (called as “Personal Code”), a theft is prevented by disabling the operation of the unit at the theft. Setting your Personal Code •... -
Page 22: Setting The Dimmer Control
• The [RESET] button was pressed. Note: • If you have lost your Personal Code, please contact Clarion customer service. 1. Enter your Personal Code currently set. 2. When the correct Personal Code is entered, the unit will restart from the initial startup screen. - Page 23 ∗ The factory default setting is “MID”. 1. Press and hold the [DISP] button (1 sec.). 2. Select “AUX SENS”. 3. Turn the [ROTARY] knob to select “HIGH”, “MID” or “LOW”. Note: • When AUX mode is selected, AUX IN sensitivity can be set. CX201...
-
Page 24: Accessories
• This unit does not support connections to a computer. In addition, connections made through a USB hub device are also not supported. CX201 • When a USB memory device is composed of two or more drives, only one of the drives will be detected. - Page 25 USB mode is selected, since it may result in loss or damage to data on the USB memory device. Always backup and save important data on your computer. 2. Remove the USB memory device from the USB connector. CX201...
-
Page 26: Ipod/Iphone Operations
• Some iPod models do not support this function. Consult your nearest Clarion dealer or website to confirm which models do not support this function. Other various play functions... -
Page 27: Repeat Play
[ROTARY] knob to select the desired subfolder. ∗ When the track name display is showing, pressing the [x] button will return to the currently playing folder name display. 7. Turn the [ROTARY] knob to select a track within a category. “ALBUMS” CX201... - Page 28 [ROTARY] knob. Playback will begin from the first track in the selected category, and the iPod menu mode will be canceled. CX201 ∗ Turn the [ROTARY] knob to select a track within a category. iPod menu list back...
-
Page 29: Troubleshooting
1. Turn down sound volume. Function can also be restored by turning the power off and on again. (Speaker volume is reduced automatically when the speaker protection circuit operates). 2. If the sound is muted again, consult our service department. Measure Reset button CX201... - Page 30 Can’t insert the The device has been inserted device. improperly. The connector is broken. CX201 Cause Write MP3/WMA files onto the disc properly. Use MP3/WMA files encoded properly. Use ISO9660 level 1, 2 or JOLIET or Romeo or APPLE ISO file system.
-
Page 31: Error Displays
Replace with a non-scratched, non-warped-disc. Eject the disc then reload it properly. Disconnect and reconnect the iPod. Disconnect the devices and reconnect. If the devices are still not recognized, try replacing with a different devices. Do not use the HUB devices. Measure CX201... -
Page 32: Specifications
Treble Control Action (10 kHz): +14 dB, –14 dB Line Output Level (CD 1 kHz): 2 V Note: • Specifications and design are subject to change without notice for further improvement. CX201 General Power Supply Voltage: 14.4 V DC (10.8 to 15.6 V allowable), negative... - Page 33 Clarion Co., Ltd. All Rights Reserved. Copyright © 2010: Clarion Co., Ltd. PE-3419B Printed in China / Imprimé en Chine / Impreso en China 2010/11 280-9008-00...