Table of Contents
Advertisement
Quick Links
Advertisement
Table of Contents

Related Manuals for Fisher & Paykel WOSV230N


Summary of Contents for Fisher & Paykel WOSV230N
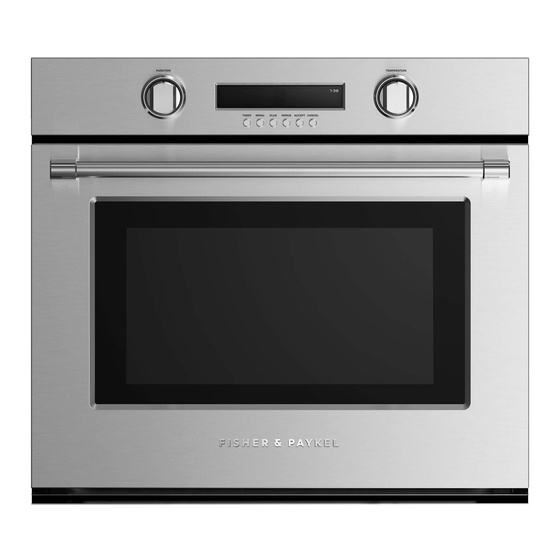
- Page 1 WALL OVEN WODV230 & WOSV230 models USER GUIDE US CA...
- Page 2 This user guide is an accompaniment to your ‘Quick start guide’ which is included with your oven. For operating instructions, see your ‘Quick start guide’. If you no longer have your ‘Quick start guide’, you can download it from our website, listed on the back cover. Refer to your ‘Quick start guide’...
-
Page 3: Table Of Contents
CONTENTS Safety and warnings Cooking guide Oven functions Cooking charts Automatic cooking Using the meat probe User preference settings Sabbath mode Care and cleaning Using the Self Clean function Troubleshooting Alert codes Warranty and service IMPORTANT! SAVE THESE INSTRUCTIONS The models shown in this user guide may not be available in all markets and are subject to change at any time. -
Page 6: Safety And Warnings
SAFETY AND WARNINGS IMPORTANT SAFETY INSTRUCTIONS Use only dry oven mitts or potholders. Moist or damp potholders on hot surfaces ● could result in burns from steam. Do not let potholders touch hot areas or heating elements. Do not use a towel or a bulky cloth for a potholder. It could catch fire. Do not heat unopened food containers. - Page 7 SAFETY AND WARNINGS IMPORTANT SAFETY INSTRUCTIONS Before starting a Self Clean cycle, remove oven shelves, side racks, and all other ● cookware/utensils, and wipe up large food spills or grease deposits. Before starting a Self Clean cycle, make sure you move any pet birds to another, ●...
-
Page 9: Cooking Guide
COOKING GUIDE BAKING For best results when baking, always pre heat your oven. The broil element may ● come on for a short time while the oven is heating up. The temperature knob halo will turn from white to orange when the preset temperature is reached. Do not open the door until at least 3/4 of the way through cooking. - Page 10 COOKING GUIDE BROILING This is a healthier alternative to frying. ● Always broil with the oven door completely shut. ● If you use glass or ceramic pans, be sure they can withstand the high temperatures ● of broiling. To avoid piercing the meat and letting juices escape, use tongs or a spatula to turn ●...
-
Page 15: Oven Functions
OVEN FUNCTIONS this is not a cooking function WARM Provides a constant low heat of less than 195°F / 90°C. ● Use to keep cooked food hot, or to warm plates and serving dishes. ● To reheat food from cold, use another oven function to heat the food piping hot and only then change to Warm, as this function alone will not bring cold food up to a high enough temperature to kill any harmful bacteria. -
Page 16: Cooking Charts
COOKING CHARTS Shelf positions are counted from the base up ● (1 is the lowest, 8 is the highest). Position shelves before you turn the oven on. For best results preheat the oven to the required temperature. ● The broil element may come on while the oven is heating up. ●... - Page 17 COOKING CHARTS The information in these charts are guidelines only. Refer to your recipe or the packaging and be prepared to adjust the cooking times and settings accordingly. RECOMMENDED SHELF TEMP (°F) TEMP (°C) TIME (MINS) FUNCTION POSITIONS Conv Bake 400–425 210–220 8–10...
- Page 18 COOKING CHARTS SAVOURY FOOD SHELVES Cornbread Single Vegetables Single Lasagne Single Single Casserole Single Pizza Single Quiche (blind bake, then add filling) Single Potatoes (whole, baked) Frittata (shallow) Single Oven Meals Single ROASTING RECOMMENDED FOOD SHELVES * FUNCTION Rare Single Roast Beef (Boneless) Medium...
- Page 19 COOKING CHARTS RECOMMENDED SHELF TEMP (°F) TEMP (°C) TIME (MINS) FUNCTION POSITIONS Conv Bake 400–425 210–215 20–25 Conv Bake 350–375 175–190 30–50 Conv Bake 350–375 175–190 35–40 Bake 300–350 150–175 1–2 hours Conv Pastry 10–15 Conv Pastry 15–30 Bake 50–60 Conv Pastry 340–360 170–180...
- Page 20 COOKING CHARTS BROILING FOOD SHELVES Beef Steak Rare Single Medium Single Hamburger Single (ground–patties) Meatballs Single (ground) Medium Single Lamb Chops Well done Single Chops (well done) Single Pork Ham steak Single Bacon Single Boneless pieces Single Chicken Bone In Pieces Single Sausages Single...
- Page 21 COOKING CHARTS RECOMMENDED SHELF TEMP (°F) TEMP (°C) TIME (MINS) FUNCTION POSITIONS Broil 8–10 Broil 10–15 Broil 12–15 Broil 12–15 Broil 15–20 Broil 20–25 Broil 15–20 Broil 15–20 Broil 4–7 Conv Broil 30–50 Conv Broil 40–50 Broil 10–15 Conv Broil 390–430 200–220 8–12...
-
Page 26: Automatic Cooking
AUTOMATIC COOKING Double oven models only: To set automatic cooking for the second oven, follow the steps above, selecting the second oven at step 2. When automatic cooking is set The oven and the lights will stay off, the halos will be unlit, but your oven is now ●... -
Page 29: Using The Meat Probe
USING THE MEAT PROBE To cancel the meat probe at any time 1 Press MENU once to enter the Automatic Cooking menu. Double ovens only: The display of the oven that is active will flash. ● Select which cavity you wish to cancel the meat probe for: 1APress PLUS or MINUS to scroll between ovens. -
Page 31: User Preference Settings
USER PREFERENCE SETTINGS SETTING DEFAULT OPTION ALTERNATIVE OPTION(S) SET TIME The current time will show in the display. See your Quick Start guide for instructions on setting the time. 12 H CLOCK 24 H Select between 24-hour or 12-hour clock display. POWER SAVE MODE** POWERSAVE POWERSAVE... -
Page 35: Care And Cleaning
CARE AND CLEANING To replace the oven door Hinge slot Hinge tongue 1 Hold the door firmly in an approximately 2 Align the hinge tongue with the hinge halfway open position. slots and push the door until you feel the latches locate into position on each side. - Page 36 CARE AND CLEANING Removing and replacing the sliding shelves and side racks 1 To remove a sliding shelf, grip it by its two front corners (making sure you are gripping the wire shelf and the sliding frame together), tilt upwards and pull it out of the oven. 2 To remove the side racks, gently push the retaining wire from underneath the lock stud, then swing the lowest edge of the side rack up and out towards the center of the oven until the rack is almost horizontal.
- Page 38 CARE AND CLEANING Manual cleaning ALWAYS NEVER Before any manual cleaning or Never use a steam cleaner. ● ● maintenance, first wait for the oven Never store flammable substances ● to cool down to a safe temperature in the oven. to touch, then turn its power supply Never use abrasive or harsh cleaners, ●...
- Page 39 CARE AND CLEANING Manual cleaning WHAT? HOW? IMPORTANT! Clean with a solution of mild Knobs Do not use stainless steel or detergent and hot water, then oven cleaner on the knobs, as wipe dry. doing so may damage their coating. Clean with a solution of Stainless steel Always read the label to make...
-
Page 40: Using The Self Clean Function
USING THE SELF CLEAN FUNCTION During the pyrolytic Self Clean cycle the extremely high temperature burns off ● and breaks down grime and grease deposits. All that is left is a small amount of grey ash that you can easily remove. There is a choice of two Self Clean cycles: ●... -
Page 43: Troubleshooting
TROUBLESHOOTING Troubleshooting chart If there is a problem, check the chart below to see if you can fix it. If the problem cannot be fixed or persists, call your Authorised Repairer or Customer Care. PROBLEM POSSIBLE CAUSES WHAT TO DO General The oven does not work No power. - Page 44 TROUBLESHOOTING PROBLEM POSSIBLE CAUSES WHAT TO DO General This is normal. For safety reasons the cooling I can feel hot air fans will continue to run even blowing out of the vents after I have when you have turned the turned the oven off function knob to ‘Off’.
- Page 45 TROUBLESHOOTING PROBLEM POSSIBLE CAUSES WHAT TO DO General The oven is in ‘Demo’ mode. Call Customer Care. The displays work, and the function and temperature knobs halos come on but the oven does not heat up The door is open during Ensure the door is shut fully.
- Page 46 TROUBLESHOOTING PROBLEM POSSIBLE CAUSES WHAT TO DO Self Clean function One oven is already turned You cannot start a Self Clean Double oven models on or set for automatic cycle when one oven already only: cooking. has a function selected. I cannot select the Turn the function knob to Self clean function...
-
Page 47: Alert Codes
ALERT CODES If there is a problem, the oven will: automatically suspend all oven functions ● beep five times ● display an alert code. ● IMPORTANT! Do not turn off the mains power supply to the oven (wall switch) if you get an alert code, unless the instructions in the chart following specifically instruct you to. - Page 48 ALERT CODES ALERT CODE POSSIBLE CAUSES WHAT TO DO The oven has overheated 1 Allow the oven to cool down. 2 Once the oven has cooled down and the door has unlocked, the alert code will disappear. You can now use the oven again. Door lock error: 1 Turn the power to the oven off the door cannot be locked...
-
Page 49: Warranty And Service
WARRANTY AND SERVICE Before you call for service or assistance ... Check the things you can do yourself. Refer to the installation instructions and your user guide and check that: 1 Your product is correctly installed. 2 You are familiar with its normal operation. If after checking these points you still need assistance or parts, please refer to the Service &... - Page 50 FISHERPAYKEL.COM © Fisher & Paykel Appliances 2018. All rights reserved. The product specifications in this booklet apply to the specific products and models described at the date of issue. Under our policy of continuous product improvement, these specifications may change at any time. You should therefore check with your Dealer to ensure this booklet correctly describes the product currently available.