Table of Contents
Advertisement
Quick Links
Advertisement
Table of Contents

Related Manuals for Fisher & Paykel CONTEMPORARY OB60SC6LEB


Summary of Contents for Fisher & Paykel CONTEMPORARY OB60SC6LEB
- Page 1 BUILT-IN OVEN CONTEMPORARY OB60SC6LEB & OB60SC7LEB USER GUIDE NZ AU...
-
Page 3: Table Of Contents
CONTENTS Safety and warnings Before you begin First use Using the kitchen timer Automatic cooking Cooking guide Cooking charts Care and cleaning Parts and accessories Troubleshooting Warranty and Service Registration To register your product visit our website: fisherpaykel.com/register... -
Page 5: Safety And Warnings
SAFETY AND WARNINGS WARNING! Electric Shock Hazard Failure to follow this advice may result in electric shock or death. • Turn the oven off at the wall before replacing the oven lamp. WARNING! Fire Hazard Failure to follow this advice may result in overheating, burning, and injury. - Page 6 SAFETY AND WARNINGS WARNING! Hot Surface Hazard Failure to follow this advice could result in burns and scalds. • Accessible parts may become hot during use. Young children should be kept away. • Surfaces of the appliance may become hot enough to cause burns.
- Page 7 SAFETY AND WARNINGS READ AND SAVE THIS GUIDE WARNING! To reduce the risk of fire, electrical shock, injury to persons or damage when using the oven, we recommend you follow the important safety guidance below. Be sure to read the user guide before using the oven. Use the oven only for its intended purpose and as detailed in this guide.
- Page 8 SAFETY AND WARNINGS Cleaning and user maintenance shall not be carried out by children without supervision. Do not store things children might want above the oven. Children could be burned or injured while climbing on your oven to retrieve items. Do not place heavy objects on the oven door.
-
Page 9: Before You Begin
BEFORE YOU BEGIN Your oven must be installed by a suitably qualified person according to the installation guide. The installer should complete the final installer checklist. Read this guide, taking special note of safety and warnings. Remove all internal and external packaging and recycle it responsibly where possible. Refit the shelves to your desired position in the oven. -
Page 10: First Use
FIRST USE Oven racks Your oven comes with the shelves positioned and secured inside. The following shows you how to remove and reposition them to your preferred position. Remove shelves from oven 1 Remove all cable ties and packaging holding shelves in place. 2 Remove all shelves, taking special care with sliding shelves. - Page 11 FIRST USE Replace shelving in your preferred positions Shelf positions We recommend placing the sliding shelves on positions 2 and 4 for everyday cooking. To replace wire shelves Guard rail Check the shelf is positioned correctly, with the guard rail at the back, then slide into place on the side racks.
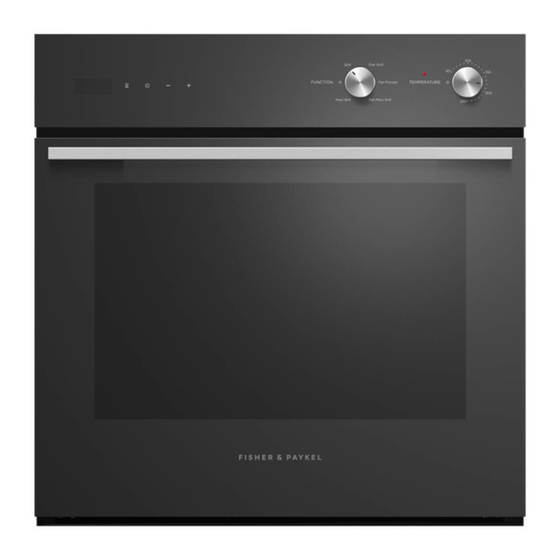
- Page 12 FIRST USE Control panel Control panel features 1 Display 7 Cooking time indicator** 2 Function dial 8 Automatic cooking stop indicator** 3 Temperature indicator* 9 Timer control 4 Temperature dial !0 Cooking time control 5 Timer indicator !1 Stop time control 6 Clock controls * Will be lit while the oven is heating up.
- Page 13 FIRST USE Setting the clock You’ll need to set the time on your oven when it is first turned on, or after a power failure. The oven will not function if the clock is not set. When the power to the oven is turned on or 00 : 00 restored after a power failure, will flash...
- Page 14 FIRST USE Conditioning the oven It is important to condition your oven before using it for cooking. This will burn off any manufacturing residues and ensure that you get the best results right from the start. Before you start: Make sure you have removed all packaging and any cable ties used to secure the shelving during transit.
-
Page 15: Using The Kitchen Timer
USING THE KITCHEN TIMER Use the kitchen timer to keep track of cooking times. You can use it at any time, even if you are not using the oven. The time counts down in minutes (hours:min) until the last five minutes of cooking, when it will countdown in seconds (min:sec). - Page 16 USING THE KITCHEN TIMER At the end of the countdown The timer will beep every seven seconds. The timer indicator will flash and the display will 00 : 00 show To stop the beeping and return to the time of day, touch any control.
-
Page 17: Automatic Cooking
AUTOMATIC COOKING You can set the oven to automatically turn on, cook for a preset time (cooking time), then automatically turn off at a preset stop time. You can also start cooking manually and set the oven to turn off automatically after the required cooking time or at a set time of day. Check the clock shows the correct time of day. - Page 18 AUTOMATIC COOKING Touch the controls to set the time you would like your food to be ready by (ie the stop time). Touch the stop time control to confirm. will stop flashing and remain on and the display will show the time of day. Select a function.
- Page 19 AUTOMATIC COOKING To check the set cooking time Touch the cooking time control. To modify the set cooking time Touch the cooking time control. The cooking time indicator will flash. You can modify the set cooking time by using controls. Touch the cooking time control again to set.
- Page 20 AUTOMATIC COOKING To check the stop time Touch the stop time control. To modify the stop time Touch the stop time control. The stop time indicator and dot will flash. You can modify the set cooking time by using controls. Touch the stop time control again to set.
- Page 21 AUTOMATIC COOKING When automatic cooking is set The oven light will stay off but your oven is now set for automatic cooking. It will automatically heat up at the required time. The display will show the time of day with the cooking time and stop time indicators are lit.
-
Page 22: Cooking Guide
COOKING GUIDE General guidelines This oven has been designed to utilise its four elements and rear fan in different combinations for enhanced performance. The wide range of functions allows you to cook all food types to perfection. Oven elements 1 upper outer element 2 upper inner element 3 rear element (concealed) 4 lower element (concealed) - Page 23 COOKING GUIDE If multi-shelf cooking (eg if roasting meat on one shelf and vegetables on another) FAN FORCED Cook larger cuts of meat for longer at a lower temperature. The meat will cook more evenly. Always roast meat fat side up. Reheating Never reheat food more than once.
- Page 24 COOKING GUIDE GRILL BAKE VENT BAKE FAN FORCED fan plus rear element Ideal for: multi-shelf cooking, eg biscuits, cookies, scones, muffins and cupcakes. Hot air is blown into the cavity, providing a consistent temperature at all levels. Always leave a gap between shelves to allow air to move FAN FORCED FAN GRILL PASTRY BAKE...
- Page 25 COOKING GUIDE FAN FORCED FAN GRILL PASTRY BAKE CLASSIC BAKE (some models only) lower element Ideal for: dishes that require delicate baking and have a pastry base, like custard tarts, pies, quiches and cheesecake. Heat comes from the lower element only. This is the traditional baking function, suitable for recipes that were developed in conventional ovens.
-
Page 26: Cooking Charts
COOKING CHARTS Shelf positions Position shelves before you turn the oven on. Shelf positions are counted from the base up, with 1 being the lowest shelf position and 6 the highest. During cooking Preheat the oven to the required temperature. The grill element will come on while the oven is heating up. - Page 27 COOKING CHARTS SHELF TEMP TIME BAKING SHELVES FUNCTION POSITION (°C) (MIN) SHORTBREAD Single Pizza Bake/Fan Bake 130-140 20-25 MUFFINS/CUPCAKES Single Fan Bake 180-190 13-17 Multi Fan Forced 2 and 4 160-170 16-21 SCONES Single Fan Bake 210-230 8-12 Multi Fan Forced 1 and 3 210-230 8-12...
- Page 28 COOKING CHARTS SHELF TEMP TIME SAVOURY SHELVES FUNCTION POSITION (°C) (MIN) PIES Chicken/Steak/Mince Single Pizza Bake/Fan Bake 190-195 30-40 Pizza Bake/Fan Bake SAUSAGE ROLLS Single 190-195 30-40 MEAT LOAF Single Bake 175-180 55-65 PIZZA Classic Single Pizza Bake 1 and 2 225-250 8-12 Thin crust...
- Page 29 COOKING CHARTS SHELF TEMP TIME ROASTING SHELVES* FUNCTION POSITION (°C) (MIN) BEEF, BONELESS (times per 450g) Single* Bake 160-170 18-32 Rare Medium Single* Bake 160-170 25-40 Well done Single* Bake 160-170 30-55 PRIME RIB ROAST (times per 450g) Rare Single* Bake 160-170 15-30...
- Page 30 COOKING CHARTS SHELF TEMP TIME ROASTING SHELVES* FUNCTION POSITION (°C) (MIN) VENISON (times per 2.5cm thickness Rare Single* Fan Grill Medium Single* Fan Grill SHELF TEMP TIME GRILLING SHELVES FUNCTION POSITION (°C) (MIN) CHICKEN Boneless pieces Single Fan Grill 175-190 30-50 BEEF Steak, rare...
- Page 31 COOKING CHARTS SHELF POSITION TEMP TIME GRILLING SHELVES FUNCTION (FULL (°C) (MIN) OVENS) VEGETABLES Sliced Single Grill 8-12 BREAD Toast (10-15mm thick) Single Grill Start at 220˚C for 10 minutes, and lower to 160˚C for further 50 minutes Brown in frying pan first * If multiple shelves are required (eg roasting vegetables at the same time), use FAN FORCED shelf positions 2 and 4.
-
Page 32: Care And Cleaning
CARE AND CLEANING Manual cleaning ALWAYS NEVER • Before any manual cleaning or maintenance, • Never use a steam cleaner. • first wait for the oven to cool down to a safe Never store flammable substances in the oven. temperature to touch, then turn its power supply •... - Page 33 CARE AND CLEANING WHAT? HOW? IMPORTANT! Oven cavity To clean light soiling off the • To prevent soiling from enamelled surfaces: becoming ‘baked on’ and • Wipe with a damp cloth and stubborn, we recommend a solution of hot water and removing any easy-to-reach mild detergent or an ammonia- spills, food or grease stains from...
- Page 34 CARE AND CLEANING Removing the side racks Remove the side racks to make cleaning the oven easier. Always turn the oven off at the wall first. Ensure the oven has cooled down completely before starting. Slide out all shelves and remove. Unscrew and remove the fixing nut at the front of the side rack.
- Page 35 CARE AND CLEANING Refitting the side racks Slide the rear prongs of the side rack back into the holes, ensuring the rack is firmly pushed up against the side wall of the oven. Fit the side rack front tab over the fixing screw.
- Page 36 CARE AND CLEANING Replacing the oven light bulbs Your oven uses G9 halogen bulbs with the specifications 220 – 240V, 50Hz and 25W. Always hold the replacement bulb in a soft cloth. Touching the bulb will reduce its life-span. The light is located in the ceiling of the oven, center front. Oven bulb replacement is not covered by your warranty.
- Page 37 CARE AND CLEANING Removing and refitting the oven door. To remove the door Take care, the oven door is heavy. Open the door fully. Locate the two small metal locking levers on both door hinges either side. Push each locking lever down fully to release the door from the hinge.
- Page 38 CARE AND CLEANING To refit the door Holding the door on both sides, line up the holes in the base of the door with the hinges and slide the door on. Ensure the door is firmly in place on the hinges.
- Page 39 CARE AND CLEANING Removing the door glass panes for cleaning The oven door is made up of 3 glass panes. To clean the middle pane you will first need to remove door and inner pane. inner middle outer Make sure you follow the precautions and guidance below very carefully. Replacing the glass panes and the door incorrectly may result in damage to the oven and could void your warranty.
- Page 40 CARE AND CLEANING To remove the inner pane Push the glass retainer tabs in on both sides of the door. Pull the glass retainer up until the tabs relocate in the uppermost hole. Holding the top of the inner pane, gently pull the pane toward the top of the door until the pane is clear of the notch at the bottom of the door and lift out.
- Page 41 CARE AND CLEANING When replacing the glass panes ensure that: you replace the inner pane correctly as shown to ensure that the oven operates safely you take extra care not to bump the edges of the glass against any object or surface you do not force any of the panes into place.
-
Page 42: Parts And Accessories
PARTS AND ACCESSORIES ITEM REFERENCE NUMBER Bulb spares kit OB60C 563377... -
Page 43: Troubleshooting
TROUBLESHOOTING If there is a problem with your oven, please check the following points before contacting your local Fisher & Paykel trained and supported service technician or the Customer Care Centre. General PROBLEM POSSIBLE CAUSES WHAT TO DO The oven does not work No power Check that the mains power supply (wall switch) is turned on,... - Page 44 TROUBLESHOOTING General PROBLEM POSSIBLE CAUSES WHAT TO DO The oven fan stays on This is normal. The oven will not heat up until the when I set a delayed start start time is reached. with automatic cooking The oven cancels The oven was set for automatic You can only adjust the clock automatic cooking when...
-
Page 45: Warranty And Service
WARRANTY AND SERVICE This oven has been designed and constructed in accordance with the following codes and specifications: New Zealand and Australia AS/NZS 60335-1 General Requirements for Domestic electrical appliances AS/NZS 60335-2-6 Particular Requirements for Domestic electrical cooking appliances AS/NZS CISPR 14.1 2010 Electromagnetic Compatibility Requirements. - Page 48 FISHERPAYKEL.COM © Fisher & Paykel Appliances 2020. All rights reserved. The models shown in this guide may not be available in all markets and are subject to change at any time. The product specifications in this guide apply to the specific products and models described at the date of issue.