
Related Manuals for Fisher & Paykel OR90L7


Summary of Contents for Fisher & Paykel OR90L7
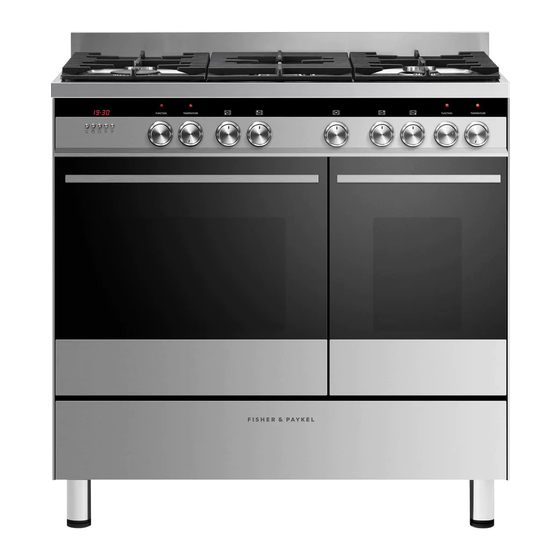
- Page 1 FREESTANDING COOKER OR90L7 double oven models INSTALLATION GUIDE / USER GUIDE GB IE...
-
Page 3: Table Of Contents
Contents Safety and warnings Installation instructions Introducing your cooker Using your gas cooktop Cooktop troubleshooting Using your main multifunction oven for the first time Clock and timer Using your main oven Cooking functions Automatic cooking Using your compact multifunction oven for the first time Using your compact oven Cooking functions Using the dish-warming shelf... -
Page 4: Safety And Warnings
Safety and warnings Installation WARNING! Electrical Shock Hazard Always disconnect the cooker from the mains electricity supply before carrying out any maintenance operations or repairs. Failure to do so may result in death or electrical shock. WARNING! Cut Hazard Take care - panel edges are sharp. Failure to use caution could result in injury or cuts. - Page 5 Safety and warnings Some appliances have a protective film. Remove this film before using the cooker. After unpacking the appliance, check to to ensure it is not damaged and the door closes correctly. If in doubt, do not use it and consult your Fisher &...
- Page 6 Safety and warnings Electrical The switch must always be accessible. The power supply cable must not touch any hot parts and must be positioned so that it does not exceed 75 C at any point and cannot become entrapped in the oven door. To connect the cooker to the mains, do not use adapters, reducers or branching devices as they can cause overheating and burning.
- Page 7 Safety and warnings General Do not leave packing elements (plastic bags, polystyrene foam, nails, packing straps etc) around within easy access of children, as these may cause serious injuries. Read the instructions carefully before installing and using the appliance. The manufacturer declines all liability for injury to persons or damage to property caused by the incorrect use or improper use of the appliance.
- Page 8 Safety and warnings Operation Your freestanding cooker has been carefully designed to operate safely during normal cooking procedures. Please keep the following guidelines in mind when you are using it: WARNING! Explosion Hazard Do not store flammable materials such as gasoline near the cooktop. Do not store flammable material in the ovens or in the storage compartment.
- Page 9 Safety and warnings WARNING! Hot Surface Hazard Accessible parts will become hot when this cooker is in use. To avoid burns and scalds keep children away. Do not touch hot surfaces inside the ovens. Use oven mitts or other protection when handling hot surfaces such as oven shelves or dishes.
- Page 10 Safety and warnings Important safety precautions Never leave the appliance unattended when in use. Boilover causes smoking and greasy spillovers that may ignite. NEVER try to extinguish a fire with water. Switch the appliance off at the wall and then cover the flame with a lid or fire blanket.
- Page 11 Safety and warnings Take particular care during warmer weather. Do not place aluminium foil, dishes, trays, water or ice on the oven floor during cooking as this will irreversibly damage the enamel. Do not line the walls with aluminium foil. Do not stand on the doors, or place heavy objects on them.
- Page 12 Safety and warnings Do not hang towels, dishcloths or other items on the cooker or oven door handle as this is a potential a fire hazard. If the electrical supply cord is damaged, it must only be replaced by an authorised person. Do not touch the cooker with wet hands or feet.
- Page 13 Safety and warnings The manufacturer declines all liability for damage to property cause by the incorrect or improper use of the appliance. Important! This appliance is designed and manufactured solely for the cooking of domestic (household) food and it not suitable for any non domestic application and therefore should not be used in a commercial environment.
-
Page 14: Installation Instructions
Installation instructions USABLE = 41 L USABLE = 70 L Figure 1 Cooker dimensions and capacity The cooker must be installed by a qualified technician and in compliance with local safety standards. This cookers has class “2/1” overheating protection so that it can be installed next to a cabinet. - Page 15 Installation instructions Fitting the adjustable feet Important! Using the supplied adjustable feet is MANDATORY. For safety reasons and to ensure adequate ventilation, the cooker chassis MUST NOT sit directly on the floor, a plinth, or other support surface. The adjustable feet must be fitted to the base of the cooker before use. Rest the rear of the cooker on a piece of the polystyrene packaging exposing the base for the fitting of the feet.
- Page 16 Installation instructions Moving the cooker Important! Two people must always raise the cooker, as shown, to prevent damaging the adjustable feet. Do not lift the cooker by the door handles. DO NOT DRAG the cooker. Lift the feet clear of the floor.
- Page 17 Installation instructions Anti-Tilt Bracket Important! To restrain the appliance and prevent it tipping accidentally, fit a bracket to its rear to fix it securely to the wall. To fit the anti-tilt bracket: After you have located where the cooker is to be positioned, mark on the wall the place where the two screws of the anti-tilt bracket have to be fitted.
- Page 18 Installation instructions Ventilation requirements (GB & IE only) The appliance should be installed into a room or space with an air supply in accordance with BS 5440-2:2000. For rooms with a volume of less than 5 m - permanent ventilation of 100 mm free area will be required.
- Page 19 Installation instructions Installation to Natural gas Installation to Natural Gas must conform to the Code of Practice, etc. The supply pressure for Natural Gas is 20 mbar. Installation to Liquid Petroleum gas This appliance must only be connected to LPG after an LPG conversion kit has been fitted. The installation must conform to the relevant British Standards.
- Page 20 Installation instructions Rear wall Rear wall Suggested area for gas Suggested area for mains connection gas mains connection Figure 12 Gas mains connection area Replacement of burner injectors If the injectors are not supplied, contact the Fisher & Paykel Authorised Service Centre. Select the injectors to be replaced according to the “Table for the choice of the injectors”.
- Page 21 Installation instructions Adjusting The Minimum Burner Setting Check whether the flame spreads to all burner ports when the burner is lit with the gas tap set to the minimum position. If some ports do not light, increase the minimum gas rate setting. Check whether the burner remains lit even when the gas tap is turned quickly from the maximum to the minimum position.
- Page 22 Installation instructions Table for the choice of the injectors Cat: II 2H3+ BURNERS NOMINAL REDUCED G 30 - 28-30 mbar G 20 - 20 mbar G 31 - 37 mbar POWER POWER [KW] [KW] Ø INJECTOR Ø INJECTOR [1/100 mm] [1/100 mm] AUXILIARY 1,00...
- Page 23 Installation instructions Connecting the feeder cable To connect the feeder cable to the cooker: Remove the screws securing the cover “A” on the rear of the cooker. Feed the supply cable through the cable clamp “D”. See the ‘Feeder cable section’...
-
Page 24: Introducing Your Cooker
Introducing your cooker Thank you for buying a Fisher & Paykel freestanding cooker. Once it is installed and ready to use, you will want to know everything about it to make sure you get excellent results right from the start. This guide introduces you to all its special features. We recommend you read the whole guide before using your new cooker, for both safety and cooking success. -
Page 25: Using Your Gas Cooktop
Using your gas cooktop Figure 18 Cooktop layout Auxillary burner Semi-rapid burner Rapid burner Triple ring wok burner Gas burners The knob controls the flow of gas through the safety tap. = closed valve = maximum aperture or flow = minimum aperture or flow You can choose to cook at any heat between , but never between and OFF. - Page 26 Using your gas cooktop Before using your cooktop Before using your new cooktop, please: Read this user guide, taking special note of the safety and warnings section. Turn the cooker on. Make sure all controls are turned off. Lighting the cooktop Choose the control knob for the burner you want to use.
- Page 27 Using your gas cooktop If the cooktop does not light If the cooktop does not light, check that: The cooker is switched on. The gas is turned on. You have held down the knob for at least ten seconds. The ignitors are sparking. If the ignitors are not sparking, they may be dirty or wet. Clean them with a toothbrush and methylated spirits, as shown.
- Page 28 Using your gas cooktop Choosing a burner Use flat-bottomed pans, and make sure that they match your burner, as shown in the following table. A small pot on a large burner is not efficient. Diameters of pans which may be used on the cooktop Burners Minimum Maximum...
-
Page 29: Cooktop Troubleshooting
Cooktop troubleshooting Problem Possible solutions My cooktop burners do not light Check the cooker is switched on. Check the gas supply valve is turned on and the supply to the house is working. You should hear the gas when you turn a burner on. The ignitors may be dirty. -
Page 30: Using Your Main Multifunction Oven For The First Time
Using your main multifunction oven for the first time Using your oven for the first time Clock display Function Temperature Control buttons knob knob Figure 23 Main oven controls Before using your new oven, please: Read this user guide, taking special note of the ‘Safety and warnings’ section. Remove all accessories and packaging. -
Page 31: Clock And Timer
Clock and timer Buttons: Timer Cooking time End of cooking time Decreases the number shown on the display or changes the volume of the beeps Increases the number shown on the display Illuminated symbols: Figure 25 Clock display and control buttons - flashing - oven in automatic position but not set - steady illumination - oven set for automatic cooking Cooking taking place... -
Page 32: Using Your Main Oven
Using your main oven Figure 26 Function knob Figure 27 Temperature knob Select the function using the function knob. The oven light will come on. Select the temperature using the temperature control knob. The oven temperature indicator light, above the temperature knob on the control panel, will glow until the oven has reached the set temperature, and then it will go out. -
Page 33: Cooking Functions
Cooking functions OVEN LAMP Only the oven light comes on. It remains on in all the cooking functions. BAKE The upper and lower heating elements come on. BAKE is the traditional method of cooking. It is best to cook on only one shelf at a time in this function. GRILL The grill at the top of the oven comes on. - Page 34 Cooking functions FAN BAKE (ENERGY SAVING) The upper and lower heating elements and the fan come on. This function reduces the appliance’s energy consumption. Ideal for gentle cooking over a longer period of time. For best results, cook small portions on a single shelf and always use with the oven door closed. It is not necessary to preheat the oven.
-
Page 35: Automatic Cooking
Automatic cooking Use automatic cooking to automatically turn the oven on, cook, and then turn the oven off. Check the clock shows the correct time. Select the function and temperature. The oven will come on. Decide how long the food will take to cook, allowing time for preheating if necessary. Press the button. -
Page 36: Using Your Compact Multifunction Oven For The First Time
Using your compact multifunction oven for the first time Before using your new oven, please: Read this user guide, taking special note of the ‘Safety and warnings’ section. Remove all accessories and packaging. Condition the oven: Put in the shelf and tray. Fit them between the metal runners, with the safety notch (which stops the tray sliding all the way out) facing down and the guard rail at the back. -
Page 37: Using Your Compact Oven
Using your compact oven Figure 30 Compact oven function and temperature knobs Select the function using the function knob. The oven light will come on. Select the temperature using the temperature control knob. The oven temperature indicator light, above the temperature knob on the control panel, will glow until the oven has reached the set temperature, and then it will go out. - Page 38 Using your compact oven DEFROST Only the oven fan comes on. Use with the temperature knob set to O. The fan circulates air around the oven, speeding up the defrosting process by approximately 30%. Note: this function is not for cooking food. FAN FORCED The circular heating element and the fan come on.
- Page 39 Using your compact oven FAN BAKE The upper and lower heating elements and the fan come on. Important! Safe food handling: leave food in the oven for as short a time as possible before and after cooking or defrosting. This is to avoid contamination by organisms which may cause food poisoning. Take particular care during warmer weather.
-
Page 40: Using The Dish-Warming Shelf
Using the dish-warming shelf The dish-warming shelf can be used to hold dishes or for cooking. If you want to warm plates, put the oven on bake at about 60 °C. Take care when removing plates, as they can get hot. To use the shelf to hold dishes Turn it with the plate supports facing up. -
Page 41: Care And Cleaning
Care and cleaning Important! Before you start cleaning your cooker, please: Read these cleaning instructions and the ‘Safety and warnings’ section at the start of this user guide. Turn the cooker off at the wall. Make sure the cooker is a safe temperature to touch. Do not use a steam cleaner. - Page 42 Care and cleaning Burner parts and pan supports You can remove and clean these parts with hot soapy water or non-abrasive detergents. Clean spills regularly before they become burnt on. Do not wash these parts in a dishwasher. After cleaning, check that the burners and their flame spreaders are dry before replacing correctly.
- Page 43 Care and cleaning Replacing the triple ring wok burner To replace the wok burner, fit the burner ring to the housing as shown by the arrow in the figure following. Make sure the burner is not able to rotate. Probe Ignitor Figure 36 Replacing the triple ring wok burner Figure 35 Triple ring wok burner parts...
- Page 44 Care and cleaning Cleaning the inside of your ovens Clean the oven regularly and do not allow fats or oils to build up in the oven base or tray. Remove spillages as soon as they occur. Do not use abrasive cleaners, cloths or pads to clean the enamel. Do not use any oven cleaners, abrasive cleaners, ammonia-based cleaners, products containing acids or alkalis, or detergents on the catalytic panels (not supplied with all models).
- Page 45 Care and cleaning Cleaning the enamel cavity Clean the enamel on the inside of the oven when it has cooled down, using household detergents or an ammonia-based cleaner. You may use ‘off the shelf’ oven cleaners, if you carefully follow the manufacturers’ instructions. Cleaning the fat filter Use only the supplied fat filter.
- Page 46 Care and cleaning Storage compartment The storage compartment is accessible through the pivoting panel. Important! Do not store flammable material in the ovens or in the storage compartment. Fig.39 Storage compartment...
- Page 47 Care and cleaning Removing and refitting the oven door(s) Important! Take care, the oven door is heavy! To remove the door Close the door until the levers hook to it. Open the door fully. Disengage the hinges and remove the door. Open the levers.
- Page 48 Care and cleaning Cleaning the oven door glass Do not use harsh abrasive cleaners, or sharp metal scrapers to clean the oven door glass as they scratch the surface and result in shattering of the glass. Removing and refitting the inner glass panes of the oven door(s) You may remove the inner glass pane for ease of cleaning.
- Page 49 Care and cleaning To refit the glass pane Make sure the open levers firmly Check the rubber pads are in place. hook to the door. Rubber pads Check the pane is the right way Insert the pane into the slide guides around .
- Page 50 Care and cleaning Replacing the halogen oven lamp Important! Disconnect the cooker from the power supply before continuing. Let the oven cavity and the heating elements cool down. Remove the protective cover (A). Replace the halogen bulb (B) with a new one suitable for high temperatures (300°C) with the specifications: 220-240V, G9, and with the same wattage as the bulb being replaced (check wattage stamped on the bulb).
-
Page 51: Warranty And Service
Warranty and service Before you call for service or assistance ... Check the things you can do yourself. Refer to the installation instructions and your user guide and check that: Your product is correctly installed. You are familiar with its normal operation. If after checking these points you still need assistance, please refer to the Service &... - Page 52 FISHERPAYKEL.COM © Fisher & Paykel Appliances 2019. All rights reserved. The product specifications in this booklet apply to the specific products and models described at the date of issue. Under our policy of continuous product improvement, these specifications may change at any time. You should therefore check with your Dealer to ensure this booklet correctly describes the product currently available.