Advertisement
Quick Links
Advertisement

Related Manuals for Fisher & Paykel CG604C


Summary of Contents for Fisher & Paykel CG604C
- Page 1 INSTALLATION INSTRUCTIONS USER GUIDE Gas cooktop CG604C & CG905C models NZ AU...
-
Page 3: Table Of Contents
CONTENTS Safety and warnings Installation instructions Introduction Using your cooktop Cooking guidelines and cookware Care and cleaning Troubleshooting Warranty and service IMPORTANT! SAVE THESE INSTRUCTIONS The models shown in this user guide may not be available in all markets and are subject to change at any time. -
Page 4: Safety And Warnings
SAFETY AND WARNINGS Your safety is important to us. Please read this information before using your cooktop. Installation WARNING! Electrical Shock Hazard Before carrying out any work on the electrical section of the appliance, it must be disconnected from the mains electricity supply. Connection to a good earth wiring system is absolutely essential and mandatory. - Page 5 SAFETY AND WARNINGS IMPORTANT SAFETY INSTRUCTIONS! Installation Read these instructions carefully before installing or using this product. ● Please make this information available to the person responsible for installing the ● product as it could reduce your installation costs. Particular attention shall be given to the relevant requirements regarding ventilation. ●...
- Page 6 SAFETY AND WARNINGS Operation and maintenance WARNING! Fire Hazard Never leave the appliance unattended when in use. Boilover causes smoking and greasy spillovers that may ignite. Never use your appliance for warming or heating the room. Failure to follow this advice may result in serious injury. WARNING! Explosion Hazard Do not use or store flammable materials such as gasoline near this...
- Page 7 SAFETY AND WARNINGS IMPORTANT SAFETY INSTRUCTIONS! Operation and maintenance Keep children away from the cooktop when it is in use. ● Household appliances are not intended to be played with by children. ● Children of less than 8 years old must be kept away from the appliance unless ●...
-
Page 8: Installation Instructions
INSTALLATION INSTRUCTIONS Cooktop and cutout dimensions Drawings for illustration purposes only PRODUCT AND CUTOUT DIMENSIONS Overall width of cooktop Overall depth of cooktop Height of chassis ( below top of bench) Width of chassis Depth of chassis Overall width of cutout Overall depth of cutout Corner radius of cutout max. - Page 9 INSTALLATION INSTRUCTIONS Clearances Drawings for illustration purposes only CLEARANCE DIMENSIONS Minimum clearance from left edge of cutout to: nearest combustible surface Minimum clearance from right edge of cutout to: nearest combustible surface Minimum clearance from rear edge of cutout to: nearest combustible surface nearest non-combustible surface Minimum height of non-combustible material when used on adjacent...
- Page 10 INSTALLATION INSTRUCTIONS Before you start Before starting to install the cooktop, make sure that: the cooktop has not been damaged during transport. In case of doubt after unpacking ● and checking it, contact the retailer the local distribution conditions (nature of gas and pressure) and the adjustment of the ●...
- Page 11 INSTALLATION INSTRUCTIONS Fastening the cooktop to the bench This cooktop is suppled with fastening brackets (and screws) that will cope with a bench thickness of 20-50mm. For benches thicker than 50mm, recess the underside to a thickness of 20-50mm. 50mm 20mm recessed to 50mm...
- Page 12 INSTALLATION INSTRUCTIONS Gas connection with a flexible hose If the gas is connected with a flexible hose, the connector on the wall should be ● between 800-850mm above the floor and to a distance of at least 250mm outside the width of the cooktop.
- Page 13 INSTALLATION INSTRUCTIONS Leak-testing and flame-testing the cooktop IMPORTANT! The operation of the cooktop, including the ignition system, must be tested before installation is complete. If, after following the instructions below, satisfactory performance cannot be obtained, contact the local gas authority or your local Authorised Repairer for advice and assistance.
- Page 14 Test point pressure (kPa) 2.75 Injector Nominal Injector Nominal Burners orifice size gas rate orifice size gas rate (mm) (MJ/h@1kPa) (mm) (MJ/h@2.75kPa) CG604C, CG905C 0.85 0.55 Auxiliary right front Semi-rapid 1.30 0.80 left & right rear 1.75 15.0 1.00 13.5 CG604C: left front CG905C: left front &...
- Page 15 INSTALLATION INSTRUCTIONS TO BE COMPLETED BY THE INSTALLER Have you securely fastened the cooktop to the bench with the supplied brackets? Have you used the supplied elbow and fibre washer to connect the gas to the inlet on the cooktop? Have you leak-tested all connections? Are the injector sizes correct for the gas type? Is the shut-off valve on the gas supply accessible to the customer?
-
Page 16: Introduction
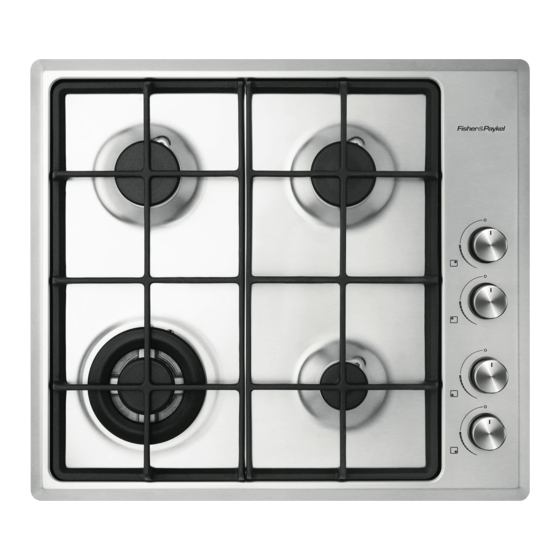
Read this user guide, taking special note of the ‘Safety and warnings’ section. ● Ensure the power supply to the cooktop is turned on. ● Cooktop layout - CG905C models Cooktop layout - CG604C models 1 Semi-rapid burner 2 Wok burner 3 Auxiliary burner 4 Control dials... -
Page 17: Using Your Cooktop
USING YOUR COOKTOP Control dials The dials control the flow of gas through the valve. OFF (closed valve) NEVER cook or leave the dial between HIGH and O (OFF) HIGH Burner indicator Control dial Using the burners 1 Press the selected burner’s dial down gently and turn it anti-clockwise to HIGH. The ignitors on all the burners will spark. - Page 18 USING YOUR COOKTOP If a burner does not light Turn the control dial to O (OFF) and wait at least 1 minute before trying again. This is to allow the gas to disperse. If after trying again the burner still does not light, check that: the cooktop is plugged in and the power supply is switched on ●...
- Page 19 USING YOUR COOKTOP If there is a power failure You can still use your cooktop. ● Light the burners by holding a match close to the side of the burner and turning the ● control dial to HIGH. Wait until the flame is burning evenly before adjusting. If the flame is accidentally extinguished The flame failure protection will automatically cut the gas supply to the burner off.
-
Page 20: Cooking Guidelines And Cookware
COOKING GUIDELINES AND COOKWARE Cooking guidelines IMPORTANT! Never leave the cooktop unattended when in use. Boilover causes smoking and greasy ● spills that may ignite. Take care when deep-frying: oil or fat can overheat very quickly, particularly on a high ●... - Page 21 COOKING GUIDELINES AND COOKWARE Using a wok Use your wok only on a wok burner and with the supplied wok stand. ● Make sure the wok does not push any other pans aside. This could make them unstable, ● or deflect heat onto nearby walls or the benchtop. IMPORTANT! Make sure that the wok stand is stable: its notches need to fit tightly on the grating.
-
Page 22: Care And Cleaning
CARE AND CLEANING IMPORTANT! Before any cleaning or maintenance, always: turn all burners off. ● switch the power to the cooktop off at the wall. ● make sure that the cooktop and its parts are a safe temperature to touch. ●... - Page 23 CARE AND CLEANING WHAT? HOW? IMPORTANT! HOW OFTEN? 1 Remove the parts that you Burner caps Make sure you keep the ● and rings, flame wish to clean. flame ports clear. Soiling spreaders, pan See the the illustrations from food spillage may clog supports, wok following this chart.
- Page 24 Correct positioning of pan supports (CG905C models) CG604C models The pan supports are interchangeable, but they can only be placed as shown and need to be rotated to match the rounded corners of the cooktop base. Correct positioning of pan supports (CG604C models)
- Page 25 CARE AND CLEANING Replacing the burner parts correctly Semi-rapid and auxiliary burners Flame spreader Probe (some models only) Correct positioning of semi-rapid, Ignitor rapid, and auxiliary burner parts Wok burner with cast iron cap and ring Fit the flame spreader to the housing as shown by the arrow following. Make sure the burner is not able to rotate.
-
Page 26: Troubleshooting
TROUBLESHOOTING PROBLEM POSSIBLE CAUSES AND SOLUTIONS There is a strong gas The gas connection could be leaking because of smell. incorrect installation or damaged piping IMPORTANT! Do not use any electrical equipment or operate any electrical switches. 1 If any burners are on, turn all of them off immediately. - Page 27 TROUBLESHOOTING PROBLEM POSSIBLE CAUSES AND SOLUTIONS The flame has been The flame failure protection will automatically cut the blown out by a draft gas supply to the burner off. or extinguished by a Turn the corresponding dial to O (OFF), then wait for spill.
-
Page 28: Warranty And Service
WARRANTY AND SERVICE Before you call for service or assistance ... Check the things you can do yourself. Refer to the installation instructions and your user guide and check that: 1 Your product is correctly installed. 2 You are familiar with its normal operation. If after checking these points you still need assistance or parts, please refer to the Service &... - Page 32 www.fi sherpaykel.com Copyright © Fisher & Paykel Appliances 2017 All rights reserved. The product specifications in this booklet apply to the specific products and models described at the date of issue. Under our policy of continuous product improvement, these specifications may change at any time. You should therefore check with your Dealer to ensure this booklet correctly describes the product currently available.