Table of Contents
Advertisement
Advertisement
Table of Contents

Related Manuals for AGFA ePhoto ePHOTO 1280


Summary of Contents for AGFA ePhoto ePHOTO 1280
- Page 1 Click anywhere to begin. User’s Guide...
-
Page 2: Fcc Information
FCC WARNING: This equipment meets the limits for a Class B digital device, pursuant to Part 15 of FCC Rules. Only the power pack and cable supplied with the camera should be used. Operation with other power packs and cables is likely to result in interference to radio and TV reception and could void the user’s authorization to operate this equipment. - Page 3 1-YEAR LIMITED HARDWARE WARRANTY Agfa warrants this product to be free from defects of material and workmanship for one (1) year from the date of pur- chase. During the warranty period, Agfa will repair or replace, at its option, the product at no charge to the customer.
- Page 4 Agfa ePhoto Digital Camera REGISTER NOW! Register your product right away to take advantage of on-line product infor- mation and technical support from Agfa. To register, visit our Web site at: http://www.agfahome.com By registering, you will get: Worldwide multilingual technical support...
-
Page 5: Table Of Contents
Contents of This Guide FCC Information 1-Year Limited Warranty Welcome! Using This Document Other Documents Parts of Your Camera Safety Information Batteries Battery Charger Camera Turning the Camera On and Off Automatic Power Down Feature Taking Pictures Memory Cards Inserting Memory Cards Memory Card Conditions Status Information Battery Indicator / Image Counters... - Page 6 Contents of This Guide (cont.) Focus Exposure MANUAL APERTURE VALUE TIME VALUE White Point External Flash Date & Time AUTOMATIC Viewing Images in Your Camera Viewing Single Images Viewing Multiple Images Viewing Camera Images on a TV Deleting Images in Memory Locking and Unlocking Images Connecting the Camera to Your Computer Downloading Images into Your Computer...
- Page 7 The wrong date and/or time are displayed. PhotoWise can’t find the camera. An image can’t be deleted. Camera Care and Maintenance System Requirements IBM PCs and Compatibles Macintosh Camera Specifications Physical Optics Images Power Operation Environment Approvals Local Agfa Dealers...
-
Page 8: Welcome
Welcome! Now that you have set up your new Agfa ePhoto™ 1280 digital camera and software, we are sure you are eager to begin taking and viewing pictures. This on-line guide is designed to show you how to use your camera properly to get the best results. -
Page 9: Parts Of Your Camera
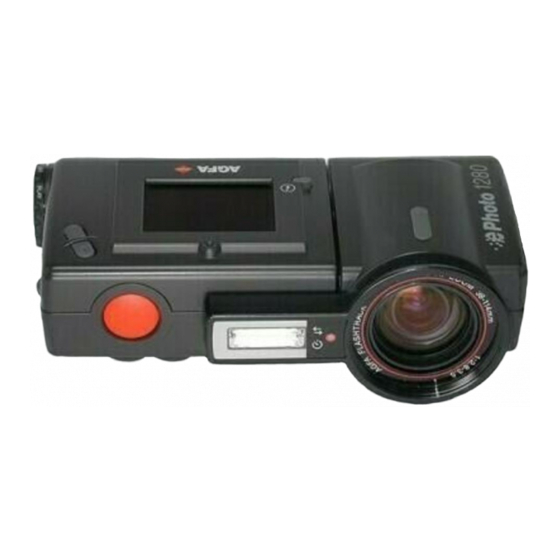
Parts of Your Camera Memory card slot (on side of main camera body) 3.3 V Memory card FlashTrack™ swivel zoom lens Built-in flash Info button Port cover Shutter button Zoom buttons EasyPilot™ button LCD panel Mode switch Wrist strap hook... -
Page 10: Safety Information
Safety Information WARNING! To avoid the risk of electric shock, do not disassemble the camera. Refer all ser- vicing to qualified service personnel. WARNING! To avoid the risk of fire or electric shock, do not expose the camera to rain or moisture. -
Page 11: Battery Charger
Safety Information (cont.) Battery Charger Place only rechargeable NiMH batteries in the battery charger. Never charge different types or sizes of batteries at the same time. Keep the battery charger away from moisture at all times. Do not use the battery charger as a power source. Camera Do not force the zoom lens to swivel beyond its range (280°). -
Page 12: Turning The Camera On And Off
Do not drop or bump the camera. CAUTION: Use only the optional Agfa ePhoto AC adapter with your camera. The use of any other adapter will void your warranty and may damage the camera. -
Page 13: Automatic Power Down Feature
Turning the Camera On and Off (cont.) Automatic Power Down Feature Whenever the ePhoto 1280 is not connected to a computer, the camera powers down auto- matically after 60 seconds of inactivity. To turn the camera back on in REC mode, press the shutter button (this does not take a picture);... - Page 14 To take pictures: Turn the Mode switch to REC. The LCD screen briefly shows the Agfa logo and then the “live” image seen through the lens. Swivel the lens and use the zoom buttons (+ to zoom in, – to zoom out) while framing your picture on the LCD screen.
-
Page 15: Memory Cards
Memory Cards The ePhoto 1280 has no internal memory. All images are stored on removable memory cards. These cards are available in the following sizes: 2 MB, 4 MB and 8 MB. Note: The ePhoto 1280 accepts only 3.3 volt SSFDC or SmartMedia™ removable memory cards. -
Page 16: Inserting Memory Cards
Memory Cards (cont.) Inserting Memory Cards To insert a memory card: Swivel the lens up to expose the memory card slot on the side of the camera’s main body. Open the door covering the memory slot and hold it down. Note: The door is equipped with an interlock mechanism which automatically turns off the camera whenever the door is opened. - Page 17 Memory Cards (cont.) This icon flashes to indicate that an installed memory card is the wrong type or is unread- able. Proceed in one of two ways: To reformat the card, turn the EasyPilot™ button to move the selection triangle to the YES option, then press in the EasyPilot button to select the option.
-
Page 18: Status Information
Status Information The ePhoto 1280 keeps track of certain information automatically. This information can be displayed on the LCD screen at any time using the Info button. Battery Indicator / Image Counters BATTERY INDICATOR Press the Info button once in REC or PLAY mode to display the following information on the LCD screen: The Battery icon (top) consists of segments which disappear as power is used. -
Page 19: Image Counters
Status Information (cont.) IMAGE COUNTERS REC mode — The image counters (bottom of the screen) indicate the following: The number after the The number after the at the current resolution setting. Note: If the camera is in REC mode and is not processing an image, but is unable to take another picture, the memory card may be full. -
Page 20: Date And Time
Status Information (cont.) Date and Time When you press the Info button twice, the date and time are displayed at the bottom of the screen in addition to the battery indicator and image counters: REC mode — The current date and time are shown (using a 24-hour clock). Whether or not this information is displayed when you take a picture, the date and time of each shot are stored with the image. -
Page 21: Changing Basic Settings
Status Information (cont.) The ePhoto 1280 comes with the following settings as defaults: Resolution: 780 HI (1024 x 768 pixels, low compression) Flash: AUTO (flash used as needed) Preview: Normal These displays are static, but the settings can be changed (see below). Note: To remove the status information display, press the Info button a third time. -
Page 22: Changing The Resolution
Changing Basic Settings (cont.) Changing the Resolution The ePhoto 1280 provides the following resolution settings: — 1024 x 960 pixels, very low compression — 1024 x 768 pixels, low compression — 1024 x 768 pixels, standard compression — 640 x 480 pixels, low compression —... -
Page 23: Changing The Flash Setting
Changing Basic Settings (cont.) Press in the EasyPilot button again. A column of settings appears below the Resolution icon. Turn the EasyPilot button in either direction to highlight the resolution settings in order. When the desired resolution is highlighted, press in the EasyPilot button. The new reso- lution is now selected. -
Page 24: Changing The Preview Setting
Changing Basic Settings (cont.) To change the flash setting for the camera: With the camera in REC mode, press in the EasyPilot button. Four icons appear in the upper left-hand corner of the LCD screen. Turn the EasyPilot button to highlight the Flash icon. Press in the EasyPilot button again. -
Page 25: Changing Advanced Settings
Changing Basic Settings (cont.) To select the preview setting: With the camera in REC mode, press in the EasyPilot button. Four icons appear in the upper left-hand corner of the LCD screen. Turn the EasyPilot button to highlight the normal Preview icon ( Press in the EasyPilot button again. -
Page 26: Using The Advanced Mode Menu
Changing Advanced Settings (cont.) To access the advanced settings: Make sure the Mode switch is set to REC. Press in the EasyPilot button. Four icons appear in the upper left-hand corner of the LCD screen. Turn the EasyPilot button until the Advanced Mode icon ( Press in the EasyPilot button again. - Page 27 Changing Advanced Settings (cont.) Note: You can leave the menu system at any time without selecting anything by simply press- ing the Info button. It is helpful to remember the following points as you use the menu system: The AUTOMATIC option allows the camera itself to determine the settings to be used. (This menu choice is the same as the default setting.) Use the EXIT option to leave the menu system without changing any settings.
-
Page 28: Self Timer
Changing Advanced Settings (cont.) Self Timer The self timer delays the shutter briefly after you press the shutter button (for example, so you can set the camera and then join the picture). When you select the SELF TIMER option, you can choose among 3 options: 5 SEC. -
Page 29: Exposure
Changing Advanced Settings (cont.) — for subjects less than 3 ft (1 m) away (MACRO) — for subjects about 3 ft (1 m) away — for subjects about 7 ft (2 m) away — for subjects about 16 ft (5 m) away —... -
Page 30: Manual
Changing Advanced Settings (cont.) MANUAL For manual exposure settings, select MANUAL. The following screen appears: To select a manual exposure setting: Scroll the EasyPilot button to select the desired exposure setting. The image in the LCD screen changes as you scroll to reflect the new exposure. Press in the EasyPilot button to select the setting. -
Page 31: Time Value
Changing Advanced Settings (cont.) Select your desired aperture. The camera automatically selects the proper exposure time for that aperture. This setting can be used for creative depth-of-field images. TIME VALUE Select this option to choose how long the camera’s shutter will remain open for each picture. The choices are: Select your desired shutter speed. -
Page 32: External Flash
Changing Advanced Settings (cont.) To set the white point manually: Select SET WHITE BAL. A message appears prompting you to aim the camera at the area with the desired white point. While aiming the lens at the desired white point, press in the EasyPilot button. A confir- mation message appears. - Page 33 Changing Advanced Settings (cont.) Depending on your external flash configuration and aperture requirements, select from the following options: The sizes in this menu refer to the desired aperture size, and the times (in seconds) indicate the shutter speed. To use the external flash mode, follow these steps: Select a large, medium or small aperture based on these ranges: LARGE MEDIUM...
-
Page 34: Date & Time
Changing Advanced Settings (cont.) Adjust the energy of the external flash power supply while taking pictures to find the prop- er exposure. The LCD screen provides a good means of evaluating each shot while the camera is processing. For best results with your equipment, experiment with different aperture and speed settings. Note: Selecting OFF returns the camera to its automatic or manually set exposure. -
Page 35: Automatic
Changing Advanced Settings (cont.) The first value to be changed (underlined) is the month. Scroll the EasyPilot button to select the right month. Note: Scrolling toward you increments the digits while scrolling away from you decrements them. Press in the EasyPilot button to set the month. The underline moves to the next setting. Repeat the above two steps for all settings. -
Page 36: Viewing Single Images
Viewing Images in Your Camera (cont.) Viewing Single Images By default in PLAY mode, the ePhoto 1280 LCD screen displays the last picture taken. To review the other stored images in succession: Scroll through the images using the zoom buttons (+ for forward, – for backward). Note: If you are viewing one image at a time, you may want to display the image counters and/or the date and time of each image. -
Page 37: Viewing Camera Images On A Tv
Viewing Images in Your Camera (cont.) Turn the EasyPilot until the Multiple Images icon ( Press in the EasyPilot button. The LCD screen now displays 9 images with the current image highlighted by a white frame. Turn the EasyPilot button in either direction to highlight the images in succession. Note: When you reach the last image on the screen, scrolling further adds a new row of images to the screen. -
Page 38: Deleting Images In Memory
Viewing Camera Images on a TV (cont.) On your TV, select an external device as the input source. (For specific information on using external devices with your TV, refer to the documentation that came with your tele- vision set.) The TV screen now takes the place of the camera’s LCD screen (which no longer functions). - Page 39 Deleting Images in Memory (cont.) With the Delete icon ( TURES menu appears: Select CURRENT to delete a single image or ALL to delete all images. A confirmation screen appears. Note: If the Lock icon appears in the upper right-hand corner of the image, the image is locked and cannot be deleted until it is unlocked.
-
Page 40: Locking And Unlocking Images
Deleting Images in Memory (cont.) Locking and Unlocking Images The ePhoto 1280 allows you to lock images to prevent them from being deleted accidentally. To lock an image: Make sure the camera is in PLAY mode. Note: If you are viewing one image at a time, you may want to display the image counters and/or the date and time of each image. -
Page 41: Connecting The Camera To Your Computer
Deleting Images in Memory (cont.) Select YES to lock the displayed image. The Lock icon appears in the upper right-hand corner of the screen. Select NO to skip to the next image for locking. When you are finished, select EXIT to leave the menu system. Note: To unlock a locked image, follow the above procedure, selecting UNLOCK instead of LOCK. -
Page 42: Downloading Images Into Your Computer
Downloading Images into Your Computer The Agfa PhotoWise software included with your ePhoto 1280 is used to download the images from your camera into your computer and then to pdf file PhotoWise Tips or on-line help in PhotoWise for more information). - Page 43 Downloading Images (cont.) Click on the Get Camera Images icon ( individual image or series of images, select the images, then click on the Get Camera Images icon, or double-click on the image.) In the dialog window that appears, select an existing photo album on disk, or create a new one, to store the images.
-
Page 44: Downloading Images With A 1280 Resolution
Photos taken using the highest resolution setting (1280) available with the ePhoto 1280 go through a special processing step called Agfa PhotoGenie™. Note: Agfa PhotoGenie processing for true 1280 resolution is available only through PhotoWise. PhotoGenie removes image artifacts (irregularities) such as those from JPEG compression, pixelation, jagged edges and posterization commonly found in digital images. -
Page 45: Using Photowise
To select JPEG artifact removal and achieve best-quality images (longer download time), select “Run JPEG enhancer on download”. To reduce the download time (no JPEG artifact removal), deselect the option. Note: JPEG removal on is the default setting. Agfa recommends using this setting to achieve the highest-quality images. Using PhotoWise This section provides an overview of some of the basic functions of PhotoWise. -
Page 46: Naming Images
Using PhotoWise (cont.) To copy an image from one album to another, click on the image and drag it to the desired location. To move an image from one album to another, Shift-click on the image and drag it to the desired location. To copy an image within an album, hold down the Ctrl key (Windows) or Option key (Macintosh), click on the image and drag it to the desired location. -
Page 47: Quicklink
Using PhotoWise (cont.) QuickLink QuickLink is a convenient way to access your images and use them in any OLE-compliant application (for example, Microsoft located at the bottom right-hand side of the task bar. On a Macintosh, QuickLink is located in the Apple menu. Launching QuickLink To launch QuickLink: Windows —... -
Page 48: Using Quicklink
Using PhotoWise (cont.) To set one of these QuickLink startup options: Windows — Click on the QuickLink icon with the right mouse button. In the menu that appears, choose Options. Select your setting in the Options dialog. (You can also open this dialog by double-clicking on the QuickLink icon.) Macintosh —... -
Page 49: Installation Floppy Disks For Photowise
Using PhotoWise (cont.) To edit an image after it has been placed in an application: Double-click on the image. Adjust the image as desired using the PhotoWise tools that now appear within your application. Installation Floppy Disks for PhotoWise To create a series of installation floppy disks for PhotoWise, follow these steps: WINDOWS Place the PhotoWise CD in the CD-ROM drive of your computer. -
Page 50: Macintosh
Using PhotoWise (cont.) MACINTOSH Place the PhotoWise CD in the CD-ROM drive of your computer. Double-click on the Make Floppies application icon on the outermost level of the CD. Follow the prompts that appear on the screen. Be sure to use blank, formatted diskettes as prompted and label them by number (i.e., Disk 1, 2, 3, 4). -
Page 51: Troubleshooting
Troubleshooting If you have a problem using your ePhoto 1280, please review this section first. If you cannot find the solution to your problem here, visit Agfa on-line at check with your The camera has no power. The camera may be turned off. Turn the Mode switch to REC or PLAY. -
Page 52: The Shutter Button Doesn't Work
Troubleshooting (cont.) If the camera is connected to a computer (LED next to lens is blinking), it only appears to have no power. The camera can be controlled only from the computer. The batteries may be too weak. Replace them. If you are using the optional AC adapter, make sure it is securely plugged into a working outlet. -
Page 53: The Lcd Screen Doesn't Light Up
Troubleshooting (cont.) The LCD screen doesn’t light up. The camera may be connected to a computer. Disconnect the camera or view the images in PhotoWise. The camera may be connected to a TV. Disconnect the camera or view the images on your TV set. -
Page 54: The Built-In Flash Doesn't Work
Troubleshooting (cont.) The built-in flash doesn’t work. The flash may be turned off. Check the The batteries may be too weak. Replace them. The recorded image is blurry. The subject may have moved while you were taking the picture. Hold the camera steady and take the picture again. -
Page 55: The Recorded Image Is Too Bright
Troubleshooting (cont.) You may have selected an incorrect advanced setting. If one of the following symbols appears, go to the respective menu: White Use PhotoWise to adjust the brightness and contrast of your image (see the .pdf file PhotoWise Tips or on-line help in PhotoWise itself). The recorded image is too bright. -
Page 56: Part Of The Recorded Image Is Missing
Troubleshooting (cont.) Part of the recorded image is missing. The lens may have been partially covered (e.g., by a finger). Make sure the lens and flash are not obstructed. The wrong date and/or time are displayed. The date and time are incorrectly set. Set the correct PhotoWise can’t find the camera. -
Page 57: An Image Can't Be Deleted
Troubleshooting (cont.) (Macintosh users) – AppleTalk may be active. Turn off AppleTalk before using PhotoWise. – If the serial cable is connected to the modem port, turn off any fax/modem soft- ware that is running in the background. – If you are using an Apple Performa 6400 or 5400, the serial cable may have grounding problems. -
Page 58: System Requirements
If condensation develops inside the camera, stop using it immediately. Leave the camera at room temperature for a few hours to allow the condensation to evaporate. Do not disassemble or attempt to repair the camera yourself. Refer all servicing to your local Agfa System Requirements IBM PCs and Compatibles 486 processor (Pentium Windows 95 or Windows NT (3.51 or later) -
Page 59: Macintosh
System Requirements (cont.) Macintosh System 7.0 or higher 68040 processor (PowerPC™ recommended) 16 MB RAM 50 MB available hard disk space Color monitor with support for at least 256 colors 2x CD-ROM drive (required for installation) Printer or modem port... -
Page 60: Camera Specifications
Camera Specifications Physical Dimensions 2" H x 6 1/8" W x 3 3/4" D (51 x 156 x 92 mm) Weight 13.5 oz or 380 g (without batteries) Other Tripod mountable (1/4" x 20, standard 35 mm photo/video) Optics Lens Aperture f/2.8 (wide) –... -
Page 61: Images
Specifications (cont.) Images Compression JPEG (internal) Resolution 1280 — 1024 x 960 pixels, very low compression 780 HI — 1024 x 768 pixels, low compression 780 S — 1024 x 768 pixels, standard compression 307 HI — 640 x 480 pixels, low compression 307 S —... -
Page 62: Environment
Specifications (cont.) Image Processing Time 1280 mode: approx. 15 seconds (REC) 780 mode: approx. 14 seconds 307 mode: approx. 14 seconds Image Display Time 1280 mode: approx. 12 seconds (PLAY) 780 mode: approx. 10 seconds 307 mode: approx. 4 seconds Computer Interface Serial, RS-232C Transmission Speed... -
Page 63: Local Agfa Dealers
CEP 01311-200, São Paulo Tel.: 55 11 251 5508 Fax: 55 11 287 5716 Canada Bayer Inc. - Agfa Division 77 Belfield Road Etibicoke, Ontario M9W 1G6 Tel.: 1 416 241 1110, 1-800 565 2432 Fax: 1 416 241 5409 Ceská... - Page 64 Grafische Systeme, Im Mediapark 5, 50670 Köln Internet: www.agfa.de CompuServe: GO DTPBVEN, Sektion Agfa Deutschland Fax-back: 49 221 5717 766 Agfa SnapScan: 49 190 871167 (DM 3,60 pro Minute) Support für alle anderen Scanner: 49 221 5717 389 Ecuador Sanitas S.A.
- Page 65 Tel.: 36 1 212 1540 Fax: 36 1 212 1574 Fax-back: 36 1 212 1574 México Bayer de México, S.A. de CV - Agfa Division Via Morelos 330-E, Sta Clara, 55540, Estado de México Tel.: 52 5 728 3000 Fax: 52 5 728 3210 Nederland Agfa-Gevaert B.V.
- Page 66 Agfa-Gevaert AB Box 6, S164 93 Kista, Stockholm Tel.: 46 7261 6161 Fax: 46 8793 0171 Taiwan Bayer Taiwan Co., Ltd - Agfa Division 5F, 237 Sung Chiang Road, Taipei 10477 Tel.: 886 2508 7272 Fax: 886 2516 1041 United Kingdom Agfa-Gevaert Ltd.