Table of Contents
Advertisement
Quick Links
Advertisement
Table of Contents

Related Manuals for AGFA ePhoto CL50


Summary of Contents for AGFA ePhoto CL50
- Page 1 CL50 User’s Guide...
-
Page 2: Fcc Information
Statement This Class B digital device meets all the requirements of the Canadian Interference- Causing Equipment Regulations. Cet appareil numérique de la Classe B respecte toutes les exigences du Réglement sur le matériel brouilleur du Canada. ePhoto CL50 User’s Guide... -
Page 3: 1-Year Limited Hardware Warranty
CL50 User’s Guide 1-Year Limited Hardware Warranty Agfa warrants this product to be free from defects of material and workmanship for one (1) year from the date of purchase. During the warranty period, Agfa will repair or replace, at its option, the product at no charge to the customer. The replacement unit may be a remanufactured unit or a unit of equal or greater functionality. -
Page 4: Table Of Contents
Digital Zoom........21 Contents ePhoto CL50 User’s Guide... - Page 5 CL50 User’s Guide Preview ........22 Panorama.
-
Page 6: Introduction
NTRODUCTION Your ePhoto CL50 takes high quality digital pictures—and it’s easy to use. Just point and click, like a conventional camera. In addition, you can: Frame images with the optical viewfinder or color LCD, and quickly change the automatic settings. -
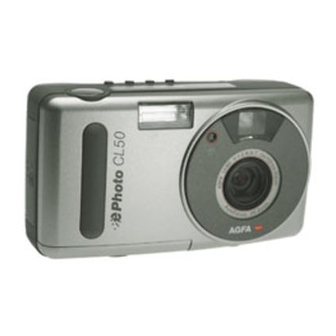
Page 7: Camera Parts
CL50 User’s Guide AMERA ARTS 1. Shutter Button: See Shutter Button on page 13. 2. Built-in Flash: With 4 settings. Controlled by the Flash button or a menu. 3. Viewfinder: Frames pictures. 4. Auto Focus Retractable Glass Lens: Provides up to 3x optical zoom. - Page 8 16. Resolution Button: See Resolution Button on page 18. 17. Flash Button: See Flash Button on page 18. 18. QuickReview Button: See QuickReview Button on page 16. 19. Macro/Self Timer Button: See Macro/Self-Timer Button on page 17. Camera Parts ePhoto CL50 User’s Guide Button, OK Button: See Navigating...
-
Page 9: Memory Cards
CL50 User’s Guide EMORY ARDS The ePhoto CL50 has no internal memory. All pictures are stored on removable memory cards. These cards are available in 2 MB, 4 MB, 8 MB and 16 MB sizes. The ePhoto CL50 accepts only 3.3 volt SSFDC or Smart- Media™... -
Page 10: Memory Card Conditions
(Flashing black icon) The memory card is full. To take more pictures, do one of the following: Memory Cards ePhoto CL50 User’s Guide Description to select YES and then press Insert a new memory card. Lower the resolution. See Resolution Button on page 18. -
Page 11: Batteries
Alkaline Battery life can be greatly extended by using the view- finder (not the LCD) to frame images and the optional Agfa AC adapter to power the camera. To install the batteries: Slide the Mode switch to OFF. Push the button on the battery compartment door and slide the door towards the front of the camera to open it. -
Page 12: Controlling The Camera
You can interrupt the camera’s startup process by switching between modes or by switching to OFF. When the ePhoto CL50 is not connected to a computer, the camera turns off (sleeps) after 60 seconds (REC) or 5 minutes (PLAY) of inactivity. -
Page 13: Lcd On/Off Switch
CL50 User’s Guide LCD ON/OFF Switch When you want to use the color LCD as a viewfinder in REC mode, slide the LCD ON/OFF button to ON. Shutter Button The shutter button has two positions. Press the shutter button: Halfway —... -
Page 14: Status Display
— No card. Insert a memory card. — Protected card. Remove the write-protect tab. — Card full. See Memory Cards on page 9. Resolution setting — See Resolution Button on page 18. Status Display ePhoto CL50 User’s Guide Resolution Pictures remaining Battery Status... -
Page 15: Taking Pictures
CL50 User’s Guide AKING ICTURES Like a conventional camera, the ePhoto CL50 has a viewfinder. You can also frame the image on the color LCD. Before you can take pic- tures, install the batteries and a removable memory card. -
Page 16: Changing Basic Settings
To share the image with others: 1. During processing, press remains on the screen after it is processed. 2. When you are ready, press Changing Basic Settings ePhoto CL50 User’s Guide ASIC ETTINGS Setting Selected to select Discard. to highlight Share. The image... -
Page 17: Macro/Self-Timer Button
CL50 User’s Guide To record sound with an image: 1. During processing, press cessing is completed, you see the prompt Record sound? 2. Press OK to record your message (up to 10 seconds). Speak into the microphone, which is next to the color LCD. A progress bar shows how much time you have left to record. -
Page 18: Flash Button
Press the Resolution button repeatedly to select: Icon 1600 x 1200 pixels: very low compression utiliz- ing PhotoGenie™ technology during transfer to computer (ideal for printing photo-quality images) Maximum 8 MB card capacity: 12 images* Changing Basic Settings ePhoto CL50 User’s Guide Setting Selected Setting Selected... - Page 19 CL50 User’s Guide Icon 1280 x 960 pixels: CCD resolution, low compres- sion Maximum 8 MB card capacity: 24 images* 640 x 480 pixels: normal compression (ideal for posting images on the Web) Maximum 8 MB card capacity: 96 images*...
-
Page 20: Changing Settings On The Color Lcd
You can exit the menu any time by pressing Resolution The ePhoto CL50 provides five resolution settings. You can also change the resolution setting by using a button on top of the cam- era. For details on the settings, see Resolution Button on page 18. -
Page 21: Flash
Automatic Fill in Red-eye Digital Zoom The digital zoom feature on the ePhoto CL50 lets you zoom into the center of the picture to create a 640 x 480 pixel image. Setting 1x: digital zoom is off (default). Setting Selected... -
Page 22: Preview
Panorama You can use the ePhoto CL50 to take pictures in sequence to form a panorama. Setting Panorama on: marks a sequence of pictures as part of a panorama. -
Page 23: Advanced Settings
CL50 User’s Guide To include the next picture in the panorama, press the shutter button within 10 seconds. For best results, we recommend that you keep the camera level by placing it on a tri- pod and overlap each picture with the previous one by about 50%. -
Page 24: Changing Advanced Settings
For manual settings, a small icon is displayed on the right-hand side of the LCD as a reminder. If there is no icon displayed, the camera is set to automatic. Changing Advanced Settings ePhoto CL50 User’s Guide DVANCED ETTINGS icon. -
Page 25: Focus
Icon Exposure Use this option to adjust the lightness or darkness of an image: Icon Before you take a picture, the ePhoto CL50 alerts you of a possible overexposure You can, however, still take the picture. Setting Selected Focus –... -
Page 26: Aperture Value
4. You can do one of the following: Take pictures with the sliding bar displayed or press return to the automatic exposure setting and exit the menu. Press OK to save the manual exposure setting for future pictures. Changing Advanced Settings ePhoto CL50 User’s Guide... -
Page 27: Metering
CL50 User’s Guide Metering This option allows you to set the light-metering method that you want the camera to use when it calculates auto exposure and shut- ter speed. You can select: Center-weighted — measures the light in the entire frame and assigns the greatest weight to an area in the center of the frame. -
Page 28: External Flash
The image on the LCD changes to reflect the new white point. External Flash Your ePhoto CL50 can be used with any external flash equipped with a white light slave sensor. The external flash is triggered by a low-power burst of light from the camera’s built-in flash. The exter- nal flash settings are:... -
Page 29: Preferences
CL50 User’s Guide The sizes refer to the aperture size, and the times (in sec- onds) indicate the shutter speed. To use an external flash: 1. Select Ext. flash in the Advanced menu. 2. Select a large or small aperture based on these ranges: Large: f/2.8 –... -
Page 30: Self-Timer Delay
Use this option to set the period of inactivity after which the ePhoto CL50 powers down automatically. The possible delays are: REC — 30, 60 (default), 90 or 120 seconds PLAY — 1 to 10 minutes. The default is 5minutes. Changing Advanced Settings ePhoto CL50 User’s Guide... -
Page 31: Date & Time
CL50 User’s Guide To set the sleep delay: 1. Select Preferences in the Advanced menu. 2. Select Sleep in the PREFERENCES menu. The SLEEP menu appears with the REC sleep delay underlined. 3. Press until the desired delay appears. -
Page 32: Working With Captured Images
ORKING WITH You can use the ePhoto CL50 PLAY mode to view and work with captured images in three different views: Single-Image Multi-Image Slide Show To select a view: 1. Slide the Mode switch to PLAY. The color LCD displays the last picture taken, in single-image view. -
Page 33: Deleting Images
CL50 User’s Guide Deleting Images To delete images: 1. Press OK. A column of green icons appears on the color LCD. 2. Press to highlight the 3. Press OK. The DELETE PICTURES menu appears. 4. Select the desired option: Current —... -
Page 34: Recording Sound
4. Press OK. The center of the image fills the color LCD. The digital zoom is indicated by the Recording Sound You can add a recording to an image or overwrite an existing recording. Working with Captured Images ePhoto CL50 User’s Guide icon. The LOCK/UNLOCK menu icon. icon. icon on the image. -
Page 35: Printing Images
CL50 User’s Guide To record sound with an image: 1. Press OK. A column of green icons appears on the color LCD. 2. Press to highlight the 3. Press OK. If sound has already been recorded with the image, a confirmation screen asks if you want to overwrite it. -
Page 36: Using Multi-Image View
4. Press OK. The LCD displays up to 9 numbered thumbnails, with the current image selected (outlined by a white frame). You cannot display the image counters and date and time in multi-image mode. Working with Captured Images ePhoto CL50 User’s Guide to increase/decrease the icon. - Page 37 CL50 User’s Guide 5. Press to scroll through the thumbnails. When you reach the last thumbnail on the screen, you can scroll further to add a new row of thumbnails to the screen (if there are more than 9 images).
- Page 38 If you want to specify how many copies to print, use single- image view. To tag images for print: 1. Press OK. A column of green icons appears on the color LCD. Working with Captured Images ePhoto CL50 User’s Guide icon. to scroll to the image you...
-
Page 39: Using Slide Show View
CL50 User’s Guide 2. Press to highlight the 3. Press OK. The DPOF PRINT menu appears. 4. Select the desired option: Print Image— to tag individual images for printing. Print all — to tag all images for printing. Index print— to tag all images for print as thumbnails. - Page 40 When you connect the camera to a TV or computer and play the slide show, you can also hear any sound that you recorded with an image. Working with Captured Images ePhoto CL50 User’s Guide icon. The slide show starts. to select a delay time (6-20 to select One...
-
Page 41: Using The Camera With Atv
CL50 User’s Guide SING THE You can connect the ePhoto CL50 to a television via the video cable (included) so you can view captured images or take pictures. As you view the images, you can also listen to any sound recorded with an image. -
Page 42: Using The Camera With A Computer
16 MB RAM 50 MB available hard disk space Color monitor with support for at least 256 colors 2x CD-ROM drive (required for installation) Printer or modem port Using the Camera with a Computer ePhoto CL50 User’s Guide AMERA WITH A OMPUTER... -
Page 43: Installing Photowise Software
Mac’s printer or modem port. Transferring Images into Your Computer You use PhotoWise to transfer images from the ePhoto CL50 to your computer. See PhotoWise Tips or online help for details. As you transfer images to the computer, the images go through a spe- cial enhancement process with Agfa PhotoGenie. - Page 44 1. Place the PhotoWise CD in the CD-ROM drive of your computer. 2. Double-click on the Make Floppies application icon on the out- ermost level of the CD. 3. Follow the prompts. Using the Camera with a Computer ePhoto CL50 User’s Guide...
-
Page 45: Care And Maintenance
Leave the camera at room temperature for a few hours to allow the condensation to evaporate. AC Adapter Use only the optional Agfa ePhoto AC adapter with your camera. Use of any other adapter will void your warranty and may damage the camera. -
Page 46: Memory Cards
To avoid scratching the lens, use a gentle, circular motion when wiping. Never use harsh or abrasive cleaners on the outside surfaces of the camera. Wipe off dust with a clean, dry cloth. Care and Maintenance ePhoto CL50 User’s Guide... -
Page 47: Troubleshooting
CL50 User’s Guide ROUBLESHOOTING If you have a problem using your ePhoto CL50, review this section first. If you cannot find the solution to your problem here, visit Agfa on-line at www.agfahome.com/ephoto or check with your dealer. Problem The camera has no power. - Page 48 The built-in flash doesn’t work. Troubleshooting ePhoto CL50 User’s Guide Possible Cause/Solution The camera is connected to a computer. Disconnect the camera or use the camera controls in PhotoWise. The camera is connected to a TV. Discon- nect the camera or view the images on your TV set.
- Page 49 CL50 User’s Guide Problem The recorded image is blurry. The recorded image is too dark. Possible Cause/Solution The subject moved while you were taking the picture. Hold the camera steady and take the picture again. You moved the camera while you were tak- ing a picture.
- Page 50 The batteries are too weak. Replace them. The serial port setting is incorrect. Your PC’s serial port should be dedicated to the ePhoto CL50. If your computer is running other software in the background that period- ically check the serial port (e.g., personal digital assistants), turn off those programs.
- Page 51 CL50 User’s Guide Problem PhotoWise can’t find the camera. An image can’t be deleted. Possible Cause/Solution The camera is off. Slide the Mode switch to PLAY or REC. The serial cable is connected incorrectly. Check the cable and connections.
-
Page 52: Camera Specifications
ISO Rating CCD Image Sensor Flash Compression Camera Specifications ePhoto CL50 User’s Guide Specifications Physical 2.8" H x 5.2" W x 2.2" D (72.2 x 131 x 55.5 mm) 10.5 oz or 300 g (without batteries) Tripod mountable (1/4" x 20, standard 35... - Page 53 CL50 User’s Guide Parameter Resolution Color Depth Storage Storage Capacity on 8 MB card Source Battery Life (NiMH) Other Source Startup Time Shutter Delay Time Sequential shots (burst mode) Sound recording Specifications — 1600 x 1200 pixels, very low com- pression (with PhotoGenie) —...
- Page 54 Levelness Altitude Temperature Relative Humidity Operating: 30 – 90%, non-condensing Camera Specifications ePhoto CL50 User’s Guide Specifications — 8.5 seconds(1680 x 1200) — 6.5 seconds (1280 x 960) — 4.0 seconds (640 x 480) — 6.7 seconds (black & white mode) —...
- Page 55 For more information about the Agfa ePhoto CL50 digital camera, visit the Agfa Web site at www.agfahome.com/ephoto. © 1998 Agfa Corporation. All Rights Reserved.
Need help?
Do you have a question about the ePhoto CL50 and is the answer not in the manual?
Questions and answers