Table of Contents
Advertisement
Advertisement
Table of Contents

Related Manuals for AGFA ePhoto 780


Summary of Contents for AGFA ePhoto 780
- Page 1 Quick-Start Quick-Start Reference Reference User’s Guide...
- Page 2 FCC WARNING: This equipment meets the limits for a Class B digital device, pursuant to Part 15 of FCC Rules. Only the power pack and cable supplied with the camera should be used. Operation with other power packs and cables is likely to result in interference to radio and TV reception and could void the user’s authorization to operate this equipment.
- Page 3 1-YEAR LIMITED HARDWARE WARRANTY Agfa warrants this product to be free from defects of material and workmanship for one (1) year from the date of pur- chase. During the warranty period, Agfa will repair or replace, at its option, the product at no charge to the customer.
-
Page 4: Using This Document
Using This Document To move around in this document, you can click on the special nav- igation symbols at the bottom of each page: Go to the previous page Return to the Contents page Go to the next page You can also click on any underlined text in blue to go to the page for that topic (e.g. -
Page 5: Quick Start
Quick-Start This section of the User’s Guide gives you a fast overview of how to use your ePhoto 780 to take pictures and review them on the camera. The more in-depth information about the ePhoto 780. Note: For hints on using this file most effectively, Step 1: Turn on the Camera To turn on the camera, slide the lens cover open. -
Page 6: Step 4: Frame The Picture
Quick-Start (cont.) To change the shown: Off (No flash used) Auto (Flash used as needed) Red-eye (Automatic flash with pre-flash to reduce “red-eye” effect) Forced (Flash always used) Step 4: Frame the Picture To frame the picture, look through the optical viewfinder. Press the Video Viewfinder button. -
Page 7: Step 5: Take The Picture
To take a picture while reviewing stored images, just press the shutter button. More Information Reference the features of your ePhoto 780, including: Deleting images Locking images so they cannot be deleted Downloading images to your computer Showing a slide show on your TV beeps and the image is stored in a few seconds. -
Page 8: Table Of Contents
Contents of this Guide FCC Information User Information Canadian Radio Interference Regulations Statement 1-YEAR LIMITED HARDWARE WARRANTY Introduction Other Documents Parts of Your Camera Safety Information Batteries Camera Turning the Camera On and Off Automatic Power Down Feature Quick-Start Mode Taking Pictures Adjusting the Focus Switch Taking Pictures with the Optical Viewfinder... - Page 9 Setting the Date and Time Selecting the Language Changing Other Settings Beeps Quick Review Mode Connecting the Camera to Your Computer Downloading Images into Your Computer Image Resolution and Agfa PhotoGenie™ Removing JPEG Artifacts Using PhotoWise Working with Images Naming Images QuickLink Launching QuickLink...
- Page 10 PhotoWise can’t find the camera. An image can’t be deleted. The LCD screen is blank except for a flashing number. Camera Care System Requirements IBM PCs and Compatibles Macintosh Camera Specifications Physical Optics Images Power Operation Environment Approvals Local Agfa Dealers...
-
Page 11: Parts Of Your Camera
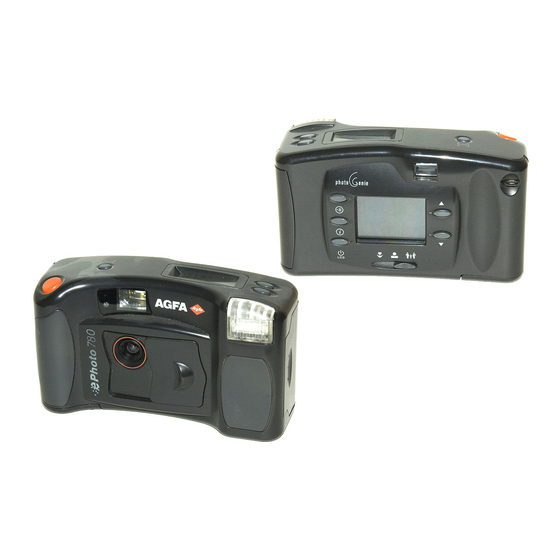
Parts of Your Camera LCD button Quick-Start Quick-Start Reference Reference Memory card/port compartment Menu button Optical viewfinder Info button Focus switch Shutter button Video viewfinder button Optical viewfinder 3.3 V Memory card Wrist strap hook LCD screen button button Resolution button Status display Flash... -
Page 12: Introduction
Introduction This section of the User’s Guide contains detailed information about your ePhoto 780 digital camera for your reference. Note: For hints on using this file most effectively, click here. For a quick overview of how to take and review pictures in your camera, see the Quick-Start section of this guide. -
Page 13: Safety Information
Safety Information WARNING! To avoid the risk of electric shock, do not disassemble the camera. Refer all ser- vicing to qualified service personnel. WARNING! To avoid the risk of fire or electric shock, do not expose the camera to rain or moisture. -
Page 14: Camera
Avoid using the camera in excessively cold (below 32°F/0°C) or excessively warm (above 104°F/40°C) conditions. When you bring the ePhoto 780 from a cold to a warm location, allow the camera to reach room temperature before you use it. Do not drop or bump the camera. -
Page 15: Turning The Camera On And Off
Turning the Camera On and Off In order to use any of the features of your ePhoto 780, you must turn on the camera’s power. To turn on the ePhoto 780, slide the lens cover open to expose the lens. - Page 16 Turning the Camera On and Off (cont.) Press the Menu button to highlight the next number. (Press the Info button to highlight the previous number.) Repeat the above two steps for each number until the date and time are correct. When you are finished, press the LCD button.
-
Page 17: Taking Pictures
You can take pictures at any distance in any of the modes. Taking Pictures with the Optical Viewfinder You can take pictures with your ePhoto 780 like any conventional camera by simply looking through the optical viewfinder and fully pressing the shutter button. -
Page 18: Taking Pictures With The Video Viewfinder
Taking Pictures (cont.) Taking Pictures with the Video Viewfinder You can also use the LCD screen as a viewfinder: Press the Video Viewfinder button. The LCD screen now shows the view as seen through the optical viewfinder. Frame your shot on the LCD screen and press the shutter button fully to take the picture. Note: The video viewfinder uses more battery power than the optical viewfinder. -
Page 19: Taking Pictures With The Self-Timer
Taking Pictures (cont.) Taking Pictures with the Self-timer The ePhoto 780 contains a self-timer that delays the shutter for 10 seconds after you press the shutter button. To use the self-timer: With the camera on (lens cover open), press the Menu button. The LCD screen displays the last picture taken along with the main menu. -
Page 20: Changing The Flash Mode
To change the resolution, press the Resolution button repeatedly until the desired setting is shown on the Status Display. Changing the Flash Mode The ePhoto 780 provides four flash modes: Off (No flash used) Auto (Flash used as needed) Red-eye (Automatic flash with pre-flash to reduce “red-eye” effect) -
Page 21: Using Memory Cards
Using Memory Cards The ePhoto 780 has no internal memory. All images are stored on removable memory cards. These cards are available in the following sizes: 2 MB, 4 MB and 8 MB. Note: The ePhoto 780 accepts only 3.3 volt SSFDC or SmartMedia™ removable memory cards. -
Page 22: Inserting Memory Cards
Using Memory Cards (cont.) Inserting Memory Cards To insert a memory card: Turn off the camera by closing the lens cover. Open the memory card compartment cover. Insert the memory card with the notched edge toward the top of the camera and push it all the way in. -
Page 23: Memory Card Conditions
Using Memory Cards (cont.) Press the button next to Reformat. The reformat menu appears. Press the button next to Format Now. The card is automatically formatted. The LCD screen then goes blank except for the message “No Pictures.” Note: To exit the menu system without formatting the card, press the button next to Don’t Format. -
Page 24: Format Menu
Using Memory Cards (cont.) Format Menu The inserted card needs to be formatted. Press the button next to Format Now. The for- matting process takes place automatically. Format Failed The formatting process failed for some reason. Try again or insert a different card. -
Page 25: Reviewing Images In Your Camera
Reviewing Images in Your Camera You can review the images stored on the memory card and/or To review individual images: With the camera on (lens cover open), press the LCD button. The LCD screen displays the last picture taken. Press the a continuous loop. -
Page 26: Displaying Image Information
Reviewing Images in Your Camera (cont.) Press the the next set. Note: Pressing To view an image in a set at full size: Press the LCD control button (Menu, Info, LCD) next to the row the image is in. The row is now displayed as a column. -
Page 27: Using Your Camera With A Tv
Using Your Camera with a TV You can use a television set as a viewer for your ePhoto 780 by connecting them with the included video cable. Setting the TV Type Before viewing images on a TV, you must set the camera for your TV type: With the camera on (lens cover open), press the Menu button. -
Page 28: Connecting The Camera To Your Tv
Using Your Camera with a TV (cont.) Connecting the Camera to Your TV Note: Set the TV type Plug one end of the video cable into the video output jack on the camera. Plug the other end of the video cable into the video input jack on your TV. On your TV, select an external device as the input source. -
Page 29: Taking Pictures While Connected To A Tv
Using Your Camera with a TV (cont.) Taking Pictures While Connected to a TV To take pictures with your ePhoto 780 while it is connected to your TV: Make sure the camera is connected to your TV. Press the Video Viewfinder button. The TV now displays the image as seen through the camera’s viewfinder. -
Page 30: Deleting Images
Deleting Images Any or all of the images stored on the memory card in your camera can be deleted at any time. To delete one or more images: With the camera on (lens cover open), press the Menu button. The LCD screen displays the last picture taken along with the main menu. - Page 31 Deleting Images (cont.) To delete all images: – Press the button next to Delete All. A submenu appears. – Press the button next to Delete Now. All deleted and LCD screen goes blank except for the message “No Pictures.” Note: To exit the menu system without deleting any images, press the button next to Don’t Delete.
-
Page 32: Locking And Unlocking Images
Locking and Unlocking Images The ePhoto 780 gives you the option to lock images to prevent them from being deleted. Note: A locked image is indicated by a padlock icon in the To lock or unlock images: With the camera on (lens cover open), press the Menu button. The LCD screen displays the last picture taken along with the main menu. -
Page 33: Setting The Date And Time
Setting the Date and Time If you are using the ePhoto 780 for the first time, and whenever you first turn the camera on after changing the batteries, your camera enters the “quick-start” mode. In this mode, you are automatically prompted to set the date and time. -
Page 34: Selecting The Language
Selecting the Language To select a language for the camera’s menu system: With the camera on (lens cover open), press the Menu button. The LCD screen displays the last picture taken along with the main menu. Press the Press the button next to Settings. The settings menu appears. Press the Press the button next to Language. -
Page 35: Changing Other Settings
Changing Other Settings Beeps By default, the ePhoto 780 emits an audible beep whenever an image is captured or to indi- cate an error condition. To turn off beeps: With the camera on (lens cover open), press the Menu button. The LCD screen displays the last picture taken along with the main menu. -
Page 36: Quick Review Mode
Changing Other Settings (cont.) Quick Review Mode The ePhoto 780 can automatically display each picture after it is taken to give you the option of deleting it if it is not to your liking. This “Quick Review” mode can be turned off. -
Page 37: Connecting The Camera To Your Computer
Connecting the Camera to Your Computer In order to download images to your computer, connect the ePhoto 780 to the computer using the serial cable provided: Plug the jack at one end of the serial cable into the serial port on your camera. -
Page 38: Downloading Images Into Your Computer
To download the images: Connect the camera to your computer. Note: When the ePhoto 780 is first connected to a computer, the camera beeps twice to indi- cate a successful connection and the Status Display shows the letters “PC”. While connect- ed to the computer, there is no need to turn on the camera by opening the lens cover. - Page 39 Downloading Images (cont.) In PhotoWise, click on the View Camera Images icon ( Camera from the Camera menu. The images stored in your camera appear as a filmstrip: Click on the Get Camera Images icon ( individual image or series of images, select the images, then click on the Get Camera Images icon, or double-click on the image.) In the dialog window that appears, select an existing photo album on disk, or create a new one, to store the images.
-
Page 40: Image Resolution And Agfa Photogenie
Downloading Images (cont.) Image Resolution and Agfa PhotoGenie™ Images downloaded from your ePhoto 780 using PhotoWise go through a special automatic processing step called Agfa PhotoGenie. Note: Agfa PhotoGenie processing is available only for images in 780 mode ) and using PhotoWise. -
Page 41: Removing Jpeg Artifacts
To select JPEG artifact removal and achieve best-quality images (longer download time), select “Run JPEG enhancer on download”. To reduce the download time (no JPEG artifact removal), deselect the option. Note: JPEG removal on is the default setting. Agfa recommends using this setting to achieve the highest-quality images. 780 mode resolution... -
Page 42: Using Photowise
Using PhotoWise This section provides an overview of some of the basic functions of your PhotoWise image- editing software. For more detailed information, see the .pdf file PhotoWise Tips or the on- line help in PhotoWise itself. Working with Images Images can be edited and managed in a number of ways in PhotoWise: To view an image in an album at full size, double-click on the image. -
Page 43: Naming Images
Using PhotoWise (cont.) To delete an individual image or series of images in an album or in the camera, select the images and press the Delete key. To delete all the images in your camera, quit the application or close the filmstrip show- ing the camera images. -
Page 44: Quicklink
Using PhotoWise (cont.) QuickLink QuickLink is a convenient way to access your images and use them in any OLE-compliant application (for example, Microsoft located at the right-hand side of the task bar. On a Macintosh, QuickLink is found in the Apple menu. -
Page 45: Using Quicklink
Using PhotoWise (cont.) To set QuickLink start-up options: PC — Click on the QuickLink icon with the right mouse button. In the menu that appears, choose Options. Select your setting(s) in the Options dialog. (You can also open this dia- log by double-clicking on the QuickLink icon.) Macintosh —... -
Page 46: Creating Installation Floppy Disks For Photowise
Using PhotoWise (cont.) To edit an image after it has been placed in an application: Double-click on the image. Adjust the image as desired using the PhotoWise tools that now appear within your application. Creating Installation Floppy Disks for PhotoWise To create a series of installation floppy disks for PhotoWise, follow these steps: Place the PhotoWise CD in the CD-ROM drive of your computer. -
Page 47: Macintosh
Using PhotoWise (cont.) MACINTOSH Place the PhotoWise CD in the CD-ROM drive of your computer. Double-click on the Make Floppies application icon on the outermost level of the CD. Follow the prompts that appear on the screen. Be sure to use blank, formatted diskettes as prompted and label them by number (i.e., Disk 1, 2, 3, 4). -
Page 48: Troubleshooting
Troubleshooting If you have a problem using your ePhoto 780, review this section first. If you cannot find the solution to your problem here, visit Agfa on the Web at your local Agfa The camera has no power. The camera may be off. Slide the lens cover open. -
Page 49: The Shutter Button Doesn't Work
Troubleshooting (cont.) The shutter button doesn’t work. The camera may still be saving the previous picture. Wait a few seconds and retry. The memory card may not have room left for an image at the currently selected resolu- tion. You can select a lower resolution, some or all of the images or If the camera is connected to your computer, you can use only the control functions in PhotoWise to operate your camera (except the Focus switch). -
Page 50: The Flash Doesn't Work
Troubleshooting (cont.) The flash doesn’t work. The flash may be turned off. Check the The batteries may be too weak. Replace them. The recorded image is blurry. You or the subject may have moved while you were taking the picture. Hold the camera steady and take the picture again. -
Page 51: The Recorded Image Is Too Bright
Troubleshooting (cont.) The recorded image is too bright. If the flash is in the Forced mode, there may be too much light. Change the to Auto. The camera may be pointed directly at a bright light. Take the picture from a different angle. -
Page 52: An Image Can't Be Deleted
Troubleshooting (cont.) (PC users) icated to the ePhoto 780. If your computer is running other software packages in the back- ground that periodically check the serial port (e.g., personal digital assistants), these packages must be turned off to avoid interfering with PhotoWise. -
Page 53: Camera Care
Camera Care Your ePhoto 780 requires minimal care. Before you proceed, read the tion of this User’s Guide. Then follow these guidelines: Never use harsh or abrasive cleaners on the outside surfaces of the camera. Wipe off dust with a clean, dry cloth. -
Page 54: System Requirements
System Requirements IBM PCs and Compatibles 486 processor (Pentium Windows 95 or Windows NT (3.51 or later) 16 MB RAM 50 MB available hard disk space VGA monitor with support for at least 256 colors 2x CD-ROM drive (required for installation) 9-pin RS-232C serial port Macintosh System 7.0 or higher... -
Page 55: Camera Specifications
Camera Specifications Physical Dimensions 2.75" H x 5" W x 1.8" D (70 x 127 x 46 mm) Weight 9.6 oz or 275 g (without batteries) Other Tripod mountable (1/4" x 20, standard 35 mm photo/video) Optics Lens Aperture f/4.0 Focal Range 15 cm –... -
Page 56: Images
Camera Specifications (cont.) Images Compression JPEG (internal) Resolution Color Depth 10 bits per channel (capture), 24 bits (saved) Storage 3.3 V removable SSFDC memory cards (2 MB – 8 MB), no internal memory Storage Capacity (2 MB card) Power Source 4 AA alkaline, lithium, NiMH or NiCd batteries Other Source Optional AC adapter... -
Page 57: Environment
Camera Specifications (cont.) Computer Interface Serial, RS-232C Transmission Speed 230,400 bps (max.) Video Output NTSC or PAL, user selectable Power Down Timer 60 seconds Self-timer 10 seconds Exposure 1/10,000 – 1/30 second Environment Levelness Can be operated at all angles Altitude Up to 11,800 ft (3,600 m) above sea level Temperature... -
Page 58: Local Agfa Dealers
CEP 01311-200, São Paulo Tel.: 55 11 251 5508 Fax: 55 11 287 5716 Canada Bayer Inc. - Agfa Division 77 Belfield Road Etibicoke, Ontario M9W 1G6 Tel.: 1 416 241 1110, 1-800 565 2432 Fax: 1 416 241 5409 Ceská... - Page 59 Grafische Systeme, Im Mediapark 5, 50670 Köln Internet: www.agfa.de CompuServe: GO DTPBVEN, Sektion Agfa Deutschland Fax-back: 49 221 5717 766 Agfa SnapScan: 49 190 871167 (DM 3,60 pro Minute) Support für alle anderen Scanner: 49 221 5717 389 Ecuador Sanitas S.A.
- Page 60 Tel.: 36 1 212 1540 Fax: 36 1 212 1574 Fax-back: 36 1 212 1574 México Bayer de México, S.A. de CV - Agfa Division Via Morelos 330-E, Sta Clara, 55540, Estado de México Tel.: 52 5 728 3000 Fax: 52 5 728 3210 Nederland Agfa-Gevaert B.V.
- Page 61 Agfa-Gevaert AB Box 6, S164 93 Kista, Stockholm Tel.: 46 7261 6161 Fax: 46 8793 0171 Taiwan Bayer Taiwan Co., Ltd - Agfa Division 5F, 237 Sung Chiang Road, Taipei 10477 Tel.: 886 2508 7272 Fax: 886 2516 1041 United Kingdom Agfa-Gevaert Ltd.
Need help?
Do you have a question about the ePhoto 780 and is the answer not in the manual?
Questions and answers