Table of Contents
Advertisement
Available languages
Available languages
Quick Links
MODEL/MODELO
MODEL/MODELO
BVSTEM3199
BVSTEM3199
MODÈLE
MODÈLE
Instruction Manual
STEAM ESPRESSO/ CAPPUCCINO MAKER
READ ALL INSTRUCTIONS BEFORE USING THIS APPLIANCE
Manual de Instrucciones
CAFETERA DE VAPOR PARA ESPRESSO Y CAPPUCCINO
LEA TODAS LAS INSTRUCCIONES ANTES DE USAR ESTE APARATO
Manual de Instruções
CAFETEIRA A VAPOR PARA EXPRESSO E CAPPUCCINO
LEIA TODAS AS INSTRUÇÕES ANTES DE USAR ESTE APARELHO
Manuel d'Instructions
MACHINE A EXPRESSO/CAPPUCCINO AVEC BUSE VAPEUR
LIRE TOUTES LES INSTRUCTIONS AVANT D ' UTILISER CET APPAREIL
Advertisement
Table of Contents

Related Manuals for Oster BVSTEM3199


Summary of Contents for Oster BVSTEM3199
- Page 1 MODEL/MODELO MODEL/MODELO BVSTEM3199 BVSTEM3199 MODÈLE MODÈLE Instruction Manual STEAM ESPRESSO/ CAPPUCCINO MAKER READ ALL INSTRUCTIONS BEFORE USING THIS APPLIANCE Manual de Instrucciones CAFETERA DE VAPOR PARA ESPRESSO Y CAPPUCCINO LEA TODAS LAS INSTRUCCIONES ANTES DE USAR ESTE APARATO Manual de Instruções CAFETEIRA A VAPOR PARA EXPRESSO E CAPPUCCINO LEIA TODAS AS INSTRUÇÕES ANTES DE USAR ESTE APARELHO...
-
Page 2: Important Safeguards
5. DO NOT operate any appliance with a damaged cord or plug or after the appliance malfunctions or has been damaged in any manner. Return this appliance only to the nearest Authorized Oster Service Center for examination, repair or adjustment. -
Page 3: Special Cord Set Instructions
CAUTION: PRESSURE In order to avoid possible burns to body parts and/or other injury from hot steam and water, NEVER open the reservoir cap or brew head while your Oster Espresso/ ®... -
Page 4: Description Of The Appliance
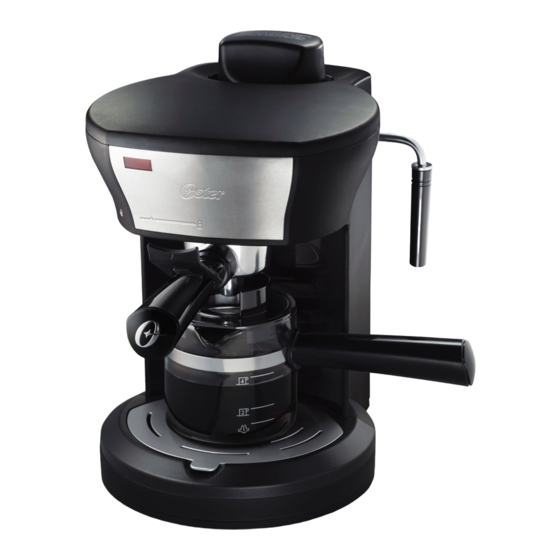
DESCRIPTION OF THE APPLIANCE Control Knob Key: Steam 1. Water Reservoir Cap 7. Frothing Aid 2. Control Knob 8. Glass Carafe 3. Indicator Light 9. Removable Drip Tray 4. Brew Head 10. Drip Tray Grid 5. Filter 11. Measuring Scoop 6. - Page 5 INTRODUCTION Congratulations! You have selected a quality Oster Espresso/Cappuccino Maker. This ® unique appliance has been designed to provide you with delicious espresso/cappuccino quickly and conveniently. Espresso is a unique method of coffee brewing in which hot water is forced through finely ground coffee.
- Page 6 HOW TO PREPARE QUALITY ESPRESSO AND CAPPUCCINO AT HOME THE COFFEE The coffee should be freshly ground, dark roasted variety. You may want to try a French or Italian roast. Pre-ground coffee will only retain its flavor for 7 – 8 days, provided it is stored in an air-tight container, in a cool, dark area.
-
Page 7: Preparing The Coffee
SERVINGS SIZE FINE ESPRESSO WATER (COLD) GROUND COFFEE 2 cups 2-cup marking on filter 2-cup mark on Glass Carafe 4 cups 4-cup marking on filter 4-cup mark on Glass Carafe 3. Remove the water reservoir cap and pour the water into the water reservoir. Be sure to accurately measure the amount of water needed. -
Page 8: How To Make Cappuccino
6. When the espresso has stopped flowing into the carafe, turn the control knob to the off position “ ”. Unplug the power cord and allow the unit to cool. Do not remove reservoir cap or brew head until the pressure in the appliance has been released. Follow procedures in the section marked “CAUTION: PRESSURE”... -
Page 9: Cleaning And Maintenance
6. When the milk has doubled in volume, or, if you are using a beverage thermometer, when the milk has reached 38°C (100°F), insert the frothing aid deeper into the milk to further heat the milk. Do not heat milk above 65°C (150°F). To avoid splattering of hot milk, do not let the frothing aid go above the surface of the milk. - Page 10 TO DELIME WATER RESERVOIR: 1. Make sure the control knob is in the off position “ “ ” and that the power cord is disconnected from the electrical outlet. 2. If the appliance is cool and the pressure has been released, (See Section “CAUTION: PRESSURE”...
-
Page 11: Problems And Causes
PROBLEMS AND CAUSES PROBLEM CAUSE SOLUTIONS Coffee does • No water in reservoir. • Add water. not come out • Coffee grind is too fine • Grind coffee medium ground. • Too much coffee in the • Fill filter only to 4-cup mark. filter. - Page 12 R E C IP E ID EA S T HAT YOU W IL L L O VE TO T R Y ! CAFÉ LATTE CAFÉ MOCHA 1/4 espresso and 3/4 steamed milk, 30 mL (1oz.) of chocolate syrup, one shot pour both in a mug at the same time of espresso, 237 mL (1 cup) frothed milk CAFÉ...
-
Page 13: Precauciones Importantes
5. NO opere ningún artefacto con un cordón o enchufe dañado, después de que el artefacto haya fallado o si se cae al suelo o se daña de cualquier otra manera. Regrese el artefacto al Centro de Servicio Oster Autorizado más cercano para examinarlo, repararlo o para ajustarlo mecánica o ®... -
Page 14: Cuidado Y Uso De La Jarra
Siga las siguientes instrucciones para reducir o eliminar el riesgo de romper la jarra: a. Esta jarra está diseñada para ser utilizada con su Cafetera para Café Espresso y Cappuccino Oster por lo tanto nunca debe ser usada sobre las hornillas de ®... -
Page 15: Descripción Del Artefacto
DESCRIPCIÓN DEL ARTEFACTO Perilla de Control: Vapor 1. Tapa del tanque de agua 7. Tubo para espumar 2. Perilla de control 8. Jarra de vidrio 3. Luz indicadora 9. Bandeja de goteo removible 4. Compartimento para el filtro 10. Rejilla de bandeja de goteo Apagado 5. -
Page 16: Cuidado: Presión
INTRODUCCIÓN Felicidades! Usted ha seleccionado una Cafetera para Café Espresso y Cappuccino Oster . Este ® artefacto único ha sido diseñado con la finalidad de ofrecerle un café espresso o cappuccino rápido y convenientemente. El método para preparar café espresso es un método único en el que el agua caliente pasa a presión por los granos de café... - Page 17 COMO PREPARAR EN CASA CAFÉ ESPRESSO Y CAPPUCCINO DE CALIDAD EL CAFÉ El café debe estar tostado y recién molido. Usted puede probar con una variedad tostada italiana o francesa. El café previamente molido solamente retendrá su sabor durante 7 a 8 días, siempre que éste sea almacenado en un contenedor cerrado, en un lugar frío y oscuro.
- Page 18 PORCIONES CAFE ESPRESSO AGUA (FRIA) MOLIDO FINO 2 tazas Marca de 2 tazas en el filtro Marca de 2 tazas en la jarra 4 tazas Marca de 4 tazas en el filtro Marca de 4 tazas en la jarra 3. Retire la tapa del tanque de agua y vierta el agua dentro del tanque. Asegúrese de medir correctamente la cantidad de agua que es requerida.
- Page 19 3. Verifique que la perilla de control se encuentre en la posición de apagado “ ”. 4. Conecte el cable eléctrico en un tomacorriente y gire la perilla de control hacia arriba al símbolo “ ”, el cual inicia el proceso de preparación. La luz se encenderá para indicarle que la cafetera se encuentra funcionando.
-
Page 20: Limpieza Y Mantenimiento
6. Cuando la leche haya duplicado su volumen, o si usted está usando un termómetro para bebidas, cuando la leche haya alcanzado los 38°C (100°F), inserte el tubo para espumar aun más adentro de la leche para calentarla más. No caliente la leche a más de 65°C(150°F). Para evitar salpicar leche caliente, no permita que el tubo para espumar quede por arriba de la superficie de la leche.