
Related Manuals for Oster BVSTEM8000RD


Summary of Contents for Oster BVSTEM8000RD
- Page 1 BVSTEM8000RD MODEL MODELO & BVSTEM8000SR Manual de Instrucciones LEA TODAS LAS INSTRUCCIONES ANTES DE USAR ESTE APARATO Instruction Manual PLEASE READ ALL INSTRUCTIONS BEFORE USING THIS APPLIANCE...
-
Page 2: Precauciones Importantes
6. NO utilice un electrodoméstico que tenga un cable o un enchufe dañado, ni después de que el artefacto haya presentado fallas, o haya sufrido cualquier otro desperfecto. Devuelva el artefacto al Centro de Servicio Autorizado Oster® más cercano para su inspección, reparación o ajuste. -
Page 3: Instrucciones Especiales Para El Cable
¡ADVERTENCIA! Para disminuir el riesgo de incendio o descarga eléctrica, no retire la tapa de ningún compartimiento de servicio. El electrodoméstico no contiene piezas que el usuario pueda reparar. La cafetera solo debe repararla personal autorizado. Antes de empezar a utilizar este electrodoméstico, le rogamos que lea cuidadosamente TODAS las instrucciones de este manual. -
Page 4: Descripción Del Aparato
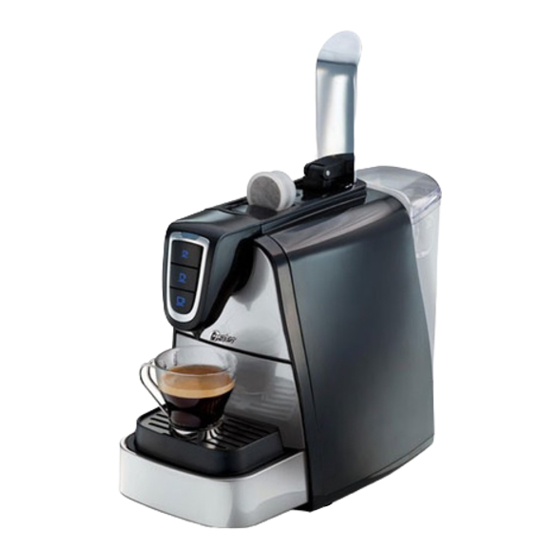
DE S C R I P CI Ó N DEL APA RATO 1. Tapa del depósito de agua 8. Botón para café espresso largo con luz indicadora 2. Depósito de agua 9. Luz indicadora de falla 3. Interruptor de encendido/apagado “I/O”... -
Page 5: Antes De Utilizar Por Primera Vez
P OR P R I M ERA VEZ Siempre limpie su cafetera para espresso antes de usarla por primera vez. Cerciórese de que su primera taza de café sea inmejorable limpiando su cafetera espresso Oster ® antes de utilizarla por primera vez. Solamente siga estos tres pasos sencillos: 1. -
Page 6: Como Utilizar
CÓ MO U T I LIZA RLA Nota: Si la unidad no ha estado en uso por un periodo de tiempo extendido, haga un ciclo sin cápsula antes de preparar café para una optima temperatura de colado. Refiérase a las instrucciones de “ Cómo cebar la unidad”. 1. - Page 7 NOTA: Antes de comenzar a colar, compruebe que el compartimiento de las cápsulas utilizadas no esté lleno. 6. Baje la palanca para cerrar firmemente (Consulte la Figura 3). (Figura 3) 7. Coloque la taza o el tazón que desee utilizar debajo de la boquilla dispensadora. 8.
- Page 8 10. Suba la palanca para expulsar la cápsula utilizada que se encuentra en el compartimiento y baje nuevamente la palanca (consulte la figura 5). NOTA: SAqUE LA CáPSULA USADA INMEDIATAMENTE DESPUéS DE qUE TERMINE EL CICLO DE COLAR. (Figure 5) C Ó...
-
Page 9: Mantenimiento Diario
MA NT ENIM IENTO MANTENIMIENTO DIARIO 1. Retire la bandeja de goteo y el compartimiento de las cápsulas utilizadas. 2. Levante el compartimiento de las cápsulas utilizadas y vacíelo. 3. Retire la rejilla de la bandeja de goteo. 4. Lave a mano el compartimiento, la rejilla y la bandeja de goteo con agua tibia jabonosa, enjuáguelos y séquelos bien. -
Page 10: Ciclo De Enjuagado
10. La luz azul del botón “Espresso doble” del medio y las luces roja y anaranjada indicadoras de funcionamiento defectuoso parpadearán alternadamente. Presione el botón “Espresso doble” del medio para iniciar el ciclo de eliminación del sarro. 11. La unidad dispensará la solución a intervalos de aproximadamente 10 minutos durante la primera etapa. -
Page 11: Como Drenar La Unidad
C Ó M O DR EN A R LA UN ID A D 1. Presione el botón “O” para apagar la unidad. 2. Compruebe que no haya cápsulas en el compartimiento de las cápsulas. 3. Compruebe que la palanca esté hacia abajo. 4. -
Page 12: Problemas Y Causas
PROBLEMAS y CAUSAS LUZ PARPADEANTE FREqUENCIA FRECUENCIA RAZON POR COMMENTARIOS CON LA qUE CON LA qUE LAS qUE LA PARPADEAN EMITE UN LUZ PARPADEA LAS LUCES SONIDO (SEGUNDOS (SEGUNDOS POR CICLO) POR CICLO) Tres luces azules 0,5 segundos No emite La unidad esta La unidad no permite colar de café... -
Page 13: Important Safeguards
5. Avoid contact with moving parts. 6. DO NOT operate any appliance with a damaged cord or plug or after the appliance malfunctions, or has been damaged in any manner. Return this appliance only to the nearest Authorized Oster Service Center for examination, ®... -
Page 14: Special Cord Set Instructions
WARNING! To reduce the risk of fire or electric shock, do not remove any service covers. There are no user serviceable parts inside the unit. Only authorized personnel should repair the expresso maker. Please read ALL of the instructions in this manual carefully before you begin to use this appliance. -
Page 15: Description Of The Appliance
DES CR I P T I ON O F T HE A PPLIA NC E 1. Water tank cover 8. Lungo espresso button with indicator light 2. Water tank 9. Malfunction indicator light 3. Power on/off “I/O” button 10. Used capsule drawer 4. -
Page 16: Before First Use
BE F O RE FIR ST U SE Always clean your Espresso Maker before using for the first time. Make sure that your 1st cup of coffee is as good as can be by cleaning your Oster Espresso Maker ®... -
Page 17: How To Use
H OW TO USE Note: If unit has not been used for a prolonged period of time, run one cycle without a capsule before preparing first shot of espresso to optimize the brewing temperature. Refer to “Priming the unit” instructions. 1. - Page 18 NOTE: BEFORE yOU START BREWING, MAkE SURE THE USED CAPSULE DRAWER IS NOT FULL. 6. Close lever firmly (See Figure 3). (Figure 3) 7. Place the cup/mug you wish to use under the dispensing spout. 8. Select the desired espresso coffee you would like to prepare by pressing once the appropriate button (see figure 4).
- Page 19 10. Raise the lever to eject the used capsule into the drawer and then close the lever again (see figure 5). NOTE: REMOvE THE USED CAPSULE RIGHT AFTER THE BREWING CyCLE IS COMPLETE. (Figure 5) P E RS ON A L IZ ING THE Q U A N T I T y OF COFFE E This espresso maker is set to prepare automatically 3 coffee selections, single shot, double shot and lungo.
-
Page 20: Daily Maintenance
M A I N T EN ANCE DAILY MAINTENANCE 1. Remove the drip tray and used capsule drawer. 2. Lift the capsule drawer and empty it. 3. Remove the grid from the drip tray. 4. Hand-wash the drawer, grid and drip tray with warm soapy water, rinse it well and dry them well. - Page 21 11. The unit will dispense the descaling solution at intervals of around 10 minutes during the first stage. During this stage, the red and orange indicator lights will blink alternately. There is no need to press the button during each interval, just wait. 12.
-
Page 22: Troubleshooting
T RO U B L E S HO OTING BLINkING FREqUENCY FREqUENCY REASON COMMENTS LIGHT OF BLINkING OF BEEP SOUND FOR BLINkING LIGHT (SECONDS/ LIGHT (SECONDS/ CYCLE) CYCLE) Three coffee blue 0.5 second No beep sound Unit is No coffee brewing is lights will blink pre-heating allowed during pre-heating. - Page 23 Características eléctricas de los modelos de la serie: BVSTEM8000RD-XXX Electric characteristics of series models: & BVSTEM8000SR-XXX Voltaje/Voltage Frecuencia/Frequency Potencia/Power 220 v 50 Hz 850 W xxx en donde x es cualquier numero entre 0 y 9 o cualquier letra entre A y z.