Troy-Bilt Pony Operator's Manual
Hide thumbs
Also See for Pony:
- Operator's manual (64 pages) ,
- Owner's/operator's manual (55 pages) ,
- Technical manual (24 pages)
Advertisement
Available languages
Available languages
Quick Links
Safe Operation Practices • Assembly & Set-Up • Controls & Operation • Service • Troubleshooting • Replacement Parts • Warranty
Record Product Information
Before setting up and operating your new equipment, please locate the model
plate and record the information in the area provided to the right. The model plate
contains the unit's model and serial numbers. This information will be necessary,
should you seek technical support via our web site, Customer Support Department or
with a local authorized service dealer.
Table of Contents
Safe Operation Practices .......................................................... 3
Assembly & Set-Up ................................................................... 5
Controls & Operation ............................................................... 7
Service .................................................................................. 10
Read and follow all safety rules and instructions in this manual before attempting to operate this machine. Failure to comply with these instructions
may result in personal injury.
Engine Exhaust, some of its constituents, and certain vehicle components contain or emit chemicals known to the State of California to cause cancer and
birth defects. www.P65Warnings.ca.gov.
NOTE: This Operator's Manual covers several models. Features may vary by model. Not all features in this manual are applicable to all models and the model depicted may differ
from yours.
O
peratOr
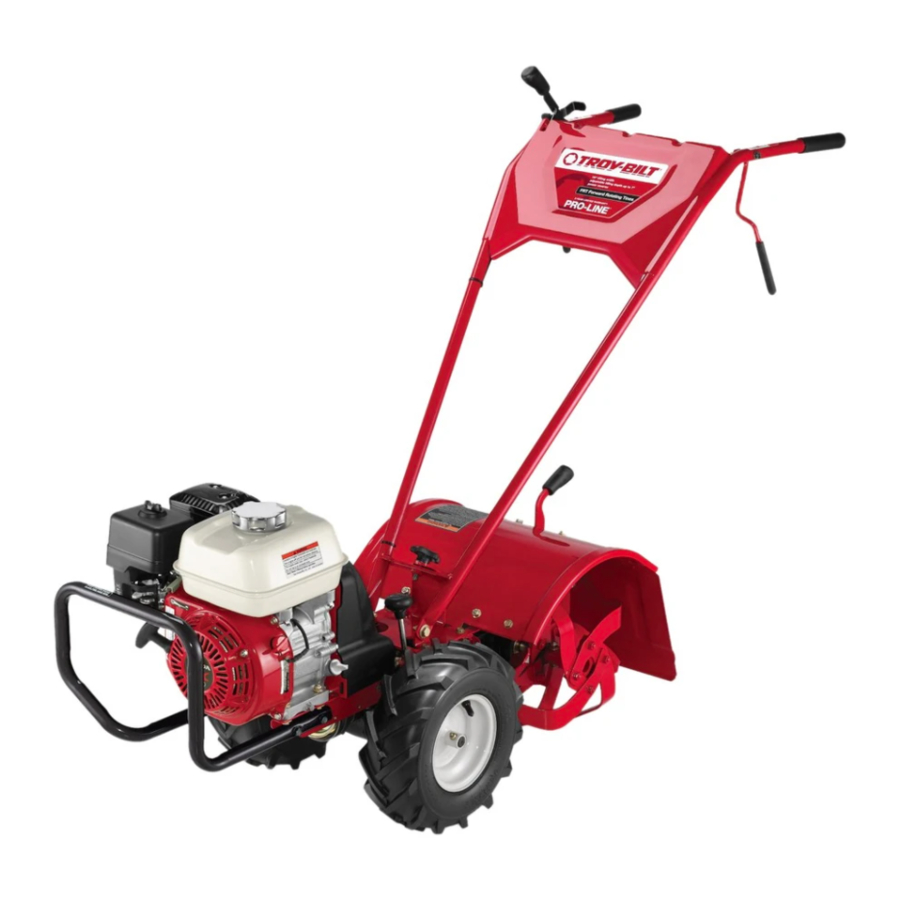
Pony, Pony ES & Pro-Line FRT Tiller
CALIFORNIA PROPOSITION 65
'
M
s
anual
M
N
odel
uMber
S
N
erial
uMber
Troubleshooting .....................................................................12
Replacement Parts .................................................................13
Warranty ...............................................................................14
Français .................................................................................15
WARNING
WARNING
Form No. 769-26059
(March 8, 2021)
Advertisement

Related Manuals for Troy-Bilt Pony


Summary of Contents for Troy-Bilt Pony
- Page 1 Safe Operation Practices • Assembly & Set-Up • Controls & Operation • Service • Troubleshooting • Replacement Parts • Warranty ’ peratOr anual Pony, Pony ES & Pro-Line FRT Tiller Record Product Information odel uMber Before setting up and operating your new equipment, please locate the model plate and record the information in the area provided to the right.
- Page 2 How-To video; you can seek help from the experts. Have your full model number and serial number ready. Choose from the options below: ◊ Web: www.troybilt.com/equipment/troybilt ◊ Phone: (800) 828-5500 ◊ Mail: Troy-Bilt LLC • P.O. Box 361131 • Cleveland, OH • 44136-0019...
- Page 3 SAFE OPERATION PRACTICES WARNING This symbol points out important safety instructions which, if not followed, could endanger the personal safety and/or property of yourself and others. Read and follow all instructions in this manual before attempting to operate this machine. Failure to comply with these instructions may result in personal injury. When you see this symbol - HEED ITS WARNING! DANGER This machine was built to be operated according to the safe operation practices in this manual.
- Page 4 SAFE OPERATION PRACTICES Notice Regarding Emissions Engines which are certified to comply with California and federal EPA emission regulations for SORE (Small Off Road Equipment) are certified to operate on regular unleaded gasoline, and may include the following emission control systems: Engine Modification (EM), Oxidizing Catalyst (OC), Secondary Air Injection (SAI), and Three Way Catalyst (TWC), if so equipped.
- Page 5 ASSEMBLY & SET-UP Contents of Carton Loosely attach the handlebars to the mounting tabs with two • Tiller shoulder screws (.437 x .268: • Handlebar Support 5/16-18), inserted through two Belleville washers (.450 x 1.0 x • Handlebar Assembly .062), then through the lower •...
- Page 6 ASSEMBLY & SET-UP Test the function of the reverse clutch control cable by pulling the knob Secure the wire on the left back and releasing it. The knob should return to its neutral position against handlebar with a cable tie just the tapered bushing.
- Page 7 CONTROLS & OPERATION FORWARD WARNING REVERSE Control Control Knob Lever (Bail) To help prevent serious personal injury or damage to equipment, put both wheels in the WHEEL DRIVE position. Never have wheels in FREEWHEEL position when the engine is running. When the wheels are in FREEWHEEL, Emergency they do not hold back the tiller and the tines could propel the tiller Stop Control...
- Page 8 CONTROLS & OPERATION Stopping the Engine WARNING To stop the wheels and tines, release the Forward Control Levers or the Reverse Control Knob (whichever control may be engaged). Look behind and exercise caution while operating in reverse. Do not attempt to till when in reverse. To stop the engine, move the Engine Throttle Control Lever to the STOP position.
- Page 9 CONTROLS & OPERATION Tilling Depths • Standing cornstalks of reasonable height can be power composted. Pushing over, but not uprooting, cornstalks will often make it easier for your tiller to • Avoid trying to dig too deeply too quickly, especially when busting sod chop up the stalks.
- Page 10 SERVICE Remove the hex washer WARNING screw (1/4-20 x .500) and flat washer (.28 x .74 x Before inspecting, cleaning, or servicing the machine, shut off the engine, .063) from the left side of wait for all moving parts to come to a complete stop, wait for the engine the belt cover and the hex to cool, disconnect the spark plug wire, and move the wire away from washer screw (1/4-20 x...
- Page 11 SERVICE Reinstall the wheel and reinstall the transmission cover. Removing a Tine Assembly Refill the transmission using synthetic 75W 140. Refill the engine with motor If removing both tine oil and replenish the fuel tank with gasoline. assemblies, mark them “left”...
- Page 12 TROUBLESHOOTING Problem Cause Remedy Wheels/tines will not turn 1. Improper use of controls. 1. Review Controls & Operation section. 2. Worn or broken clutch belt. 2. Contact authorized service dealer. 3. Internal transmission wear or damage. 3. Contact authorized service dealer. 4.
- Page 13 REPLACEMENT PARTS Problem Cause 954-04091 Reverse Drive Belt, 3L x 29.125 954-04090 Forward Drive Belt, 4L x 25.375 742-04223 Bolo Tine (LH), 12” 742-04224 Bolo Tine (RH), 12” 934-04232 Wheel, 13 x 5 x 6 946-04414A Reverse Cable 946-04413A Forward Cable 710-05289 Screw, 1/4-20 : 1.5 (Wheel Mount) 712-04064...
- Page 14 N2G 4J1, or call 1-800-668-1238 or log on to our Web site at www.mtdcanada. EXCLUSIVE REMEDY ARISING FROM THE SALE. TROY BILT SHALL NOT com. This limited product warranty is provided by Troy-Bilt LLC and is the only BE LIABLE FOR INCIDENTAL OR CONSEQUENTIAL LOSS OR DAMAGES product warranty provided by Troy-Bilt LLC for this Tiller.
-
Page 15: Table Of Contents
Consignes de sécurité • Assemblage et montage • Commandes et utilisation • Entretien • Dépannage • Pièces de rechange • Garantie ’ anuel d utilisation Motoculteur à dents arrière Pony, Pony ES et Pro-Line FRT Références de votre appareil uMéro de Modèle Avant d’utiliser votre appareil, notez ci-contre les numéros de modèle et de série. - Page 16 AU PROPRIÉTAIRE Merci ! Nous vous remercions de faire confiance à notre marque. Votre appareil vous donnera pleine et entière Le cas échéant, vous pouvez trouver l’information sur les essais de puissance utilisés pour établir le satisfaction pendant de longues années pourvu que vous l’entreteniez comme il faut. régime de puissance du moteur installé...
-
Page 17: Consignes De Sécurité
CONSIGNES DE SÉCURITÉ AVERTISSEMENT Les consignes importantes sont précédées de ce symbole. Si vous ne respectez pas ces consignes, vous pourriez vous blesser grièvement ou causer des dommages. Veuillez lire toutes les consignes de ce manuel avant d’utiliser votre appareil afin d’écarter tout risque d’accident et de blessure. Lorsque vous voyez ce symbole, RESPECTEZ LES AVERTISSEMENTS ! DANGER Ce motoculteur a été... - Page 18 CONSIGNES DE SÉCURITÉ Pare-étincelles Selon la Commission sur la sécurité des produits de consommation (Consumer Products Safety Commission) et l'Agence américaine de protection de l'environnement (U.S. Environmental Protection Agency), ce produit a une durée de vie utile moyenne de sept (7) ans ou 130 heures de fonctionnement. Au terme de cette durée de vie utile moyenne, faites inspecter l'appareil par un centre de service agréé...
-
Page 19: Assemblage Et Montage
ASSEMBLAGE ET MONTAGE Contenu de la boîte 5. Retenez légèrement chaque extrémité des bras aux pattes • Motoculteur comme suit : insérez un boulon • Support pour poignée (0,437 x 0,268 : 5/16 - 18) dans une rondelle Belleville (0,450 x 1,0 x •... - Page 20 ASSEMBLAGE ET MONTAGE Commande d’embrayage avant 4. Retenez le fil sur la poignée gauche du guidon, sous la plaque, avec une 1. Enlevez soigneusement les attache. Voir la Figure 10. attaches (bandes élastiques, ruban adhésif, etc.) des leviers de la 5.
-
Page 21: Commandes Et Utilisation
COMMANDES ET UTILISATION 7. Branchez le fil de la bougie d'allumage à la bougie d'allumage. Levier de Levier de marche marche arrière 8. Remplissez le réservoir d'essence selon les instructions de la notice d’utilisation avant du moteur. Suivez toutes les instructions et respectez toutes les consignes de sécurité. - Page 22 COMMANDES ET UTILISATION 10. Pour les modèles avec démarreur électrique, consultez la notice d’utilisation du c. Lorsque le motoculteur est en marche arrière, les dents tournent vers moteur pour les instructions de démarrage. l’arrière. Voir Figure 18. NOTE : Le démarreur à rappel peut être aussi utilisé pour démarrer les modèles avec AVERTISSEMENT démarreur électrique.
- Page 23 COMMANDES ET UTILISATION Profondeurs de labourage • Commencez par les résidus de cultures tels que vignes, tiges, pédoncules et racines. Compostez ces résidus dès que la récolte est terminée. Il est préférable • Évitez de creuser trop profondément et rapidement, surtout quand il s’agit de le faire le plus tôt possible car il est plus facile de labourer ces plantes d’ameublir la terre ou de labourer un sol qui n’a pas été...
-
Page 24: Entretien
ENTRETIEN Retirez le boulon (1/4-20 x AVERTISSEMENT 0,500) et la rondelle plate (0,28 x 0,74 x 0,500) à Avant d’inspecter, de nettoyer ou d’effectuer l’entretien de l’appareil, gauche du couvercle de arrêtez le moteur, attendez que toutes les pièces en mouvement soient courroie et le boulon (1/4- immobilisées et que le moteur soit refroidi, débranchez le fil de bougie et 20 x 0,500) à... - Page 25 ENTRETIEN Replacez la roue et le couvercle de transmission. Démontage des dents Ajoutez de l’huile à transmission avec de l’huile synthétique 75 W 140. Si vous démontez les Ajoutez de l’huile à moteur et de l’essence au réservoir. deux ensembles de dents, identifiez les ensembles Replacez le couvercle de courroie.
-
Page 26: Dépannage
DÉPANNAGE Problème Cause Solution Les roues et les dents ne tournent pas 1. Les commandes ne sont pas bien engagées. 1. Consultez le chapitre Commandes et utilisation. 2. La courroie d'embrayage est usée ou brisée. 2. Consultez un centre de service agréé. 3. -
Page 27: Pièces De Rechange
PIÈCES DE RECHANGE Problème Cause 954-04091 Courroie d'entraînement de marche arrière, 3L x 29,125 954-04090 Courroie d'entraînement de marche avant, 4L x 25,735 742-04223 Dent Bolo de 12 po, côté gauche 742-04224 Dent Bolo de 12 po, côté droit 934-04232 Roue de 13 x 5 x 6 946-04414A Câble d'embrayage de la marche arrière... -
Page 28: Garantie
Web au www.mtdcanada.com. Cette garantie limitée est offerte par Troy-Bilt PAR CONSÉQUENT, LA LIMITE CI-DESSUS PEUT NE PAS S’APPLIQUER DANS LLC. Il s’agit de la seule garantie de produit offerte par Troy-Bilt LLC pour cet VOTRE CAS.) Motoculteur. UNE COPIE DE LA FACTURE ORIGINALE DOIT ÊTRE PRÉSENTÉE LES STIPULATIONS ÉNONCÉES DANS CETTE GARANTIE CONSTITUENT LE...