Table of Contents
Advertisement
Advertisement
Table of Contents

Related Manuals for HP Pavilion N5402L


Summary of Contents for HP Pavilion N5402L
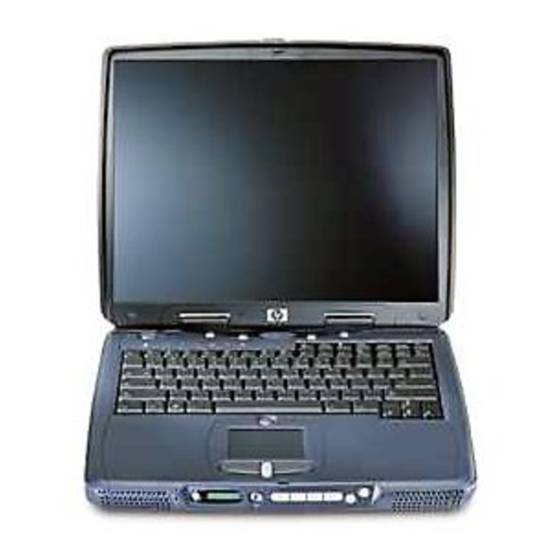
- Page 1 HP Notebook PC Reference Guide...
- Page 2 Microsoft®, MS-DOS®, and Windows® are U.S. registered trademarks of Microsoft Corporation. TrackPoint™ is a U.S. trademark of International Business Machines. Adobe® and Acrobat® are trademarks of Adobe Systems Incorporated. Hewlett-Packard Company HP Notebook Customer Care 1000 NE Circle Blvd., MS 425E Corvallis, OR 97330, U.S.A. Reference Guide...
- Page 3 COPIES AND ADAPTATIONS. Customer may make copies or adaptations of the software a) for archival purposes or (b) when copying or adaptation is an essential step in the use of the software with an HP product so long as the copies and adaptations are used in no other manner.
- Page 4 CD-ROM: (i) The product recovery CD-ROM and/or support utility software may only be used for restoring the hard disk of the HP product with which the product recovery CD-ROM was originally provided. (ii) The use of any operating system software by Microsoft contained in any such product recovery CD-ROM shall be governed by the Microsoft License Agreement.
- Page 5 Edition History Edition 1 ... October 2000 Edition 2 ... January 2001 Edition 3 ... August 2001 This manual is printed on recycled paper. Reference Guide...
-
Page 7: Table Of Contents
Contents Introducing Your Computer ... 11 Taking Inventory ... 12 To buy accessories ... 12 To find more information... 13 Identifying Parts of the Notebook... 14 Top and right side view... 14 Front view ... 15 Rear and left side view... 16 Bottom view... - Page 8 Caring for Your Computer... 45 To protect your hard disk drive... 45 To take care of your computer ... 45 To safeguard your data... 46 To extend the life of the display... 46 To get the most from your batteries ... 47 To clean your computer ...
- Page 9 Hewlett-Packard Limited Warranty Statement ... 80 Getting Support for Your HP Notebook PC ... 82 To use the Reference Guide ... 82 To get help from the HP notebook web site... 82 To call HP for service and support... 83 Obtaining Repair Service... 86 To receive warranty repair service ...
- Page 10 Safety Information ... 130 Power cords... 130 Battery safety ... 131 Laser safety ... 132 Regulatory Information... 133 U.S.A... 133 Canada... 134 European Union ... 135 Japan ... 137 Russia ... 137 International ... 137 Index ... 139 Reference Guide...
-
Page 11: Introducing Your Computer
Introducing Your Computer Reference Guide... -
Page 12: Taking Inventory
You can buy accessories for your computer online. For the latest accessories and options, visit the HP Notebook web site (www.hp.com/notebooks. As new accessories become available, you'll find them listed here. Here are some of the HP notebook accessories and replacement modules offered: • auto/airline adapter • AC adapter •... -
Page 13: To Find More Information
This pictorial introduction shows you how to get the computer up and Quick Start sheet running quickly. The Startup Guide is the printed HP manual that came with your Startup Guide computer. It shows how to set up and operate your computer and where to go for help if you run into trouble. -
Page 14: Identifying Parts Of The Notebook
Introducing Your Computer Identifying Parts of the Notebook Identifying Parts of the Notebook Top and right side view One-Touch buttons Power switch Status lights (see “Status lights” on page 18) Pad Lock touch pad on/off button Touch pad (pointing device) Scroll up/down toggle Click buttons Reference Guide... -
Page 15: Front View
Front view Headphone audio jack Status panel mode select button (on selected models) Status panel (on selected models) Multimedia buttons (on selected models) Latch (to open computer) Introducing Your Computer Identifying Parts of the Notebook Reference Guide... -
Page 16: Rear And Left Side View
Introducing Your Computer Identifying Parts of the Notebook Rear and left side view AC adapter (power) jack PS/2 port (external mouse or keyboard) Serial port Parallel port VGA port (external monitor) TV output port USB ports Reference Guide Microphone jack Kensington lock slot (security connector) PC card slots System-off button (for resetting computer) -
Page 17: Bottom View
Bottom view Battery Battery latch RAM expansion cover Mini-PCI cover (no user parts inside) Introducing Your Computer Identifying Parts of the Notebook Reference Guide... -
Page 18: Status Lights
Introducing Your Computer Identifying Parts of the Notebook Status lights Power Battery Caps lock (capital letters) Num lock (numeric keypad) Scroll lock Floppy disk drive access Hard disk drive access CD-ROM, CD-RW, DVD, or CD-RW/DVD drive access Reference Guide... -
Page 19: Multimedia Buttons
Multimedia buttons (Provided for selected models.) The multimedia buttons are on the front of the computer, to the right of the status display. They control the computer’s CD, DVD, or MP3 player in the same way that the controls of a standalone multimedia player control its functions. -
Page 20: Status Panel
Introducing Your Computer Identifying Parts of the Notebook Status panel (Provided for selected models.) The status panel on the front of the computer provides information about CD playback status, system power management, system date and time, and battery status. Messages are displayed on the 8-character LCD display, and you can switch from one kind of message to another by pressing the mode button to the left of the display. -
Page 21: Power Switch And Standby Button
Identifying Parts of the Notebook Power switch and standby button There are two controls above the keyboard that affect power in the HP notebook PC. The switch at the top left turns computer power on and off, and the large blue button in the top center—called the standby button—puts the system in standby mode or returns it to... -
Page 22: Setting Up The Computer
Introducing Your Computer Setting Up the Computer Setting Up the Computer To install the battery Your computer is shipped with the battery installed. If the battery has been removed, you can install it by inserting it into the battery bay on the bottom of your computer. Insert the back edge first, as shown, then press down the front edge until the battery latch clicks shut. -
Page 23: To Connect Ac Power
CAUTION Use only an HP AC adapter intended for this product, either the adapter that came with the computer or another authorized HP adapter. Using an unauthorized AC adapter can damage the computer and may void your warranty. Refer to the warranty statement for your product. -
Page 24: To Connect A Phone Line
Setting Up the Computer To connect a phone line Selected models of the HP notebook PC include a built-in modem. If you prefer, you can instead use a PC card modem or an external modem to connect a phone line. -
Page 25: To Turn On The Computer
Plug in the AC adapter and press the standby button again. To set up Windows Your HP notebook has Microsoft Windows XP preinstalled on the hard disk drive. The first time you turn on your computer, a Windows Setup program will automatically run so that you can customize your setup. -
Page 26: To Register Your Computer
By phone You can call your HP Customer Care Center and register by phone. Check “To call HP for service and support” on page 83 for the phone number. -
Page 27: To Connect To An Internet Service Provider
If a printer is connected to your computer, you can print a registration form and fax it to HP. Double-click the HP Notebook Registration icon on the desktop (if available), and print the registration form. You will find the fax number on the registration form. -
Page 28: To Reset Your Computer
Introducing Your Computer Setting Up the Computer To reset your computer If Windows or your computer stops responding, you can reset the computer and restart Windows. 1. If possible, shut down Windows: click Start, Turn Off Computer, Turn Off. –or, if this fails– Press CTRL+ALT+DEL, then click Shut Down. -
Page 29: Using Your Computer
Using Your Computer Reference Guide... -
Page 30: Operating The Computer
Using Your Computer Operating the Computer Operating the Computer To use the Fn hot keys The combination of the Fn key plus another key creates a hot key—a shortcut key sequence—for various system controls. Press and hold Fn while pressing the appropriate key. -
Page 31: To Use The Windows And Applications Keys
To use the Windows and Applications keys The Windows key brings up the Windows Start menu. This is the same as clicking the Start button on the taskbar. The Applications key brings up the shortcut menu for the current application. This is the same menu that appears when you click the right mouse button while pointing at the application. -
Page 32: To Use The Alt Gr Key
• To decrease the brightness, press Fn+F3. • To increase the brightness, press Fn+F4. For all screens: • Click Start, All Programs, Hewlett-Packard, Notebook, HP Display Settings, HP Display Settings. You have the option of adding a display settings icon in the taskbar for quick access. -
Page 33: To Adjust The Volume
You normally won’t change the resolution except to use an external monitor. Changing icon and label sizes To enlarge icons and labels on your screen when using a high-resolution display, use HP Desktop Zoom. • Click Start, All Programs, Hewlett-Packard, Notebook, HP Desktop Zoom, HP Desktop Zoom. -
Page 34: To Use The Touch Pad
Using Your Computer Operating the Computer With the multimedia buttons If your computer has multimedia buttons, you can use the volume control buttons to adjust volume for most audio applications when the computer is on. When the computer is off, you can use these buttons to adjust the volume for CDs. •... - Page 35 • To open an application, move the pointer over the icon, then press the left click button twice rapidly (double-click). You can instead tap twice on the touch pad. • To make a menu selection, move the pointer to the item and click the left click button once.
-
Page 36: To Use The One-Touch Buttons
Operating the Computer To use the One-Touch buttons The One-Touch buttons on your HP notebook allow you to start your e-mail or a Web browser—or any other application—by pressing a single button. The buttons are configured initially for specific applications, but you can change the configuration to start any applications you want. - Page 37 Using Your Computer Operating the Computer To format the display 1. Click Start, Control Panel, Printers and Other Hardware, Keyboard. 2. Select the One-Touch buttons tab. 3. Click Change Onscreen Display. 4. Follow the instructions below for specific formatting actions. To change the font of the display 1.
-
Page 38: To Insert Or Remove A Cd Or Dvd
Click Start, All Programs, Multimedia, DVD Player, Intervideo WinDVD. If you need to install the DVD player software, click Start, Run, type C:\HP\PROGRAMS\DVD\SETUP.EXE, and press Enter. If the DVD software is installed, you can also use Windows Media Player to play DVD movies. -
Page 39: To Create Or Copy Cds
You can also use Windows Media Player to create audio CDs, and Windows Explorer to create data CDs using a CD-RW drive. Note For best results use HP certified media. While other media may work well, HP cannot guarantee compatibility. The computer’s drive does not support 12X media (it automatically switches to a lower recordable speed). -
Page 40: Securing The Computer
Using Your Computer Securing the Computer Securing the Computer It is important to maintain security of the computer and of your data. You can improve security by—among other methods—using a password, locking the computer with a cable, or setting up virus protection. To set up password protection You can protect your computer from access by another user when you set up password protection, which is available either through Windows (software) or through the BIOS... -
Page 41: To Attach A Security Cable
To attach a security cable Your computer has a built-in connector that allows you to secure the computer with a cable. The Kensington MicroSaver lock system works with this connector and is available at many computer stores. 1. Wrap the cable around a stationary object, such as a table leg. 2. -
Page 42: To Use Virus-Protection Software
Using Your Computer Securing the Computer To use virus-protection software Virus-protection software can help protect the integrity of your data. This is especially important when you are connected to the Internet. Your computer includes Norton AntiVirus software. To use the software, do the following: •... -
Page 43: Working In Comfort With A Notebook Pc
HP equipment is available in Working in Comfort, which is preloaded on the hard disk in the HP Library (click Start, Help and Support, HP Library) and available on the Recovery CD in \hp\library—as well as at www.hp.com/ergo. - Page 44 • Position the computer so your wrists and hands are in a neutral position. Your wrists should be as straight as possible and should not have to bend sideways or more than 10 degrees up or down. Your HP notebook computer has a built-in palm rest, which is ideal for this purpose.
-
Page 45: Caring For Your Computer
Caring for Your Computer Here are some recommendations for maintaining your computer during everyday use, as well as preventing potential physical damage or data loss. To protect your hard disk drive Hard disk drives, like other internal components, are not indestructible and can be damaged by inappropriate handling and operation. -
Page 46: To Safeguard Your Data
Using Your Computer Caring for Your Computer To safeguard your data • Do not touch the touch pad or activate any other device that interrupts operation while the system is starting or stopping. • Back up your work regularly. Copy files to floppy disk, tape, or network drives. •... -
Page 47: To Get The Most From Your Batteries
To get the most from your batteries • Do not leave batteries unused for long periods of time. If you have more than one, rotate them. • If you normally use AC power, make a practice of using the battery as your power source at least once a week. -
Page 49: Traveling With Your Computer
Traveling with Your Computer Reference Guide... -
Page 50: Managing Power Consumption
Traveling with Your Computer Managing Power Consumption Managing Power Consumption When you are not using your computer, you will want to maximize battery operating time without compromising performance. It is not necessary to turn the computer off in order to reduce power consumption and extend battery life. Windows uses Advanced Configuration and Power Interface (ACPI) to provide manual and automated tools for reducing power consumption. - Page 51 Note When the system hibernates as a result of a critically low battery, you will find when resuming that all your data has been saved but that some functions may be disabled. To resume normal operation, restore power (by connecting AC power or installing a charged battery), perform a full shutdown, and then restart the computer.
-
Page 52: To Use Manual Power Management
Traveling with Your Computer Managing Power Consumption To set power management properties 1. Click Start, Control Panel, Performance and Maintenance, Power Options. 2. On the Power Schemes tab, set the timeout periods you prefer. (You can choose Never, but that setting is not recommended for hibernate mode.) 3. - Page 53 System Hibernation Action Saves the current session to disk, then shuts down. Provides maximum power savings while still allowing you to recover the current session. Restores network connections. When Click Start, Turn Off Computer, then press and hold Shift and click Hibernate. -OR- Configure lid, power switch, or standby button to perform the hibernation action...
-
Page 54: Using Battery Power
Using Battery Power Using Battery Power You can operate the HP notebook PC on battery power for extended periods, but you should be prepared to save your work and shut down if the battery is low. Follow the tips in this section to maximize the length of time you can operate on battery power. -
Page 55: To Respond To A Low-Battery Warning
From the Windows taskbar The System Tray on the Windows taskbar can display a power icon that provides detailed battery status information (see Windows help for details). The icon looks like a battery when AC is not connected. • Place pointer over the power icon to display the percentage of charge remaining. •... -
Page 56: To Optimize Battery Operating Time
Traveling with Your Computer Using Battery Power To optimize battery operating time • Plug in the AC adapter, especially while using the CD-ROM drive or DVD, the floppy disk drive, or any external connections such as a PC card or a modem. •... -
Page 57: Making Connections
Making Connections Reference Guide... -
Page 58: Using The Modem
• Outlook Express, for sending and receiving e-mail messages • Fax Console for sending and receiving faxes. Selected models of the HP notebook PC include a built-in high-speed V.90 modem. This modem allows you to connect to any Internet Service Provider (ISP) that has V.90 interoperable modems. -
Page 59: To Connect The Modem
• Do not use a telephone connection to report a gas leak in the vicinity of the leak. • Use only the power cord and batteries indicated in this manual. Do not dispose of batteries in a fire. They may explode. Check with local codes for possible special disposal instructions. -
Page 60: To Connect To The Internet
Making Connections Using the Modem Special notes about using a modem in certain countries • The pulse dialing feature may be disabled in certain countries, possibly because Loop Disconnect is not certified there. If pulse dialing is disabled, you should use tone dialing connections only. -
Page 61: To Disconnect From The Internet
You are now ready to explore the Internet. To go to a specific web site, enter the address (for example, www.hp.com) in the browser’s Address field. To search for information on the Web, you can use the browser’s Search tool and enter the word or phrase you are looking for. -
Page 62: To Dial In To A Network
Making Connections Using the Modem To dial in to a network You can use the modem to dial in to a LAN (local area network) that supports dial-in connections. This gives you access to network resources from a remote location. •... -
Page 63: To Send And Receive E-Mail
To send and receive e-mail The steps for sending and receiving e-mail depend on your Internet provider. If you are using AOL, e-mail is part of your AOL service. For other ISPs, you can use Outlook Express (included with your computer) or an e-mail system of your choice. This section includes instructions for using Outlook Express. -
Page 64: To Send And Receive Faxes
Making Connections Using the Modem To send and receive faxes Sending and receiving faxes requires just a telephone connection—you don’t need an Internet connection. You can use the modem and fax software to send and receive faxes on your computer. Fax Console fax software is included with Windows XP. To set up Fax Console Before you can use Fax Console, you need to install it. -
Page 65: Connecting To A Lan
Connecting to a LAN If your computer has a LAN port, you can use it to connect to a local area network (LAN). This gives you access to network resources—such as printers and file servers on your corporate network—and in some cases also to the Internet. To connect to a LAN 1. -
Page 66: Connecting Pc Cards
If this happens, restart the card by removing and reinserting it. Finding tested PC Cards For a list of PC Cards that have been tested and approved for use with your computer, visit the Accessories section of the HP Notebook web site (www.hp.com/notebooks). Reference Guide... -
Page 67: Connecting External Components
Connecting External Components You can connect external components—such as a printer, mouse, monitor, or keyboard— directly to your computer. To identify the ports The diagrams below shows the connectors for external devices on the computer. Note Before you connect any device, check its documentation to see if you need to make any settings or adjustments to the equipment before using it. -
Page 68: To Connect A Printer Or Another Parallel Device
Some USB devices can be connected to the computer in series—this is called a daisy- chain connection. Note If you have problems making this connection, contact the vendor of the peripheral device, as well as the HP web site, for the latest versions of the USB drivers. Reference Guide... -
Page 69: To Connect Audio Devices
To switch the display to the external monitor • Close the computer lid. • Press Fn+F5 to cycle through the display options: notebook display, external monitor, both. • Click Start, All Programs, Hewlett-Packard, Notebook, HP Display Settings, HP Display Settings. Making Connections Connecting External Components... - Page 70 Making Connections Connecting External Components To adjust monitor resolution 1. Click Start, Control Panel, Appearance and Themes, Display. 2. On the Settings tab, adjust the Screen area. To use dual display mode You can extend the desktop by connecting an external monitor to your notebook. Dual display mode requires that your computer display be set as shown in the table below.
-
Page 71: To Use A Tv Set As Monitor
To use a TV set as monitor You can connect your computer to a television set and then use it as a display. On some notebook PC models, the computer’s LCD display continues to be active when you use a TV set. - Page 72 On some models, it is necessary to change the Television Type in the Main menu of the BIOS Setup utility. To do this, restart your computer, and press F2 to start the BIOS Setup utility when you see the HP logo. To disable TV Different models of the notebook PC disable TV mode in different ways.
-
Page 73: Configuring And Expanding Your Computer
Configuring and Expanding Your Computer Reference Guide... -
Page 74: Using The Bios Setup Utility
To boot from a floppy disk or CD-ROM Note Your HP notebook is configured to boot from the hard drive first. If you want to always boot from a floppy disk or a CD-ROM, change the boot order under the Boot menu in the BIOS Setup utility. -
Page 75: Installing Ram Modules
Installing RAM Modules The notebook provides an optional memory expansion slot for installing up to two RAM expansion modules. Use HP PC-133 or higher SDRAM modules only. C A U T I O N Static electricity can permanently damage computer chips. Handle the RAM module only by its three non-connector edges. -
Page 76: Removing Ram Modules
Configuring and Expanding Your Computer Removing RAM Modules Removing RAM Modules You’ll need a small Phillips screwdriver to complete this procedure. 1. Click Start, Turn Off Computer, Turn Off. 2. Unplug the AC adapter and remove the battery. 3. Remove the RAM expansion cover located on the bottom of the computer. 4. -
Page 77: Updating Windows Drivers
Updating Windows Drivers To download the latest Windows drivers From time to time, HP releases updated versions of the drivers for your computer. These updates are intended to fix any problems that could be encountered in the drivers, and to keep your computer running smoothly. -
Page 79: Service And Support
Service and Support Reference Guide... -
Page 80: Hewlett-Packard Limited Warranty Statement
3. HP does not warrant that the operation of HP products will be uninterrupted or error free. If HP is unable, within a reasonable time, to repair or replace any product to a condition as warranted, you will be entitled to a refund of the purchase price upon prompt return of the product. - Page 81 7. TO THE EXTENT ALLOWED BY LOCAL LAW, THE REMEDIES IN THIS WARRANTY STATEMENT ARE YOUR SOLE AND EXCLUSIVE REMEDIES. EXCEPT AS INDICATED ABOVE, IN NO EVENT WILL HP OR ITS SUPPLIERS BE LIABLE FOR LOSS OF DATA OR FOR DIRECT, SPECIAL,...
-
Page 82: Getting Support For Your Hp Notebook Pc
Getting Support for Your HP Notebook PC Getting Support for Your HP Notebook PC HP offers a number of ways that you can get technical support for your computer. If you have questions or problems, here are the resources available to you: •... -
Page 83: To Call Hp For Service And Support
To call HP for service and support If you are unable to solve a problem with your computer, you can call the HP Customer Care Center. The Customer Care Center will assist you at no charge during the term of the warranty, for warranty-related questions;... - Page 84 (www.hp.com/notebooks) for the most complete and current list of phone numbers. If the HP notebook product is not normally sold and supported by HP in the country of use, the customer must call one of the supported HP Customer Care Centers located nearest the region.
- Page 85 Philippines Singapore Taiwan Thailand Vietnam Africa/Middle East Dubai Israel Republic of South Africa Getting Support for Your HP Notebook PC Europe +1 (970) 635-1000 Austria +1 (905) 206-4663 Belgium (Dutch) Belgium (French) +52 58 9922 Czech Republic +52 01 800 472...
-
Page 86: Obtaining Repair Service
If the HP notebook product is not normally sold and supported by HP in the country of use, it must be returned to a supported country for services. Warranty service may include the cost of shipping, handling, duties, taxes, freight, or fees to or from the service location. -
Page 87: To Prepare Your Computer For Shipment
To prepare your computer for shipment 1. Important. Back up the contents of your hard disk drive to floppy disks, tape, or a network drive. While your computer is being repaired, the hard disk may be replaced or reformatted. 2. Hewlett-Packard cannot guarantee the return of removable components. Please remove the following before you send your computer for service: •... -
Page 89: Solving Problems With Your Computer
Solving Problems with Your Computer Reference Guide... -
Page 90: Troubleshooting Techniques
If the PC card detection beep(s) at startup are very loud and volume cannot be adjusted • Download the latest audio driver from the technical support area of the HP notebook web site www.hp.com/notebooks. You may also want to test the speakers and sound with diagnostics. See “Testing Hardware Operation”... -
Page 91: Cd And Dvd Problems
Setup and change it. 1. Click Start, Turn Off Computer, Restart. 2. When you see the HP logo, press Esc to open the Boot menu. The default boot order is (1) Hard Drive, (2) Floppy Drive, and (3) CD-ROM/DVD Drive. - Page 92 Solving Problems with Your Computer Troubleshooting Techniques If a DVD movie stops playing in the middle • The DVD may be double-sided. Open the DVD tray and read the text near the center hole of the disc. If it says Side A, flip the disc over, close the tray, and then press the Play button to continue playing the movie.
-
Page 93: Display Problems
Display problems If the computer is on, but the screen is blank • Move the mouse or tap the touch pad. This will wake the display if it is off. • Try pressing Fn+F2 or Fn+F4 to increase the brightness. •... - Page 94 This issue is common across all vendors supplying TFT displays in their products and is not specific to the HP notebook display. HP notebook TFT displays meet or exceed all HP standards for cosmetic quality of TFT displays. HP does not warrant that the displays will be free of cosmetic imperfections.
-
Page 95: Hard Disk Drive Problems
Hard disk drive problems The hard drive’s reported capacity is less than its actual size • The hard disk drive is preconfigured to allocate some space to diagnostic software, which is used in support and service of your computer. This part of the hard drive is unavailable for other uses, and so is not included in the capacity of the hard drive as reported by Windows (My Computer, Properties). -
Page 96: Keyboard, Touch Pad, And Mouse Problems
Solving Problems with Your Computer Troubleshooting Techniques • Make sure the fan is working properly. • Keep in mind that charging the battery and running games and other programs that drive CPU usage toward 100% can increase the computer’s temperature. You may also want to test the fan with diagnostics. -
Page 97: Lan Problems
Maintenance, System. If the network interface is disabled, try to enable it. If it has a conflict, try disabling another device. • If available, run the LAN diagnostic software—run C:\hp\Drivers\Lan\Windiag\Setup.exe to install the software. Solving Problems with Your Computer Troubleshooting Techniques... -
Page 98: Memory Problems
Application and Software troubleshooter in Windows Help: click Start, Help and Support. • Not all third-party memory cards have been tested for use with the computer. Please check the HP Notebook web site (www.hp.com/notebooks) for a list of approved and tested memory cards. If memory doesn’t increase after adding RAM •... -
Page 99: Modem Problems
Modem problems If the modem seems slow • Check for excess static or noise on the line, which reduces the overall transmission speed. If necessary, contact your telephone company about fixing this type of problem. • If you’re dialing internationally, line noise is often difficult or impossible to eliminate. - Page 100 • Try restarting your computer and attempt another connection. • Try an alternative dial-in number. • Try disabling error correction and data compression. • Download the latest modem driver from the technical support area of the HP notebook web site www.hp.com/notebooks. • Run the modem diagnostics: 1.
- Page 101 If the modem isn’t detected • Check the modem setup. In Control Panel, open Phone and Modem Options. Check the COM port. • Open the hardware Device Manager: click Start, Control Panel, Performance and Maintenance, System. If the modem is disabled, try to enable it. If it has a conflict, try disabling another device.
-
Page 102: One-Touch Button Problems
Solving Problems with Your Computer Troubleshooting Techniques If the modem clicks repeatedly but doesn’t connect • Make sure you’re using an analog telephone line. You must not use a digital line. In a hotel, ask for a data line. • Check all cables and connections. If the modem connection is dropped when transferring large files •... -
Page 103: Pc Card (Pcmcia) Problems
• Check the HP Customer Care web site (www.hp.com/go/support) for information about installing certain PC Cards. • Make sure your computer supports the problem PC Card: check the HP Notebook web site (www.hp.com/notebooks) for a list of approved and tested PC Cards. -
Page 104: Performance Problems
Solving Problems with Your Computer Troubleshooting Techniques Performance problems For best performance with Windows XP, your computer should have at least 96 to 128 MB of memory (RAM). If the computer pauses or runs sluggishly • This may be normal Windows behavior. Background processing can affect response time. -
Page 105: Power And Battery Problems
• The battery gauge may need to be calibrated. Restart the computer, press F6 when the HP logo appears, and follow the instructions that appear onscreen. This process calibrates the battery, and requires four to five hours. You cannot use the computer during this process. -
Page 106: Printing Problems
Solving Problems with Your Computer Troubleshooting Techniques • Turn off the computer, then make sure the battery contacts are clean and that the AC adapter cables are fully plugged in. • Move the computer away from any nearby heat source. Unplug the AC adapter and allow the battery to cool down. -
Page 107: Serial, Parallel, And Usb Problems
• If the printer you are using is a 600-dpi (dots per inch) printer, try selecting a compatible printer driver for a 300-dpi printer. For example, for a 600-dpi HP LaserJet printer, try using the HP LaserJet IIIsi driver (300-dpi). Certain applications may not work properly with 600-dpi printers. -
Page 108: Startup Problems
111. If the USB port is not working • Contact the vendor of the peripheral device or check the HP notebook web site (www.hp.com/notebooks) for the latest versions of the USB drivers and the driver for the device. -
Page 109: Standby And Resume Problems
1. Click Start, Turn Off Computer, Restart. 2. When you see the HP logo, press F2 to start the BIOS Setup utility. 3. Tab to the Boot menu. The default boot order is (1) Hard Drive, (2) Floppy Drive, and (3) CD-ROM/DVD Drive. -
Page 110: Video File Playback Problems
Solving Problems with Your Computer Troubleshooting Techniques If you have general problems resuming from standby or hibernation • Close all applications before going into standby or hibernate mode. • If the problems appeared after you installed new software (including drivers, such as printer drivers), uninstall the software. -
Page 111: Testing Hardware Operation
To run the diagnostic test 1. Restart the computer: click Start, Turn Off Computer, Restart. 2. Press F10 when you see the HP logo. 3. When the menu appears, press Enter to run e-Diagtools. The first time you run the program, you will be prompted to select the language for the program. - Page 112 13. Exit. Press F3 and then any key to exit and reboot. 14. Optional: open the Support Ticket. In Windows, click Start, All Programs, HP e-Diagtools, e-Diagtools for Windows. 15. Click View to display the Support Ticket. 16. To add information about your problem, click Comments and type the information, then click OK.
-
Page 113: Recovering And Reinstalling Software
• On the hard drive under c:\hp\drivers. • On the Recovery CD, under \hp\drivers. • On the HP notebook web site at www.hp.com/notebooks. This web site contains the latest updates of software drivers for your computer. To recover the factory installation of your hard disk The following procedure describes how to recover the original Windows software and operating system that came with your computer. -
Page 114: To Replace A Damaged Recovery Cd
To replace a damaged Recovery CD If you lose or damage the Recovery CD, call the HP Customer Care Center for information about replacing it. See “To call HP for service and support” on page 83 for the phone number. -
Page 115: To Recover An Application
CD-ROM. Note The Recovery CD restores all the software that was originally on your HP notebook PC, but the recovery program erases the hard drive in the process. Therefore, to reinstall only specific applications and not the original system, do not use the Recovery CD. -
Page 117: Specifications And Regulatory Information
Specifications and Regulatory Information Reference Guide... -
Page 118: Hardware And Bios Specifications
Hardware and BIOS Specifications Hardware and BIOS Specifications Because we are constantly improving our products, the specifications shown below are subject to change. For the latest specifications, go to the HP notebook web site (www.hp.com/notebooks). BIOS Setup utility options The pointing devices are not active in the BIOS Setup utility. Press the Right and Left arrow keys to move from one menu to another. - Page 119 Video Display Device Switches between sending video signals to both the built-in LCD display and an external CRT display (Both) and automatically switching to the external CRT if one is attached (Auto). Video Expansion When enabled, expands video image to cover entire LCD at lower resolutions.
- Page 120 Specifications and Regulatory Information Hardware and BIOS Specifications LCD Status Panel Set date format on the status panel. Date Format LCD Status Panel Set time format on the status panel. Time Format Security Menu User Password Is Shows if a user password is set. Administrator Shows if a supervisor password is set.
-
Page 121: Hardware Specifications
Load Previous Values Save Changes Hardware specifications Note Technology codes identify different models of a notebook PC. These two-letter codes are found near the serial number on the bottom of the computer. Physical Size: Attributes 13.03"x10.72"x1.59" (331x272.3x40.5mm) for 12.1"–14.1" 13.46"x10.92"x1.65" (342x276.6x42.0mm) for 15" Weight: 6.5lbs (3.0kg) minimum Technology code GE: AMD Duron and Athlon, 200MHz FSB Technology code GE: Ali M1647 + M1535... - Page 122 Specifications and Regulatory Information Hardware and BIOS Specifications Audio Built-in microphone Two stereo speakers CD player with built-in control buttons and status display (selected models) Headphone-out and microphone-in Rechargeable lithium-ion battery (11.1V) or NiMH battery (10.8V) Power Battery life: up to 3 hrs depending on settings, usage, battery, and other factors Charging time: 2.2 hr (system off), 3 hr (system on) Low-battery warning...
-
Page 123: Modem Reference Information
This section contains summary information about AT commands, S-registers, and selected result codes for the built-in modem (with an Ambit chip), which is included with selected models of the HP notebook PC. AT commands (Ambit) In the following AT command table, default settings are shown in bold. All listed AT commands except A/ must be preceded by “AT.”... - Page 124 Specifications and Regulatory Information Modem Reference Information Command Function (Ambit) Turn speaker off Turn speaker on during handshaking and turn speaker off while receiving carrier Turn speaker on during handshaking and while receiving carrier Turn speaker off during dialing and receiving carrier and turn speaker on during answering Turn off automode detection Turn on automode detection Go on-line...
- Page 125 Command Function (Ambit) &F1 Restore factory configuration 1 &G0 Disable guard tone &G1 Disable guard tone &G2 Enable 1800 Hz guard tone &J0 Set S-Register response only for compatibility &J1 Set S-Register response only for compatibility &K0 Disable DTE/DCE flow control &K3 Enable RTS/CTS DTE/DCE flow control &K4...
- Page 126 Specifications and Regulatory Information Modem Reference Information Command Function (Ambit) &Y0 Recall stored profile 0 upon power up &Y1 Recall stored profile 1 upon power up &Zn=x Store dial string x (up to 34 digits) to location n (0 to 3) Disable line quality monitor and auto retrain Enable line quality monitor and auto retrain Enable line quality monitor and fallback/fall forward...
- Page 127 Command Function (Ambit) Enable RPI and set DTE speed to 38400 bps Enable RPI and set DTE speed to 57600 bps +H11 Enable RPI+ mode +H16 Enable Video Ready mode Download to flash memory at last sensed speed Download to flash memory at 38.4 kbps Download to flash memory at 57.6 kbps -SDR=0 Disable distinctive ring...
-
Page 128: S-Registers (Ambit)
Specifications and Regulatory Information Modem Reference Information Command Function (Ambit) *NCn Select country parameters: 0=US, 1=Japan, 2=Germany, 3=UK, 4=France, 5=Netherlands, 6=Italy, 7=Australia, 8=Sweden, 9=Denmark, 10=New Zealand, 11=Korea, 12=China, 13=Singapore, 14=Malaysia, 15=South Africa, 16=Poland, 17=Czech Republic, 18=Hungary, 19=Hong Kong, 20=Turkey, 21=Spain. S-registers (Ambit) Register Function (Ambit) -
Page 129: Selected Result Codes (Ambit)
Register Function (Ambit) LAPM break control Call failure reason code PSTN transmit attenuation level Fax transmit attenuation level Result code messages control Selected result codes (Ambit) Code Specifications and Regulatory Information Modem Reference Information Range/units 0-15/dBm 0-15/dBm Meaning CONNECT RING NO CARRIER ERROR CONNECT 1200... -
Page 130: Safety Information
New Zealand Japan India South Africa Argentina Chile People’s Republic of China Reference Guide Rated Voltage and HP Part Number Current 125 Vac (3 A) 8120-6313 250 Vac (2.5 A) 8120-6314 250 Vac (2.5 A) 8120-8699 250 Vac (2.5 A) -
Page 131: Battery Safety
• To avoid risk of fire, burns, or damage to your battery pack, do not allow a metal object to touch the battery contacts. • The battery pack is suitable for use only with compatible HP notebook models. Check the “Support and Service” section of this Reference Guide for your local HP contact. -
Page 132: Laser Safety
Safety Information Laser safety The CD-ROM and DVD drives used with the HP notebook PC are certified as Class 1 laser devices according to the U.S. Department of Health and Human Services (DHHS) Radiation Performance Standard and International Standards IEC 825 / IEC 825-1 (EN60825 / EN60825-1). -
Page 133: Regulatory Information
This section presents information that shows how the HP notebook PC complies with regulations in certain regions. Any modifications to the computer not expressly approved by Hewlett-Packard could void the authority to operate the HP notebook PC in these regions. -
Page 134: Canada
Specifications and Regulatory Information Regulatory Information Declaration of Conformity (U.S.A.) Responsible Party: Hewlett-Packard Company Manager of Corporate Product Regulations 3000 Hanover Street Palo Alto, CA 94304, U.S.A. +1 (650) 857-1501 declares that the product Trade name: Hewlett-Packard Company Product name: Notebook PC Model Number(s): Omnibook XE3 (OB XE3), Pavilion N5D series... -
Page 135: European Union
Specifications and Regulatory Information Regulatory Information European Union The equipment has been approved in accordance with Council Decision 98/482/EC for pan-European single terminal connection to the public switched telephone network (PSTN). However, due to differences between the individual PSTNs provided in different countries, the approval does not, of itself, give an unconditional assurance of successful operation on every PSTN network termination point. - Page 136 Specifications and Regulatory Information Regulatory Information Die Geräte wurden gemäß Ratsentscheidung 98/482/EC für den Anschluss an eine einzelne Telefonbuchse im europäischen Raum (Public Switched Telephone Network) und drahtlose Funknetzwerke zertifiziert. In Anbetracht der Unterschiede zwischen den einzelnen Telefonnetzen bietet die Zertifizierung für sich genommen keine absolute Sicherheit, dass die Geräte bei Anschluss an jeder beliebigen Telefonbuchse funktionieren.
-
Page 137: Japan
Specifications and Regulatory Information Regulatory Information Questa apparecchiatura è stata progettata per funzionare in tutti i paesi dell’Area Economica Europea (reti telefoniche pubbliche commutate). La compatibilità della rete dipende dalle impostazioni interne del software. Rivolgersi al fornitore dell’apparecchiatura qualora sia necessario utilizzare quest’ultima su una rete telefonica diversa. - Page 138 (1) this device may not cause harmful interference, and (2) this device must accept any interference received, including interference that may cause undesired operation. The HP F1454A and F1781A ac/dc adapter used with this product is designed to operate on all power systems, other than IT power systems.
-
Page 139: Index
Index AC adapter connecting, 23 location, 16 accessories, 12 ALT GR key, 32 antivirus software, 42 as your ISP, 61 connecting to, 60 disconnecting, 61 e-mail, 63 Applications key, 31 applications, recovering, 115 AT commands, 62, 123 audio adjusting volume, 90 connecting devices, 69 troubleshooting, 90 auto/airline adapter, 12... - Page 140 50, 53 hot keys, 30 HP Customer Care telephone numbers, 84 web site, 103 HP Desktop Zoom, 33 HP notebook web site, 82 HP Notes, 13 icons changing size, 33 installing original software, 113 Internet connecting to, 60...
- Page 141 45, 95 VGA port location, 16 virus protection, 42 voltage requirements, 130 volume adjusting, 33 troubleshooting, 90 web site HP Customer Care, 103 HP notebook, 82 Windows downloading drivers, 77 key, 31 manual, 13 password, 40 reinstalling, 113 setting up, 25...