Table of Contents
Advertisement
Advertisement
Table of Contents
Troubleshooting

Related Manuals for HP Pavilion All-in-One MS200 - Desktop PC


Summary of Contents for HP Pavilion All-in-One MS200 - Desktop PC
-
Page 1: Getting Started
HP All-in-One PC Getting Started... - Page 2 The only warranties for Hewlett-Packard products and services are set forth in the express statements accompanying such products and services. Nothing herein should be construed as constituting an additional warranty. HP shall not be liable for technical or editorial errors or omissions contained herein.
-
Page 3: Table Of Contents
Table of Contents HP All-in-One PC Setup ................1 Computer Overview ....................1 Setting Up Your Computer ..................3 Turning On Your Computer for the First Time ..............4 Special Features of Your Computer ............15 Adjusting the Tilt and Swivel ..................15 Webcam ........................ - Page 4 Getting Started (features vary by model)
-
Page 5: Hp All-In-One Pc Setup
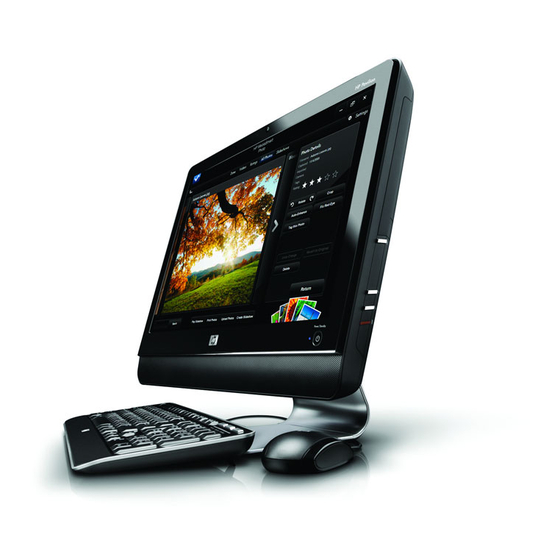
HP All-in-One PC Setup Computer Overview The HP All-in-One PC The HP All-in-One is a sleek, stylish computer with a built-in 47-cm (18.5-in) diagonal widescreen display. This stylish All-in-One computer comes with features like webcam, CD/DVD player and burner, USB ports, media card reader, wireless 802.11b/g networking, and built-in speakers. - Page 6 Item Description (continued) Audio line out Connect external 2.0 and 2.1 powered speakers. Memory card reader LED Indicates card reader activity. USB 2.0 (2 ports) Connect USB devices (USB 2.0) such as printers, external hard disk drives, digital cameras, and MP3 players. USB 2.0 (4 ports) Connect USB devices (USB 2.0) such as printers, external hard disk drives, digital cameras, and MP3 players.
-
Page 7: Setting Up Your Computer
Burn CDs and DVDs*. The LED indicates whether there is a and LED disc in the drive. *Hewlett-Packard supports the lawful use of technology and does not endorse or encourage the use of our products for purposes other than those permitted by copyright law. -
Page 8: Turning On Your Computer For The First Time
Checking the computer installation Place the computer in the proper location so that: All ventilation openings are unobstructed. All cabling is out of the way. Do not place any cable in a walkway or where it can be stepped on or damaged from placing heavy objects on it. -
Page 9: Restarting The Computer
The computer has these reduced power states: Sleep mode saves your open documents and programs, and places your computer into a reduced-power state. During Sleep mode, the power status LED turns off, and the computer is ready to wake quickly. ... -
Page 10: Connecting Analog Speakers
Connecting analog speakers (Sold separately) To connect active external speakers, such as left/right stereo speakers or a 2.1 system of two speakers and a subwoofer, to the computer: Make sure the speaker system is turned off and unplugged. For 2.0 powered speakers, connect the speaker cable to the Audio Line Out connector on the back of the computer. -
Page 11: Adjusting The Speaker Volume
Adjusting the speaker volume There are several ways to adjust volume. Use the Volume icon on the Windows 7 taskbar to set speaker volume. Then, you can adjust the volume by using: The Volume buttons on the keyboard (select models only). ... -
Page 12: Connecting To A Network
Connecting to a network This section describes connecting to the Internet through a wired or wireless connection. Your computer supports a wireless or wired LAN that connects to other devices, such as a printer. The network connection to the Internet is usually through a broadband modem (digital subscriber line [DSL] or cable), which requires a separate subscription. -
Page 13: Connecting To The Internet
Connecting to the Internet Connecting to the Internet requires that you: Purchase high-speed Internet service from an Internet service provider (ISP). Purchase a broadband modem (DSL or cable). This may be provided by the ISP. Purchase and install a wireless router (sold separately), if one is required. The computer can connect to the Internet through a LAN or digital subscriber line (DSL). - Page 14 Checking the wireless LAN device installation You can verify that the integrated WLAN device is installed on the computer correctly by using the Windows operating system Device Manager: Click the Start button. Type Device Manager into the Start Search box, and then click Device Manager to open the Device Manager window.
-
Page 15: Protecting Your Computer
Protecting your computer Protect your computer, personal settings, and data from a variety of risks by using: Passwords. Antivirus software. Firewall software. Critical security updates. NOTE: Security solutions are designed to act as deterrents, but they may not be able to prevent software attacks or to prevent the computer from being mishandled or stolen. -
Page 16: Using Antivirus Software
Using antivirus software When you use the computer for e-mail, network, or Internet access, you expose it to computer viruses. Computer viruses can disable or damage the operating system, software programs, or computer utilities. Antivirus software can detect most viruses, remove them, and, in most cases, repair any damage that they have caused. -
Page 17: Setting Up User Accounts
Installing critical security updates CAUTION: To reduce the risk of information damage or loss from security breaches and computer viruses, install all critical updates from Microsoft as soon as you receive an alert. Additional updates to the operating system and other software may have become available after the computer was shipped. - Page 18 Transferring files and settings from an old computer to your new computer You can copy files from an old computer to your new computer by using CDs or DVDs, memory sticks, or personal media drives, or by using the Windows Easy Transfer cable (sold separately).
-
Page 19: Special Features Of Your Computer
Special Features of Your Computer Adjusting the Tilt and Swivel For optimal viewing, adjust the screen tilt to your own preference: Face the front of the computer and hold the base so that you do not topple the computer while changing the tilt. Adjust the tilt by moving the top edge of the display screen either toward or away from you (the range is –5°... -
Page 20: Webcam
Webcam The webcam (A) is located at the top front of the computer. Use your webcam to: Create videos from files on your computer. Create snapshots to view, organize, edit, send, and print. Create video notes for an enhanced visual calendar and to share. ... -
Page 21: Using The Memory Card Reader
There is a built-in microphone next to the webcam on the front of the computer. A jack for an external microphone is on the side of the computer. The optimal distance for recording sound with the microphone is about .5 meters (2 feet) away from the microphone. Before you can set up a video chat: Download an Internet messenger or video phone call program. -
Page 22: Memory Card Reader
When you insert media, the Safely Remove Hardware window may appear. If it opens, or if you open the Safely Remove Hardware window by mistake, click Close. CAUTION: Do not click Stop in the Safely Remove Hardware window with the USB Mass Storage Device selected. Doing so removes the operating system recognition of the memory card reader from your computer, and you must restart the computer to see the memory card reader again. -
Page 23: Using A Vertical Cd/Dvd Drive
Using a Vertical CD/DVD Drive Your computer has an optical disc drive that is installed in a vertical position. The Eject button is just below drive door. The drive will accept either a standard-sized disc or a minidisc. Face the front of the computer. Press the Eject button to open the CD/DVD tray. -
Page 24: Using Software
Using Software NOTE: Some of the programs that are listed may not be included with your model. This is not a complete list of all included software. Your computer includes software to: Record and play CDs. Record data CDs. ... - Page 25 With this program: You can: (continued) CyberLink DVD Suite Record data and music files. Record a copy of an existing music or data CD to use on the computer. Create customized music CDs from CDs in your collection, or from .wav, .mp3, or .wma files.
- Page 26 Getting Started (features vary by model)
-
Page 27: Getting More Information
Getting More Information Using the Onscreen Help and Support Center Information about your computer is in the onscreen Help and Support Center. Here, you can find links to driver updates, access to technical support options, and information about commonly asked questions. To open the Help and Support Center: ... -
Page 28: Using Hp Advisor Software
Using HP Advisor Software (Select models only) HP Advisor is a desktop tool you use to monitor and access system health information about key areas of your computer. HP Advisor has three major areas: PC Dock — Access HP and Partner software directly on your desktop and customize your dock by dragging and dropping items. -
Page 29: Troubleshooting And Maintenance
Troubleshooting and Maintenance This section contains: Troubleshooting tables in “Troubleshooting Computer Problems” on page 25. Software repair information in “Software Troubleshooting” on page 39. Maintenance information and guidelines in “Maintenance” on page 42. For more information, refer to the Help and Support Center or access the Support Web site. (See “Getting More Information”... -
Page 30: Computer Does Not Start
Computer does not start Symptom Possible solution Computer will not turn Ensure that the cables connecting the computer to the external on or start. power source are plugged in properly. When the cables connecting the computer to the external power source are plugged in properly, and the wall outlet is functioning, the green power supply light on the back of the computer should be on;... - Page 31 Power Symptom Possible solution Error message: Invalid When optical disc drive activity stops, remove the disc and system disk or press the spacebar on the keyboard. The computer should Non-System disk or start up. Disk error. Computer does not turn Press and hold the On button until the computer turns off.
- Page 32 Keyboard and mouse (with cable) (continued) Symptom Possible solution Mouse (with cable) Unplug and reconnect the mouse cable to your computer. does not work or is not If the mouse is still not detected, turn off the computer, unplug detected. and reconnect the mouse cable, and then restart the computer.
-
Page 33: Wireless Keyboard And Mouse
Wireless keyboard and mouse Symptom Possible solution Wireless keyboard or Check for these problems: mouse does not work or Ensure you are using the wireless keyboard or wireless is not detected. mouse within range of the receiver, approximately 10 meters (32 feet) for normal use, and within 30 cm (12 inches) during initial setup or for resynchronization. - Page 34 Wireless keyboard and mouse (continued) Symptom Possible solution Wireless keyboard or Check that the mouse is on (B), and push and hold the mouse does not work or Connect button (C) on the underside of the mouse for is not detected. 5 to 10 seconds.
-
Page 35: Audio And Speakers
Audio and speakers Symptom Possible solution No sound is produced. Press the Mute button on the keyboard to see whether the Mute feature is enabled. Right-click the Volume icon on the taskbar, and then click Open Volume Mixer. The Volume Mixer settings window opens. If programs are muted, click the Mute button to unmute. -
Page 36: Internet Access
Internet access Symptom Possible solution I cannot connect to the Contact your ISP for assistance. Internet. Verify that you are using the proper cables for your Internet connection type. Run the wireless setup wizard: Click the Start button, and then click Control Panel. Click Network and Internet, and then click Network and Sharing Center. - Page 37 CD and DVD players Symptom Possible solution The CD or DVD drive Ensure the disc is inserted with the label facing out and cannot read a disc, or it centered in the tray. takes too long to start. Wait at least 30 seconds for the drive to determine the type of media.
- Page 38 CD and DVD players (continued) Symptom Possible solution I cannot create (record) Ensure the disc is inserted with the label facing out and a disc. centered in the tray. Verify that you are using the correct disc type (media) for the drive.
- Page 39 Video Symptom Possible solution Some video files do Your file may be corrupt or in an unsupported format. Open the not play. video file in a video editor, and then resave the file in a supported format. Codec error messages Open the file in Windows Media Player.
-
Page 40: Hardware Installation
Hardware installation Symptom Possible solution A new device is not Install the device driver provided with the device, or download recognized as part of and install the driver from the device manufacturer Web site. the system. You may need an updated driver for Windows. Contact the device vendor directly for an update. - Page 41 Hardware installation (continued) Symptom Possible solution A device does not work To resolve a device conflict, you may need to disable one of the after installing a new devices or uninstall an old device driver: device. Click the Start button. Type Device Manager into the Start Search box, and then click Device Manager to open the Device Manager window.
- Page 42 Performance Symptom Possible solution Computer displays a This happens when the processor is automatically running in a processor speed that is lower power state, because the applications running do not lower than expected. require the maximum processing power. Verify that your system contains the processor you purchased. To verify, click the Start button, right-click Computer, click Properties, and under the General tab check the processor installed on your system.
-
Page 43: Software Troubleshooting
Memory card reader (continued) Symptom Possible solution Memory card reader Ensure the memory card is fully inserted into the slot and the cannot read the LED is on. memory card. Inspect the ends of the memory cards for dirt or material that (continued) closes a hole or spoils a metal contact. -
Page 44: Microsoft System Restore
Double-click the specific item (for example, HP DVD Writer 640b). Click the Driver tab. To update a driver, click Update Driver, and then follow the onscreen instructions. To revert to an earlier version of a driver, click Rollback Driver, and then follow the onscreen instructions. -
Page 45: Software Program And Hardware Driver Reinstallation
Software program and hardware driver reinstallation If an individual factory-installed software program or hardware driver is damaged, you can reinstall it by using the Recovery Manager program (select models only). NOTE: Do not use the Recovery Manager program to reinstall software programs that came on CDs or DVDs included in the computer box. -
Page 46: Maintenance
Maintenance This section includes information about tasks you can perform to help ensure trouble-free operation of your computer, and to ease the recovery of important information on your computer if problems arise in the future. Maintenance tasks It is important that you perform simple maintenance of your computer to ensure that it works at peak performance. -
Page 47: Creating Data Backup Discs
Creating data backup discs Use CD or DVD recording (or burning) software that is installed on your computer to create backup discs of important information, including personal files, e-mail messages, and Web site bookmarks. You can also move data to an external hard disk drive. When writing data to a backup disc, use software that includes write verification functionality. -
Page 48: System Recovery
Cleaning the computer vents Air vents keep the computer and monitor cool. To maintain efficient air flow, keep these vents clean by using a small battery-powered vacuum cleaner. (A battery-powered vacuum cleaner eliminates the risk of electric shock.) Run the vacuum over the vents in the computer case. Remove any debris that has accumulated in and around the computer connectors (for example, the Ethernet and USB connectors). -
Page 49: Creating Recovery Discs
Creating recovery discs Complete the procedure described in this section to create a set of recovery discs from the recovery image stored on your hard disk drive. This image contains the operating system and software program files that were originally installed on your computer at the factory. You can create only one set of recovery discs for your computer. -
Page 50: System Recovery From The Windows 7 Start Menu
System recovery from the Windows 7 Start Menu If the computer is working, and Windows 7 is responding, use these steps to perform a system recovery. NOTE: System recovery deletes all data and programs you created or installed after purchase. Therefore, ensure you have backed up, to a removable disc, any data you want to keep. -
Page 51: Starting System Recovery From User-Created Recovery Discs
As soon as you see the initial company logo screen appear, repeatedly press the F11 key on your keyboard until the Windows is Loading Files... message appears on the screen. Under I need help immediately, click System Recovery. If you are prompted to back up your files, and you have not done so, select Back up your files first (recommended), and then click Next. -
Page 52: Additional Troubleshooting
When the Recovery Manager is finished, remove all recovery discs from the system. Click Finish to restart the computer. After restarting the computer, see “Setting Up Your Computer” on page 3. Performing the post-recovery procedure At the Welcome to Microsoft Windows screen, follow the onscreen setup instructions. Follow the instructions in “Turning On Your Computer for the First Time”... -
Page 53: Index
Index antivirus, installing program 13 hardware troubleshooting installation 36–37 headphones backup 43 connecting 6 buttons Help and Support 23 Eject, for the CD/DVD drive 19 Hibernate mode 4 Off, See turning off computer 4 HP Advisor 21, 24 card reader, memory 17 Internet carpal tunnel syndrome 24 troubleshooting 32... - Page 54 Network Interface Card (NIC) 8 tilt screen 15 transferring information to your new computer 14 passwords 11 troubleshooting performance audio 31 troubleshooting 38 CD/DVD drives 33–34 computer performance 38 display 27 recording level, adjusting 7 hardware installation 36–37 Recovery Manager 41 Internet 32 reinstall a software program 41 keyboard and mouse...
- Page 56 Printed in...