Table of Contents
Advertisement
IMPORTS, INC.
3
/
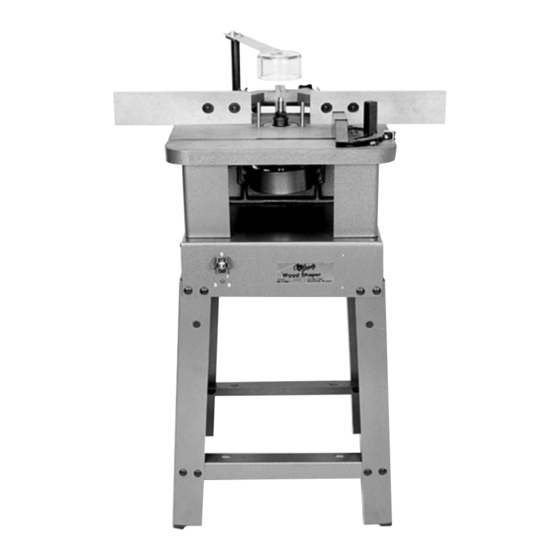
H.P. SHAPER
4
MODEL G1024
INSTRUCTION MANUAL
COPYRIGHT © 1994 BY GRIZZLY INDUSTRIAL, INC.
WARNING: NO PORTION OF THIS MANUAL MAY BE REPRODUCED IN ANY SHAPE
OR FORM WITHOUT THE WRITTEN APPROVAL OF GRIZZLY INDUSTRIAL, INC.
REVISED JUNE, 1994. PRINTED IN USA
DISCONTINUED MACHINE MANUAL DISCLAIMER
THE INFORMATION IN THIS MANUAL REPRESENTS THE LAST CONFIGURATION OF THE MACHINE BEFORE IT WAS DISCONTIN-
UED. MACHINE CONFIGURATIONS MAY HAVE CHANGED AS PRODUCT IMPROVEMENTS WERE INCORPORATED. IF YOU OWN AN
EARLIER VERSION OF THE MACHINE, THIS MANUAL MAY NOT EXACTLY DEPICT YOUR MACHINE . CONTACT CUSTOMER SERVICE
IF YOU HAVE ANY QUESTIONS ABOUT DIFFERENCES. PREVIOUS VERSIONS ARE NOT AVAILABLE ONLINE.
- 1 -
Advertisement
Table of Contents

Related Manuals for Grizzly G1024


Summary of Contents for Grizzly G1024
-
Page 1: Instruction Manual
INSTRUCTION MANUAL COPYRIGHT © 1994 BY GRIZZLY INDUSTRIAL, INC. WARNING: NO PORTION OF THIS MANUAL MAY BE REPRODUCED IN ANY SHAPE OR FORM WITHOUT THE WRITTEN APPROVAL OF GRIZZLY INDUSTRIAL, INC. REVISED JUNE, 1994. PRINTED IN USA DISCONTINUED MACHINE MANUAL DISCLAIMER THE INFORMATION IN THIS MANUAL REPRESENTS THE LAST CONFIGURATION OF THE MACHINE BEFORE IT WAS DISCONTIN- UED. -
Page 2: Table Of Contents
INTRODUCTION ...1 COMMENTARY ...1 III. SAFETY RULES FOR ALL TOOLS ...2 IV. UNPACKING ...4 PIECE INVENTORY ...5 VI. CLEAN-UP BEFORE ASSEMBLY ...6 VII. SITE PLANNING...6 A FLOOR LOAD...6 B WORKING CLEARANCES ...6 VIII. ELECTRICAL SERVICE REQUIREMENTS ...7 A. GENERAL ...7 B. -
Page 3: Introduction
We are proud to offer the Model G1024 Shaper. The Model G1024 is part of a growing Grizzly fam- ily of fine woodworking machinery. When used according to the guidelines set forth in this manual, you can expect years of trouble-free, enjoyable operation and proof of Grizzly’s commitment to cus- tomer satisfaction. -
Page 4: Safety Rules For All Tools
If you are not familiar with shapers and their safe operation, we strongly suggest you obtain as many books on the subject as you can. Grizzly has a number of fine books available on wood shaping. A visit to the local library, or time spent browsing through back issues of woodworking magazines will prove beneficial in gaining knowledge of shaper operations. - Page 5 KEEP WORK AREA CLEAN. Cluttered areas and benches invite accidents. AVOID DANGEROUS ENVIRONMENTS. Do not use power tools in damp or wet locations or expose them to rain. Keep your work area well lighted. KEEP CHILDREN AND VISITORS AWAY. All children and visitors should be kept a safe dis- tance away from your work area.
-
Page 6: Unpacking
Never operate machinery when overly fatigued. The Model G1024 Shaper is shipped from the factory in heavy-duty cardboard packaging. Carefully remove the cardboard box by cutting through the box at its base. The top of the box can then be lift- ed off and set aside while you make your inspection of the machine. -
Page 7: Piece Inventory
Take a quick inventory of the parts and put them aside for assembly later. Since the majority of the shaper is pre-assembled at the factory, there aren’t a lot of items to inven- tory. You should have the following: Rubber Feet Hex Bolt M6-1.0x12 Hex Nut M6-1.0 Flat Washer... -
Page 8: Clean-Up Before Assembly
Your Model G1024 Shaper represents a fairly large weight load in a small footprint. For planning pur- poses, the intended work area should be able to take a uniform distributed live load of 100 pounds per square foot. -
Page 9: Electrical Service Requirements
The Model G1024 comes with a standard 110V cord and plug. Its motor draws 10 amps. While that is not excessive, using the Model G1024 on a circuit that is already close to capacity could result in overload. If possible, add a circuit specifically for the shaper. A 15-amp circuit breaker is ideal for the Model G1024. -
Page 10: Assembly
Carefully lift the Model G1024 Shaper from its packaging. Be sure to get plenty of help when attempt- ing to lift or move the machine. The Model G1024 Shaper has a shipping weight of more than 150 lbs. Make sure you have plenty of help when it comes time to move the machine. The Model G1024 is largely pre-assembled at the factory, so very little actual assembly is required. -
Page 11: Stand
The Model G1024 Shaper features an A-frame stand. Begin assembling the stand by attaching the four rubber feet to the bottom of the side panels with the M6-1.0x12 hex bolts, M6-1.0 hex nuts and " flat washers provided. See Figure 4. -
Page 12: Fence Assembly
The Model G1024 Shaper comes with a two-piece adjustable fence. Before attaching the fence unit to the shaper table, you will want to “wood” it. The wood fence pieces included with the Model G1024 are pre-drilled and counterbored to allow the slotted mounting screws to rest below the wood surface once they are tightened. -
Page 13: Safety Guard
C. SAFETY GUARD The Model G1024 features a clear acrylic safety guard which is designed to deflect wood chips away from the machine’s operator. To attach the guard, slip the support rod into the hole provided in the bracket bolted to the back of the shaper table. See Figure 7. The height of the safety guard can be adjusted by loosening the locking knob on the bracket and raising or lowering the support rod. -
Page 14: Safety Procedures
X. SAFETY PROCEDURES This tool is capable of causing serious injury if used recklessly. This doesn’t mean that the machin- ery should be feared, but it does deserve a healthy respect for its power and potential danger. At the beginning of this manual we shared some general safety procedures with you. We want to re- emphasize a few points we feel are critical to safe shaper operation: GROUND EQUIPMENT PROPERLY. - Page 15 14. HAND SAFETY. Never pass your hands directly over, or in front of the cutter. As one hand approaches the 12-inch radius point, move it away from the cutter to the outfeed side and repo- sition the hand at least 12 inches beyond the cutter. 15.
- Page 16 21. MISUSE. Do not use the Model G1024 for anything other than its intended purpose. If used for other purposes, Grizzly disclaims any real or implied warranty and is not responsible for any damage or injury which may result from that use.
-
Page 17: Adjustment Section
XI. ADJUSTMENT SECTION Any adjustments or maintenance performed on the Model G1024 should be done with the power off, the plug disconnected from the power source and only after all moving parts have come to a com- plete stop. Make sure the machine is level and secure. - Page 18 Workpiece Outfeed Fence Infeed Fence Cutter Rotation Feed Direction Improper Fence Adjustment Figure 11 When the shaping operation removes the entire face of the workpiece, the shaped surface will not be supported by the outfeed fence when the fences are paralleled, or mis-aligned, as shown in Figure 11.
-
Page 19: Spindles
" spindle on your Model G1024 Shaper is capable of using most available ters with maximum diameters of 2 Remove the spindle nut and safety washer from the spindle shaft. Some Model G1024 Shapers may feature a lock nut instead of a safety washer. -
Page 20: Spindle Elevation
The Model G1024 Shaper features a locking spindle which can be adjusted for up to movement. To adjust the height of the spindle: Loosen the locking knob on the right-hand side of the shaper. Reaching under the shaper table, move the vertical adjustment lever right or left until the spin- dle reaches its desired height. -
Page 21: Rub Collars
Spacers aren’t always machined to close tolerances and not every ball-bearing can be used as a rub collar. Grizzly carries an extensive line of spacers and rub collars designed for use with Grizzly shapers. See the current catalog for listings. -
Page 22: Examples
Rub collars may be used in any of the following positions: Below the cutter. Above the cutter. Between two cutters. Suppose you want to mill a provide adequate contact with the rub collar. Remember that the width of the rabbet is controlled by the diameter of the rub collar and the depth of the rabbet is controlled by the spindle height adjust- ment. - Page 23 Rub collar above the cutter: Spindle Nut Workpiece Safety Washer Table When the collar is used above the cutter, as shown in Figure 18, the cut cannot be seen. Yet, this offers some advantage in that the cut is not affected by slight variations in the stock. Also, accidental lifting will not damage the workpiece.
-
Page 24: Pattern Work
When using a pattern, the rub collar can be positioned either above, below, or in-between cutters. See Figure 20. The pattern is usually used when the entire edge is to be shaped or when many duplicate pieces are needed. Pattern work is particularly useful when rough cutting irregular shapes oversize and then shaping the edge in a simple two-step operation. - Page 25 NOTE: Safety devices, as shown here, substantially improve the quality and consistency of your work, as well as ensuring operator safety. Grizzly offers a number of excellent safety devices for use with shapers – such as the Board Buddies™ shown below – which are available as optional equip- ment on the Model G1024 Shaper.
-
Page 26: Irregular Shaping
Irregular or freehand shaping takes a high degree of skill and dexterity. This is where the real appli- cation of the shaper comes into focus. The fence assembly is not used in irregular shaping, so rub collars must be used. Choose the correct diameter for the appropriate depth of cut. See the rub col- lar section for details. - Page 27 Insert a starting pin into the table surface, using the pin location that best supports your work. Inspect your stock or pattern for any irregularities that might transfer to the cut. Use some type of hold-down fixture and guard when doing freehand work. See Figure 24. Make a sample cut on a piece of scrap wood.
- Page 28 When making a pattern, jig, or fixture, here are a few things to consider: Use a material that will smoothly follow the rub collar or fence. Make the fixture stable. Use proven methods and materials. Fasten hand holds for operator comfort and safety. Secure your workpiece on three sides with toggle clamps or fasten the workpiece to the fixture with wood screws.
- Page 29 Replace the belt if such conditions appear. XV. CLOSURE The following pages contain the directory of parts for your Model G1024 Shaper. We have also included a wiring diagram and instructions for using the optional Router Bit Spindle for your conve- nience.
- Page 30 GRIZZLY MODEL G1024 Design Type ...Floor Model Overall Dimensions: Table ...15” x 18” Height From Floor to Top of Fence ...38" Height to Table From Floor ...34 Length...24" Width ...27" Weight (Shipping) ...155 lbs. Weight (In Place) ...145 lbs. Construction: Table ...Ground Cast Iron...
-
Page 31: Limited Warranty
XVII. WARRANTY AND RETURNS LIMITED WARRANTY Grizzly Industrial, Inc. warrants every product it sells for a period of one year on all parts and one year on all electric motors to the original purchaser from the date of purchase. This warranty does not apply to defects due directly or indirectly to misuse, abuse, negligence, accidents, repairs or alterations or lack of maintenance. - Page 32 XVIII. PARTS LISTS AND DIAGRAMS 71 69 A. MAIN BODY ASSEMBLY 63-1 - 32 - 34 29...
- Page 33 B. MODEL G1024 SHAPER PARTS LIST Ref. # Part # Description P1022003 Side Panel P1024002 Tie Bar PB02M Hex Bolt M6-1.0x12 P1024004 Rubber Foot PW02 Flat Washer PN01M Hex Nut M6-1.0 PW02 Flat Washer PN03M Hex Nut M8-1.25 PCB01M Carriage Bolt M8-1.25x20...
- Page 34 B. MODEL G1024 SHAPER PARTS LIST (CONTINUED) Ref. # Part # Description P1026223 Safety Washer P1024076 Cutter Spindle P1024077 Bearing Cover P1024078 Spindle Cartridge P1024079 Steel Ball PR23M Retaining Ring 40mm P6203 Ball Bearing P1024082 Spindle Housing P1024083 Bearing Cone...
- Page 35 XIX. USING THE MODEL G1793 ROUTER BIT SPINDLE The Model G1793 Router Bit Spindle is a handy accessory available for your Model G1024 shaper, which allows you to use your standard router bits as shaper cutters. Using the optional router bit spindle does require some minor modifications to the Model G1024.