Panasonic KX-TG7621 Operating Instructions Manual
Link-to-cell cellular convergence solution
Hide thumbs
Also See for KX-TG7621:
- Quick manual (11 pages) ,
- Installation manual (17 pages) ,
- Operating instructions manual (56 pages)
Table of Contents
Advertisement
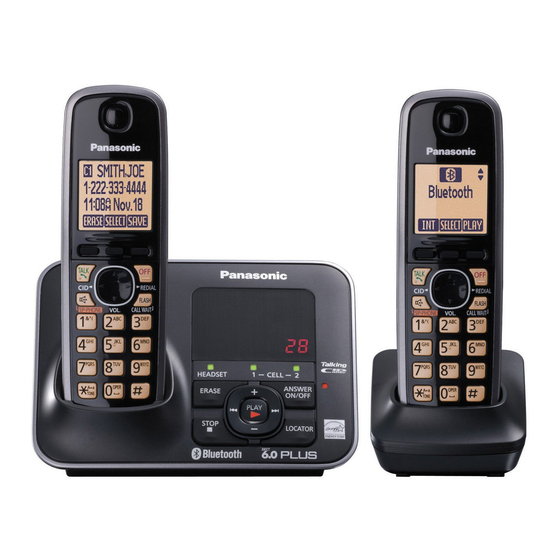
Link-to-Cell Cellular Convergence Solution
Model shown is KX-TG7622.
Before initial use, see"Getting
Started"onpage 11.
Thank you for purchasing a Panasonic product.
Please read these operating instructions before using the unit and save
them for future reference.
Consulte Guía Rápida Española.
This unit is compatible with Caller ID. You must subscribe to the appropriate
service offered by your service provider/telephone company.
For assistance, visit our Web site: http://www.panasonic.com/help for
customers in the U.S.A. or Puerto Rico.
Please register your product: http://www.panasonic.com/prodreg
Operating Instructions
Model No.
KX-TG7622
KX-TG7621
KX-TG7623
KX-TG7622
KX-TG7623
KX-TG7624
KX-TG7624
KX-TG7642
KX-TG7641
KX-TG7643
KX-TG7642
KX-TG7644
KX-TG7643
KX-TG7645
KX-TG7644
KX-TG7645
Advertisement
Table of Contents

Related Manuals for Panasonic KX-TG7621


Summary of Contents for Panasonic KX-TG7621
- Page 1 This unit is compatible with Caller ID. You must subscribe to the appropriate service offered by your service provider/telephone company. For assistance, visit our Web site: http://www.panasonic.com/help for customers in the U.S.A. or Puerto Rico. Please register your product: http://www.panasonic.com/prodreg...
-
Page 2: Table Of Contents
Table of Contents Introduction Caller ID Service Model composition ......4 Using Caller ID service ......53 Accessory information ......5 Caller list ...........54 Expanding your phone Using Bluetooth Devices system ..........6 Copying phonebook from a cellular Important Information phone (phonebook transfer) ....57 For your safety ........8 Using a Bluetooth wireless headset Important safety instructions ....9... - Page 3 Table of Contents Index..........97...
-
Page 4: Model Composition
*2 Displays date and time, phonebook entries, caller information, and messages recorded on the answering system. *3 Calls can be made or answered with the base unit. *4 Intercom calls can be made between the base unit and handset. For assistance, please visit http://www.panasonic.com/help... -
Page 5: Accessory Information
*1 The wall mounting adaptor is not supplied with KX-TG7641 series (page 4). *2 The handset cover comes attached to the handset. *3 PNYNTGA401BR: Black, PNYNTGA660BR: Black, PNYNTGA660MR: Metallic gray *4 The belt clip is not supplied with KX-TG7621 series (page 4). For assistance, please visit http://www.panasonic.com/help... -
Page 6: Expanding Your Phone System
Introduction Additional/replacement accessories Please contact your nearest Panasonic dealer for sales information (page 94). Accessory item Order number Rechargeable HHR-4DPA batteries R To order, please call 1-800-332-5368 or visit http://www.panasonic.com/batterystore Battery type: – Nickel metal hydride (Ni-MH) – 2 x AAA (R03) size for each handset... - Page 7 (for a wireless hands-free conversation: page 57) *1 Your cellular phone and headset must be Bluetooth wireless technology compatible. For more details and the list of compatible cellular phones, please visit our Web site: http://www.panasonic.com/LinkToCell For assistance, please visit http://www.panasonic.com/help...
-
Page 8: Important Information
CAUTION cause fire or electric shock. Confirm that smoke has stopped emitting and contact Installation and location the Panasonic Call Center at R Never install telephone wiring during an 1-800-211-PANA (1-800-211-7262). electrical storm. R Unplug from power outlets and never touch... -
Page 9: Important Safety Instructions
R Charge the batteries provided with or Base unit location/avoiding noise identified for use with this product only, in The base unit and other compatible Panasonic accordance with the instructions and units use radio waves to communicate with limitations specified in this manual. -
Page 10: Other Information
Important Information following places: Near obstacles such as ENERGY STAR hills, tunnels, underground, near metal As an ENERGY STAR Partner, Panasonic objects such as wire fences, etc. has determined that this product meets the R Operating the product near electrical ENERGY STAR guidelines for energy appliances may cause interference. -
Page 11: Getting Started
Base unit (KX-TG7641 series: page 4) Setting up Press plug firmly. “Click” Connections R Use only the supplied Panasonic AC adaptor PNLV226. R If you do not connect the telephone line cord and use only cellular lines, Hooks set the cellular line only mode to use... -
Page 12: Note When Setting Up
Confirm "Charging" is displayed. soft and dry cloth once a month. Clean more often if the unit is Charge indicator exposed to grease, dust, or high humidity. Battery level Icon Battery level High Medium Needs charging. Empty For assistance, please visit http://www.panasonic.com/help... -
Page 13: Intelligent Eco Mode
Controls performance (supplied batteries) Operation Operating time Handset In continuous use 13 hours max. n KX-TG7621 series (page 4) Not in use 11 days max. (standby) *1 If Eco mode is on. Note: R Actual battery performance depends on usage and ambient environment. - Page 14 – MFNCID (Caller ID): View the caller list. – MENREDIAL: View the redial list. Base unit n KX-TG7621 series (page 4) Charge indicator Ringer indicatorMessage indicator Nonslip pad R Nonslip pad offers support when G H I you cradle the handset between your shoulder and ear.
- Page 15 Display N (PLAY) Message indicator Display/Indicators MCELL 1N CELL 1 indicator Handset display items MCELL 2N Item Meaning CELL 2 indicator MANSWER ON/OFFN Within base unit range ANSWER ON/OFF indicator Out of base unit range For assistance, please visit http://www.panasonic.com/help...
- Page 16 If all lines are turned off, no ringer setting. line is indicated. – A cellular call is being received on Base unit display items that line. n KX-TG7621 series: page 4 Eco mode is on. Item Meaning (page 13) Answering system Voice enhancer is set.
- Page 17 Flashing – The base unit is registering a cellular phone. – A cellular call is put on hold. Light – A cellular phone is not registered to the base unit. For assistance, please visit http://www.panasonic.com/help...
-
Page 18: Initial Settings
(12-hour clock format) by selecting 2 MMENUN M#N M1N M1N M2N digits for each. Example: 9:30 M N/M N: Select the desired setting. M0N M9N M3N M0N MSAVEN MOFFN MAM/PMN: Select “AM” or “PM”. MSAVENAMOFFN For assistance, please visit http://www.panasonic.com/help... - Page 19 The default setting is “Tone”. “Tone”: For tone dial service. “Pulse”: For rotary/pulse dial service. MMENUN M#N M1N M2N M0N M N/M N: Select the desired setting. MSAVEN MOFFN For assistance, please visit http://www.panasonic.com/help...
-
Page 20: Link To Cell
Panasonic Corporation is under cellular calls. license. Other trademarks and trade To select which unit receives calls names are those of their respective for the cellular line, press MOKN then owners. continue from step 3, “Selecting For assistance, please visit http://www.panasonic.com/help... -
Page 21: Link To Cell Settings
R When you change the setting to are on a landline call or an intercom “All”, the base unit ringer volume call. also returns to the lowest level even if the ringer volume has been changed. For assistance, please visit http://www.panasonic.com/help... - Page 22 R Once you set this mode, you can use M N/M N: Select the desired setting. the following buttons to make cellular MSAVEN MOFFN calls: – for the handset, press M N or M instead of MCELLN (page 25). For assistance, please visit http://www.panasonic.com/help...
- Page 23 The following settings are available: MMENUN N M6N M1N M9N – “Manual” (handset only: default): Enter the new 4-digit PIN. MOKN You can select the desired cellular Enter the new 4-digit PIN again. line when making a call. MSAVEN For assistance, please visit http://www.panasonic.com/help...
- Page 24 M N/M N: “Yes” MSELECTN R When the cellular phone is deregistered, the CELL 1 or CELL 2 indicator is turned off. R When the headset is deregistered, the HEADSET indicator is turned off. MOFFN For assistance, please visit http://www.panasonic.com/help...
-
Page 25: Making/Answering Calls Using The Handset
M N/M N: Select the desired phone cellular call using the redial list”, 1 number. and 2, “Making a cellular call using MCELLN the redial list ”, page 25. R The unit starts dialing when: For assistance, please visit http://www.panasonic.com/help... -
Page 26: Answering Calls
– only 1 cellular phone is You do not need to press M N. To turn registered. this feature on, see page 44. – the line is set to make cellular calls (page 23). For assistance, please visit http://www.panasonic.com/help... - Page 27 Handset clarity booster page 47. This feature can improve sound clarity when the handset is used in an area where there may be interference. During an outside call, this feature is turned on automatically when necessary. For assistance, please visit http://www.panasonic.com/help...
- Page 28 M N/M N: Select the desired registered. cellular phone. A MSELECTN – the line is set to make cellular calls (page 23). n While another unit is on a landline call: To join the conversation, press M For assistance, please visit http://www.panasonic.com/help...
-
Page 29: During A Power Failure
R In case handset battery power runs during a conversation on a cellular line out, we recommend connecting a Press MMENUN during a cellular call. corded-type telephone (without AC adaptor) to the same telephone line or M N/M N: “Hold” MSELECTN For assistance, please visit http://www.panasonic.com/help... - Page 30 Making/Answering Calls Using the Handset to the same telephone line jack using R The range of the base unit is limited a Panasonic T-adaptor (page 6). during a power failure. Please use the handset close to the base unit. Making calls...
-
Page 31: Making/Answering Calls Using The Base Unit
NREDIAL simply lift it. MCN/MDN: Select the desired phone number.AMERASEN Adjusting the speaker volume MCN/MDN: “Yes” AM N (PLAY) n KX-TG7621 series:page 4 MnN (EDIT) Press M N or M Nrepeatedly while talking. n KX-TG7641 series:page 4 Press MDN or MCN repeatedly while talking. -
Page 32: Answering Calls
R While a cellular line is on hold, the CELL 1 or CELL 2 indicator flashes Adjusting the base unit ringer volume red. While a landline call is on hold, n KX-TG7621 series: page 4 the SP-PHONE indicator flashes. PressM N or M... - Page 33 To make a 2nd call: – for a cellular line press MCELL 1N or Press MCELL 1N or MCELL 2N. MCELL 2N. Dial the phone number. A Press – for the landline press M For assistance, please visit http://www.panasonic.com/help...
- Page 34 To answer a 2nd call: R To hold the 2nd call, press MHOLDN. To hang up the 2nd call and return to the 1st call (cellular call), press M N, then press MCELL 1N or MCELL For assistance, please visit http://www.panasonic.com/help...
-
Page 35: Shared Phonebook
3 groups. You & ’ – can search for phonebook entries by group. The ringer ID feature is available for Caller ID subscribers (page 54). For assistance, please visit http://www.panasonic.com/help... - Page 36 Base unit R If there is no entry corresponding to the character you selected, the Available for: next entry is displayed. KX-TG7641 series (page 4) M N/M N: Scroll through the phonebook if necessary. For assistance, please visit http://www.panasonic.com/help...
- Page 37 M N/M N: “Erase all” A press MPAUSEN to add pauses after MSELECTN the number and PIN as necessary M N/M N: Select the desired group. (page 26). A MSELECTN For assistance, please visit http://www.panasonic.com/help...
- Page 38 Non the base unit in step 1 to change the dialing mode temporarily to tone. When adding entries to the phonebook, we recommend adding MGN (TONE) to the beginning of phone numbers you wish to chain dial (page 35). For assistance, please visit http://www.panasonic.com/help...
-
Page 39: Programming
Answer Play new msg. – Play all msg. – device – Erase all msg. Greeting Record greeting Check greeting Pre-recorded Settings Ring count Recording time Remote code Screen call – Answer on – Answer off For assistance, please visit http://www.panasonic.com/help... - Page 40 Programming Main Sub-menu 1 Sub-menu 2 Page menu V.M. – – access Interc – – For assistance, please visit http://www.panasonic.com/help...
- Page 41 Connect Registration Settings Auto connect Cell area code Cell line only mode Cell line select – Handset – Base unit Set PIN – Date and time date & Alarm – time – – Time adjustment For assistance, please visit http://www.panasonic.com/help...
- Page 42 – Caller ID edit – Auto talk – Set tel line Set dial mode Set flash time – Set line mode – Privacy mode Registration Register handset Change language Display *1 , *3 Voice prompt For assistance, please visit http://www.panasonic.com/help...
- Page 43 Interrupt tone M2N M0N M1N Base unit: M1N: <On> M0N: Off N M2N M0N M2N M3N M8N M1N: On M0N: <Off> – Silent mode (On/Off) M2N M3N M7N <11:00 PM/06:00 – Silent mode (Start/End) AM> For assistance, please visit http://www.panasonic.com/help...
- Page 44 Customer M6N M8N M0N – – – support For Bluetooth: Link to cell System Feature Code Setting Page M6N M2N M5N M1N – Connect/ Disconnect (CELL 1) M6N M2N M5N M2N Connect/ Disconnect (CELL 2) For assistance, please visit http://www.panasonic.com/help...
- Page 45 M6N M3N M2N M1N: <1 min> M2N: 3 min M3N: 5 min M4N: 10 min M0N: Off Cell area code M6N M3N M3N – Cell line only M1N M5N M7N M1N: On mode M0N: <Off> For assistance, please visit http://www.panasonic.com/help...
- Page 46 <Tone 1> (Handset) M6N–M0N: Melody 1–5 Store VM M3N M3N M1N – access# (VM: Voice mail) VM tone detect M3N M3N M2N M1N: <On> M0N: Off Set dial mode M1N M2N M0N M1N: Pulse M2N: <Tone> For assistance, please visit http://www.panasonic.com/help...
- Page 47 Ring count M2N M1N M1N 2–7 rings <4 rings> Toll saver Recording time M3N M0N M5N 1 min <3 min> Greeting only Remote code M3N M0N M6N <111> Screen call M3N M1N M0N <On> Off – For assistance, please visit http://www.panasonic.com/help...
- Page 48 PBX supplier if necessary. The setting should stay at “700 ms” unless pressing MFLASHN fails to pick up the waiting call. *14 Generally, the line mode setting should not be changed. This setting automatically maintains receiver volume at the proper level depending on the For assistance, please visit http://www.panasonic.com/help...
- Page 49 Programming current telephone line condition. Set the line mode to “A” if telephone line condition is not good. For assistance, please visit http://www.panasonic.com/help...
-
Page 50: Special Programming
R When the handset is in use, the alarm Changing the start and end time will not sound until the handset is in standby mode. MMENUN M#N M2N M3N M7N For assistance, please visit http://www.panasonic.com/help... - Page 51 – cellular calls are rejected. R To erase a digit, pressMCLEARN. – landline calls are disconnected after MSAVEN MOFFN the unit first sends out a busy tone to the caller. For assistance, please visit http://www.panasonic.com/help...
-
Page 52: Registering A Unit
R All handsets registered to the base unit are displayed. Important: M N/M N: Select the handset you R See page 6 for information on the want to cancel. MSELECTN available model. M N/M N: “Yes” MSELECTN MOFFN For assistance, please visit http://www.panasonic.com/help... -
Page 53: Caller Id Service
(page 65), the unit does not Note: announce the caller information from R Even when there are unviewed the landline. If “Toll saver” is missed calls,“Missed call” selected and there is a new message, disappears from the standby display if For assistance, please visit http://www.panasonic.com/help... -
Page 54: Caller List
N CID Press M N to search from the most recent call, or M N to search from the oldest call. Proceed with the operation for your unit. Handset: – To call back, press M For assistance, please visit http://www.panasonic.com/help... - Page 55 For example, you can use this feature to set the unit to ignore the area code of callers in your area, so that you can call these local numbers using caller information without dialing the area code. For assistance, please visit http://www.panasonic.com/help...
- Page 56 R If you stored caller information to the Base unit: M NAMnN (EXIT) phonebook using the base unit, the entry is automatically assigned to Erasing all caller information group 1. Handset N CID MERASEN M N/M N: “Yes” A MSELECTN MOFFN For assistance, please visit http://www.panasonic.com/help...
-
Page 57: Using Bluetooth Devices
Go to step 5. When “Select mode” menu is displayed: M N/M N: Select “Auto” or “Manual”. MSELECTN “Auto”: Download all entries from the cellular phone automatically. Go to step 6. “Manual”: Copy entries you selected. For assistance, please visit http://www.panasonic.com/help... -
Page 58: Using A Bluetooth Wireless Headset (Optional) For Landline Calls
Enter your headset PIN. landline R Typically, default PIN is “0000”. Important: Refer to the headset operating instructions. R For headset operations, refer to your headset operating instructions. Press MOKN, then wait until a long beep sounds. For assistance, please visit http://www.panasonic.com/help... - Page 59 To switch to the headset, press MHEADSETN. To switch to the base unit speakerphone, press M Adjusting the headset receiver volume on the base unit Press M N or M N repeatedly while using the headset. For assistance, please visit http://www.panasonic.com/help...
-
Page 60: Answering System For Landline
– The message counter on the base minutes. A maximum of 64 messages unit displays the total number of can be recorded. messages (old and new). (KX-TG7621 series: page 4) Note: R When message memory becomes full: Call screening – “Messages full” is shown on... -
Page 61: Greeting Message
R If new messages have been recorded, MOFFN the base unit plays back new messages. Using a pre-recorded greeting R If there are no new messages, the message base unit plays back all messages. The unit provides 2 pre-recorded greeting messages: For assistance, please visit http://www.panasonic.com/help... -
Page 62: Listening To Messages Using The Handset
To listen to all messages: playing message MMENUN M#N M3N M2N M4N When finished, press MOFFN. *1 KX-TG7621 series: page 4 *2 KX-TG7641 series:page 4 Note: *3 If pressed within the first 5 seconds R To switch to the receiver, press M of a message, the previous message is played. -
Page 63: Voice Memo
M N/M N: “Edit & Call” change answering system settings. The MSELECTN unit’s voice guidance prompts you to press certain dial keys to perform different operations. For assistance, please visit http://www.panasonic.com/help... - Page 64 *3 For Spanish voice guidance only During remote operation, the unit’s voice guidance starts and prompts you to press M1N to perform a specific operation, or press M2N to listen to more available operations. For assistance, please visit http://www.panasonic.com/help...
-
Page 65: Answering System Settings
The default setting is “3 min”. the call. MMENUN M#N M3N M0N M5N MMENUN M#N M2N M1N M1N M N/M N: Select the desired setting. M N/M N: Select the desired setting. MSAVEN MOFFN MSAVEN MOFFN For assistance, please visit http://www.panasonic.com/help... - Page 66 (page 68). MMENUN M#N M3N M4N M0N M N/M N: Select the desired setting. MSAVEN MOFFN Note: R While message alert is on, battery operating time is shortened (page 13). For assistance, please visit http://www.panasonic.com/help...
-
Page 67: Voice Mail Service For Landline
MSAVEN MOFFN If you are not sure which setting is required, contact your service provider/ Note: telephone company. R When storing your voice mail access number and your mailbox password, press MPAUSEN to add pauses For assistance, please visit http://www.panasonic.com/help... - Page 68 If you want to use another phone to listen to voice mail messages, you have to dial your access number manually. *1 KX-TG7641 series: page 4 For assistance, please visit http://www.panasonic.com/help...
-
Page 69: Intercom/Locator
M N/M N: Select the desired unit. MSELECTN To stop paging: R To stop paging, pressMOFFN. Base unit: MLOCATORN Handset: When you finish talking, pressMOFFN. n (KX-TG7621 series page 4) PressMOFFN Base unit n (KX-TG7641 series page 4) PressM N, then pressMOFFN. Available for: KX-TG7641 series (page 4) PressMINTERCOMN. - Page 70 Wait for the paged party to answer. R If paged party does not answer, pressMINTERCOMNto return to the outside call. To complete the transfer: PressM R The outside call is being routed to the handset. To establish a conference call: PressMCONFN. For assistance, please visit http://www.panasonic.com/help...
-
Page 71: Useful Information
Note: R Make sure that the wall and the fixing method are strong enough to support the weight of the unit. Base unit (KX-TG7621 series: page 4) Lead the AC adaptor cord and telephone line cord through the hole in the wall mounting adaptor in the direction of the arrow. - Page 72 83 mm 102 mm inches) (4 inches) Connect the AC adaptor cord and telephone line cord (B). To remove the wall mounting adaptor While pushing down the release levers Hooks (A), remove the adaptor (B). For assistance, please visit http://www.panasonic.com/help...
- Page 73 Wall phone plate 83 mm 102 mm inches) (4 inches) Hooks To stand on a desk Turn the bracket 180 degrees clockwise from the “WALL” position to the “DESK” direction until a click is heard. Bottom For assistance, please visit http://www.panasonic.com/help...
-
Page 74: Error Messages
– Someone is using a cellular line or headset. Try again later. – Make sure that the cellular phone or headset is not connected to other Bluetooth devices. For assistance, please visit http://www.panasonic.com/help... -
Page 75: Troubleshooting
R Check the connections (page 11). R Unplug the base unit’s AC adaptor to reset the unit. Reconnect the adaptor and try again. R The handset has not been registered to the base unit. Register the handset (page 52). For assistance, please visit http://www.panasonic.com/help... - Page 76 The indicator on the R New messages have been recorded. Listen to the handset flashes slowly. new messages (page 62). R New voice mail messages have been recorded. Listen to the new voice mail messages (page 68). For assistance, please visit http://www.panasonic.com/help...
- Page 77 R Move closer to the base unit. R If you use a DSL/ADSL service, we recommend connecting a DSL/ADSL filter between the base unit and the telephone line jack. Contact your DSL/ ADSL provider for details. For assistance, please visit http://www.panasonic.com/help...
- Page 78 R The handset is too far from the base unit. Move closer and try again. R The cellular line only mode is turned on. Turn it off (page 22). I cannot make long R Make sure that you have long distance service. distance calls. For assistance, please visit http://www.panasonic.com/help...
- Page 79 R The Caller ID number auto edit feature is turned phone numbers are not off. Turn it on and try again (page 44). edited automatically. R You need to call back the edited number to activate Caller ID number auto edit. For assistance, please visit http://www.panasonic.com/help...
- Page 80 10 m (33 feet). The connection may be subject to interference from obstructions such as walls or electronic devices. Move closer to the base unit. For assistance, please visit http://www.panasonic.com/help...
- Page 81 R The answering system will not answer incoming calls while: – the base unit or 2 or more handsets are on a cellular call or an intercom call. – a headset is in use. Caller information is recorded in the caller list. For assistance, please visit http://www.panasonic.com/help...
- Page 82 Insert the batteries and charge fully before use. If the unit does not work properly, contact an authorized service center. Caution: R To avoid permanent damage, do not use a microwave oven to speed up the drying process. For assistance, please visit http://www.panasonic.com/help...
-
Page 83: Fcc And Other Information
Hearing Aids which provide adequate as soon as possible. Also, you will be shielding to RF energy commonly emitted advised of your right to file a complaint with by digital devices. the FCC if you believe it is necessary. For assistance, please visit http://www.panasonic.com/help... - Page 84 – Reorient or relocate the receiving antenna. – Increase the separation between the equipment and receiver. – Connect the equipment into an outlet on a circuit different from that to which the TIA-1083 receiver is connected. For assistance, please visit http://www.panasonic.com/help...
-
Page 85: Guía Rápida Española
Guía Rápida Española Guía Rápida Española Para obtener ayuda, visite http://www.panasonic.com/help (solo en ingls) - Page 86 Guía Rápida Española Para obtener ayuda, visite http://www.panasonic.com/help (solo en ingls)
- Page 87 Guía Rápida Española Para obtener ayuda, visite http://www.panasonic.com/help (solo en ingls)
- Page 88 Guía Rápida Española Para obtener ayuda, visite http://www.panasonic.com/help (solo en ingls)
- Page 89 Guía Rápida Española Para obtener ayuda, visite http://www.panasonic.com/help (solo en ingls)
- Page 90 Guía Rápida Española Para obtener ayuda, visite http://www.panasonic.com/help (solo en ingls)
- Page 91 Guía Rápida Española Para obtener ayuda, visite http://www.panasonic.com/help (solo en ingls)
- Page 92 Guía Rápida Española Para obtener ayuda, visite http://www.panasonic.com/help (solo en ingls)
- Page 93 Guía Rápida Española Para obtener ayuda, visite http://www.panasonic.com/help (solo en ingls)
-
Page 94: Appendix
TTY users (hearing or speech impaired users) can call 1-877-833-8855. Accessory Purchases (United States and Puerto Rico) Purchase Parts, Accessories and Instruction Books online for all Panasonic Products by visiting our Web Site at: http://www.pstc.panasonic.com or, send your request by E-mail to: npcparts@us.panasonic.com... -
Page 95: Warranty (For United States And Puerto Rico)
Limited Warranty Coverage If your product does not work properly because of a defect in materials or workmanship, Panasonic Corporation of North America (referred to as “the warrantor”) will, for the length of the period indicated on the chart below, which starts with the date of original purchase (“Limited Warranty period”), at its... - Page 96 L Send the unit to PSTC (Panasonic) Exchange Center, prepaid and adequately insured. L Do not send your unit to Panasonic Corporation of North America listed on the back cover or to executive or regional sales offices. These locations do not repair consumer products.
-
Page 97: Index
Index Cellular calls: 25, 31 Index Cellular phone Deregistration: 24 Registration: 20 Chain dial: 37 CID (Caller ID): 54 3-way conference: 28 Conference calls: 69 Control type: 14, 15 Customer support: 44 Additional handset: 52 Alarm: 50 Answering calls: 26 Date and time: 18 Answering system Dialing mode: 19... - Page 98 Index Landline calls: 25, 31 VM (Voice mail): 67 Line mode: 47 Voice guidance language: 18 Link to cell Voice mail: 65, 67 Area code: 23 Volume Auto connection: 22 Receiver: 25 Cellular line only mode: 22 Ringer (Base unit): 45, 46 Cellular line selection: 23 Ringer (Handset): 26, 45, 46 Connection: 22...
- Page 99 Notes...
- Page 100 Date of purchase (found on the bottom of the base unit) Name and address of dealer Attach your purchase receipt here. One Panasonic Way, Secaucus, New Jersey 07094 © Panasonic System Networks Co., Ltd. 2010 *TG7622* Printed in Malaysia *TG7622*...