Table of Contents
Advertisement
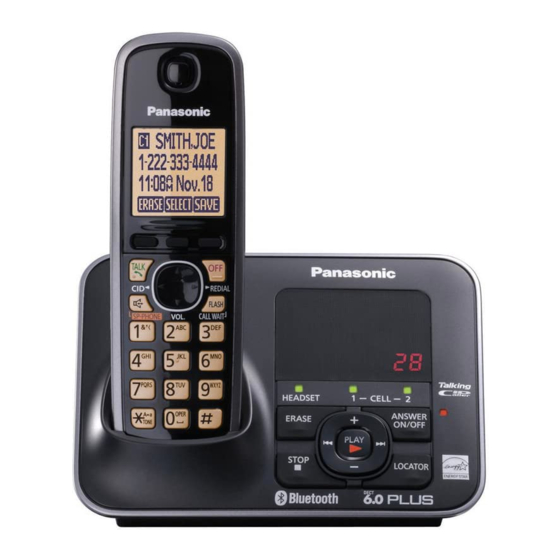
Model shown is KX-TG7622.
Before initial use, see "Getting
Started" on page 10.
Thank you for purchasing a Panasonic product.
Please read these operating instructions before using the unit and save
them for future reference.
Consulte "Guía Rápida Española", página 82.
This unit is compatible with Caller ID. You must subscribe to the appropriate
service offered by your service provider/telephone company.
For assistance, visit our Web site: http://www.panasonic.com/help for
customers in the U.S.A. or Puerto Rico.
Please register your product: http://www.panasonic.com/prodreg
Operating Instructions
Link-to-Cell Cellular Convergence Solution
KX-TG7622
Model No.
KX-TG7623
KX-TG7624
KX-TG7642
KX-TG7643
KX-TG7644
KX-TG7645
Advertisement
Table of Contents

Related Manuals for Panasonic KX-TG7622B


Summary of Contents for Panasonic KX-TG7622B
-
Page 1: Operating Instructions
This unit is compatible with Caller ID. You must subscribe to the appropriate service offered by your service provider/telephone company. For assistance, visit our Web site: http://www.panasonic.com/help for customers in the U.S.A. or Puerto Rico. Please register your product: http://www.panasonic.com/prodreg Operating Instructions Model No. -
Page 2: Table Of Contents
Table of Contents Introduction Model composition ...3 Accessory information ...4 Important Information For your safety ...7 Important safety instructions ...8 For best performance ...8 Other information ...9 Specifications ...9 Getting Started Setting up ...10 Note when setting up ...12 Intelligent eco mode ...12 Controls ...13 Initial settings ...17 Link to Cell... -
Page 3: Introduction
*2 Base unit display shows date and time, phonebook entries, caller information, and messages recorded on the answering system. *3 Intercom calls can be made between the base unit and handset. For assistance, please visit http://www.panasonic.com/help n KX-TG7641 series R Model shown is KX-TG7642. -
Page 4: Accessory Information
*3 The belt clip is not supplied with KX-TG7621 series (page 3). *4 KX-TG7621 series: page 3 PNLC1018ZB: Black KX-TG7641 series: page 3 PNLC1017ZM: Metallic gray *5 The wall mounting adaptor is not supplied with KX-TG7641 series (page 3). For assistance, please visit http://www.panasonic.com/help Quantity KX-TG7622 KX-TG7623 KX-TG7642 KX-TG7643 (–) -
Page 5: Expanding Your Phone System
Additional/replacement accessories Please contact your nearest Panasonic dealer for sales information (page 94). Accessory item Order number Rechargeable HHR-4DPA batteries R To order, please call 1-800-332-5368 or visit Battery type: – Nickel metal hydride (Ni-MH) – 2 x AAA (R03) size for each handset... -
Page 6: Bluetooth Devices
(for a wireless hands-free conversation: page 55) *1 Your cellular phone and headset must be Bluetooth wireless technology compatible. For more details and the list of compatible cellular phones, please visit our Web site: http://www.panasonic.com/link2cell For assistance, please visit http://www.panasonic.com/help : 2 max. -
Page 7: Important Information
These conditions can cause fire or electric shock. Confirm that smoke has stopped emitting and contact the Panasonic Call Center at 1-800-211-PANA (1-800-211-7262). R Unplug from power outlets and never touch the inside of the product if its casing has been broken open. -
Page 8: Important Safety Instructions
Check with local codes for possible special disposal instructions. SAVE THESE INSTRUCTIONS For best performance Base unit location/avoiding noise The base unit and other compatible Panasonic units use radio waves to communicate with each other. R For maximum coverage and noise-free communications, place your base unit: –... -
Page 9: Other Information
Notice For assistance, please visit http://www.panasonic.com/help Important Information ENERGY STAR ® As an ENERGY STAR Partner, Panasonic... -
Page 10: Getting Started
Getting Started Setting up Connections R Use only the supplied Panasonic AC adaptor PNLV226. R If you do not connect the telephone line cord and use only cellular lines, set the cellular line only mode to use this unit more conveniently (page 21). -
Page 11: Battery Installation
R Confirm correct polarities ( Rechargeable Ni-MH ONLY R When the date and time setting is displayed, see page 17. For assistance, please visit http://www.panasonic.com/help Battery charging Charge for about 7 hours. R When the batteries are fully charged, the charge indicator goes off and “Fully charged”... -
Page 12: Note When Setting Up
Clean more often if the unit is exposed to grease, dust, or high humidity. For assistance, please visit http://www.panasonic.com/help Battery level Icon Panasonic Ni-MH battery performance (supplied batteries) -
Page 13: Controls
R Eco mode is turned off when the clarity booster is activated (page 26). Controls Handset n KX-TG7621 series (page 3) For assistance, please visit http://www.panasonic.com/help n KX-TG7641 series (page 3) Charge indicator Ringer indicator Message indicator Nonslip pad R Nonslip pad offers support when you cradle the handset between your shoulder and ear. -
Page 14: Base Unit
Charge contacts HEADSET indicator Speaker Message counter CELL 1 indicator CELL 2 indicator MERASEN MnN (STOP) For assistance, please visit http://www.panasonic.com/help n KX-TG7641 series (page 3) MjN/MkN (Volume up/down) N (Repeat/Skip) M N (PLAY) Message indicator MLOCATORN MANSWER ON/OFFN ANSWER ON/OFF indicator... -
Page 15: Belt Clip
– M N: Repeat/skip messages during playback. Belt clip Available for: KX-TG7641 series (page 3) n To attach n To remove For assistance, please visit http://www.panasonic.com/help Display/Indicators Handset display items Item N: Scroll Getting Started Meaning Within base unit range Out of base unit range The landline is in use. - Page 16 *3 Corresponding lines (1, 2: cellular line, L: landline) are indicated next to the item. If all lines are turned off, no line is indicated. For assistance, please visit http://www.panasonic.com/help Base unit display item n KX-TG7621 series: page 3 Item...
-
Page 17: Initial Settings
A Bluetooth headset is (On) connected to the base unit. Ready to use it. Green A Bluetooth headset is in (Flashing) use. For assistance, please visit http://www.panasonic.com/help Getting Started Status Meaning Green A landline call is being (Flashing received. rapidly) -
Page 18: Dialing Mode
*1 KX-TG7641 series: page 3 MDISPLAYN MbN: “Change language” a M N MbN: Select the desired setting. a For assistance, please visit http://www.panasonic.com/help Voice guidance language You can select either “English” or “Español” as the voice guidance language of the answering system. The default setting is “English”. -
Page 19: Link To Cell
Panasonic Corporation is under license. All other trademarks identified herein are the property of their respective owners. For assistance, please visit http://www.panasonic.com/help Registering a cellular phone Important: R For more details and the list of... -
Page 20: Link To Cell Settings
(KX-TG7641 series: page 3) R When you change the setting to “All”, the base unit ringer volume For assistance, please visit http://www.panasonic.com/help also returns to the lowest level even if the ringer volume has been changed. Ring as cell mode... - Page 21 MMENUN#632 MbN: Select the desired setting. MSAVEN a MOFFN For assistance, please visit http://www.panasonic.com/help Note: R Some cellular phone may ask you if you accept the connection requirement from the base unit. In that case, select “Off”...
-
Page 22: Personal Identification Number
(KX-TG7641 series: page 3) The following settings are available: For assistance, please visit http://www.panasonic.com/help – “Manual” (handset only: default): You can select the desired cellular line when making a call. -
Page 23: Deregistering Bluetooth Devices
MbN: “Yes” a MSELECTN R When the cellular phone is deregistered, the CELL 1 or CELL 2 indicator is turned off. R When the headset is deregistered, the HEADSET indicator is turned off. MOFFN For assistance, please visit http://www.panasonic.com/help Link to Cell... -
Page 24: Making/Answering Calls Using The Handset
MEN REDIAL MbN: Select the desired phone number. MCELLN R The unit starts dialing when: For assistance, please visit http://www.panasonic.com/help – only 1 cellular phone is registered. – a specific line is set to make cellular calls (page 22). MbN: Select the desired cellular phone. -
Page 25: Answering Calls
You do not need to press M this feature on, see page 44. For assistance, please visit http://www.panasonic.com/help Making/Answering Calls Using the Handset Adjusting the handset ringer volume n While the handset is ringing for an... - Page 26 Note: R To change the flash time, see page 44. For assistance, please visit http://www.panasonic.com/help For call waiting or Call Waiting Caller ID service users To use call waiting or Call Waiting Caller ID, you must first subscribe with your service provider/telephone company.
-
Page 27: Transferring A Cellular Call
MSELECTN n While another unit is on a landline call: To join the conversation, press M For assistance, please visit http://www.panasonic.com/help Making/Answering Calls Using the Handset Note: R A maximum of 3 parties (including 1 outside party) can join a conversation using 2 extensions. -
Page 28: Power Back-Up Operation
Making/answering a landline call during a conversation on a cellular line Press MMENUN during a cellular call. MbN: “Hold” a MSELECTN For assistance, please visit http://www.panasonic.com/help To make a 2nd call: Dial the phone number. a M To answer a 2nd call:... - Page 29 (without AC adaptor) to the same telephone line or to the same telephone line jack using a Panasonic T-adaptor (page 5). Panasonic Ni-MH battery performance (supplied batteries) during power back-up mode...
-
Page 30: Power Failure
In such case, try to call back. For assistance, please visit http://www.panasonic.com/help R The range of the base unit is limited during a power failure. Please use the handset close to the base unit. -
Page 31: Making/Answering Calls Using The Base Unit
N REDIAL MbN: Select the desired phone number. Press MCELL 1N or MCELL 2N. For assistance, please visit http://www.panasonic.com/help Making/Answering Calls Using the Base Unit Erasing a number in the redial list N REDIAL MbN: Select the desired phone number. -
Page 32: Answering Calls
Press MDN or MCN repeatedly to select the desired volume. R To turn the ringer off, press and hold MCN until the unit beeps. For assistance, please visit http://www.panasonic.com/help n Programming the volume beforehand: To change the cellular line ringer volume:... - Page 33 2nd caller’s information is displayed after you hear the call waiting tone on the base unit. Press MCALL WAITN to answer the 2nd call. For assistance, please visit http://www.panasonic.com/help Making/Answering Calls Using the Base Unit To switch between calls, press MCALL WAITN. Note:...
- Page 34 To hang up the 2nd call and return to the 1st call (landline call), press MSP-PHONEN 2 times. For assistance, please visit http://www.panasonic.com/help Making/answering a landline call during a conversation on a cellular line Press MHOLDN during a cellular call.
-
Page 35: Shared Phonebook
MbN: Select the desired group. a MSELECTN 2 times R To add other entries, repeat from step 2. MOFFN For assistance, please visit http://www.panasonic.com/help Character table for entering names While entering characters, you can switch between uppercase and lowercase by pressing * (A®a). -
Page 36: Phonebook Entry
MSELECTN Base unit *1 KX-TG7641 series: page 3 MbN: Select the desired entry. Press MCELL 1N or MCELL 2N. For assistance, please visit http://www.panasonic.com/help n Using the landline Handset / Base unit *1 KX-TG7641 series: page 3 MbN: Select the desired entry. -
Page 37: Editing Entries
MbN: Select the desired entry. To make a cellular/landline call, continue from step 3, “Scrolling through all entries”, page 36. For assistance, please visit http://www.panasonic.com/help Shared Phonebook Editing entries Handset Find the desired entry (page 36). a MMENUN MbN: “Edit”... -
Page 38: Chain Dial
R If you have rotary/pulse service, you need to press * (TONE) before pressing MMENUN on the handset or For assistance, please visit http://www.panasonic.com/help N on the base unit in step 1 to change the dialing mode temporarily to tone. When adding entries to the... -
Page 39: Programming
Viewing the caller list. Main menu: “Answering device” Sub-menu 1 Sub-menu 2 Play new msg. (msg.: message) Play all msg. Erase all msg. For assistance, please visit http://www.panasonic.com/help indicates the reference page number. Settings – – – Programming Code #213 Code –... - Page 40 Main menu: “V.M. access” Operation Listening to voice mail messages. Main menu: “Intercom” Operation Paging the desired unit. For assistance, please visit http://www.panasonic.com/help Settings 2–7: 2-7 rings <4 rings> 0: Toll saver 1: 1 min 3: <3 min> 0: Greeting only <111>...
- Page 41 – 1: Add new device (for CELL 1) – 2: Add new device (for CELL 2) Phonebook transfer Headset For assistance, please visit http://www.panasonic.com/help Sub-menu 2 Settings Connect Disconnect 0–6: Off–6 <6> Ringer volume – Handset 0–6: Off–6 <1> Ringer volume *1, *7 –...
- Page 42 Settings Deregistration Main menu: “Set date & time” Sub-menu 1 Date and time Alarm Time *1, *11 adjustment For assistance, please visit http://www.panasonic.com/help Sub-menu 2 Auto connect Cell area code Cell line only mode Cell line select – Handset Cell line...
- Page 43 Set date & time Date and time Talking Caller Handset name Call block Voice mail Message alert LCD contrast (Display contrast) For assistance, please visit http://www.panasonic.com/help Sub-menu 2 Ringer volume *3, *7 – Handset Ringer volume *1, *3, *7 – Base unit...
- Page 44 *1 If you program these settings using one of the handsets, you do not need to program the same item using another handset. *2 This menu is not displayed when scrolling through the display menus. It is only available in direct command code. For assistance, please visit http://www.panasonic.com/help Sub-menu 2 – Handset...
- Page 45 *17 The flash time depends on your telephone exchange or host PBX. Contact your PBX supplier if necessary. The setting should stay at “700 ms” unless pressing MFLASHN fails to pick up the waiting call.
-
Page 46: Special Programming
R When the handset is in use, the alarm will not sound until the handset is in standby mode. For assistance, please visit http://www.panasonic.com/help Silent mode Silent mode allows you to select a period of time during which the handset will not ring for outside calls. -
Page 47: Changing The Handset Name
Important: R When the unit receives a call from a number that is stored in the call block For assistance, please visit http://www.panasonic.com/help list or a call without a recognized phone number, the call is logged in the caller list (page 50) with the call is disconnected. -
Page 48: Registering A Unit
Up to 6 handsets can be registered to the base unit. Important: R See page 5 for information on the available model. For assistance, please visit http://www.panasonic.com/help Registering a handset to the base unit The supplied handset and base unit are pre-registered. If for some reason the handset is not registered to the base unit, re-register the handset. -
Page 49: Caller Id Service
The display shows “Missed call”. This lets you know if you should view the caller list to see who called while you were away. For assistance, please visit http://www.panasonic.com/help Note: R Even when there are unviewed missed calls, “Missed call”... -
Page 50: Caller List
MbN: “Group” a MSELECTN MbN: Select the desired group. a MSELECTN MbN: Select the desired ringer tone. a MSAVEN For assistance, please visit http://www.panasonic.com/help MOFFN Caller list Important: R Only 1 person can access the caller list at a time. - Page 51 You can edit a phone number in the caller list by removing its area code and/ or the long distance code “1”. For assistance, please visit http://www.panasonic.com/help Handset MFN CID MbN: Select the desired entry. Press MSELECTN, then press...
-
Page 52: Caller Id Number Auto Edit
R If you move to another area, you can turn this feature off to erase previously edited area codes. To use this feature For assistance, please visit http://www.panasonic.com/help again, turn it on and reprogram the area codes you want to edit once again. - Page 53 N a MbN: “Yes” a M N MnN (EXIT) Note: R If you stored caller information to the phonebook using the base unit, the entry is automatically assigned to “Home”. For assistance, please visit http://www.panasonic.com/help Caller ID Service...
-
Page 54: Using Bluetooth Devices
Go to step 4. When “Select mode” menu is displayed: MbN: Select “Auto” or “Manual”. a MSELECTN For assistance, please visit http://www.panasonic.com/help “Auto”: Download all entries from the cellular phone automatically. Go to step 5. “Manual”: Copy entries you selected. -
Page 55: Using A Bluetooth Wireless Headset (Optional) For Landline Calls
R Typically, default PIN is “0000”. Refer to the headset operating instructions. Press MOKN, then wait until a long beep sounds. For assistance, please visit http://www.panasonic.com/help Using Bluetooth Devices MOFFN R When the HEADSET indicator on the base unit lights green, you are ready to use the headset. - Page 56 R You can only switch from the base unit to your headset. Turn on the headset referring to your headset operating instructions. For assistance, please visit http://www.panasonic.com/help Call sharing between your headset and the handset Important: R To activate this feature, you should set call sharing mode to on beforehand (page 44).
-
Page 57: Answering System For Landline
– The message counter on the base unit flashes if the answering system is turned on. (KX-TG7621series: page 3) For assistance, please visit http://www.panasonic.com/help Answering System for Landline – If you use the pre-recorded greeting message, the unit automatically switches to another pre-recorded greeting message asking callers to call again later. -
Page 58: Greeting Message
Using a pre-recorded greeting message The unit provides 2 pre-recorded greeting messages: For assistance, please visit http://www.panasonic.com/help – If you erase or do not record your own greeting message, the unit plays a pre-recorded greeting asking callers to leave a message. -
Page 59: Listening To Messages Using The Handset
(page 51). Erasing all messages Press MERASEN 2 times while the unit is not in use. For assistance, please visit http://www.panasonic.com/help Answering System for Landline Listening to messages using the handset When new messages have been recorded: –... -
Page 60: Voice Memo
2, “Making cellular calls”, page 24. Erasing all messages MMENUN#325 MbN: “Yes” a MSELECTN a MOFFN For assistance, please visit http://www.panasonic.com/help Voice memo Available for: KX-TG7641 series (page 3) Recording a voice memo You can use the base unit to leave a... -
Page 61: Using The Answering System
R If you do not press any dial keys within 10 seconds after a voice guidance prompt, the unit disconnects your call. For assistance, please visit http://www.panasonic.com/help Answering System for Landline Remote commands You can press dial keys to access... -
Page 62: Answering System Settings
(page 57). R To use this unit’s answering system rather than the voice mail service For assistance, please visit http://www.panasonic.com/help provided by your service provider/ telephone company, please contact your service provider/telephone company to deactivate your voice mail service. -
Page 63: Message Alert
(page 65). MMENUN#340 MbN: Select the desired setting. a MSAVEN a MOFFN Note: R While message alert is on, battery operating time is shortened (page 12). For assistance, please visit http://www.panasonic.com/help Answering System for Landline... -
Page 64: Voice Mail Service For Landline
Note: R When storing your voice mail access number and your mailbox password, press MPAUSEN to add pauses For assistance, please visit http://www.panasonic.com/help (page 25) between the access number and the password as necessary. Contact your service provider/telephone company for the required pause time. -
Page 65: Listening To Voice Mail
# until the handset or base unit beeps. For assistance, please visit http://www.panasonic.com/help Voice Mail Service for Landline R If your voice mail service uses voice mail tones and a message is over 3 minutes long, the unit may not indicate new messages. -
Page 66: Intercom/Locator
R To page all handsets, press 0 or wait for a few seconds. R To stop paging, press MINTERCOMN. When you finish talking, press MINTERCOMN. For assistance, please visit http://www.panasonic.com/help Answering an intercom call Handset Press M N to answer the page. When you finish talking, press MOFFN. -
Page 67: Transferring Calls, Conference Calls
R To page a specific handset, enter the handset number. R To page all handsets, press 0 or wait for a few seconds. For assistance, please visit http://www.panasonic.com/help Answering a transferred call N to return to Press M *1 KX-TG7641 series: page 3 Press MSP-PHONEN to answer the page. -
Page 68: Useful Information
Connect the AC adaptor cord and telephone line cord (B). Hooks AC adaptor cord For assistance, please visit http://www.panasonic.com/help Insert the hooks on the wall mounting adaptor into holes on the base unit. Adjust the adaptor to hold the base unit, then push it in the direction of the arrow until it clicks into place. - Page 69 (4 inches) To remove the wall mounting adaptor While pushing down the release levers (A), remove the adaptor (B). For assistance, please visit http://www.panasonic.com/help Base unit (KX-TG7641 series: page 3) The base unit can be mounted on a wall by revolving the bracket to “WALL”...
- Page 70 To stand on a desk Turn the bracket 180 degrees clockwise from the “WALL” position to the “DESK” direction until a click is heard. For assistance, please visit http://www.panasonic.com/help Charger Drive the screws (not supplied) into the wall. 83 mm...
-
Page 71: Error Messages
Call phone company for your access # Check tel line Error!! Failed For assistance, please visit http://www.panasonic.com/help Cause/solution R The handset has lost communication with the base unit. Move closer to the base unit and try again. R Unplug the base unit’s AC adaptor to reset the unit. -
Page 72: Troubleshooting
Problem The handset does not turn on even after installing charged batteries. The unit does not work. For assistance, please visit http://www.panasonic.com/help Cause/solution R There is no handset registered to the base unit matching the handset number you entered. R The handset is not registered to the base unit. - Page 73 I cannot hear a dial tone. The indicator on the handset flashes slowly. For assistance, please visit http://www.panasonic.com/help Cause/solution R Depending on the compatibility of the cellular phone, you may not be able to register it to the base unit.
- Page 74 Problem is displayed. Noise is heard, sound cuts in and out. For assistance, please visit http://www.panasonic.com/help Cause/solution R Change the display language (page 18). R The maximum number of handsets (6) is already registered to the base unit. Cancel unused handset registrations from the base unit (page 48).
- Page 75 I cannot make a call using the landline. I cannot make long distance calls. For assistance, please visit http://www.panasonic.com/help Cause/solution R The ringer volume is turned off. Adjust the ringer volume (page 41, 43). R When one handset is selected to ring for cellular calls, other units do not ring.
- Page 76 Caller information is not announced. The caller list/incoming phone numbers are not edited automatically. For assistance, please visit http://www.panasonic.com/help Cause/solution R You must subscribe to Caller ID service. Contact your service provider/telephone company for details. R If your unit is connected to any additional...
- Page 77 Noise is heard during a call on the headset. For assistance, please visit http://www.panasonic.com/help Cause/solution R The phone number you dialed might have been edited incorrectly (for example, the long distance “1” or the area code is missing). Edit the phone number with another pattern (page 51).
- Page 78 Answering system Problem The unit does not record new messages. For assistance, please visit http://www.panasonic.com/help Cause/solution R Confirm that your headset is turned on. R If your headset is already connected to another Bluetooth device such as your cellular phone,...
- Page 79 Caution: R To avoid permanent damage, do not use a microwave oven to speed up the drying process. For assistance, please visit http://www.panasonic.com/help Cause/solution R Someone is using the unit. Wait for the other user to finish. R A caller is leaving a message. Wait for the caller to finish.
-
Page 80: Fcc And Other Information
Also, you will be advised of your right to file a complaint with the FCC if you believe it is necessary. For assistance, please visit http://www.panasonic.com/help The telephone company may make changes in its facilities, equipment, operations or procedures that could affect the operation of the equipment. - Page 81 – Connect the equipment into an outlet on a circuit different from that to which the receiver is connected. For assistance, please visit http://www.panasonic.com/help Useful Information – Consult the dealer or an experienced radio/TV technician for help.
-
Page 82: Guía Rápida Española
Guía Rápida Española Guía Rápida Española Instalación Unidad base L Use solo el adaptador de corriente Panasonic PNLV226 incluido. Ganchos Oprima firmemente el contacto. Correcto Incorrecto L El modelo ilustrado es el KX-TG7622. *Requiere un filtro DSL/ADSL (no incluido) si tiene este tipo de servicio. - Page 83 {DISPLAY} s {r}: “Change language” s {6} s {r}: “Español” s {6} Idioma de la guía de voz Auricular: {MENU} (112 s {r}: “Español” s {GUARDA} s {OFF} Para obtener ayuda, visite http://www.panasonic.com/help (solo en ingls) Guía Rápida Española CEL. Auricular Subir volumen {<}...
- Page 84 Para un mejor funcionamiento, le recomendamos que coloque su teléfono celular de 0.6 m a 3 m (2 pies a 10 pies) de la unidad base. Para obtener ayuda, visite http://www.panasonic.com/help (solo en ingls) ® compatible con este Línea celular...
- Page 85 Marcas registradas L La marca denominativa y los logotipos de Bluetooth cualquier uso de dichas marcas por parte de Panasonic Corporation se hace bajo licencia. Todas las demás marcas comerciales que se identifican en el presente pertenecen a sus respectivos propietarios.
- Page 86 *1 La línea o líneas celulares correspondientes se indican enseguida del elemento. Está recibiendo una llamada de celular en esa línea. Para obtener ayuda, visite http://www.panasonic.com/help (solo en ingls) Significado Un teléfono celular está conectado. Listo para hacer o recibir llamadas celulares.
- Page 87 Para colgar Para ajustar el volumen del receptor o del altavoz Para obtener ayuda, visite http://www.panasonic.com/help (solo en ingls) Marque el número telefónico. s {CEL.} L Cuando el modo exclusivo para la línea celular está configurado, también puede oprimir {C}/{s} en lugar de {CEL.}.
- Page 88 Para ajustar el volumen del timbre del auricular (línea terrestre) Para obtener ayuda, visite http://www.panasonic.com/help (solo en ingls) {>} REDIAL s {r}: Seleccione el número telefónico deseado. Para hacer una llamada celular: Cuando solo hay 1 teléfono celular registrado: {CEL.} Cuando hay 2 teléfonos celulares registrados:...
- Page 89 Para escuchar mensajes Contestador de llamadas de la línea terrestre (auricular) Para escuchar mensajes Para obtener ayuda, visite http://www.panasonic.com/help (solo en ingls) Para CELL 1: {MENU} (*6281 Para CELL 2: {MENU} (*6282 {r}: Seleccione el volumen deseado. s {GUARDA} s...
- Page 90 Es posible que requiera el NIP de la unidad base (predeterminado: “0000”). L Las entradas que se están copiando aparecen en el auricular. Auricular: Espere a que aparezca “Completo”. s {OFF} Para obtener ayuda, visite http://www.panasonic.com/help (solo en ingls)
- Page 91 *1 Serie KX-TG7621 L Solo puede cambiar entre la unidad base y su audífono. Encienda el audífono. Para ello, consulte las instrucciones de operación de su audífono. Para obtener ayuda, visite http://www.panasonic.com/help (solo en ingls) Guía Rápida Española Registre usando el auricular.
- Page 92 ¿Es posible añadir otro auricular accesorio a mi unidad base? Para obtener ayuda, visite http://www.panasonic.com/help (solo en ingls) Causa y solución L El auricular está demasiado lejos de la unidad base. Acérquelo. L El adaptador para corriente de la unidad base no está...
- Page 93 (segunda llamada)? Para obtener más información acerca del registro, visite http://www.panasonic.com/RegisterYourHandset (solo en inglés) Para obtener ayuda, visite http://www.panasonic.com/help (solo en ingls) Causa y solución L Puede dejar el auricular en la unidad base o el cargador en cualquier momento. Esto no daña las baterías.
-
Page 94: Appendix
TTY users (hearing or speech impaired users) can call 1-877-833-8855. Accessory Purchases (United States and Puerto Rico) Purchase Parts, Accessories and Instruction Books online for all Panasonic Products by visiting our Web Site at: http://www.pstc.panasonic.com or, send your request by E-mail to: npcparts@us.panasonic.com... -
Page 95: Warranty (For United States And Puerto Rico)
Limited Warranty Coverage If your product does not work properly because of a defect in materials or workmanship, Panasonic Corporation of North America (referred to as “the warrantor”) will, for the length of the period indicated on the chart below, which starts with the date of original purchase (“Limited Warranty period”), at its... - Page 96 L Send the unit to PSTC (Panasonic) Exchange Center, prepaid and adequately insured. L Do not send your unit to Panasonic Corporation of North America listed on the back cover or to executive or regional sales offices. These locations do not repair consumer products.
-
Page 97: Index
Index 3-way conference: 27 A Additional handset: 48 Alarm: 46 Answering calls: 25, 32 Answering system Call screening: 57 Erasing messages: 59, 60, 61 Greeting message: 58 Greeting only: 62 Listening to messages: 58, 59, 61 MEMO: 60 Number of rings: 62 Recording time: 62 Remote access code: 60 Remote operation: 60... - Page 98 Index Transferring calls: 67 Troubleshooting: 72 TTY: 94 VM (Voice mail): 64 Voice guidance language: 18 Voice mail: 62, 64 Volume Receiver: 24 Ringer (Base unit): 32, 41, 43 Ringer (Handset): 25, 41, 43 Speaker: 24, 31 W Wall mounting: 68...
- Page 99 Notes...
- Page 100 We recommend keeping a record of the following information to assist with any repair under warranty. Serial No. (found on the bottom of the base unit) Name and address of dealer One Panasonic Way, Secaucus, New Jersey 07094 © Panasonic System Networks Co., Ltd. 2010 Printed in Malaysia IMPORTANT! Date of purchase Attach your purchase receipt here.