Philips D605 Series Extended User Documentation
Hide thumbs
Also See for D605 Series:
- Extended user documentation (54 pages) ,
- Short user manual (11 pages)

Related Manuals for Philips D605 Series


Summary of Contents for Philips D605 Series
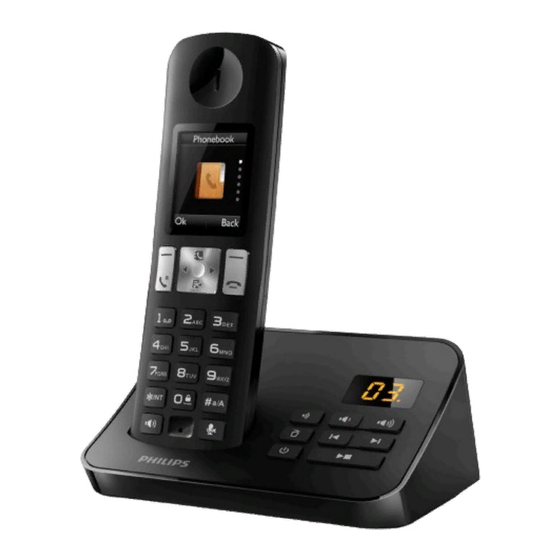
- Page 1 Always there to help you Register your product and get support at www.philips.com/support D600 Question? D605 Contact Philips Extended user documentation...
-
Page 3: Table Of Contents
Contents 8 Text and numbers Enter text and numbers Switch between uppercase and 1 Important safety instructions lowercase 2 Your phone 9 Phonebook What is in the box View the phonebook Overview of the phone Search a record Overview of the base station Call from the phonebook Access the phonebook during a call Add a record... - Page 4 Set the alarm 21 Index Turn off the alarm 14 Baby monitor Activate/Deactivate the baby unit Send an alert Set the baby cry level 15 Telephone answering machine Turn the answering machine on or off Set the answering machine language Set the answer mode Announcements Incoming messages...
-
Page 5: Important Safety Instructions
1 Important safety • Do not open the handset, base station or charger as you could be exposed to high voltages. instructions • For pluggable equipment, the socket-outlet shall be installed near the equipment and shall be easily accessible. • Handsfree activation could suddenly increase the volume in the earpiece to a very high level: make sure Power requirements... - Page 6 About operating and storage temperatures • Operate in a place where temperature is always between 0°C to +40°C (up to 90% relative humidity). • Store in a place where temperature is always between -20°C and +45°C (up to 95% relative humidity). •...
-
Page 7: Your Phone
2 Your phone Congratulations on your purchase and welcome to Philips! To fully benefit from the support that Philips Power adapter** offers, register your product at www.philips. com/welcome. What is in the box Line cord* Guarantee Base station (D600) Short user manual... -
Page 8: Overview Of The Phone
• Select the function displayed on the Overview of the phone handset screen directly above the key. • End the call. • Exit the menu/operation. • Press to enter a space during text editing. • Press and hold to lock/unlock the keypad in standby mode. -
Page 9: Overview Of The Base Station
• Enter the options menu. • Select the function displayed on the Decrease/increase the speaker volume. handset screen directly above the key. p Loudspeaker Skip backward/forward during playback. q Battery door • Play messages. • Stop messages playback. Overview of the base station Turn the answering machine on or off. -
Page 10: Main Menu Icons
3 Main menu icons The following is an overview of the menu options that are available in your D600/D605. For detailed explanation of the menu options, see the corresponding sections in this user manual. Icon Descriptions [Phone setup] - Set the date and time, sounds, ECO mode, ECO+ mode phone name, display language, and display settings. -
Page 11: Display Icons
4 Display icons The ECO mode is activated. ECO+ The ECO+ mode is activated. In standby mode, the icons shown on the main screen tell you what features are available on your handset. Icon Descriptions • When the handset is off the base station/charger, the bars indicate the battery level (from full to low). -
Page 12: Get Started
5 Get started Caution • Make sure that you have read the safety instructions in the 'Important safety instructions' section before you connect and install your handset. Connect the base station Warning Connect each end of the power adapter to (for multi handset versions only): •... -
Page 13: Insert The Supplied Batteries
Insert the supplied batteries Configure your phone (country dependent) When using your phone for the first time, you see a welcome message. Press [OK]. Set the country/language Select your country/language, then press [OK] to confirm. » The country/language setting is saved. Note •... -
Page 14: Change The Remote Access Pin Code
a docking tone (see 'Set the docking tone' on Set the date and time format page 27). » The handset starts charging. Select [Menu] > > [Date & time], then press [OK] to confirm. Select [Date format] or [Time format]. Note to select [DD-MM-YYYY] or Press... -
Page 15: What Is Standby Mode
What is standby mode? Your phone is in standby mode when it is idle. When the handset is off the charging cradle, the standby screen displays the date and time. When the handset is on the charging cradle, the standby screen displays the time as a screen saver. -
Page 16: Calls
6 Calls Call through the speed dial key If you have already pre-saved a contact in the speed dial key, press and hold the key to make Note a call. • When the power fails, the phone cannot access emergency services. •... -
Page 17: End A Call
Dial the second number. End a call » The number displayed on the screen is dialed out. You can end a call in these ways: • Press ; or • Place the handset to the base station Answer a second call or charging cradle. - Page 18 • Press , then ; or Press [Option], select [Conference] and • then press [OK] again to confirm. » The two calls are combined and a conference call is established.
-
Page 19: Intercom And Conference Calls
7 Intercom and » Wait for the other side to answer your call. conference calls Switch between calls Press [Extern] to switch between the outside An intercom call is a call to another handset call and the intercom call. that shares the same base station. A conference call involves a conversation between you, another handset user and the outside callers. - Page 20 Select or enter a handset number, then press [OK] to confirm. » The selected handset rings. Press on the selected handset. » The intercom is established. Press [Conf]. » You are now in a 3-way conference call with an external call and a selected handset.
-
Page 21: Text And Numbers
8 Text and numbers You can enter text and numbers for handset name, phonebook records, and other menu items. Enter text and numbers Press once or several times on the alphanumeric key to enter the selected character. Press [Clear] to delete the character. Press to move the cursor left and right. -
Page 22: Phonebook
9 Phonebook Enter the first character of a contact Press or select [Menu] > > [OK] to access the contact list. This phone has a phonebook that stores up Press the alphanumerical key that matches to 100 records. You can access the phonebook the character. -
Page 23: Edit A Record
Select a melody for the contact, then press [OK] to confirm. • » The melody is set. If your phonebook memory is full, the handset displays a notification message. Delete some records to add new ones. • Press and hold to insert a pause. -
Page 24: Add A Contact To The Exception List
Add a contact to the exception list You can select a contact to the exception list. When the contact who is added into the exception list calls you, the phone rings immediately even though you activate the silent mode. or select [Menu] > . Press Select a contact, then select [Option] >... -
Page 25: Call Log
10 Call log View the call records Press in standby mode or select [Menu] The call log stores the call history of all missed > from the main menu screen. or received calls. The incoming call history Select [Incoming calls] (for D605 only). includes the name and number of the caller, call »... -
Page 26: Delete A Call Record
Press to make the call. Delete a call record Press in standby mode or from the main menu screen. Select [Incoming calls] (for D605 only). » The incoming call log is displayed. Select a record, then select [Option] to confirm. Select [Delete], then press [OK] to confirm »... -
Page 27: Redial List
11 Redial list Select a record, then press [Option] to confirm. Select [Delete], then press [OK] to confirm. The redial list stores the call history of dialed » A confirmation request is displayed on calls. It includes the names and/or numbers you the handset. -
Page 28: Phone Settings
12 Phone settings Note • When you press to find your handset, or when you activate the alarm, your phone still sends alert even You can customize the settings to make it your when the silent mode is activated. own phone. Select [Menu] >... -
Page 29: Set The Date And Time
Set the ringtone on the base station Note • If [Exception] is set to [On] and [Ring delay] option Note is selected, the handset rings only after length of ring delay selected is reached. • This feature is available only for D605. •... -
Page 30: Eco+ Mode
Select [On]/[Off], and press [OK] to [Off] [On] is displayed only after the confirm. ECO+ mode is activated » The setting is saved. during standby mode . is displayed in standby mode. » [On] [Off] is displayed. [On] [On] is displayed and changed Note when the ECO+ mode is activated in... -
Page 31: Display Settings
Display settings You can change the display of the phone during standby mode. Set the brightness You can set the brightness of the handset screen to different levels. Select [Menu] > > [Display], then press [OK] to confirm. Select [Brightness], then press [OK] to confirm. -
Page 32: Alarm Clock
13 Alarm clock When the alarm rings • Press[Off] to turn off the alarm. • Press [Snooze](or any key except [Off] ) Your phone has a built-in alarm clock. Check the to snooze. information below to set your alarm clock. »... -
Page 33: Baby Monitor
14 Baby monitor Send an alert You can send an alert to other handsets within Your phone supports the baby monitor function the home or an external line. External line can which sends an alert if the sound level exceeds be a cell phone or another fixed line outside the set limit. -
Page 34: Set The Baby Cry Level
Send to a contact from the phonebook Select [Menu] > > [Send alert to] > [Select number], then press [OK] to confirm. Select a contact from the phonebook, then press [Save] to confirm. Set the baby cry level Select [Menu] > >... -
Page 35: Telephone Answering Machine
15 Telephone Set the answering machine answering language machine Note • This feature only applies to models with multiple- language support. Note The answering machine language is the language • Available only for D605. for the announcements. Select [Menu] > >... -
Page 36: Incoming Messages
Select [Answer & rec.] or [Answer only], Record an announcement then press [OK] to confirm. The maximum length of the announcement you Select [Use default], then press [OK] to can record is 3 minutes. The newly recorded confirm. announcement automatically replaces the old »... - Page 37 From the handset Call screening Select [Menu] > > [Play], then press [OK] to confirm. You can hear the caller while he is leaving a » New messages start playing. Old message. Press to answer the call. messages start playing if there is no new message.
- Page 38 » You now have access to your answering machine, and you can listen • to the new messages. When you access the answering machine remotely, you are recommended to set the ring delay to[Toll saver] mode. This is a cost effective way to manage your messages.
- Page 39 display No message It is steady on when there are 3 new messages. It flashes when the memory is full. It keeps scrolling when the answering machine is recording the incoming message or announcement. Press to display the volume level. It flashes when you access the answering machine menu from...
-
Page 40: Services
16 Services Add new number to the barred list Select [Menu] > > [Call barring] > [Barring number], then press [OK] to The phone supports a number of features that confirm. help you handle and manage the calls. Enter the PIN/passcode. The default PIN is 0000. -
Page 41: Auto Prefix
Select the call list type Network type Select [Menu] > > [Call list type], then Note press [OK] to confirm. • Select an option, then press [OK] to This is a country dependent feature. It only applies to models with network type support. confirm. -
Page 42: First Ring
» The setting is saved. » The setting is saved. . First ring Register additional handsets If you have subscribed to the caller ID service You can register additional handsets to the base with your service provider, your phone can station. -
Page 43: Unregister Handsets
Call forward Note • You can divert your calls to another phone If the PIN/passcode is incorrect or no base is found within a certain period, your handset displays a number. You can select among 3 options: notification message. Repeat the above procedure if •... -
Page 44: Restore Default Settings
Edit the call return service centre » The setting is saved. number Select [Menu] > > [Call Services] > Restore default settings [Call return] > [Settings], then press [OK] to confirm. Enter or edit the number, then press [OK] You can reset your phone settings to the to confirm. -
Page 45: Technical Data
Answering machine with up to 30 minutes recording time • Caller identification standard support: FSK, DTMF Battery • Philips: 2 x AAA Ni-MH 1.2V 550 mAh rechargeable batteries Power adapter Base and charger • Philips, MN-A102-U130, input: 100-240Vac, 50-60Hz 200mA, output: 6Vdc 400 mA •... -
Page 46: Notice
Directive 1999/5/EC. You can find the Declaration of Conformity on www.p4c.philips. com. This product has been designed, tested and manufactured according the European R&TTE When this crossed-out wheeled bin symbol is directive 1999/5/EC. - Page 47 When this logo is attached to a product, it means a financial contribution has been paid to the associated national recovery and recycling system. Environmental information All unnecessary packaging has been omitted. We have tried to make the packaging easy to separate into three materials: cardboard (box), polystyrene foam (buffer) and polyethylene (bags, protective foam sheet.)
-
Page 48: Frequently Asked Questions
19 Frequently Select it to access the language options. Select your own language. asked questions No dialing tone • Check your phone connections. • The handset is out of range. Move it closer to the base station. No signal bar is displayed on the screen. No docking tone •... - Page 49 The caller ID does not display. • The service is not activated. Check with your service provider. • The caller's information is withheld or unavailable. Note • If the above solutions do not help, disconnect the power supply from both the handset and base station. Try again after 1 minute.
-
Page 50: Appendix
20 Appendix A B Г 2 A B C Æ Ä Å Ç Δ Ε Ζ 3 D E F É Η Θ Ι 4 G H I Text and number input tables Κ Λ Μ 5 J K L Ν... - Page 51 m n o Ћ 6 Р С Т У p q r s Җ Š 7 Ф Х Ц Ч Π Θ Σ ß t u v Lj 8 Ш Щ Ъ Ы w x y z Ž 9 Ь Э Ю Я Ω Ξ Ψ...
- Page 52 21 Index ECO mode ECO+ mode exception list, silent mode additional handsets alarm announcements find handsets/paging answer a call first ring answering machine answering machine language auto clock auto conference auto prefix baby monitor hide own call base station installation overview battery incoming message...
- Page 53 phone settings phonebook 20, 23 answering machine calling barring registration power adapter recall time redial register/unregister 40, 41 remote access to the answering machine ring delay ringtone ringtone customization safety save a number signal strength silent mode 22, 26 sounds docking keytone speaker phone...
- Page 54 0168 2014 © WOOX Innovations Limited. All rights reserved. Philips and the Philips’ Shield Emblem are registered trademarks of Koninklijke Philips N.V. and are used by WOOX Innovations Limited under license from Koninklijke Philips N.V. UM_D60x_05_EN _V2.0 WK1439...