Table of Contents
Advertisement
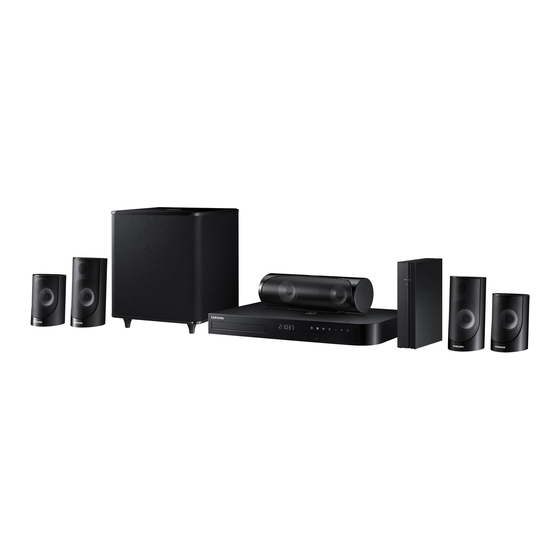
HT-J5500W
Wireless Receiver Module (SWA-7000)
User manual
5.1CH Blu-ray™
Home Entertainment System
imagine the possibilities
Thank you for purchasing this Samsung product.
To receive more complete service, please register your product at
www.samsung.com/register
This Nanum Gothic Eco font is provided by NAVER.
Advertisement
Table of Contents

Related Manuals for Samsung HT-J5500W


Summary of Contents for Samsung HT-J5500W
- Page 1 Wireless Receiver Module (SWA-7000) User manual 5.1CH Blu-ray™ Home Entertainment System imagine the possibilities Thank you for purchasing this Samsung product. To receive more complete service, please register your product at www.samsung.com/register This Nanum Gothic Eco font is provided by NAVER.
- Page 2 Safety Information The following also applies to the Wireless Receiver Module (SWA-7000). ✎ This symbol indicates that high voltage CAUTION is present inside. It is dangerous to RISK OF ELECTRIC SHOCK. DO NOT OPEN make any kind of contact with any internal part of this product.
- Page 3 Contact an authorized service center for information FCC NOTES (for U.S.A) ● if you intend to install your product in a location with This equipment has been tested and found to comply heavy dust, high or low temperatures, high humidity, with the limits for a Class B digital device, pursuant chemical substances, or where it will operate 24 hours to Part 15 of the FCC rules.
- Page 4 Safety Information Important Safety Instructions 3D Precautions Read these operating instructions carefully before using IMPORTANT HEALTH AND SAFETY INFORMATION FOR the unit. Follow all the safety instructions listed below. 3D PICTURES. Keep these operating instructions handy for future Read and understand the following safety information reference.
-
Page 5: Table Of Contents
Contents GETTING STARTED NETWORK SERVICES Accessories 35 Using BD-LIVE™ Speaker Components 35 Using DLNA Front Panel 35 Apps Rear Panel 36 Using Vewd App Store Remote Control 37 Screen Mirroring CONNECTIONS APPENDIX Connecting the Speakers 38 Additional Information 12 Connecting to a TV and External Devices 39 Disk and Format Compatibility 13 Connecting to a Network Router 44 Troubleshooting... -
Page 6: Getting Started
Getting Started Check the box for the accessories and speaker components listed or shown below. Accessories Remote Control (AH59-02533A) User Manual (AH68-02771A) ● ● Batteries (AAA size) (4301-000116) ● Power Cable (3903-000598) FM Antenna (AH42-00021A) Speaker Components Center SURROUND SPEAKERS OUT SPEAKER IMPEDANCE : 3Ω... -
Page 7: Front Panel
MIC 1 5V 0.5A MIC 1 MIC 2 MIC 1 MIC 2 5V 0.5A MIC 1 MIC 2 5V 0.5A MIC 1 MIC 2 5V 0.5A MIC 1 MIC 2 Front Panel DISPLAY ICONS FUNCTION STOP PLAY/PAUSE VOLUME OPEN/CLOSE POWER CONTROL DISPLAY 5V 0.5A... -
Page 8: Remote Control
Getting Started Remote Control Tour of the Remote Control Press to select Home Theater's Turn the product on and off. mode. (BD/DVD, D. IN, AUX, FUNCTION etc.). To open and close the disc tray. VOLUME MUTE Adjust the volume. Cut off the sound temporarily. Press numeric buttons to operate options. -
Page 9: Connections
Connections This section describes various methods of connecting the product to other external components. Before moving or installing the product, be sure to turn off the power and disconnect the power cord. Connecting the Speakers Position of the product Place it on a stand or cabinet shelf, or under the TV stand. - Page 10 Connections Speaker Cable Connections Match each speaker cable bundle to the correct speaker by matching the colored band on each bundle to the colored sticker on the bottom or back of each speaker. Connect the speaker wire plugs from each speaker to the back of the product by matching the colored band on each cable to the colors of the speaker jacks.
- Page 11 | CAUTION | If you want to install the speakers on the wall, fasten screws or nails (not provided) firmly to the wall ▶ wherever you want to hang a speaker, and then, using the hole in the rear of each speaker, carefully hang each speaker on a screw or nail.
-
Page 12: Connecting To A Tv And External Devices
Connections Connecting to a TV and External Devices White Method 1 Method 2 External Devices AUDIO OUT OPTICAL OUT HDMI IN (ARC) Connecting to a TV Connect an HDMI cable (not supplied) from the HDMI OUT jack on the back of the product to the HDMI IN jack on your TV. -
Page 13: Connecting To A Network Router
IP router is currently being policies may prevent the product from used by another device nearby, it will result in accessing Samsung's software update server. interference and communication failure. If this occurs, contact your Internet Service In compliance with the newest Wi-Fi Provider (ISP) for more information. -
Page 14: Settings
16:9 format product to an Anynet+ (HDMI-CEC)-compliant and expands 4:3 pictures to fill the 16:9 screen. Samsung TV and 1.) You have set the Anynet+ 4:3 Letter Box - For older, standard screen, (HDMI-CEC) feature to On in both the TV analog TVs. -
Page 15: The Home Screen At A Glance
The Home Screen at a Glance 7 Change Device Displays a list of external devices connected to the main unit. Switch to the desired device. 8 Function PLAY DISC PHOTOS VIDEOS MUSIC Use for switching to an external device, and for radio and mode switching for a Bluetooth connection. -
Page 16: Settings Menu Functions
When you connect a Samsung product Button : Press to exit the current EXIT and a Samsung TV with BD Wise to each other menu. via HDMI, and BD Wise is on in both the product and TV, the product outputs video at the video resolution and frame rate of the Blu-ray/DVD Disc. - Page 17 HDMI Color Format Audio Return Channel Lets you set the color space format for the HDMI Lets you direct the sound from the TV to the output to match the capabilities of the connected Home Theater speakers. Requires an HDMI device (TV, monitor, etc).
- Page 18 To operate this function, you must Note that if the product is connected to a wireless connect this product to an Anynet+ Samsung TV network, it may be disconnected when you use using an HDMI cable.
-
Page 19: Radio Setup
STEREO and MONO. page 24. In a poor reception area, select MONO for a clear, ● interference-free broadcast. Contact Samsung Presetting Stations Provides contact information for assistance with your product. Example : Presetting FM 89.10 into memory. Press the button to select FM. -
Page 20: Network Setup
Settings To delete all Preset FM stations at once, press ✎ Network Setup button for about 5 seconds TITLE MENU in FM Manual mode until DEFAULT PRESET When you connect this product to a network, you appears on the display. can use network based applications and functions such as BD-LIVE and upgrade the product's software Recording FM Radio... - Page 21 Wireless - Automatic Ğ Network Settings Follow the Steps 1 to 3 in "Configuring Your Wired network connection failed. Network Connection". (See page 20) MAC Address XX:XX:XX:XX:XX:XX In the Network Settings screen, change IP Address 0. 0. 0. 0 Subnet Mask 0.
- Page 22 Settings You can get the Network parameter values ✎ Enter your wireless network or wireless router's name. from your Internet provider. Enter numbers directly using the number 11. When finished, select Return ( ' ), and then ● buttons on your remote control. press the v button.
-
Page 23: Wi-Fi Direct
When you have completed the procedure, you Wi-Fi Direct should see a pop-up on your TV screen saying that a device that supports Wi-Fi Direct has The Wi-Fi Direct function allows you to connect Wi- requested to connect. Confirm that the device Fi Direct devices to the product and each other using that is making the request is your device, select a peer-to-peer network, without a wireless router. -
Page 24: Upgrading Software
POWER turn on the updated product for your use. Left click your product's model number in the drop down list. Samsung Electronics takes no legal ● responsibility for product malfunction On the page that appears, select Downloads. caused by an unstable Internet connection... -
Page 25: Setting Up Dlna
Auto Upgrade Notification If your product is connected to the network and you set Auto Upgrade Notification on, the product will notify you if a new software version is available with a pop-up message. Turn on the product. In the Software Upgrade menu, set Auto Upgrade Notification to On. -
Page 26: Playing Content
Playing Content Your home theater can play content located on Press the ^ button to close the disc tray. Blu-ray/DVD/CD discs, USB devices, PCs, smart Playback starts automatically. phones, tablets, and in Apps. If playback does not start automatically, press To play content located on your PC or a mobile the 6 button on the remote. -
Page 27: Playing Files On A Usb Device
A screen appears listing the contents of the If necessary, use the ▲▼◀▶ buttons to select disc. Depending on how the contents are a folder, and then press the v button. arranged, you will see either folders, individual Select a file to view or play, and then press the files, or both. -
Page 28: Controlling Video Playback
Playing Content Controlling Video Playback 2 Using the disc menu, title menu, popup menu, and title list You can control the playback of video content located on a Blu-ray/DVD disc, USB device, mobile DISC MENU FUNCTION device, or PC. Depending on the disc or contents, VOLUME MUTE During playback, press this button to display the... - Page 29 Using the TOOLS Menu Menu selections that appear only when a BD/DVD disc plays During playback, press the button. TOOLS Title Chapter If there is more than one title on a disk or device, Lets you move to a chapter that you want to lets you move to or select a desired title.
-
Page 30: Playing A Pre-Recorded Commercial Audio Disc
Playing Content Creating a Video Playlist Buttons on the Remote Control used for FUNCTION Music Playback You can create a playlist of video files in nearly the VOLUME MUTE same way you create a playlist of music files. See page 31 for instructions. Select video files instead of music files. - Page 31 Creating a Music Playlist Ripping If you are playing music from a commercial CD Insert a USB device into the USB jack on the or DVD, press the 5 or button. The front of the product. RETURN Music List Screen appears. If you are creating With the Playback screen displayed, use the a playlist from music on a user created disk or ▲▼...
-
Page 32: Playing Photo Content
Playing Content Playing Photo Content Using Bluetooth You can play photo content located on a DVD, USB, You can use a Bluetooth device to enjoy music with mobile device, or PC. high quality stereo sound, all without wires! Using the Tools Menu Pairing distance : max. - Page 33 - If the Bluetooth device is turned off, not in To Connect the Home Theater to a Bluetooth place, or malfunctions. Device Note that such devices as microwave ovens, wireless LAN adapters, fluorescent lights, and gas stoves use the same frequency range as the Bluetooth device, and can cause electric interference.
-
Page 34: Using The Special Effects Remote Control Buttons
Playing Content Use TV SOUND: Using the Bluetooth Quick Start Ğ 1) When you want to listen to the TV's audio When the home theater is turned off, connecting through the home theater speakers. your smart device to the product via a Bluetooth 2) When you want to listen to the audio from connection can turn the home theater on. -
Page 35: Network Services
Network Services On your home theater, select Change Device. Using BD-LIVE™ Use the ▲▼ button to select your PC in the Device List. Connect the product to your network. Select the kind of file you want to view or play, (See page 13) PHOTOS, VIDEOS, or MUSIC and then press v . -
Page 36: Using Vewd App Store
Network Services Using Apps Using Vewd App Store The first time you access any one of the apps, the At the Vewd App Store, you will find high-quality home theater displays two agreements. You must Internet video streaming, social network, and music accept both agreements to download and use any streaming services. -
Page 37: Screen Mirroring
The TV displays a connecting message (for Deleting Apps from MY APPS example, Connecting to Android_92gb...) and Highlight the MENU button on the top of the then displays the connected message. My Apps screen, and then press the v button In a few moments, the screen of your device on your remote. -
Page 38: Appendix
● does not support CEC. Depending on the disc type, some aspect ratios ● If your Samsung TV has an Anynet+ logo, then it may not be available. ● supports the Anynet+ function. If you select an aspect ratio and option which is ●... -
Page 39: Disk And Format Compatibility
Playing Content HDMI audio When HDMI audio is output to the TV speakers, it Using the TOOLS button while playing pictures ● is automatically down-mixed to 2 channels. If the home theater is connected to a BD Wise ● compliant TV that has BD Wise On, the Picture Audio Return Channel Settings menu will not appear. - Page 40 Both products and discs are coded by region. These product. regional codes must match for a disc to play. If the codes Samsung cannot guarantee that this product ✎ do not match, the disc will not play. will play every disc bearing the Blu-ray Disc,...
- Page 41 ✎ additional power by plugging the HDD into a wall depending on the recording conditions. socket. If the problem continues, contact the USB HDD manufacturer. SAMSUNG is not responsible for any data file damage ● or data loss. - English...
- Page 42 Appendix Video File Support File Extension Container Video Codec Audio Codec Resolution MP4v3 MP3, Dolby Digital, DTS, *.avi WMA, PCM H.264 BP/MP/HP VC-1 AP *.mkv MP3, Dolby Digital, DTS H.264 BP/MP/HP VC-1 AP *.wmv (wmv9) 1920x1080 VC-1 SM MP4 (mp4v) *.mp4 H.264 BP/MP/HP MPEG1...
- Page 43 Digital Output Selections Bitstream Bitstream Bitstream Setup (Re-encoded (Unprocessed) (Re-encoded DTS) Dolby D) Connection HDMI supported AV receiver Up to PCM 7.1ch Dolby Digital Up to PCM 5.1ch Dolby Digital Dolby Digital Up to PCM 5.1ch Dolby Digital Plus Plus Audio Dolby TrueHD Up to PCM 5.1ch...
-
Page 44: Troubleshooting
Refer to the table below when this product does not function properly. If the problem you are experiencing is not listed below or if the instructions below do not help, turn off the product, disconnect the power cord, and contact Samsung Electronics at 1-800-SAMSUNG (1-800-726-7864). Symptom... - Page 45 Symptom Check/Remedy Is there "Dolby Digital 5.1 CH" mark on the disc? Dolby Digital 5.1 CH Surround Dolby Digital 5.1 CH ● Sound is produced only if the disc is recorded with 5.1 channel sound. Surround Sound is not produced. Is the audio language correctly set to Dolby Digital 5.1-CH in the information ●...
- Page 46 We will provide you with the amount of the administration fee before we make a home visit or begin any work on your product. We recommend you read this manually thoroughly, search for a solution on line at www.samsung.com, or contact Samsung Customer Care at 1-800-SAMSUNG (1-800-726-7864) before seeking to repair your product.
-
Page 47: Specifications
For the power supply and Power Consumption, refer to the label attached to the product. ✎ Dispose unwanted electronics through an approved recycler. ✎ To find the nearest recycling location, go to our website: www.samsung.com/recyclingdirect or call, (877) 278 - 0799 SWA-7000 Ğ... -
Page 48: Licenses
Appendix Licenses Manufactured under license from Dolby Laboratories. Dolby, Dolby Audio, Pro Logic, and the double-D symbol are trademarks of Dolby Laboratories. For DTS patents, see http://patents.dts.com. Manufactured under license from DTS Licensing Limited. DTS, DTS-HD, the Symbol, & DTS and the Symbol together are registered trademarks, and DTS-HD Master Audio | Essential is a trademark of DTS, Inc. - Page 49 Transportation of the product to and from the service center is the responsibility of the purchaser. SAMSUNG will repair or replace this product, at our option and at no charge as stipulated herein, with new or reconditioned parts or products if found to be defective during the limited warranty period specified above. All replaced parts and products become the property of SAMSUNG and must be returned to SAMSUNG.
- Page 50 © 2015 Samsung Electronics Co., Ltd. All rights reserved. The party responsible for product compliance: Samsung Electronics Co., LTD. America QA lab of Samsung 19 Chapin Rd. Building D, Pine Brook, New Jersey 07058 QUESTIONS OR COMMENTS? COUNTRY CALL OR VISIT US ONLINE AT WRITE Samsung Electronics America, Inc.