Table of Contents
Advertisement
www.SewingSupplyWarehouse.com
Operation Manual
Sewing Machine
Product Code: 888-N00/N02/N20/N22/N40/N42
CONTENTS
IMPORTANT SAFETY INSTRUCTIONS ����������������������2
Names of Machine Parts ��������������������������������������������4
Main parts ����������������������������������������������������������������������� 4
Needle and presser foot section �������������������������������������� 4
Operation buttons ����������������������������������������������������������� 4
Flat bed attachment ��������������������������������������������������������� 4
Accessories ����������������������������������������������������������������5
Included accessories ������������������������������������������������������� 5
Optional accessories ������������������������������������������������������ 5
Using Your Machine ��������������������������������������������������5
Power supply ������������������������������������������������������������������ 6
Foot controller ����������������������������������������������������������������� 6
Operation panel �������������������������������������������������������������� 6
Settings/Functions ����������������������������������������������������������� 6
Be sure to read this document before using the machine.
We recommend that you keep this document nearby for future reference.
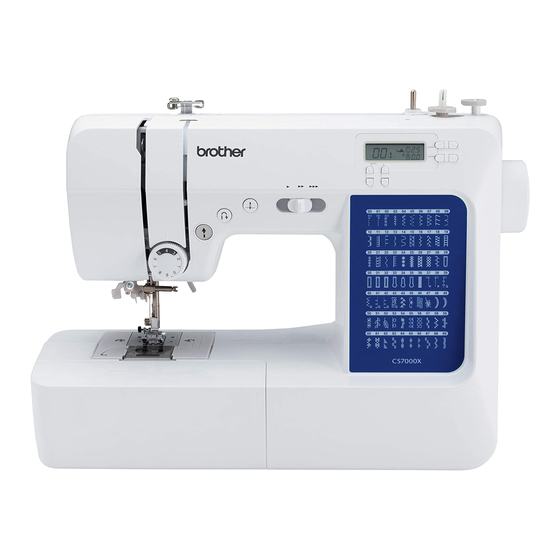
CS7000X
Threading the Machine ����������������������������������������������7
Winding/Installing the bobbin ����������������������������������������� 7
Upper threading �������������������������������������������������������������� 9
Drawing up the bobbin thread �������������������������������������� 11
Fabric/Thread/Needle Combination ������������������������12
Needle ���������������������������������������������������������������������13
Checking the needle ����������������������������������������������������� 13
Replacing the needle ����������������������������������������������������� 13
Sewing with the twin needle ����������������������������������������� 13
Replacing the Presser Foot ���������������������������������������14
Replacing the presser foot ��������������������������������������������� 14
Removing the presser foot holder ���������������������������������� 15
Sewing Basics�����������������������������������������������������������15
Selecting the stitch �������������������������������������������������������� 15
Setting the stitch length and stitch width ����������������������� 15
Starting to sew ��������������������������������������������������������������� 16
Sewing reverse/reinforcement stitches ��������������������������� 16
Automatic reverse/reinforcement stitching ��������������������� 17
Thread tension �������������������������������������������������������������� 17
Utility Stitches ���������������������������������������������������������17
Overcasting stitches ������������������������������������������������������ 17
Blind hem stitching �������������������������������������������������������� 18
Buttonhole sewing �������������������������������������������������������� 19
Button sewing (for models equipped with
Zipper insertion������������������������������������������������������������� 22
Bar tack stitching ����������������������������������������������������������� 23
Making Adjustment��������������������������������������������������23
(Downloading Manuals) ������������������������������������������24
Care and Maintenance ���������������������������������������������24
Restrictions on oiling ����������������������������������������������������� 24
Precautions on storing the machine ������������������������������� 24
Cleaning the machine surface ��������������������������������������� 24
Cleaning the race ���������������������������������������������������������� 24
Frequent troubleshooting topics ������������������������������������ 25
Upper thread tightened up �������������������������������������������� 25
Tangled thread on wrong side of fabric ������������������������� 25
Incorrect thread tension ������������������������������������������������ 26
removed ������������������������������������������������������������������������ 26
winder seat�������������������������������������������������������������������� 28
List of symptoms������������������������������������������������������������ 28
Error Messages ���������������������������������������������������������30
Advertisement
Table of Contents
Troubleshooting

Related Manuals for Brother CS7000X


Summary of Contents for Brother CS7000X
-
Page 1: Table Of Contents
“M”) �������������������������������������������� 21 Zipper insertion������������������������������������������������������������� 22 Bar tack stitching ����������������������������������������������������������� 23 Making Adjustment��������������������������������������������������23 Brother Support Website Information (Downloading Manuals) ������������������������������������������24 Care and Maintenance ���������������������������������������������24 Restrictions on oiling ����������������������������������������������������� 24 Precautions on storing the machine ������������������������������� 24 CONTENTS Cleaning the machine surface ���������������������������������������... -
Page 2: Important Safety Instructions
• The plastic bag that this machine was supplied unit� Return the machine to the nearest authorized in should be kept out of the reach of children or Brother dealer for examination, repair, electrical or disposed of� Never allow children to play with the mechanical adjustment�... - Page 3 • Always replace the fuse cover� Never use plugs with the fuse cover omitted� • If the available electrical outlet is not suitable for the plug supplied with this equipment, you should contact your authorized Brother dealer to obtain the correct lead�...
-
Page 4: Names Of Machine Parts ��������������������������������������������4 Troubleshooting
1 Needle threader (page 10) ★ Names of Machine Parts 2 Buttonhole lever (page 20) ★ 3 Presser foot holder (page 15) 4 Presser foot holder screw (page 15) Main parts 5 Presser foot The presser foot applies pressure consistently on the fabric as the sewing takes place�... -
Page 5: Included Accessories
If the plug does not fit fully in the electrical available, contact your authorized Brother dealer outlet, reverse the plug� If it still does not fit, or visit our site http://s�brother/cpkag/� Always use contact a qualified electrician to install the accessories recommended for this machine�... -
Page 6: Power Supply
Power supply Operation panel Insert the plug into a household electrical outlet� 1 LCD (Liquid crystal display) Turn on the machine� The selected stitch (1), presser foot that should be used Press the “I” mark on the main (2), stitch length in millimeters (3), stitch width in power switch to turn on the main millimeters (4), needle stop position (5), and single/twin power, sewing light, and LCD�... -
Page 7: Threading The Machine
2 Changing the initial needle position 6 Changing the needle mode You can change the stitch selected when the You can change the needle mode to either the single or twin needle mode� machine is turned on to either “straight stitch (Default: Single needle mode) (left needle position)”... - Page 8 Pass the thread under the thread guide and Stop the machine and trim the excess thread� around the pretension disk, front to back� Release� ★ Pretension disk Slide the sewing speed controller to adjust the bobbin winding speed� ★ ★ Passing the thread through a hole on the bobbin, Slower Faster...
-
Page 9: Upper Threading
Put the bobbin in, hold the end of the thread, n For models equipped with the cutter ★ push the bobbin down with your finger, and then pass the thread though the slit as shown� Follow steps of “Winding/Installing the bobbin”�... - Page 10 Raise the needle to its highest position� n Using the needle threader ★ ★ CAUTION • The needle threader can only be used with Press once or twice� home sewing machine needles size 75/11- Turn toward you so that this mark 100/16�...
-
Page 11: Drawing Up The Bobbin Thread
b) While lowering the needle threader lever Lightly hold the end of the upper thread� fully (1), hook the thread onto the guide Upper thread (2)� Next, push back the needle threader lever until it stops (3), and pass the thread in front of the needle�... -
Page 12: Fabric/Thread/Needle Combination
• Select a stitch appropriate for the fabric, and then adjust the stitch length� When sewing lightweight fabrics, make the stitch length finer (shorter)� When sewing heavyweight fabrics, make the stitch length coarser (longer)� (page 15) When sewing stretch fabrics, refer to “Sewing guide” (http://s�brother/cmkag/)� Thread Stitch length... -
Page 13: Needle
For details on the stitches that can be sewn with the CAUTION twin needle, refer to “Stitch chart” (http://s�brother/cmkag/)� * The twin needle and the extra spool pin are sold separately • Before replacing the needle, be sure to turn with some models�... -
Page 14: Replacing The Presser Foot
Turn the machine into the twin needle mode� CAUTION (page 7) Select a stitch and start sewing� • When using the twin needle, be sure to select * If you select an inappropriate stitch with the an appropriate stitch, otherwise the needle twin needle, an error message appears�... -
Page 15: Removing The Presser Foot Holder
Place another foot so that the groove and pin Selecting the stitch align� Press the stitch selection keys to change the stitch number� Selected stitch Presser foot that should be used Groove Stitch selection keys Note 1 Changes the tens digit of the •... -
Page 16: Starting To Sew
Start sewing� CAUTION * Guide the fabric lightly by hand� Depress� ★ • After adjusting the stitch width, slowly turn the handwheel toward you (counterclockwise) and check that the needle does not touch the presser foot� If the needle hits the presser foot, the needle may bend or Stop sewing�... -
Page 17: Automatic Reverse/Reinforcement Stitching
The machine will sew reverse stitches (or reinforcement stitches) and stop� You can see the “Stitch chart” from Thread tension “ http://s�brother/cmkag/ ”� The thread tension will affect the quality of your Overcasting stitches stitches� You may need to adjust it when you change fabric or thread�... -
Page 18: Blind Hem Stitching
Turn the skirt or pants inside out� CAUTION 1 Wrong side of fabric 2 Right side of fabric 3 Lower edge of fabric • When using overcasting foot “G”, be sure to select a stitch that can be used with Fold the lower edge of fabric to the desired length overcasting foot “G”�... -
Page 19: Buttonhole Sewing
Attach blind stitch foot “R”� Stop sewing when you are finished, and raise the presser foot and needle to pull the fabric under the presser foot towards the back of the machine� Note Select a stitch� • Be sure to pull the fabric towards the back of * Stitches may differ depending on the model�... - Page 20 Note Use chalk to mark on the fabric the position and length of the buttonhole� • When lowering the presser foot, do not push in the front of the presser foot, otherwise the bar Marks on fabric tack will not be sewn with the correct size� Buttonhole sewing Pull down the buttonhole lever as far as possible�...
-
Page 21: Button Sewing
Measure the distance between the When using the eyelet punch, place thick paper or some other protective sheet under the holes in the button to be attached� fabric before punching the hole in the fabric� Raise the presser foot lever� CAUTION Slide the feed dog position switch, located at the rear of the machine on the base, to... -
Page 22: Zipper Insertion
Baste the fabric from the zipper opening to the CAUTION edge of the fabric� 1 Basting stitching • When sewing, be sure that the needle does 2 Wrong side of fabric not touch the button, otherwise the needle may bend or break� Sew about 10 stitches at a slow speed�... -
Page 23: Bar Tack Stitching
Topstitch around the zipper� Position the fabric so that the opening of the pocket 1 Stitching faces toward you, and then 2 Right side of fabric lower the presser foot lever 3 Basting stitching 4 End of zipper so that the needle drops 2 opening mm (1/16 inch) in front of the pocket opening�... -
Page 24: Brother Support Website Information
Information (Downloading Manuals) Cleaning the race Sewing performance will suffer if dust collects in the Brother support website introduces a variety of information about the product, such as sewing tips, bobbin case� how to use optional accessories, and details on stitch CAUTION patterns�... -
Page 25: Frequent Troubleshooting Topics
FAQs and troubleshooting tips� Visit us at “ http:// • The thread becomes s�brother/cpkag/ ” � tangled on the wrong If the problem persists, contact your Brother dealer or side of the fabric� the nearest Brother authorized service center� Frequent troubleshooting topics •... -
Page 26: Incorrect Thread Tension
“Winding/Installing the bobbin” (page the procedure, instead of attempting to remove it 7) to correct the threading� forcefully, contact your nearest Brother authorized <With symptoms 3 through 5 described above> service center� The upper threading is incorrect�... - Page 27 Turn off the machine� completing these steps, contact your nearest Remove the needle� Brother authorized service center� If the needle is lowered into the fabric, turn the Insert the bobbin case by following step handwheel away from you (clockwise) to raise “Cleaning the race”...
-
Page 28: Winder Seat
If the reference page is “ ”, contact your authorized and "Replacing the presser foot" (page 14)� Brother dealer or the nearest Brother authorized Correctly thread the machine� service center� * For details on threading the machine, refer to "Upper threading"... - Page 29 Symptom, Cause/solution Reference Symptom, Cause/solution Reference The needle is not appropriate for the thread The needle is turned, bent or the point is dull� you are using� The needle is not installed properly� The upper thread tension is too tight� Dust has accumulated under the needle plate The thread is tangled, for example, in the or in the bobbin case�...
-
Page 30: Error Messages
Brother dealer or the nearest Brother authorized service center� The handwheel does not turn smoothly� Operation beep ★ Thread is tangled in the bobbin case�... - Page 31 Index accessories ����������������������������������������������������������������������������������5 presser foot ���������������������������������������������������������������������������4, 14 automatic reverse/reinforcement stitching ����������������������������� 7, 17 presser foot holder ����������������������������������������������������������������4, 15 presser foot lever ��������������������������������������������������������� 4, 8, 14, 16 pretension disk ����������������������������������������������������������������������8, 28 bobbin ����������������������������������������������������������������������������������������7 bobbin case ������������������������������������������������������������������������������24 bobbin cover ���������������������������������������������������������������������������4, 8 quick-set bobbin ���������������������������������������������������������������������4, 9 bobbin installation ����������������������������������������������������������������������7 quilting foot ���������������������������������������������������������������������������5, 15 bobbin winder ����������������������������������������������������������������������4, 28...
- Page 32 Please visit us at http://s.brother/cpkag/ where you can get the support information (Sewing Guide, Stitch Chart, Instruction Videos, FAQs, etc.) for your Brother product. To get information about Videos, please go to http://s.brother/cvkag/. Brother SupportCenter is a mobile app that provides the support information (Instruction Videos, FAQs, etc.) for your Brother product.