Brother CS-100T Operation Manual
Brother cs-100t sewing machines: users manual
Hide thumbs
Also See for CS-100T:
- Manual (42 pages) ,
- Service manual (2 pages) ,
- Operation manual (67 pages)

Related Manuals for Brother CS-100T


Summary of Contents for Brother CS-100T
- Page 1 KNOWING YOUR SEWING MACHINE SEWING BASICS UTILITY STITCHES APPENDIX Computerized Sewing Machine Operation Manual...
-
Page 2: Important Safety Instructions
IMPORTANT SAFETY INSTRUCTIONS When using this machine, basic safety precautions should always be taken, including the following: Read all instructions before using. DANGER To reduce the risk of electric shock: 1. The machine should never be left unattended while plugged in. Always unplug the machine from the electrical outlet immediately after using and before cleaning. - Page 3 FOR USERS IN THE UK, EIRE, MALTA AND CYPRUS ONLY If this machine is fitted with a three-pin non-rewireable BS plug then please read the following. IMPORTANT If the available socket outlet is not suitable for the plug supplied with this equipment, it should be cut off and an appropriate three-pin plug fitted.
- Page 4 If the problem persists, please consult your local authorized Brother dealer. For additional product information and updates, visit our web site at www.brother.com The contents of this manual and specifications of this product are subject to change without notice.
-
Page 5: Table Of Contents
CONTENTS 1. KNOWING YOUR SEWING MACHINE ...5 NAMES OF MACHINE PARTS AND THEIR FUNCTIONS ... 5 The main parts ... 5 Needle and presser foot section ... 6 Operation buttons ... 6 Operation panel ... 7 Flat bed attachment ... 7 ACCESSORIES ...8 Optional accessories ... - Page 6 —————————————————————————————————————————————————————————— 3. UTILITY STITCHES ...32 OVERCASTING STITCHES ... 32 BASIC STITCHING ... 33 Basic stitching ... 33 BLIND HEM STITCHING ... 34 BUTTONHOLE SEWING ... 35 Button sewing ... 38 ZIPPER INSERTION ... 40 SEWING STRETCH FABRICS AND ELASTIC TAPE ... 41 Stretch stitching ...
-
Page 7: Knowing Your Sewing Machine
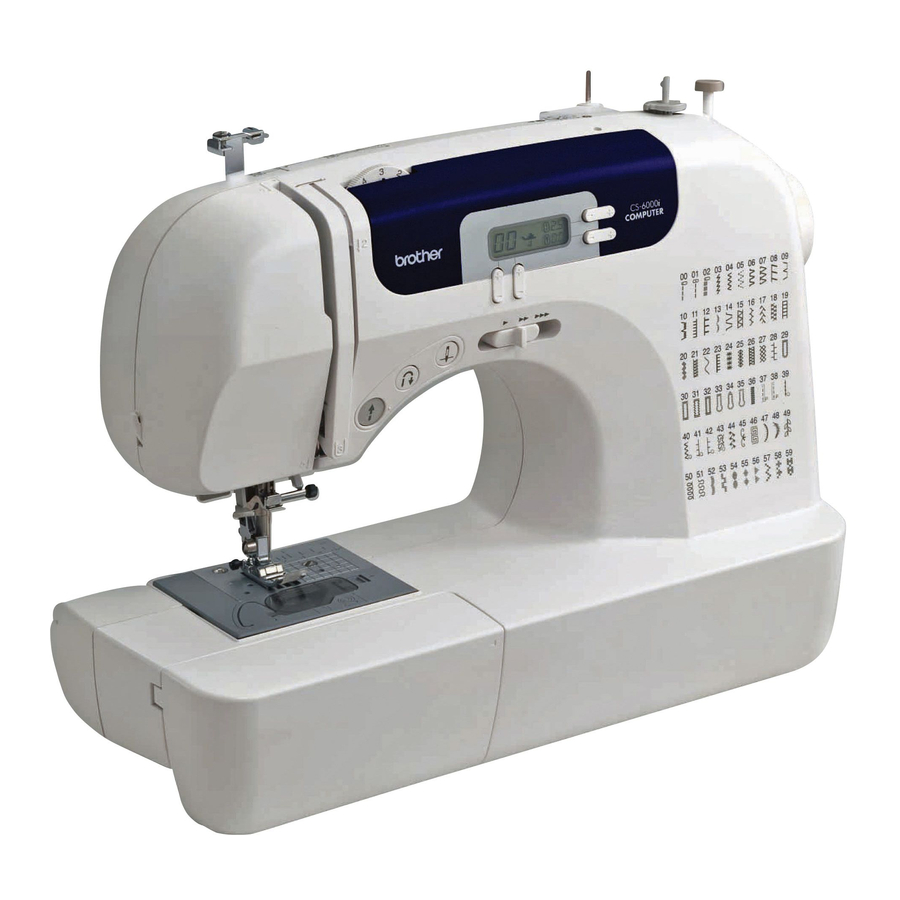
KNOWING YOUR SEWING MACHINE NAMES OF MACHINE PARTS AND THEIR FUNCTIONS The main parts a Bobbin winder (page 11) This winds the thread onto the bobbin for use as the lower thread. b Spool pin (pages 11 and 16) This holds the spool of thread. c Hole for extra spool pin (page 23) This holds a second spool of thread for sewing with two needles. -
Page 8: Needle And Presser Foot Section
KNOWING YOUR SEWING MACHINE ————————————————————————————————————————— Needle and presser foot section a Buttonhole lever Lower the buttonhole lever when sewing buttonholes and bar tacks. b Needle threader (for models equipped with the needle threader) (page 17) c Presser foot holder The presser foot is installed onto the presser foot holder. Operation buttons The operation buttons help you to easily perform various basic sewing machine operations. -
Page 9: Operation Panel
Operation panel The operation panel, located on the front of the sewing machine, allows you to select a stitch and specify how the stitch will be sewn. a LCD (Liquid crystal display) The selected stitch ( ), presser foot that should be used ), stitch length in millimeters ( ), and stitch width in millimeters (... -
Page 10: Accessories
KNOWING YOUR SEWING MACHINE ————————————————————————————————————————— ACCESSORIES The following accessories are stored in the flat bed attachment. We have designed these accessories to help you be able to carry out most sewing tasks. Note (For U.S.A. only) ● Foot controller: Model T This foot controller can be used on the following machine models: CS-100, CS-6000, CS-6000i, CS-5100, CS-4000, BC-2500, BC-2300, BC-2100, ES-2400, ES-2200, ES-2000, ES-2410, ES-2210, ES-2010, ES-2420, ES-2220, ES-2020, EX-660, CE-4000, BC-1000... -
Page 11: Using Your Sewing Machine
USING YOUR SEWING MACHINE Power supply precautions Be sure to observe the following precautions concerning the power supply. WARNING ● Use only regular household electricity for the power source. Using other power sources may result in fire, electric shock, or damage to the machine. ●... -
Page 12: Foot Controller
KNOWING YOUR SEWING MACHINE ————————————————————————————————————————— Foot controller Insert the foot controller plug into its jack/socket on the rear side of the sewing machine. a Foot controller jack/socket CAUTION ● When connecting the foot controller, be sure to turn off the sewing machine in order to prevent the machine from accidentally being started. -
Page 13: Threading The Machine
THREADING THE MACHINE Winding the bobbin This section describes how to wind the thread onto the bobbin. • For details on the fast bobbin winding, see page 13. CAUTION ● Only use bobbins (part code: SA156, SFB: XA5539-151) that have been designed for this sewing machine. - Page 14 KNOWING YOUR SEWING MACHINE ————————————————————————————————————————— While holding the end of the thread, gently press the foot controller or press stop button) (for models equipped with the start/stop button) to wind the thread around the bobbin a few times. Then stop the machine.
- Page 15 ■ For models equipped with the fast bobbin winding system Follow steps 1 through 2 of the procedure in “Winding the bobbin” to pass the thread around the pre-tension disk (page 11). Place the bobbin on the bobbin winder shaft so that the spring on the shaft fits into the notch in the bobbin.
-
Page 16: Lower Threading
KNOWING YOUR SEWING MACHINE ————————————————————————————————————————— Memo ● When the sewing machine is started or the handwheel is turned after winding the thread around the bobbin, the machine will make a clicking sound; this is not a malfunction. ● The needle bar does not move when you slide the bobbin winding shaft to the right. - Page 17 the right side (see arrow b) until the cover clicks into place. • Replace the cover so that the end of the thread comes out from the left side of the cover (as shown by the line in the diagram). ■...
-
Page 18: Upper Threading
KNOWING YOUR SEWING MACHINE ————————————————————————————————————————— Upper threading Set the upper thread and thread the needle. • For details on the needle threader, see page 17. CAUTION ● Make sure you thread the machine properly. Otherwise, the thread could tangle and break the needle. Raise the presser foot using the presser foot lever. - Page 19 Pull up the spool pin as far as possible, and then put a spool of thread on this pin. CAUTION ● If the spool of thread is in the wrong place, or is set incorrectly, the thread may tangle on the spool pin and cause the needle to break.
- Page 20 KNOWING YOUR SEWING MACHINE ————————————————————————————————————————— Fully lower the needle threader lever. The end of the needle threader rotates toward you and the hook passes through the eye of the needle. Catch the thread on the hook as shown below. a Hook b Thread While lightly holding the thread, release the needle threader lever.
-
Page 21: Drawing Up The Lower Thread
Drawing up the lower thread Lightly hold the end of the upper thread. a Upper thread While holding the end of the upper thread, raise the needle either by turning the handwheel toward you (counterclockwise) so that the mark on the wheel points up or by pressing (needle position button) (for models equipped with the needle position... -
Page 22: Replacing The Needle
KNOWING YOUR SEWING MACHINE ————————————————————————————————————————— REPLACING THE NEEDLE This section provides information on sewing machine needles. Needle precautions Be sure to observe the following precautions concerning the handling of the needle. Failure to observe these precautions is extremely dangerous. Be sure to read and carefully follow the instructions below. CAUTION ●... -
Page 23: Checking The Needle
CAUTION ● The appropriate fabric, thread and needle combinations are shown in the table on the previous page. If the combination of the fabric, thread and needle is not correct, particularly when sewing thick fabrics (such as denim) with thin needles (such as 65/9 to 75/11), the needle may bend or break. - Page 24 KNOWING YOUR SEWING MACHINE ————————————————————————————————————————— Hold the needle with your left hand, and then use a screwdriver to turn the needle clamp screw counterclockwise to remove the needle. Note ● The needle can be removed by simply loosening the needle clamp screw about one turn.
-
Page 25: Sewing With A Twin Needle
Sewing with a twin needle We have designed your machine so you can sew with this needle and two top threads. You can use the same color or two different colors of thread for making decorative stitches. For details on the stitches that can be sewn with the twin needle, refer to “Stitch settings” (page 52). CAUTION ●... -
Page 26: Replacing The Presser Foot
KNOWING YOUR SEWING MACHINE ————————————————————————————————————————— REPLACING THE PRESSER FOOT CAUTION ● Always turn off the power before you change the presser foot. If you leave the power on and step on the controller, the machine will start and you may be injured. ●... -
Page 27: Removing The Presser Foot Holder
Slowly lower the presser foot lever so that the presser foot pin snaps into the shank in the presser foot holder. a Presser foot lever The presser foot is attached. Raise the presser foot lever to check that the presser foot is securely attached. Removing the presser foot holder Remove the presser foot holder when cleaning the... -
Page 28: Sewing Basics
SEWING BASICS ——————————————————————————————————————————————————— SEWING BASICS SEWING Basic sewing operations are described below. Before operating the sewing machine, read the following precautions. CAUTION ● While the machine is in operation, pay special attention to the needle location. In addition, keep your hands away from all moving parts such as the needle and handwheel, otherwise injuries may occur. -
Page 29: Selecting Stitching
Selecting stitching Using the stitch selection keys, select the desired stitch. When the sewing machine is turned on, the straight stitch ( left needle position) is selected. Turn on the sewing machine. Press (stitch selection keys). The number of the selected stitch is displayed. Press the “+”... -
Page 30: Starting To Sew
SEWING BASICS ——————————————————————————————————————————————————— Starting to sew Raise the needle by turning the handwheel toward you (counterclockwise) so that the mark on the wheel points up. (With models equipped with (needle position button), raise the needle by pressing once or twice.) a Mark b Needle position button Raise the presser foot lever. -
Page 31: Thread Tension
Pull the fabric to the left side of the machine, and then pass the threads through the thread cutter to cut them. a Thread cutter Memo ● When the foot controller is plugged in, (start/stop button) cannot be used to start or stop sewing. -
Page 32: Useful Sewing Tips
SEWING BASICS ——————————————————————————————————————————————————— USEFUL SEWING TIPS Various ways to achieve better results for your sewing projects are described below. Refer to these tips when sewing your project. Trial sewing After you select a stitch, the machine automatically sets the stitch width and length for the stitch that is selected. -
Page 33: Sewing Thin Fabrics
■ If thick seams are being sewn and the fabric does not feed at the beginning of stitching Zigzag foot “J” is equipped with a feature that keeps the presser foot level. a Sewing direction When you encounter a seam that is too thick to feed under the foot, raise the presser foot lever. -
Page 34: Utility Stitches
UTILITY STITCHES —————————————————————————————————————————————————— UTILITY STITCHES OVERCASTING STITCHES You can use the overcasting stitches to join together seams and finish them in one operation. They are also useful for sewing stretch materials. Pattern No. Stitch Name Zigzag stitch 3-point zig- zag stitch Overcasting stitch *Rev.: Reverse... -
Page 35: Basic Stitching
BASIC STITCHING Straight stitches are used for sewing plain seams. Three stitches are available for basic stitching. Pattern No. Stitch Name Left Center Triple stretch stitch *Rev.: Reverse **Rfc.: Reinforcement Basic stitching Baste or pin together the fabric pieces. Attach zigzag foot “J”. Select a stitch. -
Page 36: Blind Hem Stitching
UTILITY STITCHES —————————————————————————————————————————————————— BLIND HEM STITCHING You can use the Blind Hem Stitch to finish the edge of a project, like the hem of a pair of trousers, without the stitch showing. Pattern No. Stitch Name Blind hem stitch *Rfc.: Reinforcement Fold the fabric along the desired edge of the hem, and then baste it about 5 mm (3/16 inch) from the edge of the fabric. -
Page 37: Buttonhole Sewing
BUTTONHOLE SEWING Buttonholes can be sewn and buttons can be sewn on. Pattern No. Stitch Name Buttonhole stitch – – Zigzag stitch – (for quilting) *Auto Rfc.: Automatic Reinforcement The maximum buttonhole length is about 28 mm (1-1/8 inch) (diameter + thickness of the button). Buttonholes are sewn from the front of the presser foot to the back, as shown below. - Page 38 UTILITY STITCHES —————————————————————————————————————————————————— The names of parts of buttonhole foot “A”, which is used for sewing buttonholes, are indicated below. a Button guide plate b Presser foot scale c Pin d Marks on buttonhole foot e 5 mm (3/16 inch) Use chalk to mark the position and length of the buttonhole on the fabric.
- Page 39 • When lowering the presser foot, do not push in the front of the presser foot, otherwise the buttonhole will not be sewn with the correct size. a Do not reduce the gap. Pull down the buttonhole lever as far as possible.
-
Page 40: Button Sewing
UTILITY STITCHES —————————————————————————————————————————————————— ■ Sewing buttonholes on stretch fabrics When sewing buttonholes on stretch fabrics, use a gimp thread. Hook the gimp thread onto the part of buttonhole foot “A” shown in the illustration so that it fits into the grooves, and then loosely tie it. - Page 41 Place a button between the presser foot and the fabric. • When attaching four-hole buttons, first sew the two holes closest to you. Then, slide the button so that the needle goes into the two holes toward the rear of the sewing machine, and then sew them in the same way.
-
Page 42: Zipper Insertion
UTILITY STITCHES —————————————————————————————————————————————————— ZIPPER INSERTION You can use the zipper foot to sew different types of zippers, and can easily position it to the right or left side of the needle. When sewing the right side of the zipper, attach the shank to the left pin of the zipper foot. When sewing the left side of the zipper, attach the shank to the right pin of the zipper foot. -
Page 43: Sewing Stretch Fabrics And Elastic Tape
SEWING STRETCH FABRICS AND ELASTIC TAPE Stretch fabrics can be sewn and elastic tape can be attached. Pattern No. Stitch Name Stretch stitch 3-point zigzag stitch *Rfc.: Reinforcement Observe the corresponding precautions when performing each of the following stitching operations. Stretch stitching Attach zigzag foot “J”. -
Page 44: Appliqué, Patchwork And Quilt Stitching
UTILITY STITCHES —————————————————————————————————————————————————— APPLIQUÉ, PATCHWORK AND QUILT STITCHING The stitches that can be used for sewing appliqués, patchwork and quilts are described below. Pattern No. Stitch Name Zigzag stitch Zigzag stitch (for quilting) Appliqué 11 Appliqué stitching stitch Appliqué stitch (for quilting) Piecing straight... -
Page 45: Patchwork (Crazy Quilt) Stitching
Carefully sew around the edge of the design. Cut away any fabric that is left outside the stitching. Remove the basting, if necessary. Memo ● Make reinforcing straight stitches at the beginning and the end of stitching. CAUTION ● Be careful that the needle does not hit a pin during sewing, as the needle can break. -
Page 46: Quilting
UTILITY STITCHES —————————————————————————————————————————————————— Quilting Sandwiching batting between the top and bottom layers of fabric is called “quilting”. Quilts can easily be sewn using the optional walking foot and the optional quilting guide. Note ● Only use the walking foot with straight or zigzag stitches. -
Page 47: Free-Motion Quilting
Free-motion quilting With free-motion quilting, the feed dogs can be lowered (using the feed dog position lever) so that the fabric can be moved freely in any direction. The optional quilting foot is needed for free-motion quilting. Remove the presser foot and the presser foot holder. -
Page 48: Reinforcement Stitching
UTILITY STITCHES —————————————————————————————————————————————————— REINFORCEMENT STITCHING Reinforce points that will be subject to strain, such as sleeve holes, inseams and pocket corners. Pattern No. Stitch Name Triple stretch stitch Bar tack stitch *Rfc.: Reinforcement **Auto Rfc.: Automatic Reinforcement Triple stretch stitching Use triple stretch stitching to reinforce sleeve holes and inseams. - Page 49 Select stitch Position the fabric so that the opening of the pocket faces toward you, and then lower the presser foot lever so that the needle drops 2 mm (1/16 inch) in front of the pocket opening. a 2 mm (1/16 inch) Pass the upper thread down through the hole in the presser foot.
-
Page 50: Decorative Stitching
UTILITY STITCHES —————————————————————————————————————————————————— DECORATIVE STITCHING Various decorative stitches can be sewn with this sewing machine. Pattern No. Stitch Name Fagoting stitch 18 Fagoting, smocking and Joining stitch Shell tuck 12 Sell tuck stitching stitch Satin scallop 13 Scallop stitching stitch 19 Decorative stitching 20 Decorative stitching 21 Decorative stitching and... -
Page 51: Fagoting
Fagoting Stitching across an open seam is called “fagoting”. It is used on blouses and children's clothing. This stitch is more decorative when thicker thread is used. Use an iron to fold the two pieces of fabric along their seams. Baste the two pieces of fabric, separated by about 4.0 mm (3/16 inch), onto thin paper or a sheet of water-soluble stabilizer. -
Page 52: Smocking
UTILITY STITCHES —————————————————————————————————————————————————— Smocking The decorative stitch created by stitching or embroidering over gathers is called “smocking”. It is used to decorate the front of blouses or cuffs. The smocking stitch adds texture and elasticity to fabric. Attach zigzag foot “J”. Select the straight stitch, and then adjust the stitch length to 4.0 mm (3/16 inch) and loosen the thread tension. -
Page 53: Joining
Unfold the fabric, and then iron the tucks down to one side. Joining Decorative bridging stitches can be sewn over the seam allowance of joined fabrics. This is used when making a crazy quilt. Attach zigzag foot “J”. Sew together the right sides of the two pieces of fabric, and then open up the seam allowances. -
Page 54: Appendix
APPENDIX ————————————————————————————————————————————————————— APPENDIX STITCH SETTINGS Applications, stitch lengths and widths and whether the twin needle can be used are listed for utility stitches in the following table. CAUTION ● Select a stitch width of 5.0 mm (3/16 inch) or less, otherwise the needle may break or the machine may be damaged. - Page 55 Pattern No. Stitch Name Blind hem stitch Appliqué 11 Appliqué stitching stitch Shell tuck 12 Shell tuck stitching stitch Satin scallop 13 Scallop stitching stitch Joining stitch 16 Patchwork stitching and Fagoting stitch 19 Decorative stitching 20 Decorative stitching Decorative stitch *Rfc.: Reinforcement **Select a stitch width of 5.0 mm (3/16 inch) or less.
- Page 56 APPENDIX ————————————————————————————————————————————————————— Pattern No. Stitch Name Decorative stitch Buttonhole stitch – – Bar tack stitch Piecing straight stitch Hand-look 31 Straight stitch quilting quilting Zigzag stitch (for quilting) *Rfc.: Reinforcement **Auto Rfc.: AutomaticReinforcement ***Select a stitch width of 5.0 mm (3/16 inch) or less. Stitch Width [mm (inch.)] Application...
- Page 57 Pattern No. Stitch Name Appliqué stitch (for quilting) Quilting stippling 32 For decoration, etc. 33 For decoration, etc. Decorative stitch 34 For decoration, etc. *Rfc.: Reinforcement Stitch Width [mm (inch.)] Application Auto Manual Attaching appliqués and 0.5–5.0 binding (1/16) (1/32–3/16) Attaching appliqués and 0.5–5.0 binding...
- Page 58 APPENDIX ————————————————————————————————————————————————————— Pattern No. Stitch Name 35 For decoration, etc. 36 For decoration, etc. Satin stitches 37 For decoration, etc. Cross- 38 For decoration, etc. stitches 39 For decoration, etc. *Rfc.: Reinforcement **Select a stitch width of 5.0 mm (3/16 inch) or less. Stitch Width [mm (inch.)] Application...
-
Page 59: Maintenance
MAINTENANCE Simple sewing machine maintenance operations are described below. Cleaning the machine surface If the surface of the machine is dirty, lightly soak a cloth in neutral detergent, squeeze it out firmly, and then wipe the surface of the machine. After cleaning it once with a wet cloth, wipe it again with a dry cloth. - Page 60 APPENDIX ————————————————————————————————————————————————————— Remove the bobbin case. Grasp the bobbin case, and then pull it out. a Bobbin case Use the cleaning brush or a vacuum cleaner to remove any dust from the race and its surrounding area. a Cleaning brush b Race •...
-
Page 61: Troubleshooting
TROUBLESHOOTING If the machine stops working properly, check the following possible problems. If the problem it still there, contact your retailer or the nearest authorised service center. Symptom Possible cause The machine is not plugged in. The main power switch is turned off. Turn on the main power switch. The sewing The bobbin winder shaft is pushed to machine does... - Page 62 APPENDIX ————————————————————————————————————————————————————— Symptom Possible cause You have not inserted the needle properly. The area around the hole in the nee- dle plate is scratched. The area around the hole in the The upper presser foot is scratched. thread breaks. The bobbin case is scratched, or has a burr on it.
- Page 63 Symptom Possible cause You have not threaded the upper thread properly. You have not used the right combi- nation of fabric, thread and needle. Stitches are The needle is bent or blunt. skipped. You have not inserted the needle properly. Dust has accumulated under the needle plate or in the bobbin case.
-
Page 64: Error Messages
APPENDIX ————————————————————————————————————————————————————— ERROR MESSAGES If an operation is performed incorrectly before the sewing machine is set up, an error message appears on the operation panel. Follow the instructions indicated in the table. If you press the stitch selection key or do the operation correctly while the error message is displayed, the message disappears. -
Page 65: Index
INDEX Numerics 3-point zigzag stitch ...32 accessories ...8 appliqués ...42 bar tack ...46 basic stitching ...33 blind hem stitching...34 bobbin ...14 bobbin case...14 bobbin cover...6 bobbin winder... 11 button sewing...38 buttonhole foot...36 buttonhole lever ... 6 buttonhole sewing...35 crazy quilt stitching ...43 Darning...32 elastic tape ...41 error messages...62... - Page 66 —————————————————————————————————————————————————————————— thick fabrics...30 thin fabrics ...31 thread cutter...29 thread guide ...16 thread tension ...29 trial sewing...30 triple stretch stitch ...33 troubleshooting ...59 twin needle ...22 upper tension-control dial ...29 upper threading...16 walking foot ...44 wing needle ...51 zigzag stitch ... 30 zipper foot...40 zipper Insertion ...40...
- Page 67 English 885-S33/S34/S36/S37 XC8835-3215 Printed in China...