Table of Contents
Advertisement
Quick Links
Advertisement
Table of Contents

Related Manuals for Stoelting Futura F131


Summary of Contents for Stoelting Futura F131
- Page 1 Futura F144 and F131 w/ Blender OWNER'S MANUAL Manual No. 513603-1 March 2005...
- Page 3 Need Parts or Service? We stock the parts you need. Our Technicians are factory trained and are certified in the Stoelting Technicare program. CALL Distributor: _________________________ Phone No.: _________________________ Model No.: _______________________ Serial No.: _______________________ Purchase Date: ____________________ Start-Up Date:____________________...
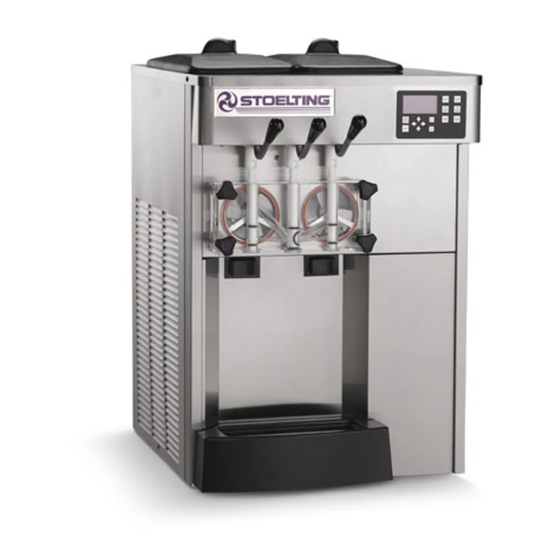
- Page 5 Owner's Manual For Futura F144/SF144 Stoelting Counter Model Gravity Freezer Soft Serve/Shake This manual provides basic information about the freezer. Instructions and suggestions are given covering its operation and care. The illustrations and specifications are not binding in detail. We reserve the right to make changes to the freezer without notice, and without incurrring any obligation to modify or pro- vide new parts for freezers built prior to date of change.
- Page 7 The instructions or warnings they give are not substitutes for proper accident prevention measures. If you need to replace a part, use genuine Stoelting parts with the correct part number or an equivalent part. We strongly recommend that you do not use replacement parts of inferior quality.
-
Page 9: Table Of Contents
SECTION 1 - SPECIFICATIONS ... 1.1 Description ... 1.2 Specifications ... SECTION 2 - INSTALLATION INSTRUCTIONS ... 2.1 Safety Precautions ... 2.2 Shipment and Transit ... 2.3 Freezer Installation ... 2.4 Floor Stand Installation ... 2.5 Installing Permanent Wiring ... SECTION 3 - INITIAL SET-UP AND OPERATION ... - Page 10 Fig. Description Model Endura/Futura 131G Freezer ... 1 Specifications ... 1 Warning Label Locations ... 3 Space and Ventilation Requirements ... 4 Installing Tray and Insert ... 4 Power Cord ... 4 Floor Stand ... 5 Power Cord Connection ... 5 Controls ...
-
Page 11: Section 1 - Specifications
If you desire to use one barrel only, the freezer must be cleaned, sanitized and filled with fresh mix daily. The F131 freezer includes a blender for mixing fruit and berries into the dairy product for making smoothies. -
Page 12: Specifications
1.2 SPECIFICATIONS MODEL FUTURA 144 COUNTERTOP COMBINATION SHAKE/SOFTSERVE GRAVITY FREEZER Dimensions: Freezer: 22" (56 cm) wide x 28" (72 cm) deep x 34.75" (88 cm) high Crated: 28" (71 cm) wide x 35 1/2" (89.4 cm) deep x 40.3" (102.4 cm) high Weight: Freezer: 385 lbs. -
Page 13: Section 2 - Installation Instructions
If danger, warning or caution labels are needed, indicate the part number, type of label, location of label, and quantity required along with your address and mail to: ATTENTION: Customer Service Fig. 3. Warning Label Locations STOELTING, INC. 502 HWY 67 Kiel, Wisconsin 53042-1600... -
Page 14: Shipment And Transit
If concealed damaged and/or shortage is found later, advise the carrier within 10 days and request inspection. The customer must place claim for damages and/or shortages in shipment with the carrier. Stoelting, Inc. cannot make any claims against the carrier. 2.3 FREEZER INSTALLATION... -
Page 15: Floor Stand Installation
2.4 FLOOR STAND INSTALLATION To install the F144 on the floor stand, follow the steps outlined below. 1. Uncrate the floor stand and place in an upright posi tion. NOTE Detailed instructions are included with each floor stand. 2. Place a spirit level across the top of the stand to check for level condition, side to side and front to back. -
Page 17: Section 3 - Initial Set-Up And Operation
3.1 OPERATOR'S SAFETY PRECAUTIONS SAFE OPERATION IS NOT AN ACCIDENT; Observe these rules: A. Know the freezer. Read and understand the Operating Instructions. B. Notice all warning labels on the freezer. C. Wear proper clothing. Avoid loose fitting garments, and remove watches, rings or jewelry which could cause a serious accident. - Page 18 WARNING High voltage will shock, burn or cause death. The OFF-ON switch must be placed in the OFF position prior to disassembling for cleaning or servicing. Do not operate machine with cabinet panels removed. B. OFF-ON SWITCH The OFF-ON switch is a two position toggle switch used to supply power to the control circuit.
-
Page 19: Sanitizing
L. BLENDER POWER SWITCH (F131 Models Only) The blender power switch is a two position toggle switch used to supply power to the blender. When the switch is in the OFF position, the agitator will not turn. When the switch is in the ON position, the agitator will be activated every time the blender activation switch is pressed. -
Page 20: Freeze Down And Operation
D. Clean sides of hopper, mix inlet regulator and under- side of hopper cover using a sanitized soft bristle brush dipped in the sanitizing solution (Fig. 13). Figure 13. Sanitizing Hopper E. After five minutes, place a bucket under the spigot and open spigot to drain sanitizing solution. -
Page 21: Mix Information
G. After about 6 to 10 minutes the freezer will shut off and the green lens will illuminate. The product will be ready to serve. Freeze down time may be longer for some frozen diet dessert mixes. High ambient temperatures may extend freeze down time. H. -
Page 22: Cleaning The Freezer
B. Place the OFF-ON rocker switch in the ON position and push the CLEAN switch to rotate the auger. Allow the mix to agitate in the freezer barrel until the mix has become a liquid, about 5 minutes. C. Drain the liquid mix by opening the spigot. A bucket or container should be placed under the spigot to catch the liquid mix (Fig. -
Page 23: Removing Front Door
Figure 20. Auger Flight Wear and Front Auger Support Bushing Wear D. Place the OFF-ON switch in the OFF position. To disassemble the freezer, refer to the following steps: A. Remove the mix inlet regulator from the hopper by pulling straight up. B. -
Page 24: Cleaning The Freezer Parts
G. Remove the auger assemblies from the freezer. Pull the augers out of the freezer barrel slowly. As the augers are being pulled out, carefully remove each of the plastic flights with springs. H. Keep the rear of the auger shafts tipped up once they are clear of the freezer barrels to avoid dropping rear seals. -
Page 25: Exploded View Of Auger
D. Screw the springs onto the studs in plastic flights. Springs must be screwed into the flights com pletely to provide compression (Fig. 26). Figure 26. Exploded View of Auger CAUTION Do not place the mix inlet regulator into the hopper before installing the auger. -
Page 26: Routine Cleaning
3.12 ROUTINE CLEANING To remove spilled or dried mix from the freezer exterior, simply wash in the direction of the finish with warm soapy water and wipe dry. Do not use highly abrasive materials as they will mar the finish. 3.13 PREVENTIVE MAINTENANCE It is recommended that a maintenance schedule be fol- lowed to keep the freezer clean and operating properly. - Page 27 SANITIZING – After the machine has been cleaned and contains no milkstone, the machine is reassembled. Then a FDA approved sanitizing solution is run through the machine to kill bacteria. The machine is then ready for food preparation. As a recommended cleaner and sanitizer for your frozen dessert machine, STERA-SHEEN has proven to be one of the best daily maintenance products for: ·...
-
Page 28: Condenser And Filter
D. QUARTERLY WARNING High voltage will shock, burn or cause death. Turn off and lock out main power disconnect before servicing. Do not operate machine with cabinet panels removed. The air-cooled condenser is a copper tube and aluminum fin type. Condensing is totally dependent upon airflow. A plugged condenser filter, condenser, or restrictions in the louvered panel will restrict airflow. -
Page 31: Section 4 - Troubleshooting
i t c l l i . f f t l e r i f i a f r u l . t f u l l n i l . r i i l i r i f r i f i a f r u l a t l... - Page 32 t e l l a i y t i t l e t e l t e l t e l l l i F ° ° 7 t a l t e l t a l i a f r u l .
-
Page 33: Error Code System
CODE *Refer to Page 19 for Troubleshooting. If the Clean switch is operated three times within 10 seconds, this will cause the Push-To-Freeze light to flash and the clean function will be disabled for 10 minutes. The power switch must remain on or the 10 minute timer will not time out. -
Page 35: Section 5 - Replacement Parts
5.1 HOW TO ORDER PARTS To assure receipt of the proper replacement parts, supply your dealer or distributor with the following information: A. Model number of equipment. Part Number Description 208135 Brush, Nylon: 16" x 4", Wooden Handle 208380 Brush, Nylon: 14" x 1/4", Wire Handle 208401 Brush, Nylon: 10"... -
Page 36: Spigot, Front Door And Auger Assembly
Item No. Part No. Description 2183047 Front Door Only 2177072 1.5" Spigot Extension 2177073 2.5" Spigot Extension 2177074 3" Spigot Extension 482019 Circular Door Knob 625133 O-ring Front Door 3159696 Spigot 624598-5 O-ring Spigot (5 Pack) 232734 Rosette Cap 381804 Auger Flight 2149243-01 Mix Inlet Regulator... -
Page 37: Warranty
Stoelting, LLC warrants to the first user (the “Buyer”) that the freezer cylinders, hoppers, compressors, drive motors, speed reducers, auger and auger flights of Stoelting soft serve / shake freezers will be free from defects in materials and workmanship under normal use and proper maintenance appearing within five (5) years, and that all other...