
Related Manuals for Carrier 69NT40-541-505


Summary of Contents for Carrier 69NT40-541-505
- Page 1 Container Refrigeration OPERATIONS AND SERVICE MANUAL 69NT40-541-505, 508 and 509 Upflow Container Refrigeration Units T-368 Change 12/16 Downloaded from ManualsNet.com search engine...
- Page 2 Downloaded from ManualsNet.com search engine...
- Page 3 OPERATIONS AND SERVICE MANUAL 69NT40-541-505, 508 and 509 Upflow Container Refrigeration Units © Carrier Corporation, 2016 Printed in U. S. A. December 2016 Downloaded from ManualsNet.com search engine...
- Page 4 Downloaded from ManualsNet.com search engine...
- Page 5 TABLE OF CONTENTS PARAGRAPH NUMBER PAGE SAFETY SUMMARY ..............1–1 GENERAL SAFETY NOTICES .
-
Page 6: Table Of Contents
DESCRIPTION ............... . 3–1 GENERAL DESCRIPTION . - Page 7 PRE−TRIP DIAGNOSTICS ........... . 4–12 DATACORDER .
- Page 8 MICROPROCESSOR MALFUNCTION ..........6–4 6.10 NO EVAPORATOR AIR FLOW OR RESTRICTED AIR FLOW .
- Page 9 7.18 VALVE OVERRIDE CONTROLS ..........7–19 7.18.1 Checking the Stepper Valve .
- Page 10 Downloaded from ManualsNet.com search engine...
- Page 11 LIST OF ILLUSTRATIONS FIGURE NUMBER Page Figure 3.1 Refrigeration Unit - Front Section ..........3–1 Figure 3.2 Evaporator Section - Units with Center Access Panel .
- Page 12 Figure 7.23 Hermetic Thermostatic Expansion Valve Brazing Procedure ......7–17 Figure 7.24 Suction Modulation Valve (SMV) .
- Page 13 LIST OF TABLES TABLE NUMBER Page Table 3–1 Safety and Protective Devices ........... . 3–8 Table 4–1 Keypad Function .
- Page 14 Downloaded from ManualsNet.com search engine...
- Page 15 SECTION 1 SAFETY SUMMARY GENERAL SAFETY NOTICES When performing any arc welding on the unit or con- tainer, disconnect all wire harness connectors from the Installation and servicing of refrigeration equipment modules in both control boxes. Do not remove wire can be hazardous due to system pressures and electri- harness from the modules unless you are grounded to cal components.
- Page 16 WARNING WARNING Do not attempt to remove power plug(s) Before disassembly of any external com- before turning OFF start-stop switch (ST), pressor component make sure to relieve unit circuit breaker(s), and external possible internal pressure by loosening power source. the bolts and tapping the component with a soft hammer to break the seal.
- Page 17 CAUTION CAUTION The unit will remain in the full cooling Use only Carrier Transicold approved mode as long as the emergency bypass Polyol Ester Oil (POE) − Castrol-Icematic switch is in the BYPASS position and the SW20 compressor oil with R-134a. Buy in MODE SWITCH is in the FULL COOL quantities of one quart or smaller.
- Page 18 Downloaded from ManualsNet.com search engine...
- Page 19 18 and 24 volts, single phase. thermal expansion valve (TXV) and a heat exchanger. The unit has six heaters. The controller is a Carrier Transicold Micro-Link 3 microprocessor. The controller operates automatically 2.3.9 Evaporator Fan Operation...
- Page 20 2.4.3 Interrogator 2.4.9 230 Volt Cable Units that use the DataCORDER function are fitted with Units equipped with an autotransformer require an interrogator receptacles for connection of equipment to additional power cable for connection to the 230 volt download the recorded data. Two receptacles may be source.
-
Page 21: Description
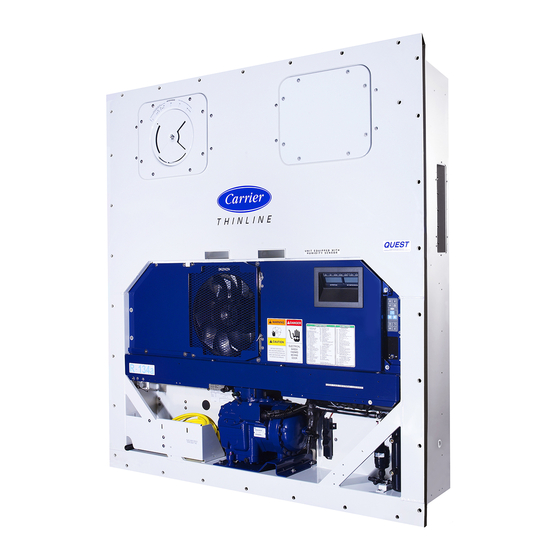
SECTION 3 DESCRIPTION GENERAL DESCRIPTION 3.1.2 Fresh Air Makeup Vent The function of the upper or lower makeup air vent is to 3.1.1 Refrigeration Unit − Front Section provide ventilation for commodities that require fresh The unit is designed so that the majority of the compo- air circulation. -
Page 22: Evaporator Section
3.1.3 Evaporator Section The evaporator fans circulate air through the container by pulling it from the bottom of the unit, directing it The evaporator section (Figure 2-2) contains the sup- through the evaporator coil where it is heated or ply temperature sensor, humidity sensor, thermostatic cooled, and discharging it at the top. -
Page 23: Compressor Section
3.1.4 Compressor Section This section also contains the suction modulating valve, discharge pressure regulating valve, discharge The reciprocating compressor section includes the temperature sensor, and discharge/suction pressure compressor (with high pressure switch), power cable transducers. storage compartment, and autotransformer. The return temperature sensor, return recorder sensor, and ambient sensor are located at the right side of the compressor. -
Page 24: Air-Cooled Condenser Section
3.1.5 Air-Cooled Condenser Section service valve, filter-drier, condenser pressure trans- ducer, and fusible plug. The air-cooled condenser section (Figure 3.4) consists of the condenser fan, condenser coil, receiver with The condenser fan pulls air from around the coil and dis- sight glass/moisture indicator, quench valve, liquid line charges it horizontally through the condenser fan grille. -
Page 25: Control Box Section
3.1.6 Control Box Section 3.1.7 Communications Interface Module (option) The control box (Figure 3.5) includes the manual oper- ation switches, circuit breaker (CB-1), compressor, fan The communications interface module is a slave mod- and heater contactors, control power transformer, cur- ule which allows communication between the refrigera- rent sensor module, controller module and the commu- tion unit and a ship system master central monitoring... -
Page 26: Refrigeration System Data
REFRIGERATION SYSTEM DATA Number of Cylinders Model 06DR Weight (Dry) 118kg (260 lb) a. Compressor/Motor Assembly Approved Oil Castrol Icematic Oil Charge degrees 3.6 liters (7.6 U.S. pints) Oil Sight Glass The oil level range, with the compressor off, should be between the bottom and one-eighth level of the sight glass. -
Page 27: Electrical Data
ELECTRICAL DATA CB-1 Trips at 29 amps a. Circuit Breaker CB-2 (50 amps) Trips at 62.5amps CB-2 (70 amp) Trips at 87.5amps 17.6amps @ 460VAC b. Compressor Motor Full Load Amps (FLA) (with current limiting set at 21 amps) Nominal Supply 380 VAC, Three Phase, 460 VAC, Three Phase, 50 Hz... -
Page 28: Safety And Protective Devices
ELECTRICAL DATA (Continued) Orange wire Power Red wire Output Brown wire Ground Input voltage 5 vdc Output voltage 0 to 3.3 vdc h. Humidity Sensor Output voltage readings verses relative humidity (RH) percentage: 0.99V 1.65V 2.31V 2.97V i. Controller Setpoint Range -30 to +30°C ( -22 to +86°F) SAFETY AND PROTECTIVE DEVICES Unit components are protected from damage by safety and protective devices listed in the following table. -
Page 29: Refrigeration Circuit
REFRIGERATION CIRCUIT The flow of liquid to the evaporator is regulated by a variable orifice which opens to increase refrigerant flow Starting at the compressor (see Figure 3.6), the (decrease superheat), or closes to decrease refrigerant suction gas is compressed to a higher pressure and flow (increase superheat). -
Page 30: Figure 3.6 Refrigeration Circuit Schematic
Figure 3.6 Refrigeration Circuit Schematic Refrigeration Circuit with Receiver EVAPORATOR TXV BULB THERMOSTATIC EXPANSION VALVE (TXV) CONDENSER HEAT EXCHANGER FUSIBLE PLUG SIGHT GLASS SIGHT GLASS / FILTER QUENCH VALVE MOISTURE DRIER INDICATOR LIQUID LINE RECEIVER VALVE DISCHARGE QUENCH VALVE BULB SERVICE VALVE SUCTION... -
Page 31: Microprocessor
SECTION 4 MICROPROCESSOR TEMPERATURE CONTROL MICROPROCES- The DataCORDER software functions to record unit operating parameters and cargo temperature parameters SOR SYSTEM for future retrieval. Coverage of the temperature control The temperature control Micro-Link 3 microprocessor software begins with Section 4.2. Coverage of the Data- system (see Figure 4.1) consists of a keypad, display... -
Page 32: Figure 4.2 Keypad
4.1.1 Keypad 5. SUPPLY − Yellow LED: Energized when the supply air probe is used for control. When this The keypad (Figure 4.2) is mounted on the control box LED is illuminated, the temperature displayed in door. The keypad consists of 11 push button switches the AIR TEMPERATURE display is the reading that act as the user’s interface with the controller. -
Page 33: Controller
Figure 4.3 Display Module CONTROLLER SOFTWARE The controller software is a custom designed program that is subdivided into the configuration software and the operational software. The controller software per- COOL HEAT DEFROST IN RANGE ALARM SUPPLY RETURN forms the following functions: a. -
Page 34: Operational Software (Cd Function Codes)
4.2.2 Operational Software (Cd Function When CnF26 (Heat Lockout Temperature) is set to Codes) −10°C, perishable mode is active with set points above −10°C (+14°F). When CnF26 is set to −5°C, perishable The operational software is the actual operation pro- mode is active with set points above −5°C (+23°F). -
Page 35: Perishable Mode Dehumidification
Figure 4.5 Controller Operation - Perishable Mode Pull Down Perishable Mode (Only Applicable to Perishable Mode) Controller Set Point ABOVE 10 C (+14 F), Controller Set Point ABOVE 10 C (+14 F), or 5 C (+23 F) optionally or 5 C (+23 F) optionally +5 C (+9 F) Cooling,... -
Page 36: Perishable, Dehumidification − Bulb Mode
Two timers are activated during dehumidification to tolerant cargo or non-respiration items which do not require high airflow for removing respiration heat. prevent rapid cycling and consequent contactor wear: There is no active display that indicates that economy 1. Heater debounce timer (three minutes) − The fan mode has been initiated. -
Page 37: Perishable Mode Heating − Sequence Of Operation
b. When supply air temperature decreases to a Figure 4.7 Perishable Mode Heating predetermined tolerance above set point (Cd30), the green IN RANGE light is illuminated. ENERGIZED DE-ENERGIZED CONTROL TRANSFORMER c. As the air temperature continues to fall, modu- FOR FULL DIAGRAM AND LEGEND, SEE SECTION 7 lating cooling starts as the supply air tempera- ture approaches set point. -
Page 38: Frozen Idle Mode
Figure 4.8 Controller Operation - Frozen Mode Frozen Mode Controller Set Point at or BELOW 10 C (+14 F), or 5 C (+23 F) optionally +2.5 C (+4.5 F) Cooling +.20 C Set Point .20 C Air Circulation Falling Rising Temperature Temperature 4.3.13... -
Page 39: Frozen Mode Cooling − Sequence Of Operation
4.3.16 Frozen Mode Cooling − Sequence of 4.3.17 Defrost Operation Defrost is initiated to remove ice buildup from the evap- orator coil which can obstruct air flow and reduce the NOTES cooling capacity of the unit. The defrost cycle may con- 1.In the Frozen Mode the evaporator sist of up to three distinct operations depending upon motors run in low speed. -
Page 40: Figure 4.10 Defrost
a. Automatic defrost starts with an initial defrost at a. In Perishable Pull Down - Delta T increases to three hours and then adjusts the interval to the greater than 12°C, and 90 minutes of compres- next defrost based on the accumulation of ice sor run time have been recorded. -
Page 41: Defrost Related Settings
PROTECTION MODES OF OPERATION 4.4.1 Evaporator Fan Operation The SMV is independently operated by Opening of an evaporator fan internal protector will the microprocessor. Complete schemat- shut down a unit. (CnF32 set to 2EFO). ics and legends are located in Section 4.4.2 Failure Action... -
Page 42: Controller Alarms
During setpoint pulldown supply air tempera- b. The alarm queue stores up to 16 alarms in the ture is controlled according to the unit’s nomi- sequence in which they occurred. The user may nal supply air setpoint. scroll through the list by depressing an ARROW key. -
Page 43: Datacorder
The unit is also fitted with interrogation connections (see Figure • “Auto 1/Auto 2/Auto 3” Pre-trip Start and End 4.1). A personal computer with Carrier Transicold • Bulb Mode Start DataLINE software may also be used to download data and configure settings. -
Page 44: Sensor Configuration (Dcf02)
The user may configure the format in which the thermistor to record may be done using the Carrier Transicold Data readings are recorded. The low resolution is a 1 byte for- Retrieval Program. -
Page 45: Figure 4.11 Standard Configuration Report
Figure 4.11 Standard Configuration Report Raw Data Report for ABC1234567 Jan 01, 2015 to Mar 01, 2015 System Configuration at the Time of Interrogation: Interrogated On Mar 05, 2015 Extracted by DataLINE Rev 1.0.0 Controller Software: 5361 Controller Serial #: 04163552 Bill of Lading #: 1 Origin: Origin Date:... -
Page 46: Sampling Type (Dcf05 & Dcf06)
Data Retrieval program. Refer herein may be obtained on the Container Products Table 4–9 for a description of the data stored in the Group Information Center by authorized Carrier Transi- DataCORDER for each corresponding pre-trip test. cold Service Centers. T-368 4–16... -
Page 47: Usda Cold Treatment
In response to the demand to replace fumigation with this environmentally sound process, Carrier has inte- Sensor 3 Place in pulp of product five feet from grated Cold Treatment capability into its microproces- the end of the load for 40−foot contain-... -
Page 48: Datacorder Alarms
4.8.12 DataCORDER Alarms 3. Press the ENTER key. The alarm list will clear and “-----” will be displayed. Alarm display is an independent DataCORDER func- tion. If an operating parameter is outside of the 4. Press the ALARM LIST key. “AL” will show expected range or a component does not return the on the left display and “-----”... -
Page 49: Controller Configuration Variables
CONTROLLER CONFIGURATION VARIABLES Table 4–4 Controller Configuration Variables CONFIGURATION TITLE DEFAULT OPTION NUMBER CnF01 Bypass Valve Enable 0-in, 1-out CnF02 Evaporator Fan Speed dS (Dual) 0-single, 1-dual CnF03 Control Sensors FOUr (quad) 0-duAL, 1-quad CnF04 Dehumidification Mode 0-on, 1-off CnF07 Unit Selection, 20FT/ 40FT/45FT 40ft 0-40ft, 1-20ft, 2- 45ft... - Page 50 Table 4–4 Controller Configuration Variables CONFIGURATION TITLE DEFAULT OPTION NUMBER CnF44 Autoslide Enabled 0-Out 1-Lo, 2-Up CnF45 Low Humidity Enabled 0-Out 1-in CnF47 Fresh Air Vent Position Sensor 0-Out 1-up, 2-low, 3-cust CnF48 CFS / WPS Override 0-Out 1-in CnF49 OEM Reset Option 0-Off 1-std, 2-spec, 3-cust...
-
Page 51: 4.10 Controller Function Codes
4.10 CONTROLLER FUNCTION CODES Table 4–5 Controller Function Codes Code TITLE DESCRIPTION Note: If the function is not applicable, the display will read “-----” Display Only Functions − Cd01 through Cd26 are display only functions. Suction Modulation Displays the SMV percent open. The right display reads 100% when the valve is Cd01 Valve (SMV) Opening fully open and 0% when the valve is fully closed. - Page 52 Table 4–5 Controller Function Codes Code TITLE DESCRIPTION This code checks the Controller/DataCORDER battery pack. While the test is run- ning, “btest” will flash on the right display, followed by the result. PASS will be dis- played for battery voltages greater than 7.0 volts. FAIL will be displayed for battery Cd19 Battery Check voltages between 4.5 and 7.0 volts, and ----- will be displayed for battery voltages...
- Page 53 Table 4–5 Controller Function Codes Code TITLE DESCRIPTION Configurable Functions Configurable Functions − Cd27 through Cd37 are user-selectable functions. The operator can change the value of these functions to meet the operational needs of the container. There are two modes for defrost initiation, either user-selected timed intervals or automatic control.
- Page 54 Table 4–5 Controller Function Codes Code TITLE DESCRIPTION The in-range tolerance will determine the band of temperatures around the set point which will be designated as in-range. For normal temperature control, control temperature is considered in range if it is within setpoint In-Range Tolerance.
- Page 55 Table 4–5 Controller Function Codes Code TITLE DESCRIPTION This is the desired evaporator fan speed for use during the bulb Dehumidification and Humidification mode option. (Replaced by Cd48 if CnF50, Enhanced Bulb Mode, is active.) This code is enabled only if in the dehumidification mode (Cd33) and bulb mode (Cd35) has been set to bulb.
- Page 56 Table 4–5 Controller Function Codes Code TITLE DESCRIPTION Configurable Functions - Cd43 is a user-selectable function. The operator can change the value of this function to meet the operational needs of the container. Cd43 is a user selectable mode of operation that allows opening and closing of a mechanical air vent door via a stepper motor.
- Page 57 Table 4–5 Controller Function Codes Code TITLE DESCRIPTION Initially Cd48 will display current dehumidification-mode; bUlb - bulb cargo mode, dEhUM - normal dehumidification, or OFF - off. This display is steady. Pressing ENTER key will take the interface down into a hierarchy of parameter se- lection menus (mode, setpoint, evaporator speed, DTT setting).
- Page 58 Table 4–5 Controller Function Codes Code TITLE DESCRIPTION Configurable Functions - Cd50 through Cd53 are user-selectable functions. The operator can change the value of these functions to meet the operational needs of the container. "OFF" = disabled. "On" = enabled. "SEtPt"...
- Page 59 Table 4–5 Controller Function Codes Code TITLE DESCRIPTION ASC-mode: Cd53 increments of (1 day)_(1hr), Display: default 0_0 done mm-dd this will be display is ASC has completed ASC value “On” “OFF” Display /Select: default OFF nSC value “1 - 6” (This is the value n for the subsequent entries). SP (n-1) value °C/°F on 0.1 degree increments Display/Select: default 10.0°C DAY (n-1) value “1-99”...
-
Page 60: Figure 4.12 Alarm Troubleshooting Sequence
Figure 4.12 Alarm Troubleshooting Sequence Start Troubleshooting Check Power Refer to CONNECT POWER Unit does Supply self test? Section 4.2 Refer to CONNECT POWER Check Power Evaporator Supply fans start? Section 4.2 Correct Install Latest Refer to CONTROLLER SOFTWARE software Software Section 3.2 version? -
Page 61: 4.11 Controller Alarm Indications
4.11 CONTROLLER ALARM INDICATIONS AL05 MANUAL DEFROST SWITCH FAILURE Cause: Controller has detected continuous Manual Defrost Switch activity for five minutes or more. Component Keypad Troubleshooting Power cycle the unit. Corrective Action Resetting the unit may correct problem, monitor the unit. If the alarm reappears after 5 minutes replace the keypad. - Page 62 AL12 EVAPORATOR FAN 2 IP Cause: Alarm 12 is triggered when configured for single evap operation and KB10 sensed high. Component Evaporator Fan 2 Troubleshooting The unit will suspend probe check diagnostic logic and disable the probe check portion of defrost cycle. Corrective Action AL11 is triggered off when KB10 sensed low.
- Page 63 AL21 CONTROL CIRCUIT FUSE (F1/F2) Cause: One of the 18 VAC controller fuses (F1/F2) is open. Refer to Cd08. Component System Sensors Troubleshooting Check system sensors for short to ground. Corrective Action Replace defective sensor(s) Component Wiring Troubleshooting Check wiring for short to ground. Corrective Action Repair as needed.
- Page 64 AL25 CONDENSER IP Cause: Condenser fan motor internal protector (IP) is open. Component Insufficient Air Flow Troubleshooting Shut down unit and check condenser fan for obstructions. Corrective Action Remove obstructions. Component Condenser Fan Motor Troubleshooting Shut down unit, disconnect power, & check Condenser Fan Motor IP at plug connection pins 1 &...
- Page 65 AL50 AIR VENT POSITION SENSOR (VPS) Cause: VPS Sensor out of range. Component Vent Position Sensor (VPS) Troubleshooting Make sure VPS is secure. Corrective Action Manually tighten panel. Component Vent Position Sensor (VPS) Troubleshooting If the alarm persists, replace the sensor or the assembly. Corrective Action Replace VPS.
- Page 66 AL54 PRIMARY SUPPLY SENSOR (STS) Cause: Invalid Supply Temperature Sensor (STS) reading. Component Supply Temperature Sensor (STS) Troubleshooting Perform Pre-trip P5: Corrective Action If P5 passes, no further action is required. If P5 fails, replace the defective sensor as determined by P5, refer to TEM- PERATURE SENSOR Service Section 7.21.
- Page 67 AL59 HEATER TERMINATION THERMOSTAT (HTT) Cause: Heat Termination Thermostat (HTT) is open. Component Alarm 59 is triggered by the opening of the Heat Termination Thermostat (HTT) and will result in the disabling of the heater. Troubleshooting Check for 24 volts at test point TP10, if no voltage at TP10 after unit has reached set point HTT is open.
- Page 68 AL63 CURRENT LIMIT Component Power supply Troubleshooting Confirm supply voltage/frequency is within specification and balanced ac- cording to Electrical Data Section 3.3. Corrective Action Correct power supply. Component Current limit set too low Troubleshooting Check current limit setting Code Cd32. Corrective Action The current limit can be raised (maximum of 23 amps) using Cd32.
- Page 69 AL70 SECONDARY SUPPLY SENSOR (SRS) Cause: Secondary Supply Sensor (SRS) is out of range. Component Secondary Supply Sensor (SRS) Troubleshooting Perform Pre-trip P5: Corrective Action If P5 passes, no further action is required. If P5 fails, replace the defective sensor as determined by P5, refer to Tem- perature Sensor Service Section 7.21.
-
Page 70: Table 4-6 Controller Alarm Indications
Table 4–6 Controller Alarm Indications NOTE If the controller is configured for four probes without a DataCORDER, the DataCORDER alarms AL70 and AL71 will be processed as Controller alarms AL70 and AL71. Refer to Table 4–10. The controller performs self-check routines. If an internal failure occurs, an ERR alarm will appear on the display. -
Page 71: 4.12 Controller Pre-Trip Test Codes
4.12 CONTROLLER PRE-TRIP TEST CODES Table 4–7 Controller Pre-Trip Test Codes NOTE Auto or Auto1 menu includes the: P, P1, P2, P3, P4, P5, P6 and rSLts. Auto2 menu includes P, P1, P2, P3, P4, P5, P6, P7, P8, P9, P10 and rSLts.Auto3 menu includes P, P1, P2, P3, P4, P5, P6, P7, P8 and rSLts Container identifier code, Cd18 Software Revision Number, Cd20 Container Unit Model Number, &... - Page 72 Table 4–7 Controller Pre-Trip Test Codes P4 Tests - High Speed Evaporator Fans Current Draw: High speed evaporator fans are turned on, then off. Current draw must fall within specified range and measured current changes must exceed specified ratios. No other system components will change state during this test.
- Page 73 Table 4–7 Controller Pre-Trip Test Codes This is a Pass/Fail/Skip test of the humidity sensor configuration. Test passes if the controller configuration has humidity sensor in. Humidity Sensor Test fails if the controller configuration has humidity sensor out and Vout is greater Controller P5-10 than 0.20 Volts for the humidity sensor.
- Page 74 Table 4–7 Controller Pre-Trip Test Codes P7 Tests - High Pressure Tests: Unit is run at full capacity without condenser fan running to make sure that the HPS opens and closes properly. With the unit running, the condenser fan is de-energized, and a 15 minute timer is started.
- Page 75 Table 4–7 Controller Pre-Trip Test Codes Control temperature must be at least 15.6C (60F). The set point is changed to 0C (32F), and a 180-minute timer is started. The left display will read P81, the right display will show the supply air temperature. The unit will then start to pull down the temperature to the 0C set point.
- Page 76 Table 4–7 Controller Pre-Trip Test Codes P10 Tests - Frozen Mode Tests: After completion of the Defrost Test, if the container temperature is below 7.2C, the setpoint is changed to 7.2C, and a 180 minute timer is started. The control will then be placed in the equivalent of normal heating.
-
Page 77: Table 4-8 Datacorder Function Code Assignments
Table 4–8 DataCORDER Function Code Assignments NOTE Inapplicable Functions Display “-----” To Access: Press ALT. MODE key then CODE SELECT key Code No. TITLE DESCRIPTION Recorder Supply Current reading of the supply recorder sensor. Temperature Recorder Return Current reading of the return recorder sensor. Temperature dC3-5 USDA 1,2,3 Temperatures Current readings of the three USDA probes. -
Page 78: Table 4-9 Datacorder Pre-Trip Result Records
Table 4–9 DataCORDER Pre-Trip Result Records Test No. TITLE DATA Heater On Pass/Fail/Skip Result, Change in current for Phase A, B and C Heater Off Pass/Fail/Skip Result, Change in currents for Phase A, B and C Pass/Fail/Skip Result, Water pressure switch (WPS) - Open/ Condenser Fan On Closed, Change in currents for Phase A, B and C Condenser Fan Off... -
Page 79: Table 4-10 Datacorder Alarm Indications
Table 4–10 DataCORDER Alarm Indications To Access: Press ALT. MODE key then ALARM LIST key Code No. TITLE DESCRIPTION dAL70 Recorder Supply The supply recorder sensor reading is outside of the range of 50 to 70C Temperature Out of (58F to +158F) or, the probe check logic has determined there is a fault with Range this sensor. - Page 80 Downloaded from ManualsNet.com search engine...
-
Page 81: Operation
SECTION 5 OPERATION INSPECTION (BEFORE LOADING) 5.2.1 Connection To 380/460 VAC Power 1. Make sure start-stop switch (ST on control WARNING panel) and circuit breaker (CB-1 in the control box) are in position “O” (OFF). Beware of unannounced starting of the 2. -
Page 82: Upper Fresh Air Makeup Vent
Air exchange depends on static pressure differential, 5.3.2 Vent Position Sensor which will vary depending on the container and how the The VPS allows the user to determine position of the container is loaded. fresh air vent via Cd45. This function code is accessi- Units may be equipped with a vent position sensor ble via the code select key. -
Page 83: Starting The Unit
(ST) are in the “O” (OFF) position before PRE-TRIP DIAGNOSTICS connecting to any electrical power source. CAUTION 5.5.1 Starting the Unit a. With power properly applied, the fresh air vent in Pre-trip inspection should not be per- proper position, place the START−STOP switch to formed with critical temperature cargoes “I”... -
Page 84: Probe Diagnostics
matically terminate. When initiated via commu- 1. Individually selected tests, other than the LED/ nications, a Pre−trip test may not be interrupted Display test, will perform the operations neces- with an arrow key, but the Pre−trip test can be sary to verify the operation of the component. At terminated with the PRE−TRIP key. -
Page 85: Emergency Bypass Operation (Option)
(0.9°F) or greater between the supply air sensors and/ To place the unit in the emergency bypass mode, cut the wire tie installed at the switch mounting and place or a difference of 2.0°C (3.6°F) between the return air the EMERGENCY BYPASS switch in the BYPASS sensors. - Page 86 Downloaded from ManualsNet.com search engine...
-
Page 87: Troubleshooting
SECTION 6 TROUBLESHOOTING UNIT WILL NOT START OR STARTS THEN STOPS Condition Possible Cause Remedy/Refer- ence Section External power source OFF Turn on Start-Stop switch OFF or defective Check No power to unit Circuit breaker tripped or OFF Check Autotransformer not connected 5.2.2 Circuit breaker OFF or defective Check... -
Page 88: Unit Runs Bu Has Insufficient Cooling
UNIT RUNS BU HAS INSUFFICIENT COOLING Condition Possible Cause Remedy/Refer- ence Section Compressor Compressor valves defective Abnormal pressures Controller malfunction Evaporator fan or motor defective 7.14 Refrigeration System Suction modulation valve malfunction 7.17 Condenser Pressure Transducer defective Check Shortage of refrigerant 7.7.1 UNIT WILL NOT HEAT OR HAS INSUFFICIENT HEATING Condition... -
Page 89: Unit Will Not Defrost Properly
UNIT WILL NOT DEFROST PROPERLY Condition Possible Cause Remedy/Refer- ence Section Defrost timer malfunction (Cd27) Table 4–5 Loose terminal connections Tighten Will not initiate defrost Defective wiring Replace automatically Defrost temperature sensor defective or heat termination Replace thermostat open Heater contactor or coil defective Replace Manual defrost switch defective Replace... -
Page 90: Abnormal Noise Or Vibrations
ABNORMAL NOISE OR VIBRATIONS Condition Possible Cause Remedy/Refer- ence Section Loose mounting bolts Tighten Worn bearings Compressor Worn or broken valves Liquid slugging 7.16 Insufficient oil 7.8.6 Bent, loose or striking venturi Check Condenser or Evaporator Fan Worn motor bearings 7.11/7.14 Bent motor shaft 7.11/7.14... - Page 91 6.11 THERMOSTATIC EXPANSION VALVE MALFUNCTION Condition Possible Cause Remedy/Refer- ence Section Superheat setting too low 7.16 High suction pressure with low su- External equalizer line plugged ice holding valve open Open perheat Foreign material in valve 7.16 Pin and seat of expansion valve eroded or held open by for- Liquid slugging in compressor 7.16 eign material...
- Page 92 Downloaded from ManualsNet.com search engine...
-
Page 93: Figure 7.1 Manifold Gauge Set
(see Figure 7.2) is required for service of the ready for use. models covered within this manual. The manifold gauge/hose set is available from Carrier Transicold. (Carrier Transicold P/N 07-00294-00, which includes items 1 through 6, Figure 7.2). 7–1... -
Page 94: Figure 7.2 R-134A Manifold Gauge/Hose Set
Figure 7.2 R-134a Manifold Gauge/Hose Set Figure 7.3 Service Valve To Low Side To High Side Access Valve Access Valve 1. Line Connection 2. Access Valve 3. Stem Cap 4. Valve stem 5. Compressor or Filter Drier Inlet Connection 6. Valve (Frontseated) 1. - Page 95 After repairs have been made, be sure to per- tronic vacuum gauge. The pump is available form a refrigerant leak check (refer to Section from Carrier Transicold, P/N 07-00176-11. The 7.5), and evacuate and dehydrate the low side micron gauge is P/N 07−00414−00. (refer to Section 7.6).
-
Page 96: Figure 7.4 Refrigeration System Service Connections
Figure 7.4 Refrigeration System Service Connec- f. Break the vacuum with clean dry refrigerant 134a gas. Raise system pressure to approxi- tions mately 0.2kg/cm (2psig), monitoring it with the compound gauge. g. Remove refrigerant using a refrigerant recovery system. h. Repeat steps e.and f. one time. Remove the copper tubing and change the filter- drier. - Page 97 7.7.1 Checking the Refrigerant Charge b. Maintain the conditions outlined in Section 7.7.1. c. Fully backseat the suction service valve and NOTE remove the service port cap. To avoid damage to the earth’s ozone layer, use a refrigerant recovery system whenever d.
-
Page 98: Figure 7.5 Compressor
Figure 7.5 Compressor q. Remove vacuum pump lines. r. Start unit and check refrigerant charge (refer to Section 7.7). s. Check moisture-liquid indicator for wetness. Change filter-drier if necessary (refer to Section 7.12). t. Check compressor oil level per Section 7.8.6. -
Page 99: Figure 7.7 Bottom Plate Removed
Figure 7.7 Bottom Plate Removed Figure 7.8 Oil Pump and Bearing Head Set screw must be removed 1. Oil Pump & Bearing Head 1. Oil Pressure Relief Valve 2. Thrust Washer 2. Oil Return Check Valve 3. Oil Pickup Tube 3. -
Page 100: Figure 7.10 Motor End Cover
h. Be very careful not to damage the motor wind- Figure 7.11 Equalizing Tube and Lock Screw ings when removing the motor end cover (see Assembly Figure 7.10), as the cover fits over the winding coils. Loosen the cap screws, break the seal, and then remove all cap screws except one in the top of the cover. -
Page 101: Figure 7.13 Suction Valve And Positioning Rings
Compressor Oil Level CAUTION The gap between the ends of the piston rings can be Use only Carrier Transicold approved checked with a feeler gauge by inserting the ring into Polyol Ester Oil (POE) − Castrol-Icematic the piston bore approximately one inch below the top of SW20 compressor oil with R-134a. -
Page 102: Figure 7.15 High Pressure Switch Testing
a. Checking the Oil Level in the Compressor d. Removing Oil from the Compressor 1. If the oil level is above one-eighth sight glass, 1. Turn unit on and operate in cooling mode for at excess oil must be removed from the compressor. least 20 minutes. - Page 103 d. Set nitrogen pressure regulator at 26.4kg/cm d. Systematically wash across the inside top face (375psig) with bleed-off valve closed. of the coil until the water runs clean. e. Close valve on cylinder and open bleed-off valve. e. Wash down the center section, and then through the bottom of the coil, continue washing until the f.
-
Page 104: Figure 7.16 Condenser Fan Position
7.10.3 Condenser Coil Preparation m. Slide the condenser fan motor wiring harness back through the side support bracket and refit Before installing the new condenser coil, the receiver to condenser motor. assembly and mounting hardware must be removed n. Replace all wire ties that were removed to prop- from the old coil assembly: erly secure the drain line and wiring. - Page 105 7.11 CONDENSER FAN AND FAN MOTOR 2. If the fan motor is not properly centered, loosen the mounting bolts, and adjust the motor posi- The condenser fan rotates counter-clockwise (viewed tion on the bracket, and then secure the motor. from front of unit). The fan pulls air through the con- denser coil, and discharges the air horizontally through k.
-
Page 106: Figure 7.17 Heater Arrangement
7.13.1 Evaporator Coil Replacement 7.13.2 Evaporator Heater Replacement The heaters are wired directly back to the contactor and if a. Pump unit down. (Refer to Section 7.4). a heater failure occurs during a trip, the heater set con- taining that heater may be disconnected at the contactor. WARNING The next Pre-trip (P1) will detect that a heater set has been disconnected and indicate that the failed heater... -
Page 107: Figure 7.18 Evaporator Fan Locating Dimension
Apply unit evaporator stator and fan deck. power, momentarily, to check fan rotation. Analyses by Carrier Transicold environmental special- 6. Replace access panel, making sure panel does ists have identified the white powder as consisting pre- dominantly of aluminum oxide. -
Page 108: Figure 7.20 Thermostatic Expansion Valve Bulb
TXV Bulb Clamp is soldered to the suction line. lodging of the corrosive elements. Figure 7.20 Thermostatic Expansion Valve Bulb This cleaner is available from the Carrier Transicold Performance Parts Group (PPG) and can be ordered through any of the PPG locations; Part Number NU4371−88. -
Page 109: Figure 7.21 Thermostatic Expansion Valve
7.16.2 TXV Replacement 4. Unbraze the equalizer connection (1/4”), the out- let connection (5/8”), and then the inlet connec- NOTES tion (3/8”). See Figure 7.23. Be careful to protect the insulation on the heaters and their wires. 1. The TXV is a hermetic valve, it does not have adjustable superheat (See Figure 7.21). -
Page 110: Figure 7.24 Suction Modulation Valve (Smv)
7.17 SUCTION MODULATION VALVE After the CREL time-out has been met, the valve will start responding to the control logic and open or On start up of the unit, the SMV will reset to a known close relative to the demand. Scrutinize the unit open position. -
Page 111: Table 7-1 Valve Override Control Displays
Checking with SMA-12 portable stepper drive tester tions and motor resistance are good, check the drive module (refer to step 7.18.2). The SMA-12 portable stepper drive tester (Carrier Transicold P/N 07-00375-00) is a battery−operated 5. If the valve is determined to be faulty after com-... - Page 112 OR current limit is maintained. For perishable loads, it is recom- a. Obtain a grounding wrist strap (Carrier Transi- mended that the adjustment be made so that the available capacity is slightly larger than the cold P/N 07-00304-00) and a static dissipation load.
-
Page 113: Figure 7.25 Controller Section Of The Control Box
7.20.2 Controller Troubleshooting Figure 7.25 Controller Section of the Control Box A group of test points (TP) (see Figure 7.25) are pro- vided on the controller for troubleshooting electrical cir- c u i t s ( s e e s c h e m a t i c d i a g r a m , S e c t i o n 8 ) . - Page 114 5. Press the UP or DOWN arrow key until display 7. Press the UP or DOWN ARROW key to scroll reads, LOAd 51XX for Recip. through the list to obtain the proper model dash number. (If a defective card is being used, the 6.
-
Page 115: Table 7-2 Sensor Temperature/Resistance Chart
14, 13, 11. DTS, CPDS OR CPSS as required). Follow those wires to the connector and using the pins d. Using Driver Bit, Carrier Transicold part number of the plug, measure the resistance. Values are 07−00418−00, remove the 4 screws securing the provided in Table 7-2. -
Page 116: Figure 7.26 Sensor Types
Due to the variations and inaccuracies in ohmmeters, When replacing two single sensors with a combination thermometers, or other test equipment, a reading (3-wire) sensor, the black wires of the cables should be within 2% of the chart value would indicate a good sen- cut to the same length and the red wire of one cable cut sor. -
Page 117: Figure 7.28 Return Sensor Positioning
7.21.3 Sensor Re-Installation Figure 7.29 Supply Sensor Positioning a. Sensors RTS/RRS Evaporator Grille To properly position a return sensor, the sensor must be fully inserted into the probe holder. This positioning Combination will give the sensor the optimum amount of exposure to Sensor (Mount in the return air stream, and will allow the Controller to Either Clamp) -
Page 118: Figure 7.30 Communications Interface Installation
7.23 MAINTENANCE OF PAINTED SURFACES Units with communication interface module provision have the required wiring installed. The provision wiring The refrigeration unit is protected by a special paint kit (part number 76-00685-00), includes three pre- system against the corrosive atmosphere in which it addressed wires installed between the circuit breaker normally operates. -
Page 119: Table 7-3 Recommended Bolt Torque Values (Dry, Non-Lubricated For 18-8 Stainless Steel)
Table 7–3 Recommended Bolt Torque Values (Dry, Non-Lubricated for 18-8 Stainless Steel) Bolt Diameter Threads in-lb ft-lb Free Spinning 5/16 14.9 27.1 7/16 58.3 9/16 77.3 1104 124.7 1488 168.1 Non Free Spinning (Locknuts etc.) 82.5 5/16 145.2 12.1 16.4 22.0 29.8 7/16... -
Page 120: Table 7-5 Compressor Torque Values
Table 7–5 Compressor Torque Values SIZE TORQUE RANGE THREADS DIAMETER USAGE PER INCH ft-lb (inches) 1/16 27 (pipe) 8 − 12 11 − 16 Pipe Plug - Crankshaft 20 (pipe) 6 − 10 8 − 13 Oil Return Check Valve − Crankcase 20 (pipe) 20 −... -
Page 121: Table 7-6 R-134A Temperature - Pressure Chart
Table 7–6 R-134a Temperature - Pressure Chart Temp Vacuum Temp Pressure “/hg cm/hg kg/cm “/hg cm/hg kg/cm 14.6 49.4 37.08 0.49 24.5 168.9 1.72 1.69 12.3 41.6 31.25 0.42 26.1 180.0 1.84 1.80 32.8 24.64 0.33 27.8 191.7 1.95 1.92 22.7 17.00 0.23... -
Page 122: Figure 7.31 R-134A Compressor Pressure And Motor Current Curves Vs. Ambient Temperature, Sheet 1
Figure 7.31 R-134a Compressor Pressure and Motor Current Curves Vs. Ambient Temperature, Sheet 1 Note: Curves to be used as troubleshooting guide only for model series 69NT40 with fresh air makeup vent closed, unit powered on 460VAC/60Hz and SMV 100% open. (Bar) psig (22.0) -
Page 123: Figure 7.32 R-134A Compressor Pressure And Motor Current Curves Vs. Ambient Temperature, Sheet 2
Figure 7.32 R-134a Compressor Pressure and Motor Current Curves Vs. Ambient Temperature, Sheet 2 (Bar) psig (.97) (.83) (.69) (.55) 35 F (1.7 C) Box (.41) (.28) (.14) 0 F (-17.8 C) Box (-.14) (-.28) (-.41) ( F) (15.6) (21.1) (26.7) (32.2) (37.8) - Page 124 Downloaded from ManualsNet.com search engine...
- Page 125 Downloaded from ManualsNet.com search engine...
- Page 126 Downloaded from ManualsNet.com search engine...
-
Page 127: Figure 8.1 Single Evaporator Fan Capability And Vps - Legend
SECTION 8 ELECTRICAL WIRING SCHEMATIC AND DIAGRAMS INTRODUCTION This section contains the Electrical Schematics and Wiring Diagrams. Figure 8.1 Single Evaporator Fan Capability And VPS - Legend 8–1 T-368 Downloaded from ManualsNet.com search engine... -
Page 128: Figure 8.2 Single Evaporator Fan Capability And Vps - Schematic Diagram
Figure 8.2 Single Evaporator Fan Capability And VPS - Schematic Diagram T-368 8–2 Downloaded from ManualsNet.com search engine... -
Page 129: Figure 8.3 Single Evaporator Fan Capability And Vps - Unit Wiring Diagram
Figure 8.3 Single Evaporator Fan Capability And VPS - Unit Wiring Diagram 8–3 T-368 Downloaded from ManualsNet.com search engine... -
Page 130: Figure 8.4 Single Evaporator Fan Capability And Vps - Unit Wiring Diagram
Figure 8.4 Single Evaporator Fan Capability And VPS - Unit Wiring Diagram T-368 8–4 Downloaded from ManualsNet.com search engine... -
Page 131: Figure 8.5 Single Evaporator Fan Capability And Emergency Bypass - Legend
Figure 8.5 Single Evaporator Fan Capability and Emergency Bypass - Legend 8–5 T-368 Downloaded from ManualsNet.com search engine... -
Page 132: Figure 8.6 Single Evaporator Fan Capability And Emergency Bypass - Schematic Diagram
Figure 8.6 Single Evaporator Fan Capability and Emergency Bypass - Schematic Diagram T-368 8–6 Downloaded from ManualsNet.com search engine... -
Page 133: Figure 8.7 Single Evaporator Fan Capability And Emergency Bypass - Unit Wiring Diagram
Figure 8.7 Single Evaporator Fan Capability and Emergency Bypass - Unit Wiring Diagram 8–7 T-368 Downloaded from ManualsNet.com search engine... -
Page 134: Figure 8.8 Single Evaporator Fan Capability And Emergency Bypass - Unit Wiring Diagram
Figure 8.8 Single Evaporator Fan Capability and Emergency Bypass - Unit Wiring Diagram T-368 8–8 Downloaded from ManualsNet.com search engine... -
Page 135: Figure 8.9 Single Evaporator Fan Capability, Emergency Bypass And Failsafe - Legend
Figure 8.9 Single Evaporator Fan Capability, Emergency Bypass and Failsafe - Legend 8–9 T-368 Downloaded from ManualsNet.com search engine... -
Page 136: Figure 8.10 Single Evaporator Fan Capability, Emergency Bypass And Failsafe - Schematic Diagram
Figure 8.10 Single Evaporator Fan Capability, Emergency Bypass and Failsafe - Schematic Diagram T-368 8–10 Downloaded from ManualsNet.com search engine... -
Page 137: Figure 8.11 Single Evaporator Fan Capability, Emergency Bypass And Failsafe - Unit Wiring Diagram
Figure 8.11 Single Evaporator Fan Capability, Emergency Bypass and Failsafe - Unit Wiring Diagram 8–11 T-368 Downloaded from ManualsNet.com search engine... -
Page 138: Figure 8.12 Single Evaporator Fan Capability, Emergency Bypass And Failsafe - Unit Wiring Diagram
Figure 8.12 Single Evaporator Fan Capability, Emergency Bypass and Failsafe - Unit Wiring Diagram T-368 8–12 Downloaded from ManualsNet.com search engine... - Page 139 INDEX Numerics Connection to 190/230VAC Power 5–1 Connection To 380/460 VAC Power 5–1 230 Volt Cable 2–2 Control Box 2–1 460 Volt Cable 2–2 Control Box Section 3–5 Controller 2–1 4–3 7–20 Controller Alarms 4–12 Adding Refrigerant to System 7–5 Controller Configuration Variables 4–19 Adding Refrigerant to System - Partial 7–5 Controller Function Codes 4–21...
- Page 140 First Aid 1–1 Perishable Heating 4–4 Fresh Air Makeup Vent 3–1 Perishable Idle, Air Circulation 4–4 Frozen “Heat” Mode 4–8 Perishable Mode Cooling − Sequence of Operation 4–6 Frozen Economy Mode 4–8 Perishable Mode Dehumidification 4–5 Frozen Idle Mode 4–8 Perishable Mode Heating −...
- Page 141 Upper Air (Fresh Air Make Up) 2–2 Upper Fresh Air Makeup Vent 5–2 Temperature Control Microprocessor System 4–1 USDA 2–1 Temperature Readout 2–1 USDA Cold Treatment 4–17 Temperature Sensor Service 7–23 USDA Cold Treatment Procedure 4–17 Thermistor Format (dCF04) 4–14 Thermometer Port 2–2 Thermostatic Expansion Valve 7–16 Valve Override Controls 7–19...
- Page 142 Downloaded from ManualsNet.com search engine...
- Page 143 A member of the United Technologies Corporation. Stock symbol UTX. Carrier Transicold Division, Carrier Corporation P.O. Box 4805 Syracuse, NY 13221 USA www.carrier.transicold.com Downloaded from ManualsNet.com search engine...