
Related Manuals for Philips 502-1040510


Summary of Contents for Philips 502-1040510
- Page 1 DTR 5520 www.philips.com/support For support call 0800 331 60 15 EN High-Definition Digital Terrestrial Receiver...
-
Page 3: Table Of Contents
Table of contents Important 1.1 Safety information 1.2 Reducing power consumption Your HD receiver 2.1 What’s in the box? 2.2 What you also need (not supplied)? 2.3 Overview 2.4 How to read this manual? 2.5 How to use the menus? Getting started 3.1 Preparing your remote control 3.2 Connecting your HDTV 3.3 Installing your HD receiver 3.4 What if no channels are found? Using your HD receiver 4.1 Standby/wake up 4.2 Switching on and off 4.3 Changing channels 4.4 Adjusting volume 4.5 Using the channel banner 4.6 Using channel lists... -
Page 4: Important
Important Thank you for purchasing a Philips product. Take time to read this user manual before using your HD receiver. It provides important information on the installation, operation and safety of your HD receiver. Keep this manual next to your HD receiver for future reference. Disposal of your old product Your product is designed and manufactured with high quality materials and components, which can be recycled and reused. When this “crossed-out wheeled bin” symbol is attached to a product or its packaging, it means that the product is covered by the European Directive 2002/96/EC. Please inform yourself about the local separate collection process for electrical and electronic products. Please act according to your local rules and do not dispose of your old products with your normal household waste. The correct disposal of your old product will help prevent potential negative consequences for the environment and human health. The “Material recyclability” symbol affixed on the package cardboard and user manual means that these parts are recyclable. So do not dispose of them with your normal household waste. The “Material recyclability” symbol affixed on plastic packaging parts means that these parts are recyclable. So do not dispose of them with your normal household waste. The “Green Dot” symbol affixed on the cardboard means that the manufacturer of the product has financially contributed to the “Avoidance and Recovery of Packaging Waste” organization. Important... -
Page 5: Safety Information
Safety information Your HD receiver is powered using a 12 V power supply unit. Your HD receiver has been manufactured to meet the appropriate safety standards, but you must follow the below instructions to operate it safely. Keep these instructions for future reference. Warnings • Your HD receiver does not contain any user-serviceable parts. Do not attempt to open it. All maintenance work must be carried out by qualified services centres. • Before connecting the 12 V power supply unit to the mains, check that the mains supply voltage corresponds to the voltage printed on it. If the mains voltage is different, consult your local dealer. • The 12 V power supply unit has been designed for indoor use only. • Use only the original 12 V power supply unit. • To prevent fire or shock hazard, do not expose your HD receiver to rain or moisture. • Place your HD receiver on a firm surface, and do not cover the ventilation openings with items such as newspapers, table clothes, curtains, etc. • Do not install your HD receiver near heat sources such as radiators, stoves or other equipment that produce heat. Protect it from direct sunlight. • In order to ensure a free flow of air around your HD receiver, allow at least 5 cm of space above and around it. This prevents overheating of your HD receiver. • Do not place any combustible objects such as candles, etc., on your HD receiver. • Never stand objects filled with liquids, such as vases, on top of your HD receiver. Do not place anything on your HD receiver that might drip or spill into it. If this happens, disconnect the 12 V power supply unit from the wall socket and have your HD receiver checked at any authorized service centre. • The batteries installed in the remote control should not be exposed to excessive heat such as sunshine, fire or the like. Please also pay attention to all the warnings and cautions listed throughout this manual. Important... -
Page 6: Reducing Power Consumption
Reducing power consumption Your HD receiver is designed to reduce its impact on the environment and complies with the European Directive 2009/125/EC. This is part of Philips’ ongoing commitment to lead the way in environmental responsibility. It has a standby mode of operation that needs very little power. See the table below and please note that: • When your HD receiver is in the standby mode, you save energy (and therefore money) and reduce carbon dioxide emissions that damage the environment. • You use the standby button on your HD receiver or remote control to switch between on and standby modes. In addition, if your HD receiver is on, but you do not press any button on it or your remote control for 3 hours (configurable - see ‘Automatic eco mode’ on page 24), your HD receiver will automatically get into the standby mode. • You use the ON/OFF switch on the rear panel of your HD receiver to turn off your HD receiver. • If you are not going to use your HD receiver for several days, you can cut its energy consumption to zero by unplugging it from the mains wall socket. • In the off and standby modes, your HD receiver cannot receive updates from the network. However, at receiver wake-up, you will be prompted by a message if an update notification has been received. Mode Front-panel standby indicator and display Power Not lit up adaptor unplugged Standby Standby indicator is Active... -
Page 7: Your Hd Receiver
Your HD receiver Congratulations on your purchase and welcome to Philips! To fully benefit from the support that Philips offers, register your product at www.philips.com/welcome. What’s in the box? HD receiver User manual TEXT RADIO EXIT GUIDE OPTIONS INFO DIGITAL RECEIVER Remote control and 2 x AAA batteries Caution Plastic bags can be dangerous. To avoid suffocation, keep the bag away from babies and children. Your HD receiver 12 V power HDMI cable supply unit Quick start Freeview flyer guide RF cable Retune flyer... -
Page 8: What You Also Need (Not Supplied)
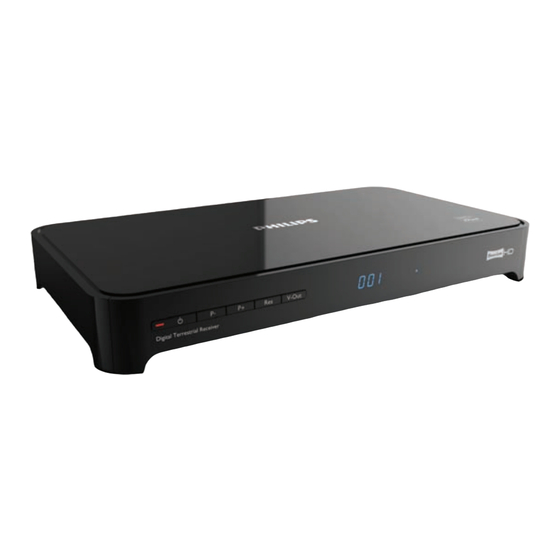
What you also need (not supplied)? Overview Front panel Rear panel Remote control TEXT RADIO EXIT GUIDE OPTIONS INFO DIGITAL RECEIVER SCART cable (required only if you have a standard-definition TV or if you want to record a programme to an external recording device such as a Video or DVD-R recorder) Front Panel 1 Standby indicator 2 Standby button 3 Programme +/- buttons 4 Resolution button 5 V-Out button 7 HD indicator Rear Panel 1 Antenna IN... -
Page 9: How To Read This Manual
How to read this manual? Danger Describes situations of injury or loss of life. Warning Describes actions that may cause damage to the product. Caution Describes actions that are required to avoid dangerous or illegal situations. Note Additional information. Information that is useful to know but not essential to the task. For example, information about alternative use. How to use the menus? Press MENU, GUIDE, OPTIONS or INFO on your remote control to display the Main menu, TV guide, Tools menu or channel banner respectively. / to navigate through the menus and change any setting. Press or OK to confirm your choice. Press EXIT to remove the menu. For more information, see pages 13 to 27. -
Page 10: Connecting Your Hdtv
Connecting your HDTV Danger Risk of electric shock! Before making any connections, ensure that your equipment is disconnected from the mains. Aerial wall socket HDMI Connect the aerial cable (not supplied) from the aerial wall socket to the Antenna IN connector on the rear panel of your HD receiver. Use the supplied HDMI cable to connect the HDMI connector on the rear panel of your HD receiver to the HDMI input connector of your TV. For the next step, note the chosen HDMI input of your TV (e.g. ‘HDMI 1’). Connect your TV to the mains and select the correct A/V source on your TV. This should correspond to the HDMI input connector to which your HD receiver is connected. If necessary, refer to your TV’s user manual for instructions. Notes • Optionally, you can also use the supplied RF cable to connect the RF output connector (labelled To TV/VCR) of your HD receiver to the RF input connector of your TV. • To connect your HD receiver to your standard-definition TV, see page 29. Before you start the installation, make sure you have made all the required connections. - Page 11 Press the green button to confirm. The TV shape menu appears. Let the TV shape setting be 16:9 if you use an HDMI connection to your TV. Press the green button to confirm and start scanning for the available channels. Note If you are in an area that receives signals from more than one network and possibly variant of the same channel (e.g. BBC1, BBC1 Scotland), then your HD receiver will prompt you to select the network and channel variant that you want in the All TV and All Radio lists. Getting started / to highlight the network that you want to install and press the green button. A progress screen displays to confirm that the search is taking place. When the search is complete, a screen displays the number of TV and radio channels that your HD receiver has found. Your HD receiver automatically saves these channels. Press the green button to go to the next step. Note In case your HD receiver does not find any channels, see the ‘What if no channels are found?’ section on page 12.
-
Page 12: What If No Channels Are Found
On the Code entry menu, use / number buttons to enter your area’s postal code, and then press OK to highlight PIN code. Note Entering your postal code is mandatory. You will not be able to complete the first installation setup without entering your postal code. To change the default PIN code (0000), press and use the number buttons to enter you new PIN code. You will then be prompted to re-enter your PIN code to confirm. Note Your new PIN code can be any 4-digit number other than the default PIN code (0000). Press the green button to confirm your choice and complete the installation. You can now start using your HD receiver. or the What if no channels are found? In case your HD receiver does not find any channels, check your connections (see pages 10 and 29) and press the red button to start the first installation setup again. -
Page 13: Using Your Hd Receiver
Using your HD receiver Standby/wake up To put your HD receiver into standby, press on your HD receiver’s front panel or remote control. To take your HD receiver out of standby, press again. You can also press BACK P+/P- or any number button on your remote control to wake up your HD receiver. See page 6 for more information. Switching on and off Use the ON/OFF switch on the rear panel of your HD receiver to switch your HD receiver on/off. See page 6 for more information. Changing channels To change channels, use the P+/P- on your remote control or your HD receiver’s front panel. You can also use the number buttons on your remote control. Press BACK to switch to the last channel you were watching. You can also use the on-screen channel lists or channel banner to change channels (see sections 4.5 and 4.6). Note Initially, HD programmes are available only on channels 50 and 51. Switch to these channels to watch HD programmes. - Page 14 To display what programme is on next (on the channel listed in the channel banner), press the yellow button. Press INFO a third time, or press EXIT to remove the channel banner without changing the channel. Alternatively, press BACK 4.5.1 More about the channel banner content to return to the channel banner. Using your HD receiver...
-
Page 15: Using Channel Lists
Using channel lists You use the channel list menu to switch to any TV or radio channel from the All TV or All Radio channel list, or your favourite lists. Changing channel Press OK to display the current channel list. / to select the channel you want to watch. Press OK to preview the channel; press OK again to watch it. Changing current channel list Press OK to display all the channels of the current channel list. Press to display all the available channel and favourite lists. To create new favourite lists, see page 21. / to highlight the list you want to use. Press OK to confirm and display all the channels of the selected list. / to highlight a channel and press OK to preview it. Press OK again to watch the channel or press EXIT to remove the channel list menu without changing the... -
Page 16: Scheduling/Stopping Recordings
Scheduling/stopping recordings To record a programme, you must first connect your HD receiver to your VCR or any recording device using a SCART cable (see page 28), and then schedule a recording using the TV guide or by setting a recording timer. Using TV guide Press GUIDE to display the TV guide. to highlight the programme you want to record and press OK. In the menu that pops up, press one of the following: • OK again to confirm the scheduling of the recording. • EXIT to return to the TV channel that you were watching prior to displaying the TV Guide. • BACK to return to the TV Guide. IMPORTANT NOTE: If the scheduling is made on a ‘Now’ programme (highlighted in blue), your HD receivers starts recording instantly and is locked on the programme to secure its recording. Any attempt to control the receiver displays rEC on your HD receiver’s front panel. You must STOP the recording to recover the control of your receiver. If the scheduling is made on a later programme, your HD receiver will record it at the set date and time. The program is highlighted in red in the TV Guide. -
Page 17: Using The Tools Menu
Note If parental control is on while scheduling a recording on a locked channel, we recommend you to go to the Parental control menu and enter your PIN code (then reported as “Typed in”). In that case, the recording will start automatically. / to highlight the setting you want to change and press or OK. Use to change it and press the green button to confirm the recording timer. Press the red button to cancel the recording timer and return to the Scheduled recordings menu. To delete an already scheduled recording, / to highlight it and press the red button. Press EXIT to return to watching live TV or press Menu to return to the Main menu. Using the Tools menu You use the Tools menu to display subtitles, change the audio language, control audio description and synchronise audio with video. Press OPTIONS to display the Tools menu. -
Page 18: Using More Of Your Hd Receiver
Using more of your HD receiver HD receiver Front panel Standby indicator: Red: initialisation mode and standby mode Orange: active-standby mode standby button: Switches your HD receiver into or out of standby P+ & P- buttons: To change channel up or down Res button: To change the HDMI output resolution to Auto (default), 576i, 576p, 1080i or 1080p V-Out button: To change the active video output to HDMI (default) or SCART Display: 4-digit display HD indicator: Lights up when you are watching an HD channel Rear panel * Safe extra low voltage... -
Page 19: Remote Control
Remote control TEXT RADIO EXIT GUIDE OPTIONS INFO DIGITAL RECEIVER Using more of your HD receiver 2 MENU 3 RADIO 4 EXIT 5 Colour buttons Used in contextual menus 7 U, D, L, R 9 P +/- 10 Number buttons Alphanumeric keypad 12 AD 13 VOL +/- 16 OK 18 TEXT Switch to standby or wake up from standby Open/close ‘Main’ menu Switch between radio and TV channels Remove menus, channel banner and channel lists... -
Page 20: Front-Panel Display Messages
Front-panel display messages Your HD receiver is starting up Your HD receiver is tuned to TV channel 25. Your HD receiver displays r025 when it is tuned to radio channel 25. - rEC is displayed each time you press a button on your remote control to indicate that: • A recording is in progress • Your HD receiver is locked on to the programme being recorded - To unlock your HD receiver, you must stop the recording by pressing EXIT and then OK. Antenna signal is not available Subtitle on. oFF indicates that subtitles are turned off. Main menu is open Channel list is open TV guide is open Your HD receiver is switching to standby mode HDMI is the active A/V output (recommended) of your HD receiver AUX SCART is the active A/V output of your HD receiver Picture format is 4:3 with black bars – 16:9E indicates that the picture format is 4:3 stretched to 16:9 – 16:9o indicates that the picture format is 4:3 zoomed in to the screen width. Software update is starting – L0 to L100 indicate that the software is being loaded – S0 to S100 indicate that the software is being loaded – End indicates a successful update – FAiL indicates a failed update. Automatic resolution adjustment (recommended) – other possible settings are indicated as 576i, 576P, 720P, 180i (for 1080i) and 180P (for 1080p). Your HD receiver is in the first installation setup Using more of your HD receiver... -
Page 21: Using The Main Menu
Using the Main menu Press MENU to display the Main menu. / to highlight a setting. Press or OK to confirm your choice. Press BACK to return to the Main menu. Press BACK again, MENU or EXIT to remove the Main menu. Note Use the colour buttons to perform contextual actions, which are described at the bottom of the screen. 5.4.1 Managing favourite lists Your HD receiver allows you to create favourite lists that include the channels you watch the most. This lets you access your favourite channels quickly instead of scrolling through the entire list. Creating a favourite list On the Main menu, make sure that Favourites is highlighted and press or The Favourites menu appears. - Page 22 Renaming favourite lists From the Favourites menu, use highlight either TV channels or Radio channels and press or OK. The menu now displays the default channel list (All TV or All Radio) and any existing favourite lists. / to highlight the favourite list that you want to rename, and press the blue button. In the Rename list menu that pops up, or the number buttons to rename your favourite list. Press the green button to confirm or press the red button to return to the previous menu without saving any changes. Press or BACK to return to the Favourites menu.
-
Page 23: Analog Output
Setting your preferences From the Settings menu, use highlight Preferences and press or OK. The Preferences menu appears. / OK to navigate through the settings and options, and make changes. Press or BACK to save your changes and return to the previous menu. You use the Preferences menu to change these settings: Display • Banner duration - Use this to set the length of time (3 to 10 seconds) that the channel banner remains on-screen when you change channel. By default, it is set to 5 seconds. • Timer warning duration - Use this to set how soon before the start of a program should the record-timer alert you. The available options are 30 seconds... - Page 24 * The Auto and Dolby Digital settings on HDMI or S/PDIF are not recommended until your HD receiver has been updated with the appropriate software. Visit www.philips.com/support regularly to check if the relevant software update is available. Automatic eco mode Use this to set the time after which your inactive HD receiver automatically enters into the active standby mode. You can set this to off, 3 hours (default), 4 hours, 5 hours, 6 hours, 7 hours or 8 hours.
- Page 25 Note The Network messages menu (under the Settings menu) alerts you of any changes to your network such as recently added channels, services, etc. To save time, check this menu before retuning your HD receiver. Updating your HD receiver’s software manually You can manually update your HD receiver software using a USB memory stick. Download the latest software file from the Philips website (www.philips.com/support), unzip it and transfer it to a USB memory stick. Be sure to place the downloaded file in the top-level folder of your USB memory stick. Connect your USB memory stick to the USB connector on the rear panel of your HD receiver. From the Settings menu, use highlight Set-up and press or OK. In the Set-up menu that appears, press to highlight Software update and...
- Page 26 Your HD receiver locates the software available on your USB memory stick and displays a confirmation message. Press the green button to install the software immediately. Press the red button to cancel and return to the previous menu. If you press the green button, your HD receiver updates the software and restarts. You may, depending on the update, then be required to complete the first installation setup (see page 10). Restoring factory default settings From the Settings menu, use highlight Set-up and press or OK. In the Set-up menu that appears, to highlight Factory reset and press OK twice. A message appears asking you to confirm. If you are sure, press the green button, or press the red button to cancel and return to the previous menu. If you press the green button, your HD receiver restores the factory default settings and restarts. You will then be required to complete the first installation setup (see page 10).
-
Page 27: Maintenance
Note Set Antenna powering to On only if you need to power an active-indoor antenna that requires a 5 V power supply not exceeding 50 mA current consumption. Be sure to read your indoor antenna’s user manual before turning this setting on. To control antenna output, press to highlight Antenna output and press or OK. Use to highlight Inactive in eco mode or Always active. Press or BACK to save your changes and return to the previous menu. Note If Antenna output is set to Inactive in eco mode while Antenna powering is set to On, the device(s) connected to the To TV/VCR output will not receive the... -
Page 28: Accessories And Connections
Accessories and connections Connecting your audio equipment HDMI Digital HDMI HDMI Option A – Electrical S/PDIF connection (Digital) Connect the DIGITAL audio output of your HD receiver to the relevant audio input of your audio equipment using an electrical S/PDIF cable (not supplied). Refer to the user manual of your audio equipment to choose the proper digital audio input. Note With a digital connection via the DIGITAL output of your HD receiver, mute and volume operations are managed by your audio equipment and not by your HD receiver. Option B – Analogue connection Connect the L/R audio outputs to the relevant audio inputs of your audio equipment using a double CINCH cable (not supplied). Refer to the user manual of your audio equipment to choose the proper analogue audio inputs. -
Page 29: Connecting Your Standard-Definition Tv
Use a SCART cable (not supplied) to connect the AUX connector on the rear panel of your HD receiver to the SCART input connector of your VCR or other recording equipment. Connect your HD receiver and other equipment to the mains. Notes Double Scheduling To succeed making recording, do not forget to set timers on your video or DVD recorder according to your HD receiver’s recording schedulings. How to avoid double scheduling? Your recorder is fitted with a feature allowing its start-stop control compatible* with your HD receiver. * The recorder function is activated by the video signal at its SCART input. Once the function is active, the recording starts when video is on and stops when video is off. If your Video or DVD-R recorder supports the above function, the simple scheduling of your HD receiver will automatically control your recorder. Necessary system installation • Enable ‘Recorder Control’ on your Video or DVD-R recorder. Refer to the user manual of your recorder. • Set the Recording link setting of your HD receiver (under Menu >... -
Page 30: Guarantee And Service
Guarantee and service For the Philips warranty applicable to your HD receiver, please visit the Philips website: www.philips.com/guarantee. In case you do not have an Internet connection, please contact your local Philips Consumer Care Centre (see page 37). Technical data This product is in conformity with European 95/47/EC and 2002/21/EC directives. The product complies with the following European council Directives: 2006/95/EEC and 2004/108/EC. Video decoding Standard definition • MPEG2 MP@ML • MPEG4 AVC MP@L3 • Video bit rate 15 Mbit/s • Resolution: 576i max 720x576 pixels interlaced • Picture format 4:3 et 16:9 High definition • MPEG2 MP@HL • MPEG4 AVC HP@L4 • Video bit rate 20 Mbit/s • Resolution of broadcast: 720p, 1080i • Upscale up to: up to 1080p50... - Page 31 • Event timer 8 • Event programming via EPG • DVB subtitling • Digital TXT / MHEG with Interaction channel • Video scaling on HDMI output: Auto, Original 576i, 576p, 720p, 1080i, 1080p50 • Dolby Digital 5.1 audio output • ECO power management • IP address assignment: Manual or DHCP • Software update: Update via OTA download Local update via USB Application system resources • Processor STi 7105 Reception - Demodulation • Reception of DVB-T broadcast (EN 300744) • Reception of DVB-T2 broadcast (acc. D-Book 6.1) • Demodulation type: COFDM FFT • Input frequency range: UHF IV / V 470 – 862 MHz • Active RF Loop-through: Bandwidth 47 - 862 MHz Switch to passive loop-through in...
-
Page 32: Frequently Asked Questions
Frequently asked questions Connection Your HD receiver does not display any digital TV channels on your TV. You may also see the on-screen message “Signal lost”. • Check that the aerial cable from the aerial wall socket is correctly connected to your HD receiver (see page 10). • There may be a temporary problem with the reception, caused, for example, by bad weather; try again later. • Check if there is any network message related to this signal loss. You can access the Network messages menu from Menu > Settings >... - Page 33 The picture seems to be stretched or squashed. Check the TV format setting under Digital output or Analog output (Main > Settings > Preferences). Alternatively, press the picture format button on your remote control to scroll through the different settings.Also refer to your TV’s user manual. Your HD receiver displays ‘err’ on the front-panel display when you plug in a USB memory stick. Reformat your USB memory stick using a computer. Ensure that the filesystem is FAT16 or FAT32.
- Page 34 Although you set Audio capabilities to “Auto” for HDMI or “Dolby Digital” for S/PDIF, your HD receiver does not deliver Dolby Digital 5.1 multi-channel audio output. • Your HD receiver needs a software upgrade. • Visit www.philips.com/support regularly to check if the appropriate software for ugrading your HD receiver via USB is available. • Set the Audio capabilities setting to PCM until the upgrade of your HD receiver is done.
-
Page 35: Glossary
Dynamic Host Configuration Protocol (DHCP) is a network protocol that enables a router or server to automatically assign IP addresses to devices that are part of its network. Digital audio Digital sound is available when you use the DIGITAL audio connector (coaxial S/PDIF) on the rear panel of your HD receiver. These sockets send audio through multiple channels, instead of just two channels as analogue does., Dolby Digital A surround sound system developed by Dolby Laboratories containing up to six channels of digital audio (front left and right, surround left and right, centre and subwoofer). Digital Video Broadcasting Electronic Programme Guide Glossary EasyLink The Philips EasyLink™ technology enables you to control multiple devices, which are connected through standard HDMI cables, using a single remote. HDCP High-bandwidth Digital Content Protection (HDCP) is a type of digital copy protection system. When your set-top is attached via an HDMI cable to an HDCP-compliant HDTV, the HDTV and set-top negotiate a secure link, which allows your set-top to transmit full resolution video to your HDTV. HDMI High-Definition Multimedia Interface (HDMI) is a high-speed digital interface that can transmit uncompressed high-definition video and digital multi-channel audio. It delivers perfect picture and sound quality, completely free from noise. HDMI is fully backward compatible with DVI. -
Page 36: Index
SDTV Standard-Definition Television. Surround A system for creating three dimension sound fields full of realism by arranging multiple speakers around the listener. USB memory stick A small size storage device, which is used to update your HD receiver’s software (see page 25). Connect it to the USB 2.0 connnector on the rear panel of your HD receiver. Index Change channel, 13 -15 Channel banner, 13, 14 Connect HDMI, 10 SCART, 29 Control volume, 13 Favourite lists Create, 21 Delete, 22 Modify, 22 Rename, 22 Front panel, 18 Indoor antenna Setting, 26 Powering, 10, 27 Install First installation, 10 Rear panel, 18 Record Programmes, 16 Stop, 16, 32 Remote control, 19 Restore factory settings, 26 Retune, 25 Return channel, 24 Software update, 25 System settings, 26... -
Page 37: Contact Information
Contact information DTR 5520/05 Serial number: UNITED KINGDOM Phone: 0800 331 60 15 Contact information... -
Page 38: Trademarks And Partner Logos
Trademarks and partner logos The Philips wordmark and the Philips shield are registered trademarks of Koninklijke Philips Electronics N.V. and are used by Pace plc under license from Koninklijke Philips Electronics N.V. Manufactured under license from Dolby Laboratories. “Dolby” and the double-D symbol are trademarks of Dolby Laboratories. HDMI, the HDMI logo, and High-Definition Multimedia Interface are trademarks or registered trademarks of HDMI licensing LLC in the United States and other countries. Trademark of the DVB Digital Video Broadcasting Project (1991 to 1996) The FREEVIEW service is subject to coverage. The FREEVIEW, FREEVIEW+, FREEVIEW HD and FREEVIEW+HD words and logos are trademarks of DTV Services LTD. © DTV Services Ltd 2010. The “HD TV” Logo is a trademark of EICTA. 100% recycled paper Pace and are trademarks and/or registered trademarks of Pace plc. Trademarks and partner logos... - Page 39 Trademarks and partner logos...
- Page 40 © 2010 Koninklijke Philips Electronics N.V. All rights reserved. Document order number: 502-1040510...