
Related Manuals for Philips HDTP 8530


Summary of Contents for Philips HDTP 8530
-
Page 1: User Manual
Register your product and get support at www.philips.com/welcome HDTP 8530 HDTP 8540 User manual... - Page 2 Congratulations! This High Definition Digital Television Receiver (DTR) is an innovative product from the latest generation of Philips digital TV recorders, dedicated to Digital Terrestrial Television. Equipped with a silent hard disk drive, it allows easy reception and recording of digital programmes, including those broadcasted in High Definition.
-
Page 3: Table Of Contents
Contents Technical Settings Information and Support 10 Environment 1 Safety recommendations Meaning of logos present on the product or its packaging Where to put your recorder? Product recycling and disposal Warnings and safety instructions European Directive on Waste Electrical and Electronic Batteries Equipment (WEEE) Interference... -
Page 4: Safety Recommendations
1 Safety recommendations Warnings and safety instructions NEVER OPEN THE RECORDER OR THE POWER SUPPLY UNIT! YOU RISK GETTING AN ELECTRIC SHOCK. Use of the recorder is subject to safety measures designed to protect • Use only the power supply unit supplied with the users and their environment. -
Page 5: Batteries
• Always connect the power adapter cord to the recorder first, then connect the power cord to the power adapter, and finally connect the power cord to the mains power socket. By not observing the order indicated, you risk getting an electric shock. •... -
Page 6: What's In The Box
2 What‘s in the box Your new equipment includes: High Definition Digital Television Recorder (DTR) Remote control with 2 batteries (AAA) Power supply unit (power adapter and power cord) Quick start guide This user manual HDMI® lead for connection to a High Definition TV set... -
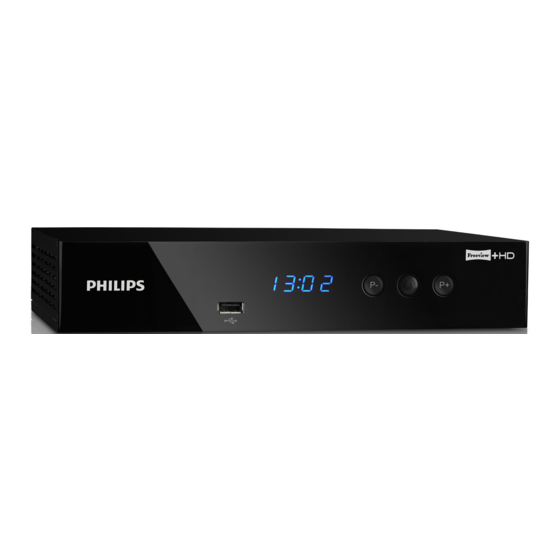
Page 7: Front Panel Of The Recorder
Front panel of the recorder Rear panel of the recorder Manufactured under license from Dolby Laboratories. Dolby and the double-D symbol are trademarks of Dolby Laboratories. ETHERNET DIG. ANTENNA HiFi AUDIO TV/AUX a USB port g Power supply unit connector b LED h Ethernet port •... -
Page 8: Overview Of The Remote Control
Overview of the remote control • Launch immediate recording, Schedule a recording from the TV Guide MENU • Access menus • Increase or decrease the audio volume ,.;@ • Move in a page, a menu, the PIP window… • Go back to the previous channel, screen or mode pqrs wxyz LIBRARY... - Page 9 Batteries The remote control needs two batteries (AAA) to operate. The drawing in the battery compartment indicates how to install them. The batteries provided are not rechargeable.
-
Page 10: Connecting Your Devices
3 Connecting your devices Connection to the TV set Connection to a High-Definition television set using an Before installing your recorder: HDMI lead • Please check that the delivery is complete (see What‘s in the box, page 6). To take advantage of High Definition picture quality, you must •... -
Page 11: Connection To A Vcr/Dvd Recorder
Connection to a VCR/DVD recorder Connection to a hi-fi unit See the diagram below to connect your recorder to a VCR/DVD To make the most of the quality sound and listen to radio channels recorder. with the TV turned off, just connect the right and left audio outputs of the recorder to the auxiliary input of your hi-fi system (cable not supplied). -
Page 12: Before Starting
4 Before starting Basics of the menu system How to access the main menu? Press the key. MENU How to access a feature? You can access some features using the remote control as well as the main menu. When both possibilities are available, the corresponding procedures are proposed. -
Page 13: Menu Tree
Menu tree The tree below introduces the recorder menus: Watch TV TV Guide Scheduled Recording Library Recording Schedule BBC i-Player Catch up TV PICTURES Media Player Media Player MUSIC VIDEOS ALL MEDIA Features Channel Locking Favourites Configuration Channel Search Automatic search Manual search Channel Management Channel Locking... -
Page 14: Running Your First Installation
5 Running your first Parental Control installation Once the recorder is physically connected, you need to go through the setup procedure to get your FREEVIEW channels. Switch on your TV. If necessary, press the Standby button on your remote control to wake the recorder up from standby mode. The first installation screen should appear. -
Page 15: Selecting Your Region
You recorder is now set. You can start watching and enjoying all your FREEVIEW channels. Should any problem that prevents you from completing the installation arise, please contact your retailer or the Philips Hotline. UK Hotline: 08450 900 315... -
Page 16: Your Recorder's Main Commands
6 Your recorder’s main Program information banner commands Each time you switch channels, the information banner appears onscreen. You can also display it by pressing the key once while watching a programme. Selecting a TV channel You can set the display time of the information banner in your User Preferences (see Setting your User preferences, page 28). -
Page 17: Adjusting The Audio Volume
Using the Picture in Picture (PIP) feature Detailed programme information If you want more information on the current and following You can watch a programme on the full TV screen and display at the same time another programme in an inset window. programme, press the key twice while watching a programme to Please note that the sound is from the main programme only. -
Page 18: Temporarily Selecting Audio Languages, Subtitles And Audio Description
Temporarily selecting audio languages, TV Guide subtitles and audio description The TV Guide displays programme information for all available channels (depending on the information provided by channel broadcasters). You can also record programmes directly from the TV Note Guide (see Recording programmes from the TV Guide, page 21). -
Page 19: Live Mode/Deferred Mode
Live mode/Deferred mode Recording programmes When you start viewing a new channel, the recorder automatically Recording a live programme starts to save a buffer of the channel as long as it is being watched up to 120 minutes depending on the signal. Select the desired channel. -
Page 20: Video Recordings
7 Video Recordings Recording programmes from the Recording Schedule menu The recording capacity of your recorder depends on the model and > DVR > Recording Schedule. MENU Go to on the type of programmes you choose to record. On average, one The Recording Schedule screen shows the list of your scheduled hour of recording requires between 1 GB (SD programme) and recordings. -
Page 21: Recording Programmes From The Tv Guide
If you want to lock the recording by requiring your parental Recording programmes using the TV Guide code and hiding it in the Recording List, set Parental control to locked (see section Accessing Locked Recordings, Press the key or select >... -
Page 22: Recording List
Recording List Managing the Recording list Action keys used The coloured and action keys let you manage the recording list and offer you the following actions: Use this key... to... display information about the selected recording. [Information] Red [Actions] Manage the selected recording. To access the recording list: Blue [Show Access locked recordings. - Page 23 Creating folders Erasing recordings You can create folders to organise your recordings. You can create up Select the recording(s) that you want to erase with the Green to three levels of folders. [Multiselect] key (see Selecting recorded programmes, You can use the characters: ".", "_" and "-". page 22).
-
Page 24: Multimedia Player
8 Multimedia Player Press the key to display the folder content. The following screen appears: The recorder allows you to view and play media files stored on compatible mass storage devices. Note • Please note that the devices must be formatted FAT or FAT32. -
Page 25: Viewing Photo Files
Viewing photo files Viewing your own video files To play a picture file (*.jpeg), select it and press the key to To view a video file (*.mpeg, *.mp4), select it and press the key. display it in full screen mode. To play a picture file, select it and press the key to display it in To launch a slideshow, select a picture file and press the... -
Page 26: Adjusting The Installation Parameters
9 Adjusting the installation Searching manually for channels parameters This menu lets you manually search for a specific channel, on a specific frequency or with a specific modulation. Go to > Configuration > Channel Search. MENU Notet • To see the menu tree and learn how to navigate through the various screens, see Before starting, page 12. -
Page 27: Channel Management
Channel Management Parental control options MENU To set your parental control options, go to > Creating and managing favourite lists Configuration > Channel Management > Parental Control. To create a favourite list: Receiver locking Go to > Configuration > Channel Management > MENU You can lock access to the recorder. -
Page 28: Technical Settings
Technical Settings Setting your language options To set your language options: Setting your User preferences Go to > Configuration > Technical Settings > MENU To set your user preferences: Languages Go to > Configuration > Technical Settings > MENU User preferences. Select the audio and subtitle languages you want. - Page 29 • Aerial Power Amplification: If you use an indoor active Picture settings antenna with an amplifier and if you want the recorder to supply it with power (5V power voltage -50mA max.), set Check the manuals of your video equipment to know what settings Aerial Power Amplification to Yes.
-
Page 30: Information And Support
Information and Support The information contained in this menu may be requested if you contact your supplier or our technical support service. You will find here important information about the recorder, the hard disk drive, the embedded software and the customer support details. MENU To access the recorder technical information, go to >... -
Page 31: Environment
Directive on the Restriction of use of certain hazardous substances in electronic equipment (RoHS) Preservation of the environment is an essential concern of Philips. The desire of Philips is to operate systems observing the Your recorder along with the batteries supplied comply with the environment and consequently it has decided to integrate directive relating to the RoHS –... -
Page 32: Troubleshooting
11 Troubleshooting A FAQ (Frequently asked questions) is available for the common questions. > Features > FAQ. MENU To access the FAQ, go to Using the recorder Problem Solution • The remote control is not working. Point the remote control at the recorder. •... -
Page 33: Updating The Software
You can also update your decoder using a USB key. Please check www.philips.com to find more information and the most recent software version for your product. A clear demonstration video will show you how to easily update your recorder using the USB port. -
Page 34: Customer Support
12 Customer Support At Philips we believe that a high quality product should come with the highest quality customer service. In the design of this product we have taken great care to ensure the maximum quality possible and are sure that you will be delighted with your purchase. -
Page 35: Specifications
13 Specifications Audio Decoding Stereo 2.0 • MPEG-1 layer I & II (Musicam) DUAL DVB-T/T2 FRONT END • MPEG-2 layer II RF INPUT • AAC • 2 RF tuners (w. internal splitter) • Mode: Mono, stereo, joint stereo • Input frequency range: UHF470-862 (8 MHz bandwidth) •... - Page 36 Front panel • 1 x 4-Digit 7-segment LED display • 1 x IR sensor: 38 kHz • 1 x Bicolour LED • 3 x Buttons (P+,P-, Standby) • 1 x USB 2.0 connector (Type A Host) Rear panel • 1 x RF input (IEC169-24-F) •...
-
Page 37: Guarantee Terms
If you bought your equipment from Philips directly, the following shall apply: 1) Philips undertakes to remedy by repair, free of charge for labour and replacement parts, any defects in the equipment during a period of twenty four (24) months from the date of original delivery of the equipment, where those defects are a result of faulty workmanship. - Page 40 PHILIPS and the PHILIPS’ Shield Emblem are registered trademarks of Koninklijke Philips Electronics N.V. and are used by Sagemcom Broadband SAS under license from Koninklijke Philips Electronics N.V. © 2012 Sagemcom Broadband SAS All rights reserved Sagemcom Broadband SAS Broadband Business Unit Headquarters : 250, route de l’Empereur...