Table of Contents

Related Manuals for Linear M&S VMC1


Summary of Contents for Linear M&S VMC1
- Page 1 VMC1 Video Security Intercom system for the home VMC1 Rough-In Instructions Video Security Intercom system for the home USA & Canada (800) 421-1587 & (800) 392-0123 (760) 438-7000 - Toll Free FAX (800) 468-1340 www.linearcorp.com 233254 X5...
- Page 2 All other servicing should be referred Keep this manual in a safe place for future reference. To replace this manual, download available from Linear Web site:www.linearcorp.com...
- Page 3 ✔ DO NOT STAPLE CABLES. Staples cause shorts. ✔ DO NOT SPLICE CABLES. Splices are unreliable and defeat the signal isolation properties of the cable. Keep this manual in a safe place for future reference. To replace this manual, download available from Linear Web site:www.linearcorp.com...
-
Page 4: Table Of Contents
VMC1 Table of Contents Block Diagram ..............5 Introduction . -
Page 5: Block Diagram
Block Diagram VMC1 Block Diagram AM ANTENNA FM ANTENNA MASTER STATION DEDICATED POWER 5 ROOM STATIONS TERMINAL BLOCK TE6D POWER SUPPLY VIDEO DOOR STATION DOOR STATION DOOR LOCK RELAY VMC1 Block Diagram1.ai... -
Page 6: Introduction
Introduction Rough in Kit The VMC1 Rough in Kit (VMC1H) includes: VMC1H – Video Intercom Package Rough In Kit 1 – (VMC1MB) Master Station mounting bracket 1 – (TE6D) Power supply 1 – (101093) FM dipole antenna (#3) 1 – (226804) 300 ohm to 75 ohm F female Balum 1 –... -
Page 7: Materials Required
Materials Required Tools and Recommended Parts The VMC1 installation Rough in prepares the home to accommodate the video intercom system. A VMC1MB mounting bracket is necessary for the Master Unit. Room stations and the Alloy Color Video Door Station (VMC1VDS) can be mounted directly onto finished walls. -
Page 8: Overview
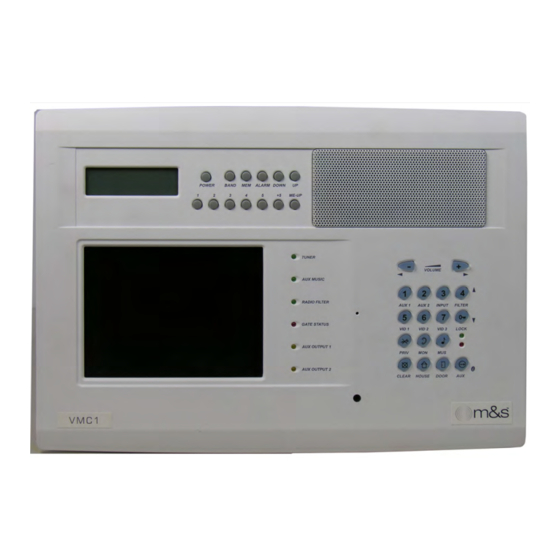
Overview Introduction Designed for installation in new homes, the VMC1 is a Whole House Color Video Security Intercom system that provides room to room communication, multiple camera support, basic home automation controls and video security for mid to large residential applications. VMC1 provide years of service and security for the homeowner as many people move into ‘smart home’... - Page 9 Overview Cameras For door stations fitted with cameras, consideration must be given the viewing area of the camera taking factors such as lighting and sun exposure into account. Power Supply The power supply should be attached to the VMC1MB as directed. Improper installation of the power supply can lead to unit malfunction and void the warranty.
-
Page 10: Cables & Wiring
(See section “Maximum Length for Cable Runs”) In large installations, Linear recommends a combination of Home Run and Daisy chain wiring. -
Page 11: Vmc1Mb Station Rough In
VMC1MB Station Rough In VMC1MB Installation The VMC1MB mounts flush with the wall stud and holds the master unit and power transformer. Position the VMC1MB at a suggested height of 4. 5 to 5.5. feet from the floor to center of the unit. As all wiring from other stations is generally terminated at the rear of the Master, the wall should be no less than 3 inches deep. -
Page 12: Vmc1Mb Station Rough In
VMC1MB Station Rough In VMC1MB Installation WALL VMC1MB STUD 55" ABOVE FLOOR PLATE FLOOR The VMC1MB mounts flush with the wall stud and holds the master unit and power transformer. Position the VMC1MB at a suggested height of 4. 5 to 5.5. feet from the floor to center of the unit. As all wiring from other stations is generally terminated at the rear of the Master, the wall should be no less than 3 inches deep. - Page 13 The VMC1 Rough In Kit includes an eight position terminal block for ease of installation. For all Door Stations and Home-Run Room Stations, the majority of the wires will be connected to this Terminal Block. Before installing the terminal block, Linear recommends pre-wiring and then firmly attach the terminal block to an available wood stud within 12 inches of the Master Unit location.
-
Page 14: Te6D Power Supply
VMC1MB Installation TE6D Power Supply The Power Supply unit is prewired and self contained, and the wires are tucked inside and can be pulled out. To open the Power Supply Unit, there are four screws on either end of the metal plate. Figure 6 shows the TE6D Power Supply internal setup, and the wires that need to be pulled out on the left side. - Page 15 VMC1MB Installation Figure 5 VMC1MB Mounting Bracket TE6D Power Supply Unit WALL STUD Figure 5A Figure 5B TE6D Power Supply Unit VMC1MB Mounting Bracket Lip ts on Mounting Bracket, fasten with screws TE6D Power Supply Unit installpowerunit1.ai WARNING ALL AC ELECTRICAL CONNECTIONS TO THE POWER SOURCE TE6D POWER SUPPLY MUST BE MADE BY A LICENSED ELECTRICIAN AND MUST OBSERVE ALL NATIONAL AND LOCAL ELECTRICAL CODES power supply unit.ai...
-
Page 16: Power Supply
Power Supply Power Unit Internal Wiring In the unlikely case that the TE6D electrical connectors becomes unplugged, the power supply unit connects to the Master Station as shown in Figure 6. Ensure that the wires are connected. There is a six pin connector and a two-pin connector. The six-pin connector is the low voltage (13.8 V, 3.8 amp) output from the TE6D Power Supply Unit: •... -
Page 17: Radio Antennas
Antennas Radio Antennas Antenna arrangement is crucial to quality radio reception, and AM and FM antennas should be placed at the highest point of the roof and at least six feet away from any electrical or intercom wiring. VMC1 requires two antennas, one for AM and one for FM reception. The AM antenna is 25-foot in wire length, and the FM antenna is a 25-foot length of coax with a “T”... -
Page 18: Room Station Auxiliary Activation
Room Station Rough In The room station is normally mounted at a height from the floor of: 55 – 60”. The room station is not designed to be installed outdoors. For an unfinished wall it is recommended that the VMC1HR rough in box be used. Identify the location where the room station is to be installed. Attach the Rough In Box to the stud using the two inner pre-punched holes in the Rough In Box. -
Page 19: Door Station Rough-In
Door Station Rough In VMC1VDS Door Station Rough in The VMC1VDS is a metal door station with a 90 degree horizontal viewing area. It is normally mounted at a height from the floor of: 55 – 60”. When installing the VMC1VDS be aware of the camera location and the direction of sunlight and other ambient light. Direct sun or lighting into the lens of the VMC1VDS camera may impact the video quality. -
Page 20: Door Station Rough-In
4 seconds and can be activated multiple times while the intercom is active. To connect the optional Linear Model DRW Door Release Mechanism, refer to be instructions below. For controlling other door release devices, refer to the hook-up instructions supplied with the device. -
Page 21: Appendix A Recommended Parts -1
Appendix A Recommended Parts -1 System Master Station Color Video Door Station with 5.6” TFT LED color screen with 10 different door chimes, supporting up to 20 remote stations. 90º horizontal and 50º degree Point-to-Point, Point-to-Group and All Call vertical viewing angle. intercom with hands free response. -
Page 22: Appendix A Recommended Parts - 2
Appendix A Recommended Parts - 2 Plexiglas weather shield increases the weather resistance of Non-video door station. Basic doorbell intercom VMC1VDS-BZ/S to IP31 station where video is not required. Standard Clear (DSWS) weather resistance IP30 (VMC1DS-BZ Bronze) (VMC1DS-S Silver) pictured Nightstand station. -
Page 23: Appendix A Recommended Parts - 3
Appendix A Recommended Parts - 3 Video Modulator for transmitting door camera Electronic door release and power supplies image to TV or get Video on TV (DRW RT11 or RT35 ) (5415) Video Encoder Emails snapshot of person pressing doorbell and providing a live video feed to an IP address ( ENC-D1POE) Color video camera... -
Page 24: Appendix A Recommended Parts - 4
Appendix A Recommended Parts - 4 Miniature door / window transmitter (DXS-32 12V Control Output switched 110V outlets for lights and other “notification” devices Remote Turn On for Lights AC1 (1 outlet) AC3 (2 outlets) MFG: Xantec/Niles 8 port Distribution Hub for use in large installations (H628) 2-Channel Receiver (DXR-702) Wire Relay The 284 Leaded Accessory Relay is a 5 amp... -
Page 25: Limited Warranty
-Year Limited Warranty Linear LLC warrants these products to be free of defects for 2 years. The warranty period begins on either (a) the date of purchase or installation date of this product or (b) the date of closing on a new residence in which this product was originally installed. The warranty extends to the original user of the product and to each subsequent owner of the product during the term of the warranty.