Table of Contents
Advertisement
Quick Links
Advertisement
Table of Contents

Related Manuals for Marantz VP8100


Summary of Contents for Marantz VP8100
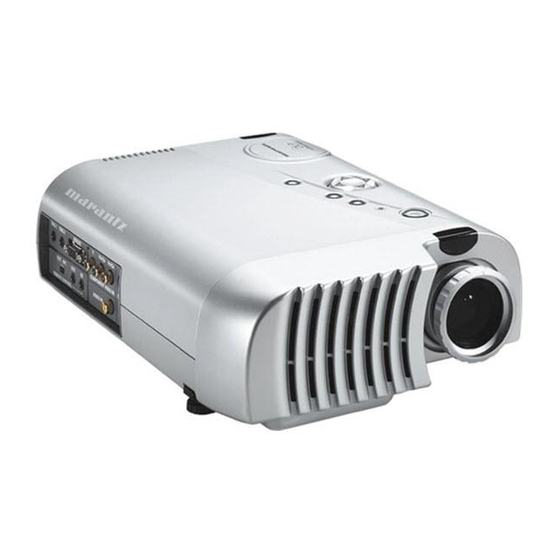
- Page 1 Model VP8100 User Guide Video Projector...
- Page 2 CAUTION: TO REDUCE THE RISK OF ELECTRIC SHOCK, REFER SERVICING TO QUALIFIED SERVICE PERSONNEL WARNING TO REDUCE THE RISK OF FIRE OR ELECTRIC SHOCK, DO NOT EXPOSE THIS APPLIANCE TO RAIN OR MOISTURE. CAUTION: TO PREVENT ELECTRIC SHOCK, MATCH WIDE BLADE OF PLUG TO WIDE SLOT, FULLY INSERT.
-
Page 3: Important Safety Instructions
This product was designed and manufactured to meet strict quality and safety standards. There are, however, some installation and operational precautions which you should be particularly aware of. Read Instructions: All the safety and operating instructions should be read before the appliance is operated. Retain Instructions: The safety and operating instructions should be retained for future reference. - Page 4 When the projector is mounted on the ceiling, the Ceiling Mount Kit approved by MARANTZ must be used for installation. Do not look into the lens when the projector is turned on. It could damage your eyesight.
-
Page 5: Table Of Contents
Preparing the Remote Controller ... 7 Floor Installation ... 8 Ceiling Installation ... 8 Distance between the projector and the screen (throw distance) ... 9 The screen image in a Widescreen (16:9) ... 10 The screen image in a 4:3 screen ... 10 Standard connections ... -
Page 6: Features
• The MARANTZ 3D-Y/C separation technology ensures clear screen image without blur in color. • The Marantz Two to Three Pull Down film detection technology ensures to depict the most natural moments of objects projected in the recorded film format. -
Page 7: Projector Layout And Functional Overview
Adjust the vertical angle of the projector. y Connector panel u POWER key Press to turn the projector on and off. The POWER key lights up in green when the power is turned on. i MENU key Press to display the on-screen menu. -
Page 8: Connector Panel And Rear
EXTERNAL. Otherwise select INTERNAL. n REMOTE CONTROL IN/OUT Connect to the REMOTE CONTROL connectors of other Marantz equipment. It is then possible to control the whole system with a single Remote Controller. m TRIG.1 OUT When the projector is turned on, a 12-volt signal is sent to the equipment connected to the TRIG.1 OUT. -
Page 9: Bottom
Bottom q Lamp cover w Lamp cover securing screw e Adjuster r Ventilation hole t Rear adjuster Adjusters How to use adjuster, adjuster button, and rear adjuster. Adjuster button PRESS DOWN Adjuster DOWN INTRODUCTION Rear Adjuster... -
Page 10: Remote Controller
The key toggles between DYNAMIC1, DYNAMIC2, DYNAMIC3 and DYNAMIC STD. ⁄3 OSD key When the key is pressed, projector setting information is displayed. Press again to display the FOCUS pattern. Then press again to clear the FOCUS pattern. ⁄4 FULL key ⁄2... -
Page 11: Preparing The Remote Controller
– The effect range of the Remote Controller is approximately – The Remote Controller operation may not function if the projector’s IR sensors are exposed to direct sun light or strong artificial light, or if there is an obstacle between the IR sensors and the Remote Controller. -
Page 12: Installation
Ceiling Installation For ceiling installation, consult with Marantz dealer. Height CAUTION – Do not look into the lens when the projector is turned on. It could damage your eyesight. Vertical positioning Side view Adjust the vertical and horizontal position of the... -
Page 13: Distance Between The Projector And The Screen (Throw Distance)
Distance between the projector and the screen (throw distance) Screen size (Diagonal) TRIG.1 TRIG.2 RGB IN COMPONENT VIDEO IN S-VIDEO EXT. INT. VIDEO IN REMOTE CONTROL Distance Unit :mm Screen Size (inches) (inches) Minimum 1730 2620 (103 3510 (138 4400... -
Page 14: The Screen Image In A Widescreen (16:9)
The Screen Images in a Widescreen (16:9) • Press the 4:3 key or the ZOOM key on the remote controller for the 4:3 aspect ratio video source. • Press the FULL key on the remote controller for 16:9 aspect ratio video source. { ZOOM mode 4:3 video source { SQUEEZE mode... -
Page 15: Installing
INSTALLING Standard Connections Connections with VIDEO EQUIPMENT TRIG.1 TRIG.2 RGB IN COMPONENT VIDEO IN EXT. INT. VIDEO IN REMOTE CONTROL Connection with a PC TRIG.1 TRIG.2 RGB IN COMPONENT VIDEO IN EXT. INT. VIDEO IN REMOTE CONTROL When making connections be sure to: •... -
Page 16: Initial Set Up
Press the POWER ON key on the remote controller or the POWER key on the projector. The POWER key lights in green. Switch on the equipment connected to the projector. Press the INPUT SELECT key on the projector or the COMPONENT key, S-VIDEO key, VIDEO key, or RGB key on the remote controller. -
Page 17: Operations
OPERATIONS Menu Refer to the on-screen menu for making various adjustments and settings. Press the MENU key. The menu display appears. THEATER 1 MEMORY SELECT PICTURE ADJUST SETTING Use the keys to select a menu, then press the ENTER key. The selected menu appears. Make adjustments in MEMORY SELECT, PICTURE ADJUST, or SETTING. -
Page 18: Setting
Setting Use the keys to select an item. Use the keys to change the setting SETTING ASPECT SQUEEZE TRIG.2 LANGUAGE ENGLISH CEILING REAR COMPONENT AUTO 2-3 P/D AUTO OFF RESET LAMP RESET ALL Press the ENTER key to restore. -
Page 19: Lamp Life And Replace Lamp
A lamp may be worn out when the LAMP LIFE becomes less than 1000 HOURS. • The projector is designed not to turn on after the lamp use has exceeded 2000 hours. (LAMP LIFE 0 HOUR) If the projector is in use, it will turn off. -
Page 20: Maintenance
• Do not loosen any screws except for those mentioned below. • The lamp may break if handled improperly. • Do not use a lamp housing other than a Marantz replacement lamp unit. WARNING: • The lamp itself may get hot. Be careful when handling. -
Page 21: Troubleshooting
Notes: • When the projector is installed on the ceiling and the WARNING indicator lights up or flashes, never open the lamp cover. • Install a standard lamp. • If the lamp still does not function after the replacement and initialization of the lamp life indicator, contact the dealer, or service center. -
Page 22: Specifications
SPECIFICATIONS { Optical characteristics Panel 0.67inch Digital Micromirror Device 786,432 pixels (1,024 Lamp 120W P-VIP Lamp Lens f: 28 to 33/ F: 3.0 to 3.3 1.2 times zoom lens Projection size 4:3 screen 23 to 275 inches (diagonal measure) Light output 700 ANSI lumen { INPUT/OUTPUT VIDEO IN... -
Page 23: Dimensions
DIMENSIONS í FRONT í TOP 96 (3 12 ( 84 (3 í SIDE It depends on the focus adjustment position and the zoom adjustment position. 322 (12 15.8 ( A TEXAS INSTRUMENTS TECHNOLOGY Unit: mm (inches) - Page 24 P.O. Box 685, Bell Village, Port Louis, Mauritius PO BOX 1280, Sandhausen 69200, Germany A division of Marantz Europe B.V., Building SFF2, P.O. Box 80002, 5600 JB Eindhoven, The Netherlands 4 Station Street, Thornleigh NSW 2120, Australia Sandkerveien 64, Oslo 0483, Norway P.O.