Table of Contents
Advertisement
Contents
. . . . . . . . . . . . . . . . . . . . . . . . . . . . . . .
. . . . . . . . . . . . . . . . . . . . . . . . . . . . . . . . . .
. . . . . . . . . . . . . . . . . . . . . . . . . . . . . . . .
. . . . . . . . . . . . . . . . . . . . . . . . . . . . . . . . . . . . . . . . . . . . .
. . . . . . . . . . . . . . . . . . . . . . . . . . . . . . . . 11
. . . . . . . . . . . . . . . . . . . . . . . . . . . . . . . . . . . . . .
. . . . . . . . . . . . . . . . . . . . . . . . . . . . . . . . . . . . . . . . 12
. . . . . . . . . . . . . . . . . . . . . . . . . . . . . . . . . 15
. . . . . . . . . . . . . . . . . . . . . . . . . . . . . . . . . . . . . . . . . 16
. . . . . . . . . . . . . . . . . . . . . . . . . . . . . . . . . . . . . . . . . . . . . . . 16
. . . . . . . . . . . . . . . . . . . . . . . . . . . . . . . . . . . . . . . .
. . . . . . . . . . . . . . . . . . . . . . . . . . . . . . . . . . 17
. . . . . . . . . . . . . . . . . . . . . . . . . . . . . . . . . . . . . . 18
. . . . . . . . . . . . . . . . . . . . . . . . . . . . . . . . . . . . 19
. . . . . . . . . . . . . . . . . . . . . . . . . . . . . . . . . . . . . . . . . 19
© 2021 Roland Corporation
. . . . . . . . . . . . . . . . . . . . . . . . . .
. . . . . . . . . . .
. . . . . . . . . . . . . . . . . . . . . .
. . . . . . . . . . . . . . . . . .
. . . . . . . . . . . . . . . . . . . . . . . . . . . .
. . . . . . . . . . . . . . 10
. 11
. . . . . . . . . . . . . . . . . . . . . . . . . . 17
. . . . . . . . . . . . . . . 17
. . . . . . 18
. . . . . . . . . . 18
. . . . . . . . . . . . . . . . . . . . . . . . . . . 18
. . . . . . . . . . . . . . . . . . . . . . . . 18
. . . . . . . . . . . . . . . . . . . . . . . . 19
Before using this unit, carefully read "USING THE UNIT SAFELY"
(p. 2) and "IMPORTANT NOTES" (p. 4). After reading,
keep the document(s) where it will be available for immediate
reference.
2
. . . . . . . . . . . . . . . . . . . . . . . . . . . . . . . . . . . . . . . . . . . . .
. . . . . . . . . . . . . . . . . . . . . . . . . . . . . . . . . . . . . . . . . 20
4
. . . . . . . . . . . . . . . . . . . . . . . . . . . . . . . . . . . . . . . . . 20
5
. . . . . . . . . . . . . . . . . . . . . . . . . . . . . . . . . . . . . . 21
5
6
. . . . . . . . . . . . . . . . . . . . . . . . . . . . . . . . . . . . . . . . . . . .
6
7
8
. . . . . . . . . . . . . . . . . . . . . . . . . . . . . . . . . . . . . . . 23
8
. . . . . . . . . . . . . . . . . . . . . . . . . . . . . . . . . . . . . . . . . . . . . 24
. . . . . . . . . . . . . . . . . . . . . . . . . . . . . . . . . . . . . . . . .
12
. . . . . . . . . . . . . . . . . . . . . . . . . . . . . . . . . . . 26
. . . . . . . . . . . . . . . . . . . . . . . . . . . . . . . . . . . . . 27
. . . . . . . . . . . . . . . . . . . . . . . . . . . . . . . . . . . 30
. . . . . . . . . . . . . . . . . . . . . . . . . . . . . . . . . . . . . . . 31
. . . . . . . . . . . . . . . . . . . . . . . . . . . . . . . . . . . . . . . . 31
17
. . . . . . . . . . . . . . . . . . . . . . . . . . . . . . . . . . . . . . . . . . . .
. . . . . . . . . . . . . . . . . . . . . . . . . . . . . . . . . . . . . 32
. . . . . . . . . . . . . . . . . . . . . . . . . . . . . . . . . . . . . . . 33
. . . . . . . . . . . . . . . . . . . . . . . . . . . . . . . . . . . . . . . . . . . .
Owner's Manual
. . . . . . . . . . . . . . . . . . . . . . . . . . . . . . . . . . 22
. . . . . . . . . . 22
. . . . . . . . . . . . . . . . . . . . . . . . 23
. . . . . . . . . . . . . . . . . . . . . . 23
. . . . . . . . . . . . . . . . . . . . . . . . . . . . . . . . 23
. . . . . . . . . . . . . . . . . . . . . . . . . . 26
. . . . . . . . . . . . . . . . . . 32
. . . . . . . . . . . . . . . . . . . . . . . . . . . . . 32
. . . . . . . . . . . 32
. . . . . . . . 33
. . . . . . . . . . . . . . . . . . . . . . . . . 34
. . . . . . . . . . . . . . . . . . . . . 34
. . . . . . . . . . . . . 34
. . . . . . . . . . . . . . . . . . . . . . . . . . . . . . .
20
23
26
32
34
35
Advertisement
Table of Contents

Related Manuals for Roland FANTOM-06


Summary of Contents for Roland FANTOM-06
-
Page 1: Table Of Contents
. . . . . . . . . . . . . . . . . . If You’re Using the FANTOM-06/FANTOM-07 . -
Page 2: Using The Unit Safely
Roland, the stand consult a specialized physician. must be carefully placed so it is level Be sure to contact your dealer, a Roland and sure to remain stable. If not using service center, or an official Roland Do not allow foreign objects or liquids to a stand, you still need to make sure that any dealer. - Page 3 It should before using this product. For a list of Roland service centers and official be handled carefully, all the while keeping it level. Roland dealers, refer to the Roland website.
-
Page 4: Important Notes
Roland assumes no liability distance from this unit, or switch them off. concerning the restoration of any stored content that has been lost. -
Page 5: Pdf Manuals Available For Download
Corporation in the United States and/or other accompaniment patterns, phrase data, audio countries. ¹ This Product uses the Source Code of μT-Kernel loops and image data) is reserved by Roland ¹ Company names and product names appearing Corporation. under T-License 2.0 granted by the T-Engine Forum (www.tron.org). -
Page 6: Placing This Unit On A Stand
* When using the KS-10Z, ensure that the height of the unit is one meter or lower. If You’re Using the FANTOM-06/FANTOM-07 If you want to place the FANTOM-06/FANTOM-07 on a stand, please use the KS-12, KS-10Z or KS-20X stands manufactured by Roland. * The illustration shows the FANTOM-06. -
Page 7: If You're Using The Fantom-08
Placing This Unit on a Stand If You’re Using the FANTOM-08 If you want to place the FANTOM-08 on a stand, please use the KS-12, KS-10Z, KS-G8B, or KS-20X stands manufactured by Roland. KS-10Z Adjust so that the Adjust the width of the stand so that the... -
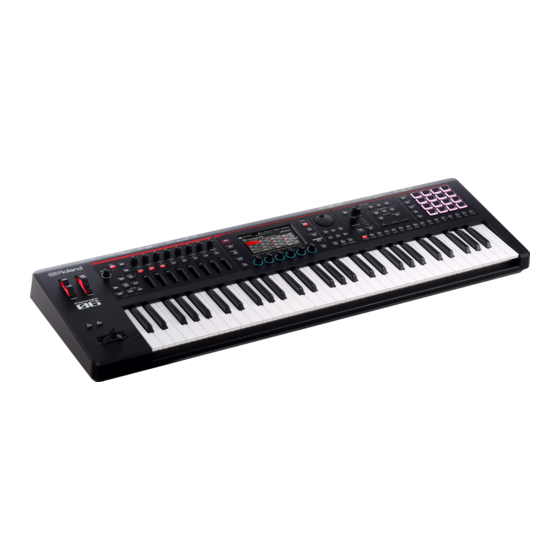
Page 8: Panel Descriptions
Panel Descriptions Top Panel Controller section Controller Explanation Switches the zones that you’re operating. Controller Explanation [ZONE 9-16] button Unlit: 1–8 You can assign various parameters or Lit: 9–16 functions to these wheels. To use the assigned Select the zone that you want to control (the function, move a wheel while you perform. - Page 9 Panel Descriptions SYNTH control section Controller Explanation The MASTER FX screen appears. Controller Explanation If you hold down the [SHIFT] button and press [MASTER FX] button this button, the MASTER EQ editing screen Accesses the OSC setting screen of the TONE [OSC] button appears.
-
Page 10: Rear Panel (Connecting The External Equipment)
Panel Descriptions Rear Panel (Connecting the External Equipment) * To prevent malfunction and equipment failure, always turn down the volume, and turn off all the units before making any connections. MIC/LINE INPUT PHONES jack SUB OUT MAIN OUT Computer Dynamic Audio Monitor speaker Mixer... -
Page 11: Turning The Power On/Off
Panel Descriptions PHONES jack Turning the Power On/Off A set of headphones can be connected to this jack. Even if headphones are connected, an audio signal is sent Turning on the Power from the OUTPUT jacks and BALANCED OUT jacks. Ground terminal Minimize the volume of this unit. -
Page 12: Introduction
Introduction Basic Operation Display [VALUE] dial [INC] [DEC] buttons Cursor buttons [MENU] button Function knobs [E1]–[E6] [SHIFT] button [ENTER] button [EXIT] button NUMERIC window Editing a Value If you hold down the [SHIFT] button and press the [ENTER] button, Use the following methods to modify a setting’s value. the numeric window appears. - Page 13 Introduction Confirming or Canceling the Value Knob and Slider Operations When you use a knob or slider to edit a setting, the edited [ENTER] button parameter and its value are shown in a popup screen. The popup screen closes automatically after a time. Use this button to confirm a value or execute an operation.
- Page 14 Introduction TONE EDIT screen Operations in the Display This unit’s display is a touch panel; you can perform various Touch to close a window . operations by directly touching the display. There are many screens, but here we explain the typical screen operations. Text enclosed in [ ] indicates buttons shown in the panel.
-
Page 15: An Overview Of This Unit
Introduction An Overview of This Unit Broadly speaking, this unit consists of four sections: controller, synthesizer, sequencer, and sampler. Controller Synthesizer Sampler Sequencer Sequencer Controller Keyboard Sliders This lets you create patterns using a 16-track MIDI sequencer (p. 26). Pitch bend Knobs Pads Tones of the 16 zones in the scene can be recorded directly using... -
Page 16: Units Of Sound
Introduction Units of Sound SCENE A scene contains a favorite performing state, including settings for TONE each zone (tone, MFX, volume, etc.), settings common to all zones (Reverb, Chorus, IFX, etc.), and sequence data for each zone. A “tone” is the smallest unit of sound on this unit. You can store an idea for a song or phrase as a scene, and manage scenes by switching them for each song. -
Page 17: Performing
Performing Press a tone category button [1]–[16] to select the type Selecting a Sound (SCENE/TONE) (category) of tone. Move the cursor to the tone name (number), and use Selecting a Scene the [VALUE] dial or the [INC][DEC] buttons to select a tone. -
Page 18: Raising/Lowering The Key Range In Semitones (Transpose)
Performing Raising/Lowering the Key Range in Semitones Playing Chords (Chord Memory) (Transpose) Chord memory is a function that sounds a pre-registered chord form when you play a single note on the keyboard. Hold down the [TRANSPOSE] button and press the Press the [CHORD MEMORY] button to make it light. -
Page 19: Changing The Tempo
Performing Changing the Tempo Simultaneously Modifying the Volume of Multiple Zones (Motional Pad) Press the [TEMPO] button to access the TEMPO screen. The motional pad function lets you simultaneously modify the volume of four zones by dragging in the screen. By using the Use the [VALUE] dial to change the tempo. -
Page 20: Editing
Editing Editing a Zone Editing a Tone There are 16 zones, and you can specify settings such as volume Here’s how to edit a tone. (Level), equalizer (EQ), and key range (KBD) for each zone. As described in the procedure “Selecting a Tone” Select a scene. -
Page 21: Editing The Effects
Editing Editing the Effects FANTOM-0x Block Diagram The arrangement and signal paths for each effect are as shown below. Select the effect to match your needs, and then edit its settings. FANTOM-0x Block Diagram Here we’ll explain how to edit the tone effects (MFX). SCENE Master FX IFX 1... -
Page 22: Saving A Scene Or Tone
Editing Move the cursor to the desired parameter, and edit the If you want to change the name, touch <Rename> and value. edit the name. You can use the knobs [E1]–[E6] to move the cursor or edit After changing the name, touch <OK> to close the window. parameters directly. -
Page 23: Sampler
Sampler This unit lets you audio-record (sample) your keyboard or the input Switching Banks sound from an audio device or mic. The recorded sample can be played by pressing a pad. The samples are assigned to four banks in units of 16 samples. This instrument features a built-in sampler that supports When you switch banks, the samples assigned to each pad will also multisamples, whose sound can be heard via the sound engine. -
Page 24: Sampling
Sampler SAMPLING Copying a Sample Function Explanation Hold down the pad of the sample that you want to copy To Pad Assigns the sampled sound to a pad. and the [SHIFT] button; then press the [CLIP BOARD] To Keyboard Assigns the sampled sound to the keyboard. button. - Page 25 Sampler Adjust the sampling volume. Deleting a Sample (Delete) Adjust the volume as high as possible without letting the Here’s how to delete a sample. level meter reach full scale. Hold down the [SHIFT] button and press the [PAD Device to Explanation sample MODE] button.
-
Page 26: Sequencer
Sequencer How the Sequencer Is Structured Playing the Sequencer Pattern Playing Pattern This unit’s sequencer lets you record and play back using 16 tracks Select a scene. which correspond to the zones. Each track can have up to eight patterns. Press the [PATTERN] button. -
Page 27: Recording A Pattern
Sequencer Press the [ ð STOP] button to stop playback. Playing Group Recording a Pattern Select a scene. There are three ways to record a pattern. Press the [GROUP] button. The GROUP screen appears. Method of Explanation recording Current Group Group List Create a pattern by recording your keyboard Realtime recording... - Page 28 Sequencer Directly touch parameters in the screen to select them, or If you’re creating groups or a song as described in the next use the [VALUE] dial to edit the value. section, it’s a good idea to divide the recording into several tracks and create several patterns so that you can distinguish them.
- Page 29 Sequencer You can record a chord by playing multiple notes. In <TRACK/PATTERN>, note the track that you’ll be recording. Repeat step 6 to record each step. Press the [EXIT] button to end recording. MEMO TRACK / PATTERN ¹ If you want to enter a rest, touch <REST>. ¹...
-
Page 30: About The Edit Screen
Sequencer Use the keyboard to specify the instrument that you About the Edit Screen want to record (only for a drum kit). The instrument changes when you press a key of a different Piano Roll Screen pitch. (Piano Roll Edit) For tones other than a drum kit, use the keyboard to specify The piano roll screen shows the pitches of sounds in the music, as the pitch that you want to input. -
Page 31: Creating A Group
Sequencer Creating a Group Creating a Song Press the [PATTERN] button. Press the [GROUP] button. The PATTERN screen appears. The GROUP screen appears. Here’s how to select patterns for each track to specify Touch <MAKE SONG>. their combination. The MAKE SONG screen appears. Touch <GROUPING>. -
Page 32: Control
Choose this if you want to use a USB VENDOR driver downloaded from the Roland BASIC website. The internal sound Choose this if you want to use the engine and the external... -
Page 33: Using Usb Audio
Control Use the cursor to select “USB Audio Input Volume,” and When the applicable When the applicable use the [VALUE] dial to adjust the input level. Button status zone is the current zone is not the current zone zone Outputting USB Audio Only if the ZONE INT/ BASIC EXT button of another... -
Page 34: Settings
Settings Detailed Function Settings Restoring Saved Data from USB Flash Drive (Menu) (RESTORE) NOTE Press the [MENU] button. When you execute the restore operation, all settings currently saved The MENU screen appears. in this unit will be lost. If you want to keep the current settings, back them up using a different name. -
Page 35: Main Specifications
* This document explains the specifications of the product at the time that the document was issued. For the latest information, refer to the Roland website. * Please be aware that in some countries or regions, it might not be possible to use Roland Cloud at this time.