
Related Manuals for Casio KL-P350W


Summary of Contents for Casio KL-P350W
- Page 1 KL-P350W User’s Guide Supported Tape Widths MO2003-C © 2018 CASIO COMPUTER CO., LTD.
- Page 2 Important! Before using this printer, be sure to read and follow the information in the “Safety Precautions” section of this manual. Be sure to keep all user documentation handy for future reference.
-
Page 3: Table Of Contents
Contents Safety Precautions ....................4 Precautions During Use ..................9 Check to make sure that everything has been included with the printer..11 Read this before using the printer! ..............11 Printer User Documentation ................... Printer Operation Flow ..................12 Installing the Software ..................13 Names of Parts and Their Functions ..............14 Turning Power On and Off ..................15... - Page 4 CASIO COMPUTER CO., LTD. is prohibited under copyright laws. • CASIO COMPUTER CO., LTD. shall not be held liable for any damages or losses suffered by you or any third party due to the use or malfunction of this product.
-
Page 5: Safety Precautions
Doing so creates the risk of electric shock. If the AC adaptor or power cord becomes damaged, contact your original retailer or a CASIO Service Center. Continued use creates the risk of fire and electric shock. Before leaving the product unattended, unplug the AC adaptor from the power outlet, and move the product to a location away from animals and pets. - Page 6 Warning AC Adaptor, USB Cable Observe the precautions below in order to avoid the risk of fire and electrical shock from the AC adaptor and USB cable. • Use only the specified type of AC adaptor and USB cable. • Use only the included power cord. •...
- Page 7 Disassembly and Modification Do not attempt any disassembly or modification. For any internal inspection, adjustment, or repair, contact your original retailer or a CASIO Service Center. Doing so creates the risk of electric shock, burn injury, and personal injury. Suffocation and Choking Risks Do not allow anyone to play with the plastic bags used for product packaging.
- Page 8 Warning In the case of a lightning storm, do not touch the device plugged into the power outlet. Lightning creates the risk of electric shock. Effect on Other Electronic Devices When using the product in a medical facility or aircraft, follow the instructions of local personnel and crew concerning use of such devices.
- Page 9 Caution Connections Connect only specified devices and items to connectors. Connecting to other devices and items creates the risk of fire and electric shock. AC Adaptor Observe the precautions below in order to avoid AC adaptor fire and electric shock. •...
-
Page 10: Precautions During Use
Also note that problems caused by use of a non-CASIO tape cartridge are not covered by the printer’s warranty, so any charges required for servicing and repair must be borne by you. - Page 11 States, and so it cannot be exported to or brought into countries that fall under U.S. Embargoes and Other Special Controls. Note that CASIO COMPUTER CO., LTD. shall not be held liable for any damages or losses due to data or information theft that may occur during wireless LAN data communication.
-
Page 12: Check To Make Sure That Everything Has Been Included With The Printer
This section explains the user documentation required for using this printer. ■ ■ Printed Documentation KL-P350W Quick Start Guide ■ ■ Download Documentation KL-P350W User’s Guide (This manual) Go to the site at the URL below and download the user documentation to your computer or phone. https://support.casio.com/global/en/d-stationery/model/KL-P350W/... -
Page 13: Printer Operation Flow
Printer Operation Flow Install the software. Page 13 Connect to a computer. Connect to a phone. Pages 21, 24 Page 25 Use LABEL DESIGN MAKER to create the data to be printed. Load a tape cartridge. Page 16 Print the label. Page 26... -
Page 14: Installing The Software
At the website below, you can select either “For a computer” or “For a phone”. On the page that appears, download and install LABEL DESIGN MAKER. Download LABEL DESIGN MAKER here: https://labeldesignmaker.casio.jp • For information about supported operating systems, versions, and other running environment details, refer to the above download page. -
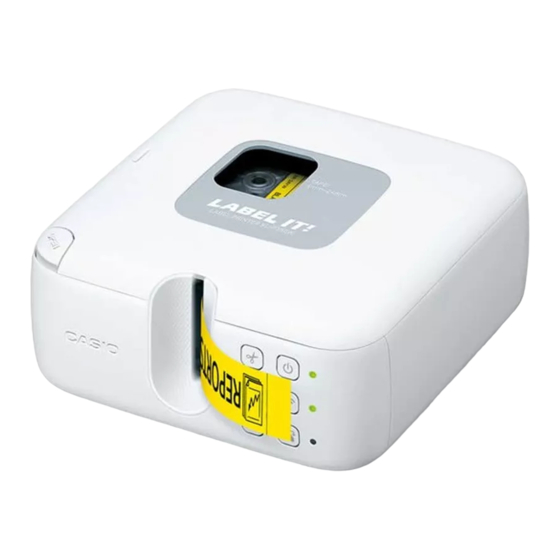
Page 15: Names Of Parts And Their Functions
Names of Parts and Their Functions Tape compartment Feed key Cut key Press to feed the tape. Press to cut the tape. Remaining tape window (tape window) ON/Stand-by Tape cartridge Power lamp cover open button Wireless LAN Wireless LAN lamp Front Status lamp Tape outlet... -
Page 16: Turning Power On And Off
Turning Power On and Off Use the procedures below to turn power on or off. ■ ■ To turn on power Press . This will turn on power and cause the power lamp to light green. • Before turning on power, connect the supplied AC adaptor and power cord to the printer. -
Page 17: Loading And Removing A Tape Cartridge
Loading and Removing a Tape Cartridge A tape cartridge must be loaded in the printer in order to print a label. A tape cartridge comes with the printer, and there are various types of tape cartridges that are also available separately. •... - Page 18 Check the condition of the tape and the ink Tape guide ribbon. • Make sure the leading end of the tape is Tape not bent. If it is, use scissors to trim off the (Pull out about 3cm.) bent part. •...
- Page 19 Set the tape cartridge in place. Taking care not to pull on the ink ribbon, pass the tape and ink ribbon between the print head and the rubber roller (illustration below). Press down on the tape cartridge until it clicks securely into place. Important! •...
- Page 20 Attach and close the tape compartment cover. • Hook the hinges of the cover onto the printer at the two points marked “a” in the illustration and then close the cover. Press down at point “b” in the illustration until the cover clicks securely into place.
-
Page 21: To Remove A Tape Cartridge
To remove a tape cartridge Press the printer’s to turn off power. Press the tape cartridge cover open button and remove the tape compartment cover. Remove the tape cartridge from the printer. • The print head is hot immediately after printing, so wait until it is cooled down before removing the tape cartridge. -
Page 22: Connecting With The Usb Cable (Computer Only)
Connecting with the USB Cable (Computer Only) Important! • Do not connect the printer to a computer that does not have LABEL DESIGN MAKER installed. Install LABEL DESIGN MAKER first and then connect. To connect Start up the computer and then connect the supplied USB cable to a USB port on the computer. -
Page 23: To Disconnect
Connect the USB cable to the printer’s USB port. Important! • Wireless LAN and USB operation cannot be performed at the same time. To disconnect On the printer, press to turn off power. Disconnect the USB cable from the computer. Unplug the power cord from the power outlet and then disconnect it from the printer. -
Page 24: Connecting Over A Wireless Lan
Connecting Over a Wireless LAN In addition to connection with a computer using a USB cable, your printer can also connect with a computer or phone over a wireless LAN. Wireless LAN Mode The wireless LAN function of the printer has a Client mode and an Access Point mode. •... -
Page 25: Getting Ready To Connect
■ ■ Access Point Mode In this mode, you can establish a direct wireless LAN connection between the printer and a computer or phone. Since the printer functions as an access point, it can connect to another device even when a wireless LAN router or another wireless LAN access point environment is not available. -
Page 26: Connecting To A Phone
With the LABEL DESIGN MAKER phone app Print Settings, specify the printer to be connected. • KL-P350W Printer Name (initial default): My CASIO PC LABEL PRINTER 18 ■ ■ Connecting with the Access Point Mode In this mode, you can establish a direct wireless LAN connection with a phone. -
Page 27: Initializing Printer Settings
With the LABEL DESIGN MAKER phone app Print Settings, specify the printer to be connected. • KL-P350W Printer Name (initial default): My CASIO PC LABEL PRINTER 18 Initializing Printer Settings Use the procedure below to return the printer to its initial factory default setup. -
Page 28: Stopping A Print Operation
Stopping a Print Operation To interrupt an ongoing print operation, press • After printing stops, cut the tape manually. For information about how to cut tape, see “Cutting the Tape”. Feeding the Tape You can perform a tape feed operation either before or after printing. Press •... -
Page 29: Affixing A Label To A Surface
Affixing a Label to a Surface If required, use scissors or some other implement to trim the label to the desired size or shape. Peel off the backing of the label and affix the label to the desired surface. • Bending a corner of the label makes the backing easier to peel off. •... -
Page 30: Print Modes (Computer Printing Only)
Print Modes (Computer Printing Only) You can select either of the following print modes: Normal Print, Magnetic Tape. Select the print mode on the LABEL DESIGN MAKER setting screen. • Normally, you should use the Normal Print mode. ■ ■ Printing on Magnetic Tape •... -
Page 31: Printing Label Data From Printer Memory
Printing Label Data From Printer Memory Your printer’s Reprint function and Memory Print function let you print label data from printer memory. Re-printing the Last Label Printed (Reprint) Reprint lets you re-print the last label you printed. You can re-print even when the printer is not connected to a computer or phone. This comes in handy when you need one more copy of a label you just printed. - Page 32 After printing is complete, hold down for at least three seconds. Release the key when the status lamp lights green. • The status lamp will remain lit for about one second, indicating that the Memory Print data was saved. • Memory Print data is not cleared if you turn off printer power or print a different label.
-
Page 33: User Maintenance
User Maintenance A dirty print head or rubber roller will make proper label printing impossible. Perform the procedure below to clean the print head and the rubber roller as required. Using a Cotton Swab for Cleaning Important! Use a cotton swab or some other soft object to clean the print head and the rubber roller. Use of a thin cotton swab is recommended. -
Page 34: Troubleshooting
This section explains reference information that comes in handy when you experience problems with printer operation. If, for any reason, you cannot find the solution to your problem here, contact your original retailer or a CASIO service center. Symptom Possible Cause Required Action ●... - Page 35 The tape cutter is dull. Contact your original retailer or a CASIO Service Center for replacement. Magnetic Tape is Note that selecting Magnetic selected for the print Tape automatically disables auto mode.
-
Page 36: Lamp And Printer Status
Symptom Possible Cause Required Action ● I cannot connect • There is a problem with Initialize printer settings, ■ using wireless LAN. the wireless LAN reconfigure wireless LAN settings, settings. and then try connecting again. • You forgot the (page password. - Page 37 Status Lamp Unit Status Lamp Light/Flash Pattern Reprint or Memory Print Green operation in progress Tape jam Printing stopped, no Reprint data, data save failed Load 18 mm or 24 mm tape. Wrong tape Load 9 mm or cartridge 12 mm tape. loaded Load 6 mm tape.
-
Page 38: Specifications
Specifications Model Name: KL-P350W Printing Printing resolution: 200 dpi Printing method: Thermal transfer Printing speed: 20 mm per second maximum (6 to 18 mm wide tape printing) 10 mm per second maximum (24 mm wide tape printing) 5 mm per second maximum (magnetic tape printing)* •... - Page 39 CASIO COMPUTER CO., LTD. 6-2, Hon-machi 1-chome Shibuya-ku, Tokyo 151-8543, Japan...