Table of Contents
Advertisement
Quick Links
Download this manual
See also:
User Manual
Advertisement
Table of Contents

Related Manuals for Casio KL-8100


Summary of Contents for Casio KL-8100
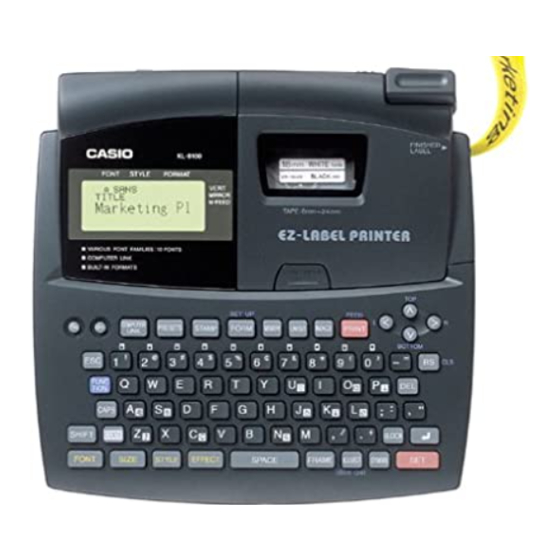
- Page 1 KL-8100 User’s Guide...
-
Page 2: Important Safety Precautions
Important Safety Precautions Note of the following safety precautions before using the label printer for the first time. Keep these safety precautions and operating instructions on hand for future reference. About safety precaution symbols The following symbols are used in this manual and on the product itself to alert you and others to the risk of personal and material injury. -
Page 3: Quick Reference
• Be sure that the plus (+) and minus (–) sides of each battery are facing correctly. • Never mix batteries of different types. • Never leave dead batteries in KL-8100. • Remove the batteries if you do not plan to use KL-8100 for a long time. -
Page 4: Table Of Contents
Quick Reference ... E-2 Part 1 Getting Acquainted ... E-4 Important Precautions ... E-4 General Guide ... E-5 Label Printer Menus ... E-5 Part 2 Getting Ready ... E-5 Power Supply ... E-5 AC Adaptor ... E-5 To connect the AC adaptor ... E-6 Loading/Replacing Batteries ... -
Page 5: Part 1 Getting Acquainted
Part 1 Getting Acquainted This part of the manual provides you with important infor- mation you need to know in order to use the label printer to its full potential. Be sure to read it carefully before using the label printer for the first time. -
Page 6: General Guide
Note the following important precautions when using an AC adaptor to power your label printer. • Use only specified CASIO AD-A12070 AC adaptor, and make sure the adaptor has the same voltage rating as the household current in your area. Using a wrong adap- tor can damage your label printer. -
Page 7: To Connect The Ac Adaptor
• You have to reset the Label Printer if you want to change the on-screen message language. Press RESET and then perform the procedure performed under Message Lan- guage. -
Page 8: To Load A Tape Cartridge
1. Make sure the label printer is turned off. 2. Press the cover release and open the cover. • If there is a cartridge already in the label printer, remove it by grasping the cartridge on both sides with your thumb and forefinger, and lift straight up. -
Page 9: Message Language
2. Use u and i to highlight the setting you want (cm or inch) and then press SET. Demo Print After setting up the label printer, you may want to produce a demo print to make sure that everything is working properly. To produce a demo print 1. -
Page 10: Basic Alpha-Numeric Input
Mirror image printing indicator This indicator appears when the label printer is set up for mirror image printing. Normal (non-mirror image) printing is performed when this indicator is not shown. Manual feed indicator This indicator appears when you are using manual feed in- stead of auto feed. -
Page 11: Inputting Symbols, Dingbats, Special Numbers, Greek Characters, And Russian Characters
See page E-25 for a complete list of symbols, dingbats, and characters that are available from each menu. Inputting Illustrations Your label printer gives you a choice of 50 illustrations that you can use in your labels. To input illustrations 1. -
Page 12: To Delete A User Character
6. Press SET to clear the highlighted text or ESC to abort without clearing anything. Text Editing You can set up the label printer so it either overwrites exist- ing characters with new input, or inserts new input between existing characters. Note the following example. -
Page 13: Part 5 Character Attributes And Text Effects
SET. 2. Press SET to change the font for all the text on the dis- play. • At this point, the label printer returns to the text input screen. • Pressing ESC returns to the RANGE menu without chang- ing anything. -
Page 14: To Change The Character Styles
3. Move the cursor to the end block up to which you want to change the text effect and then press SET to register your selection and change the effect. • At this point, the label printer returns to the text input screen. To change the text effect for lines of text 1. -
Page 15: To Change The Text Effect For A Range Of Text
• At this point, the label printer returns to the text input screen. To change the text effect for a range of text 1. After performing the two steps under “To assign text ef- fects”, use u and i to highlight “TEXT” and then press SET. -
Page 16: Specifying Character Sizes For Lines Of Text Using Preset Formats
The formats that appear depend on the width of the tape loaded in the label printer and the number of lines in the block of text where the cursor is located when you press the SIZE key. -
Page 17: Part 7 Form Menu Functions
Side Spaces The side spaces are blank areas that the Label Printer au- tomatically adds on either end of the print area. Note that side spaces are only added when you are using auto feed, and they are not added when using manual feed. -
Page 18: To Display The All Form Menu
Select “FIX” if you want so specify a fixed block length in the range of 0.0 cm to 99.9 cm. Specify “AUTO” for this option if you want the label printer to automatically adjust the length of the block. All Text Operations The procedures in this section control the following param- eters for all of the text on the display. -
Page 19: Part 8 Printing
• Never turn power off while printing is being performed. • Make sure that the tape outlet is not blocked before you start printing. • Never operate the tape cutter while printer is being per- formed (indicated by the message “NOW PRINTING” on the display). -
Page 20: Using The Image Display
Whenever either of these messages appears, replace all the batteries with a full set of new ones as soon as possible. Continued use of the label printer while battery power is low can result in sudden power failure during operation or printing. -
Page 21: To Use A Preset Layout To Create A Label And Print It
You can then assemble the tapes into an enlarged label. Note that this item is available only when 12, 18, or 24mm tape is loaded in the label printer. See page E-26 for impor- tant information about character sizes and tape width when using the various setting of this item. -
Page 22: Bar Code
If you do not want to input comment text, press SET without inputting anything. • Always test bar codes produced using this label printer before actually using them. If bar codes cannot be read properly, try adjusting the print density (page E-18) or us- ing a larger character size. -
Page 23: Numbering
8. Use u and i to move the highlighting to “PRINT” and then press SET to execute it. • The label printer prints a tape with the number and com- ment text, and then displays the screen shown in step 3, with the number incremented by one. -
Page 24: To Create A New Stamp Label
With character search, you input up to eight charac- ters and the label printer searches through its memory to find them for you. To recall memory text using sequential search 1. -
Page 25: To Recall Memory Text Using Character Search
2. Press the tape cartridge compartment cover release and open the compartment cover. 3. Remove the tape cartridge. 4. Use a cotton swab dipped in alcohol to clean the printer head and roller as shown in the illustration. Printer head Roller 5. -
Page 26: Illustrations
• This prompt confirms whether or not you want to initialize the label printer. 3. Press SET to initialize the label printer or ESC to abort the reset operation. Format Indicator The following shows how the brackets on either side of the format indicator change to indicate various conditions. -
Page 27: Enlarged Label Measurements
ENLARGED Label Measurements Size Character Resulting Tape Width Increase Size Tape Width 8 × 8 times 24 × 24mm 2 pieces 24mm 12 × 12 times 36 × 36mm 3 pieces 36mm 16 × 16 times 48 × 48mm 4 pieces 48mm 8 ×... -
Page 28: Troubleshooting
Be sure to press the FEED key manual tape feed. before performing the tape cut operation. Important! When the printer is set up for manual tape feed, the tape is not fed automatically after print- ing is complete. Out of tape Replace the tape cartridge with a new one. -
Page 29: Error Messages
CANNOT PRINT proper number of digits. RESET! Memory has not been initialized yet. Perform the reset operation. COMMUNICA- Label printer was unable to receive TION ERROR! data being sent from an external source. Check cable connections and parameter settings. POWER OFF... -
Page 30: Specifications
Have the battery replaced by the retailer where you purchased the label printer or by an authorized CASIO service provider. Note that you will be charged for battery replacement. Power consumption: 12 W... - Page 31 CASIO COMPUTER CO., LTD. 6-2, Hon-machi 1-chome Shibuya-ku, Tokyo 151-8543, Japan...